Using Core Location Manager
In Swift it is possible to get the location of the device using the classes provided within the CoreLocation framework. To do this you will use a class called CLLocationManager which requires you to implement a few steps to make it work.
You must:
- Add a Privacy description to your info.plist
- Import the CoreLocation framework into your project
- Make your viewController class inherit from the CLLocationManagerDelegate
- Create a CLLocationManager object
- Set the viewController class as it's delegate, and request authorization to use location services in the app
- Start updating the location if the user grants authorization
- Get the location and use the values
Additional steps when using the simulator to test:
- While the alert is being presented to the user, select a location to simulate
- Then grant access, and get the location.
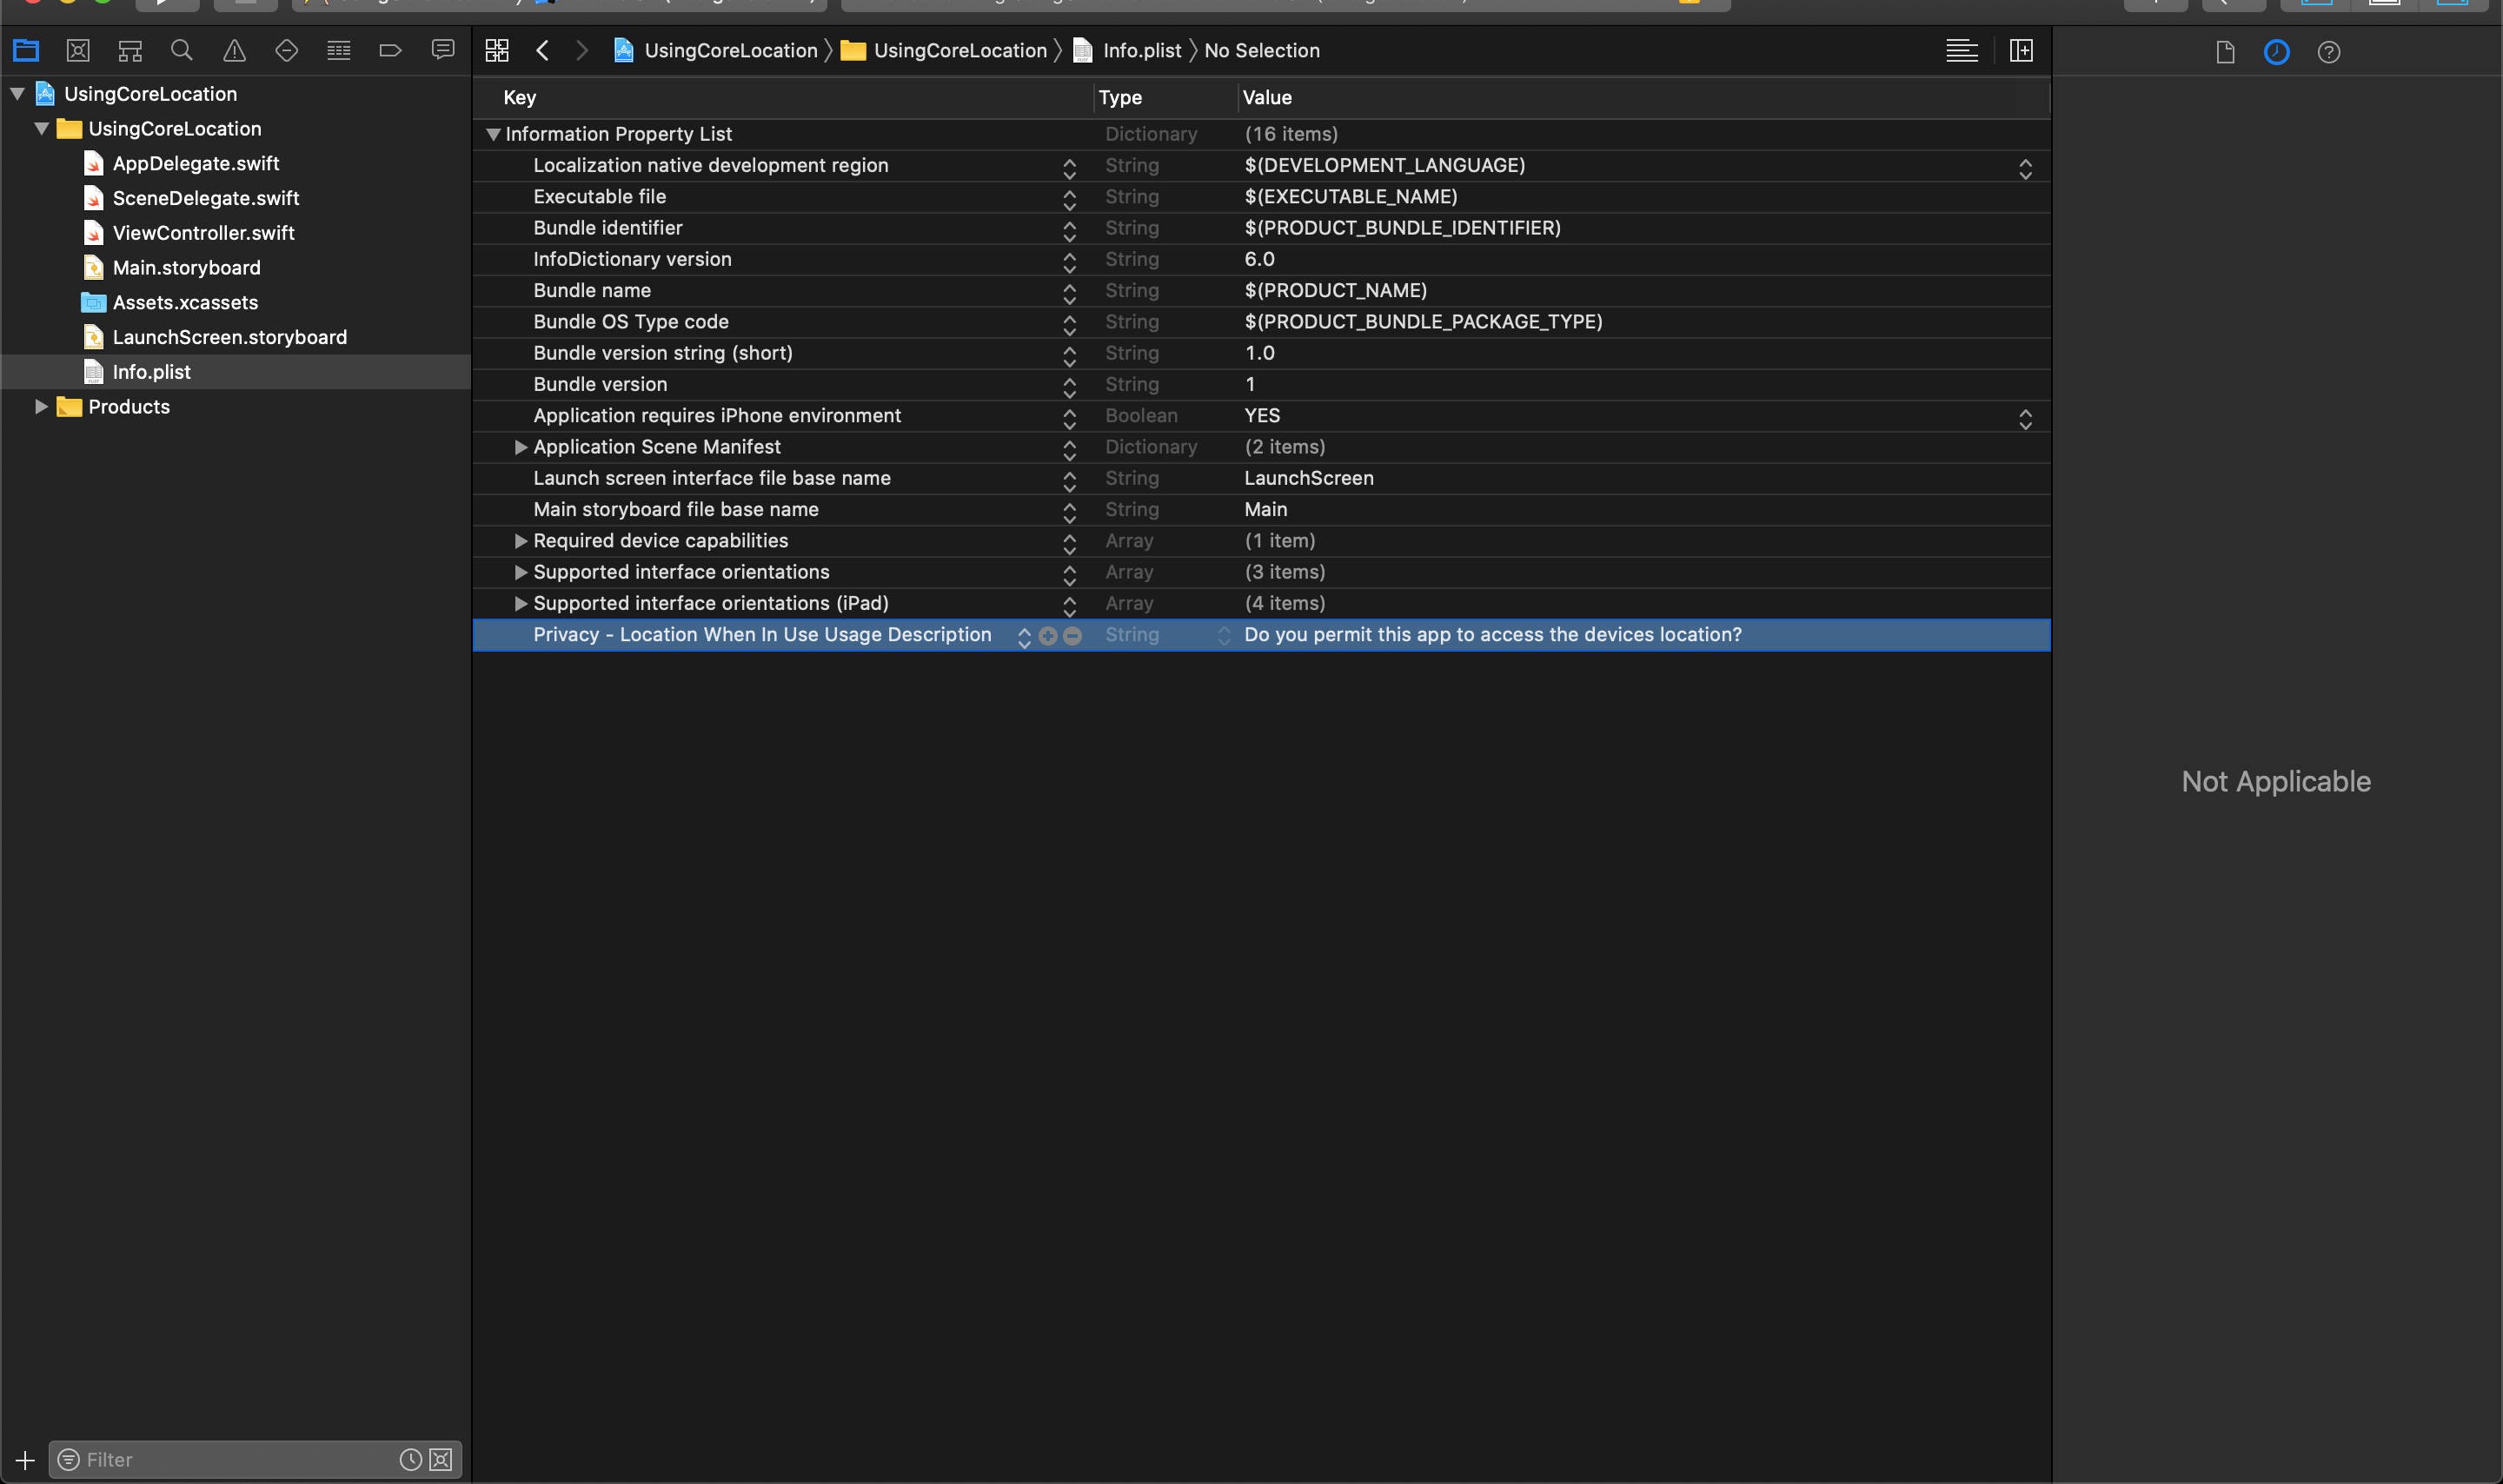
Add a Privacy Descriptor
First you must add some settings (keys with values) to the Info.plist in your project. These settings will be used to request permission for your application to access the devices location from the user. The following keys can be used to request permission from the user, and the values you add for these keys will be the message that the user is asked.
Privacy - Location Usage Description
Privacy - Location Always Usage Description
Privacy - Location When In Use Usage Description
Privacy - Location Always and When In Use Usage Description
NOTE
The values are your own custom messages that will be displayed to the user when asking permission. (eg. "Do you let this application access this devices location data?")
The minimum required key when you are using CoreLocation in your project will be Privacy - Location When In Use Usage Description. You can see an example of this here:
Import the CoreLocation Framework
Then at the top of the class that will need to access the geo-location of the device you must add the following import statement:
// include the CoreLocation framework
import CoreLocation
2
Inherit From CLLocationManagerDelegate
After this you will need to tell your class to inherit from the CLLocationManagerDelegate. This lets your class have access to the function that will be used to capture the location.
// Inherit from the LocationManagerDelegate in this class
class ViewController: UIViewController, CLLocationManagerDelegate
2
Create CLLocationManager Object
Then you need to create an object of the type CLLocationManager like so:
// Create a CLLocationManager object
var myLocationManager = CLLocationManager()
2
Set Delegate and Request Authorization
This object contains the methods needed to request authorization from the user to access the location and request the current location. You will most often request authorization in the viewDidLoad() method of your viewController class. But before you can do this, you must set it's delegate equal to the viewController you are coding in like so:
// Set the locationManager delegate
myLocationManager.delegate = self

// Request authorization from user to access location
myLocationManager.requestWhenInUseAuthorization()
2
3
4
5
NOTE
You can choose to instead use myLocationManager.requestAlwaysAuthorization() if your application needs to update the location when it is running in the background. But you will need the correct security authorization value added to the info.plist to use this.
Start to Update the Location
To get the current location you you must tell the manager to start updating the location values if and only if the user has granted access. This is best done in one of the delegate protocol functions like so:
func locationManager(_ manager: CLLocationManager, didChangeAuthorization status: CLAuthorizationStatus) {
    // Switch on the state of the authorization to decide what to do.
    switch(CLLocationManager.authorizationStatus()) {
    case .restricted, .notDetermined, .denied :
        // If the user has not allowed access stop all updating.
        locationManager.stopUpdatingLocation()
    case .authorizedWhenInUse,  .authorizedAlways :
        // If the user has allowed access start updating the location of the device.
        locationManager.startUpdatingLocation()
    @unknown default:
        // Manage any future states to be exhaustive.
        locationLabel.text = "ERROR: Unable to access Location Manager"
    }
}
2
3
4
5
6
7
8
9
10
11
12
13
14
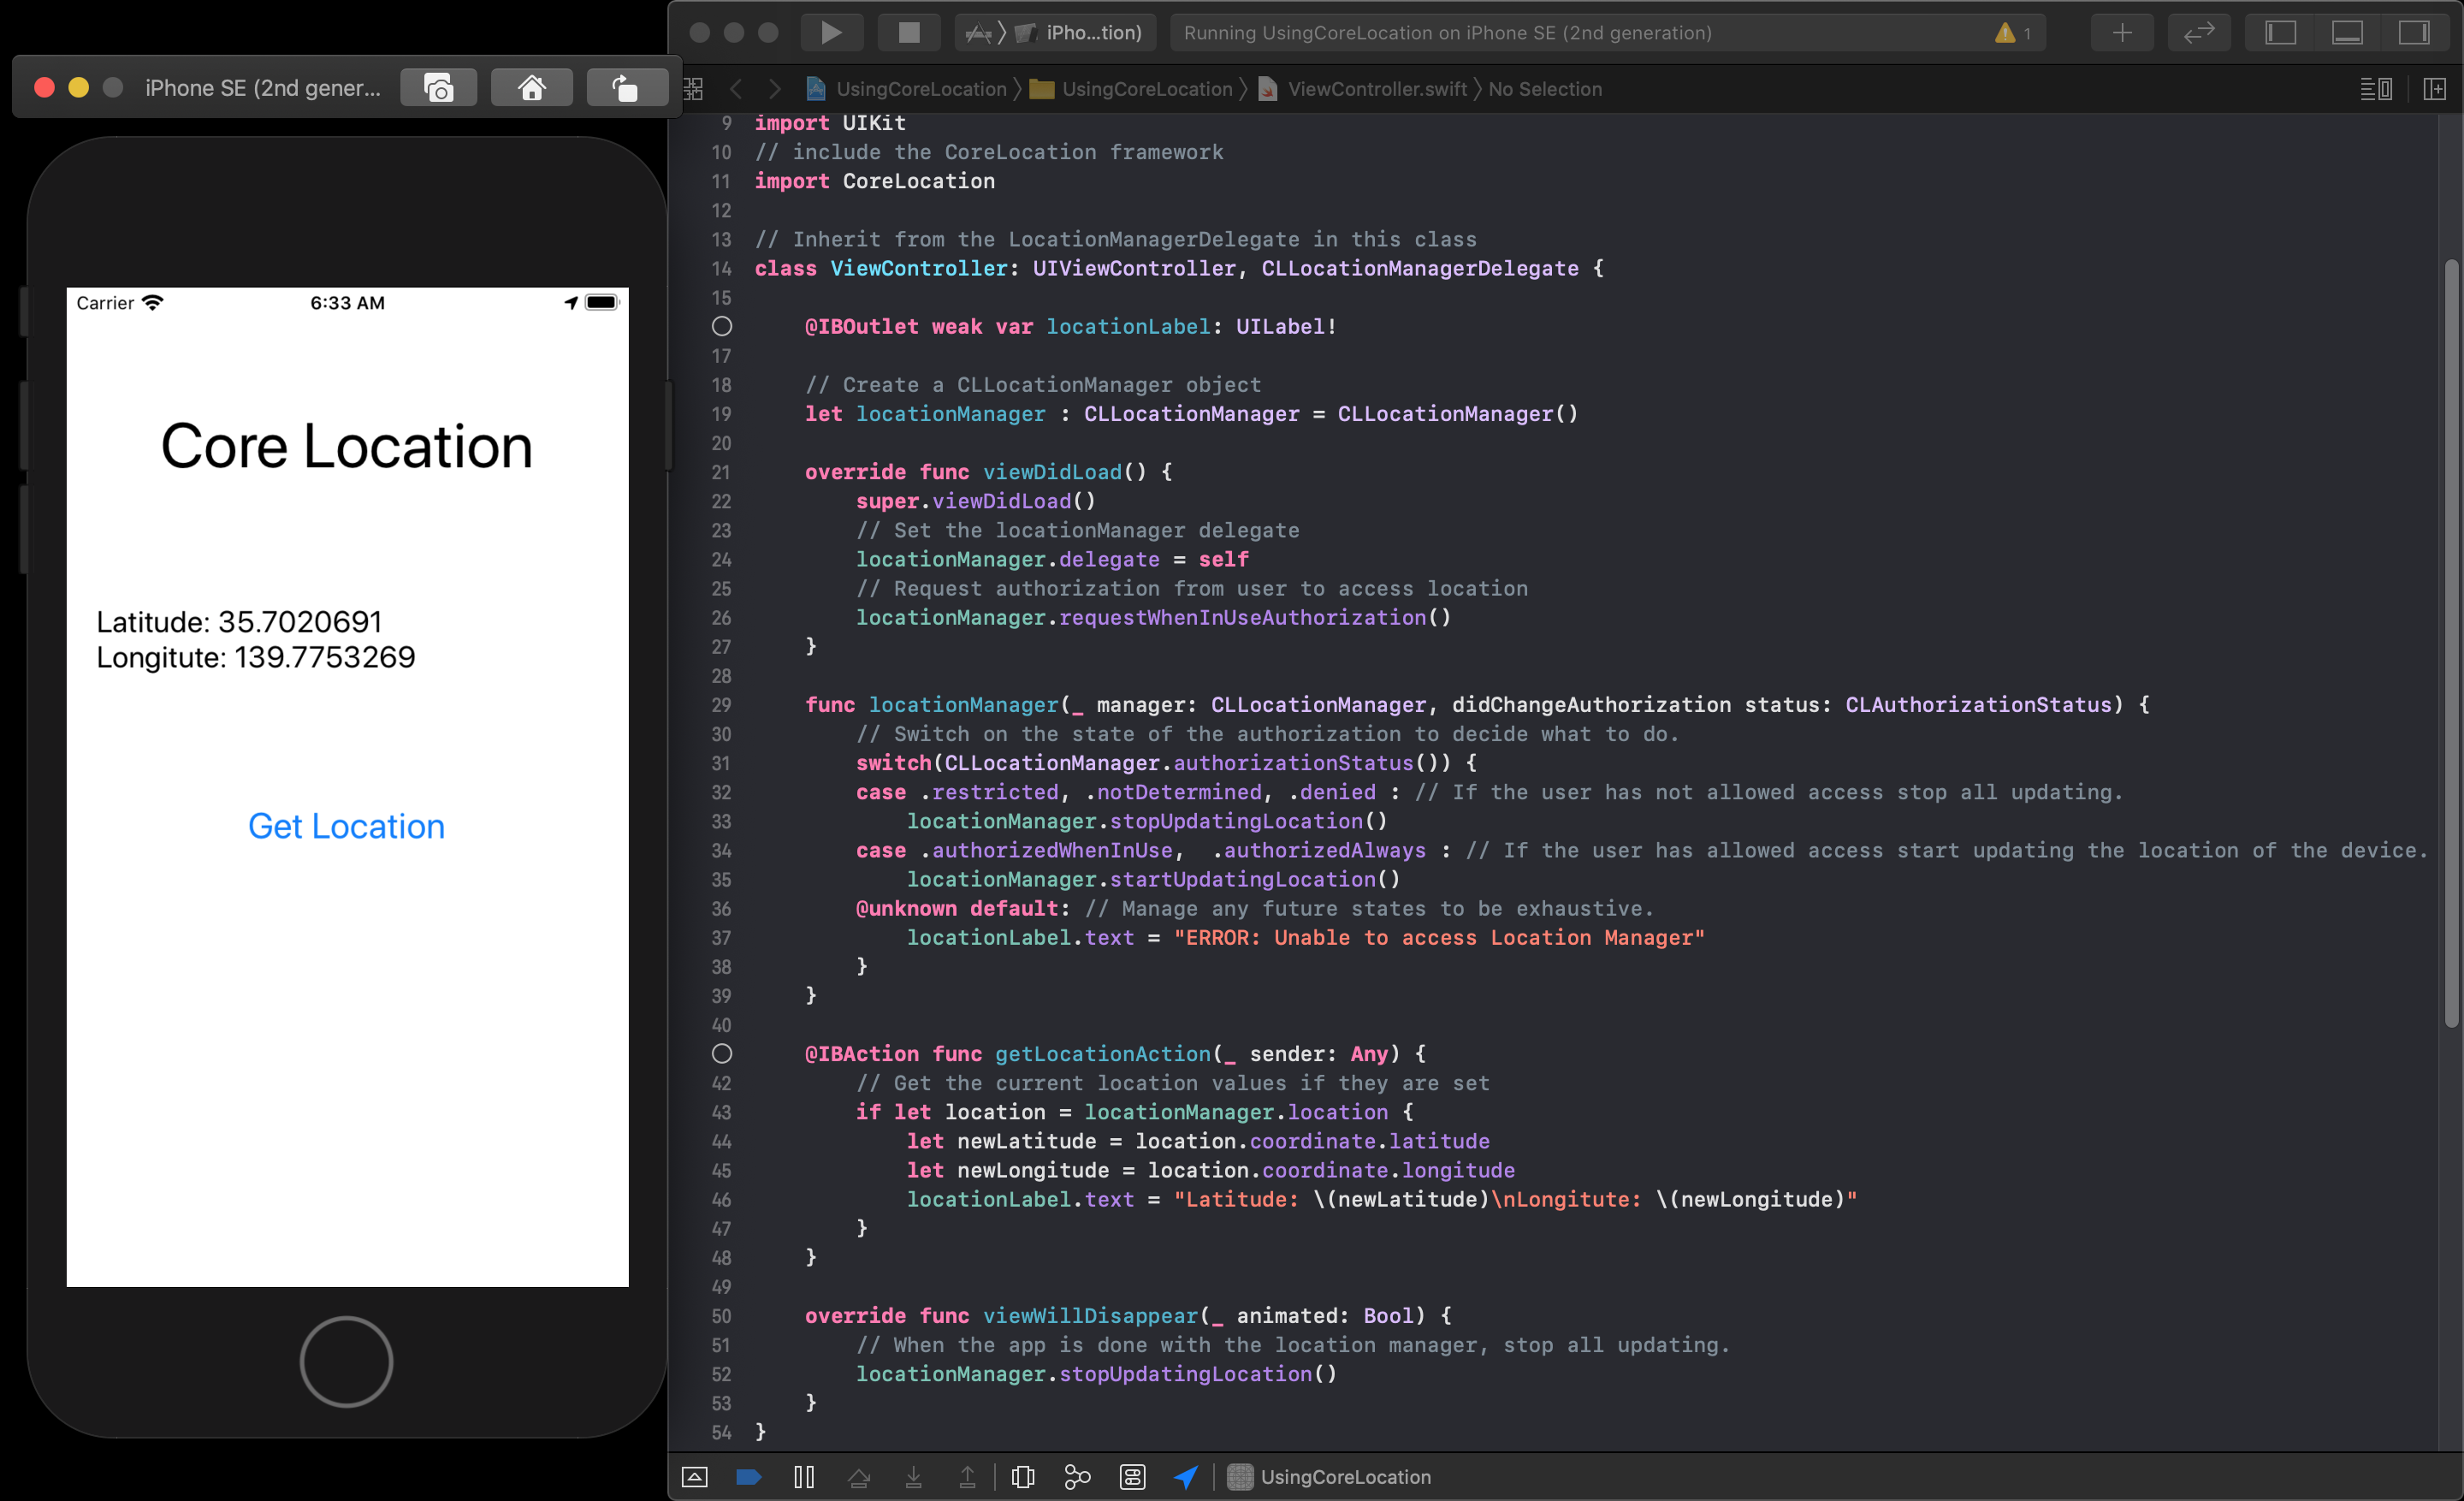
Get the Location
Then to get the current location you can access the following values like this:
 // Get the current location values if they are set
if let location = locationManager.location {
    let newLatitude = location.coordinate.latitude
    let newLongitude = location.coordinate.longitude
    //Do something with the values
}
2
3
4
5
6
NOTE
Whenever your application is no longer needing the location to be read you must tell the manager to stop updating the location with this function locationManager.stopUpdatingLocation(). Depending on your application it might be easiest to call this in the function override func viewWillDisappear(_ animated: Bool).
Testing in the Simulator
When you launch the application for testing in the simulator you will need to make sure you properly start simulating a location. While the application is running in the simulator you will need to go back into Xcode and find the option at the bottom.
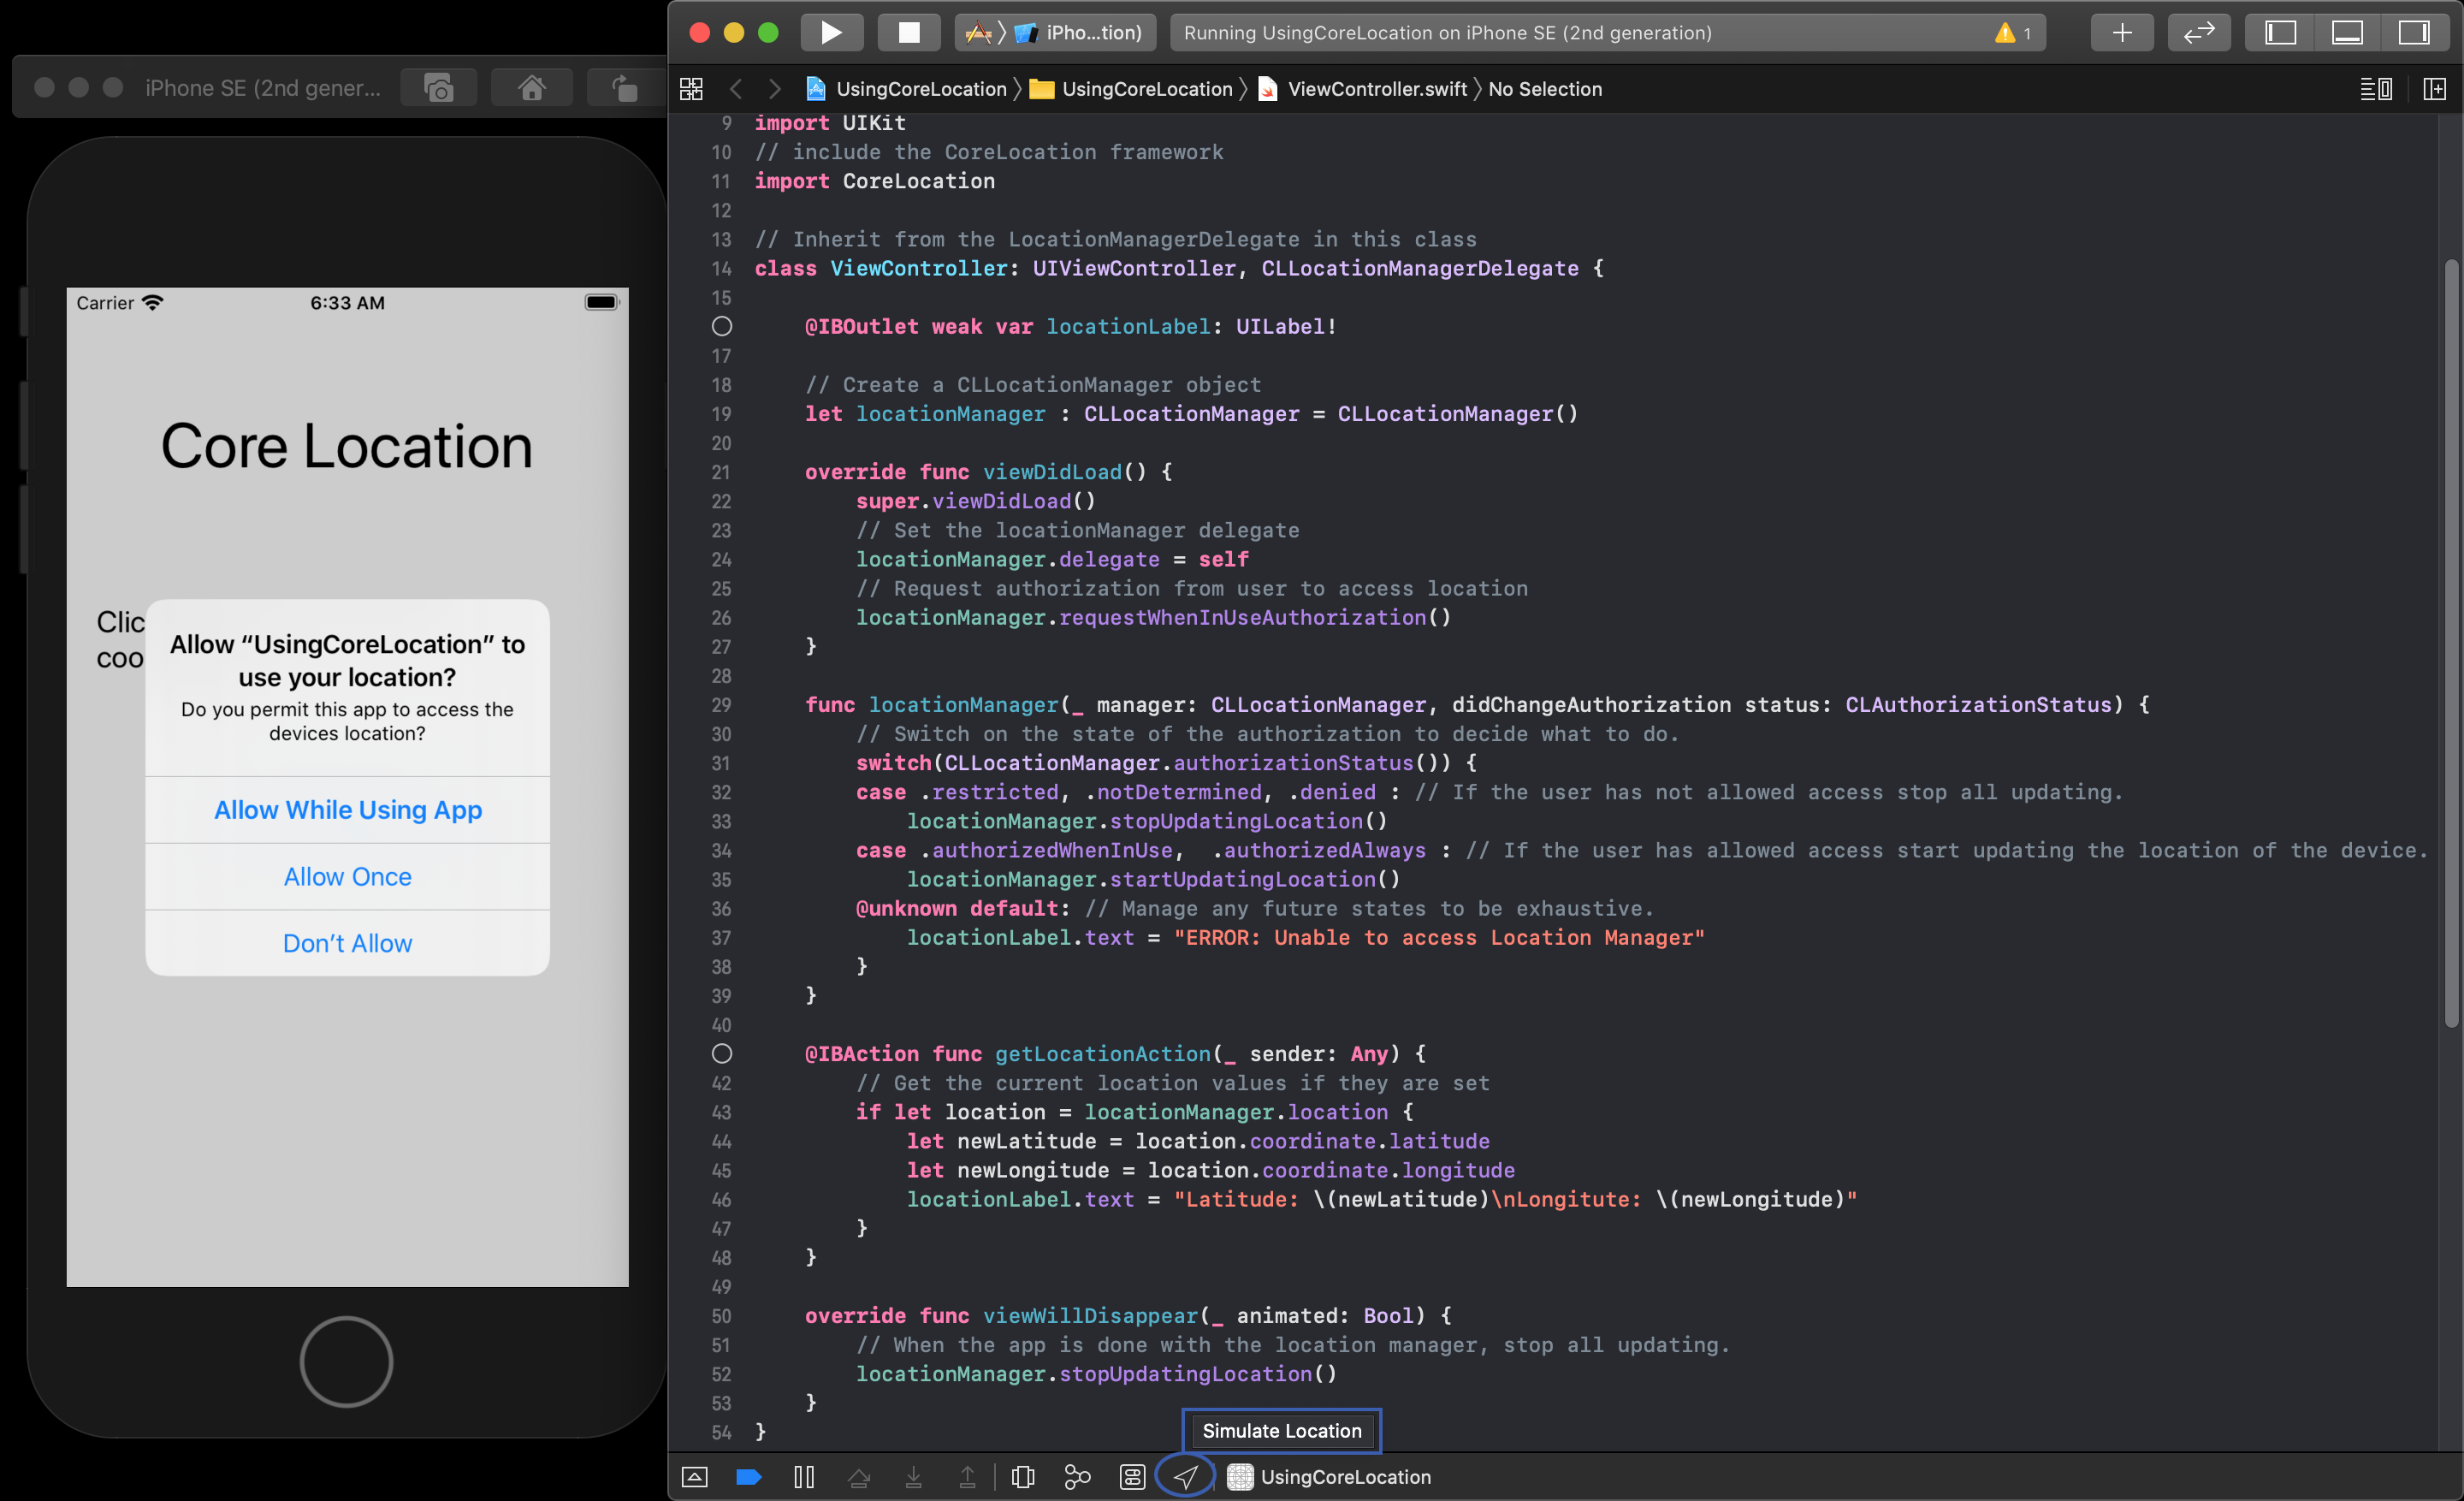
NOTE
It is best to do this when the alert has popped up asking the user for permission.
You will be able to choose a location for the list that pops up.
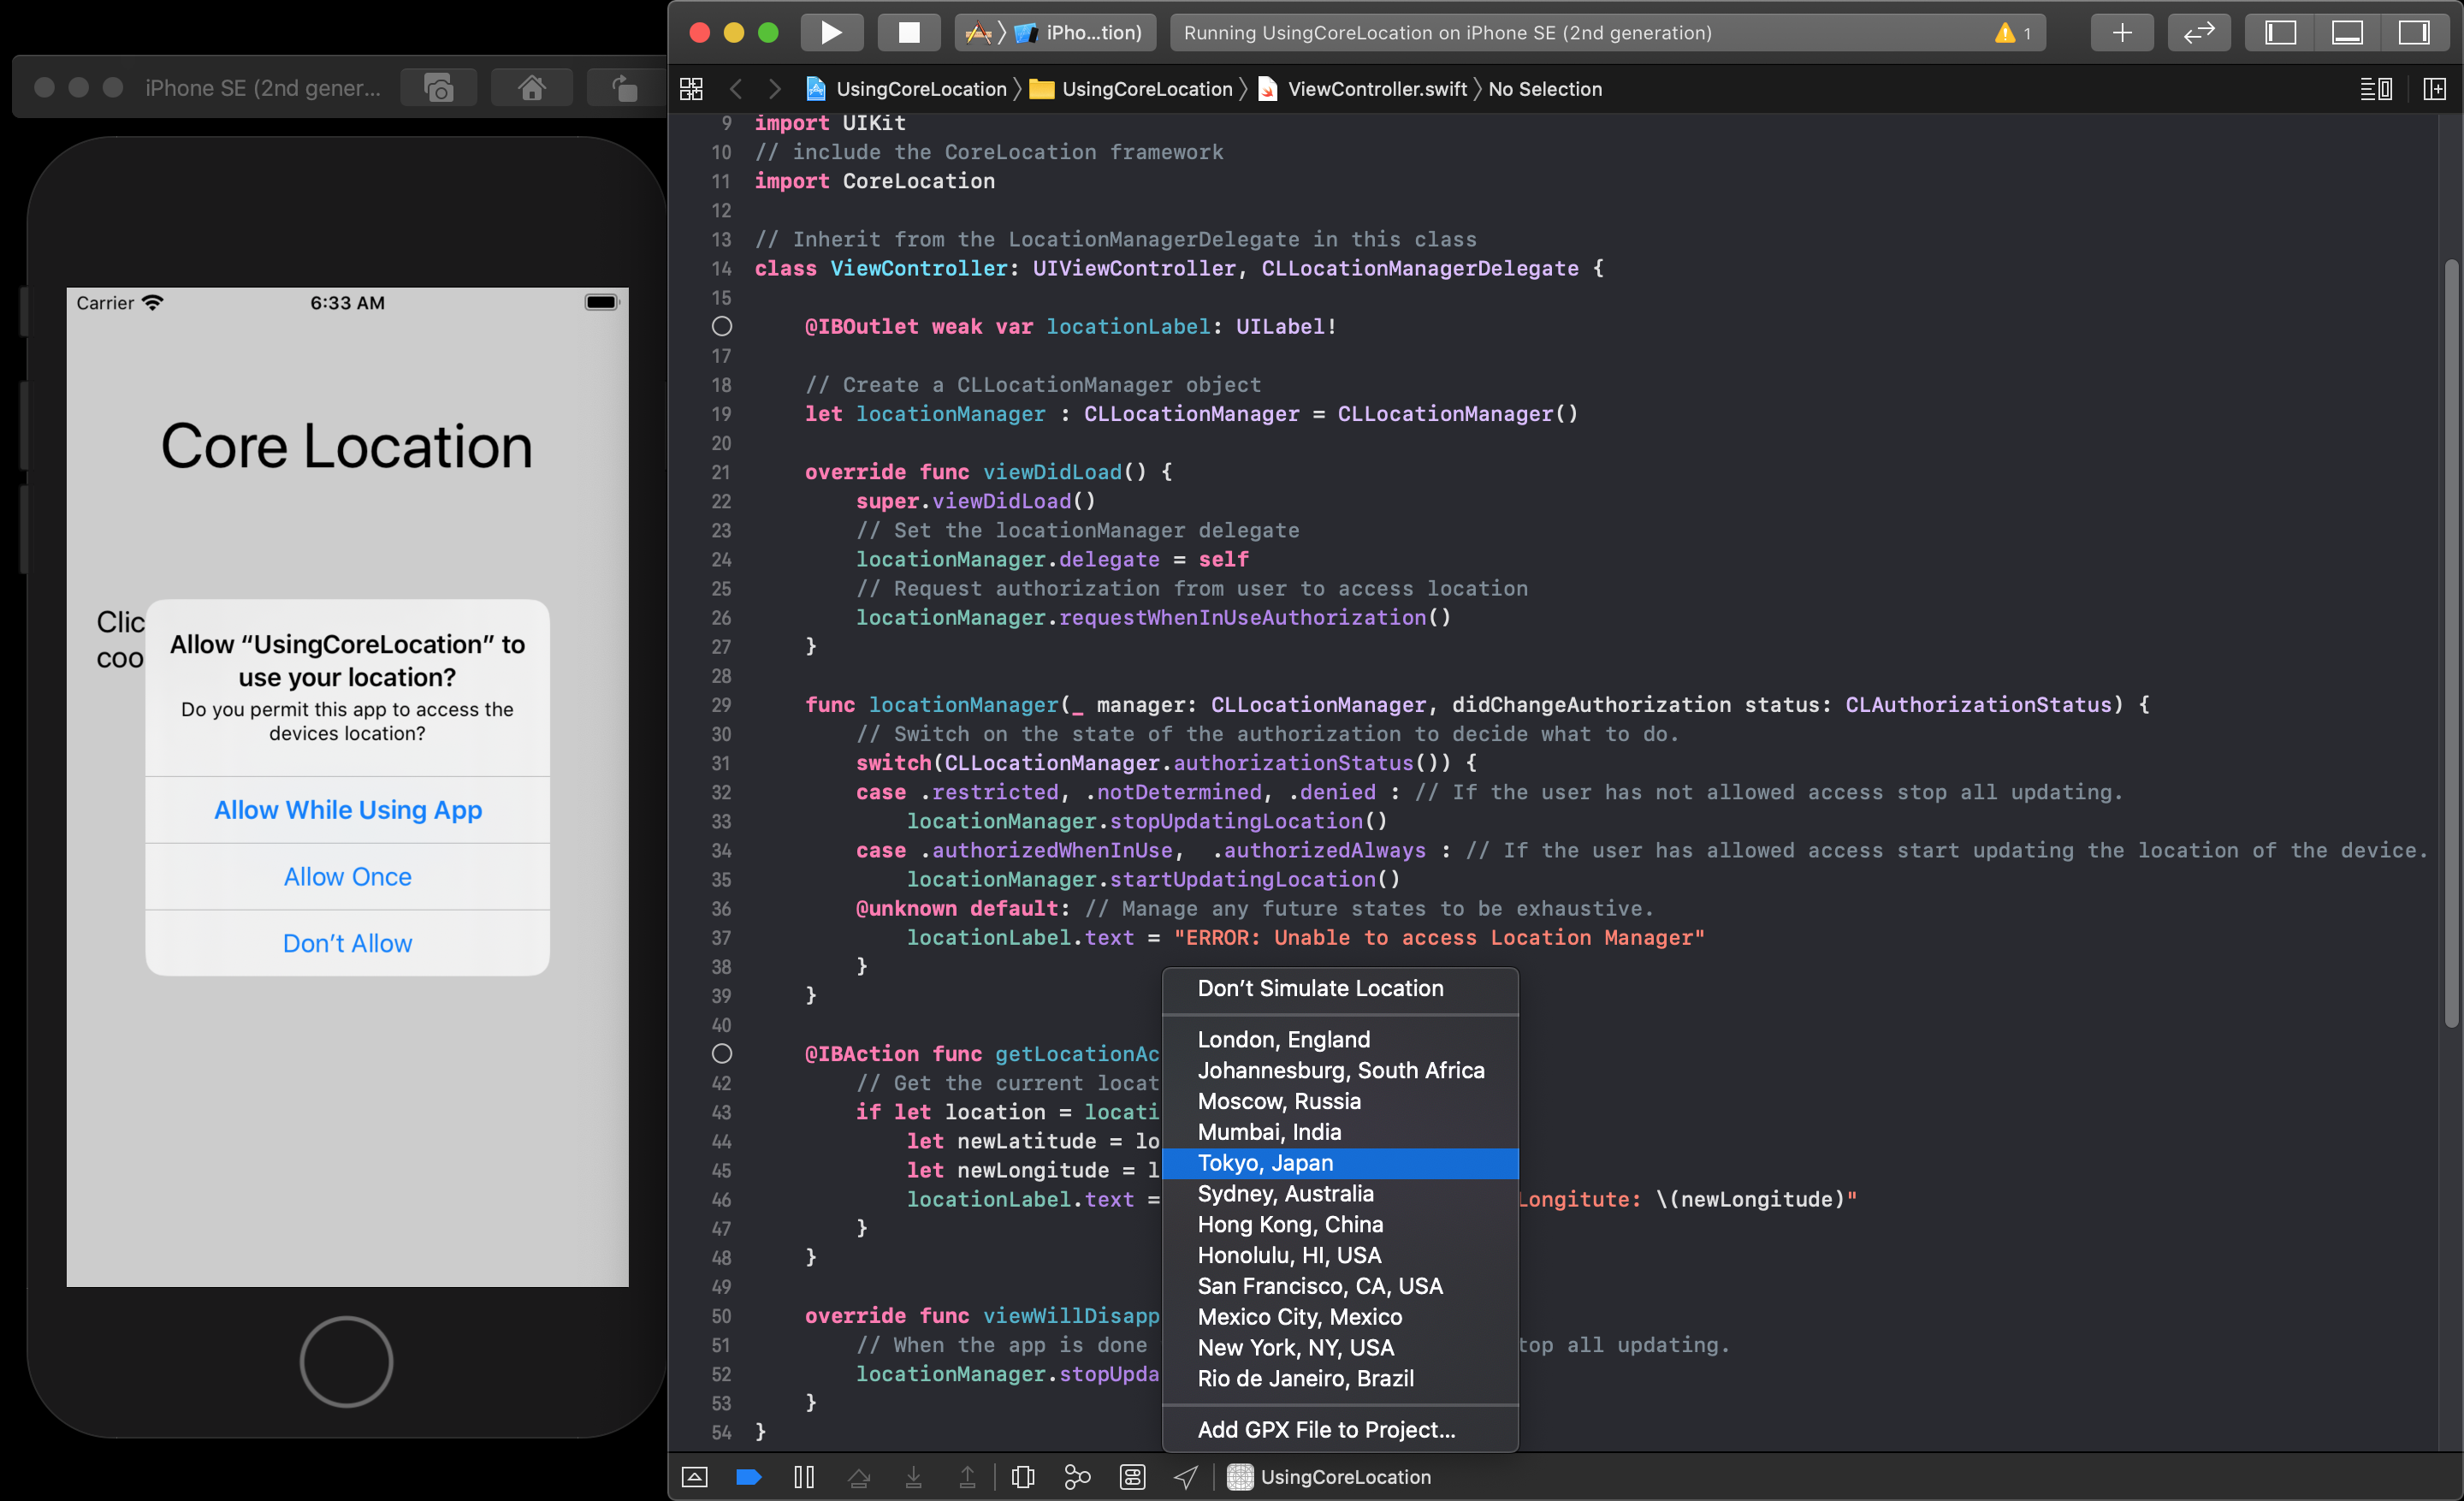
Then you can accept the request for permission back in the application.
Now when you choose to get the location your application will have permission, and a test location to return the values from.
NOTE
You can also choose from another list of simulated location in the Simulators top menu by selecting Features->Location and selecting your choice of Custom Location, City Run, City Bicycle Ride, Freeway Drive or Apple. Each one actually simulates a moving device on a predetermined rout that changes over time.