Connecting Outlets and Actions to UI Objects
In iOS development, you will be using Swift to react to input and manipulate views in your application using a viewController. Let's look at how to make connection between UI objects and the code in the viewController class.
How to Connect an Outlet to a UI Object
To allow your viewController class to access and manipulate the UI objects you add to this view, you must setup a connection from each UI object, to your viewController class. This is done using a special type of variable in your viewController class called an Outlet. Modifying an outlet will let you change the parameters and values of the specific UI object the outlet is connected to.
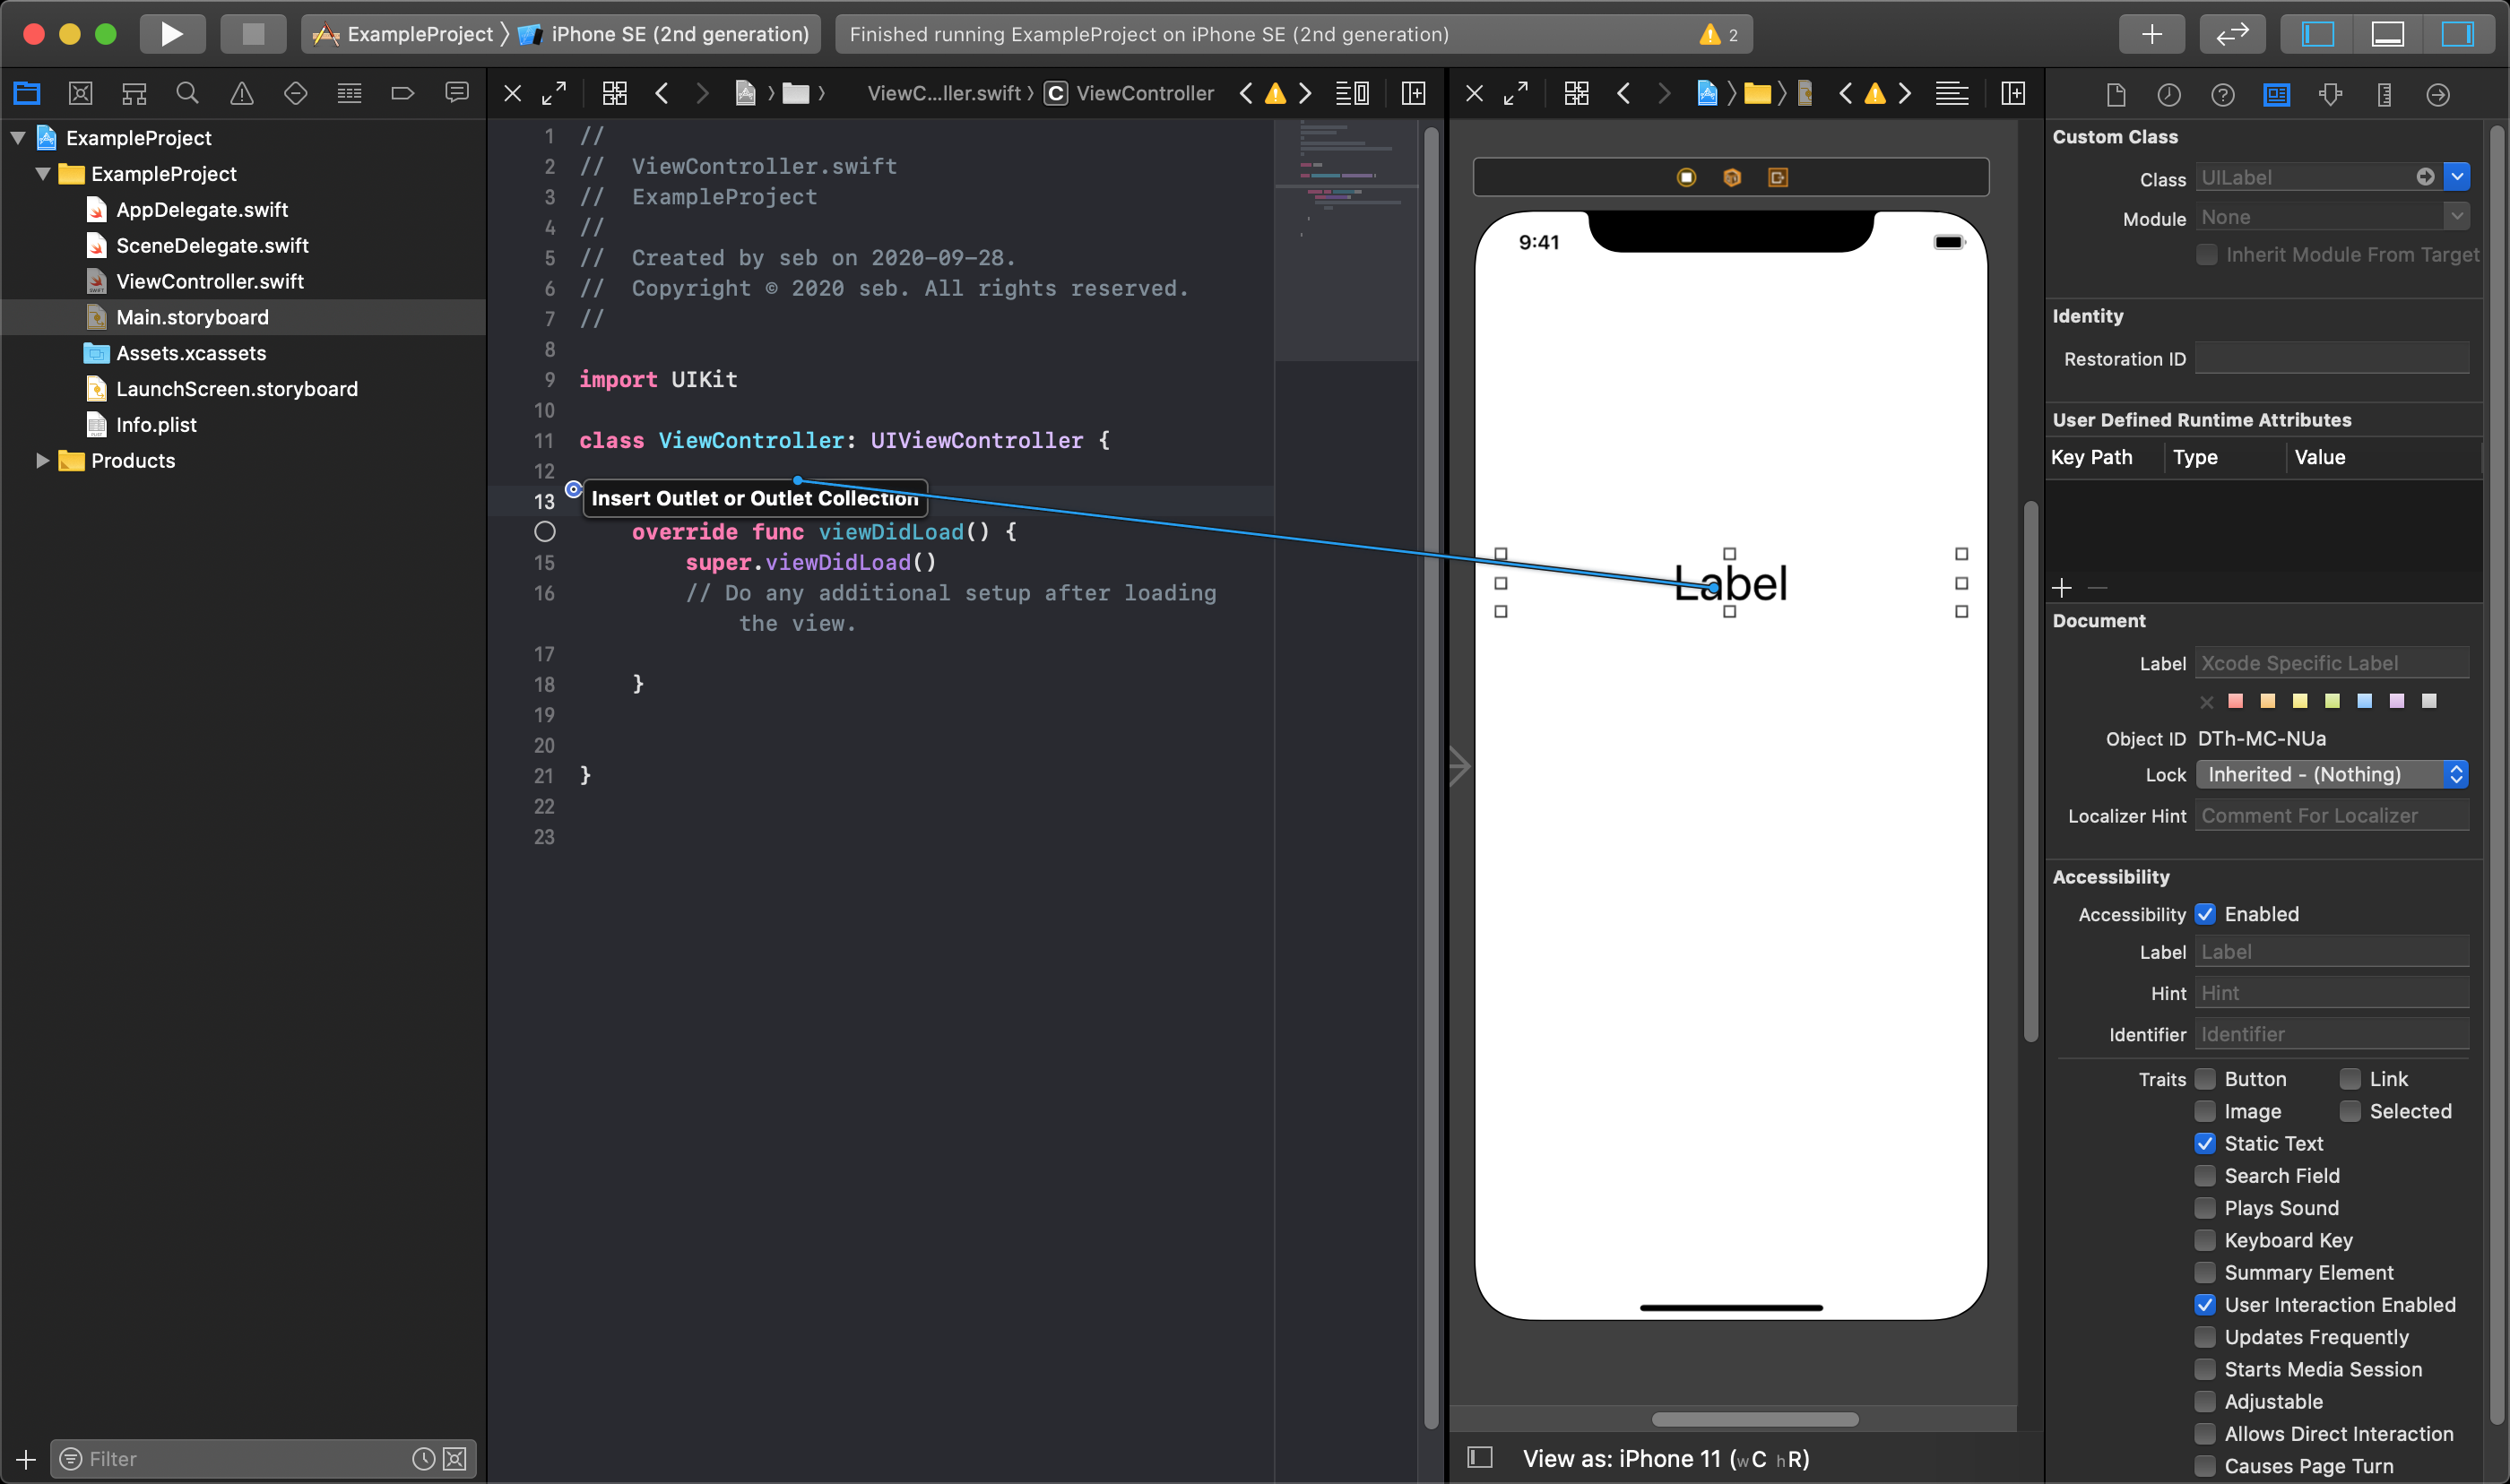
First, select the Main.storyboard from the project folder. Then, in the storyboard select the view you want to connect to your code. Now open a second view in the editor and select the corrisponding viewController code file to be displayed beside the storyboard.
TIP
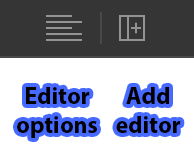
The Add Editor button is used to display a second display in the editor, and is found on the right side of the Jump Bar at the top of the Editor Area.
After dragging the UI object you want from the Object Library into your view (in this case a Label), you need to connect the UI object to the specific viewController class for that view. You make the connection by holding the Control key on your keyboard while you control+click and holding your mouse button down, then dragging it to the top area inside your viewController class definition and releasing your mouse button wherever the blue horizontal line appears. The blue line only appears in appropriate places to place the Outlet, and should show a small tool-tip labeling it with “Insert Outlet or Outlet Collection.”
TIP
You can change the alignment of the two displays in the editor; showing them left to right, or above and below. This is done by selecting the View -> Change Editor Orientation from the top menu in Xcode.
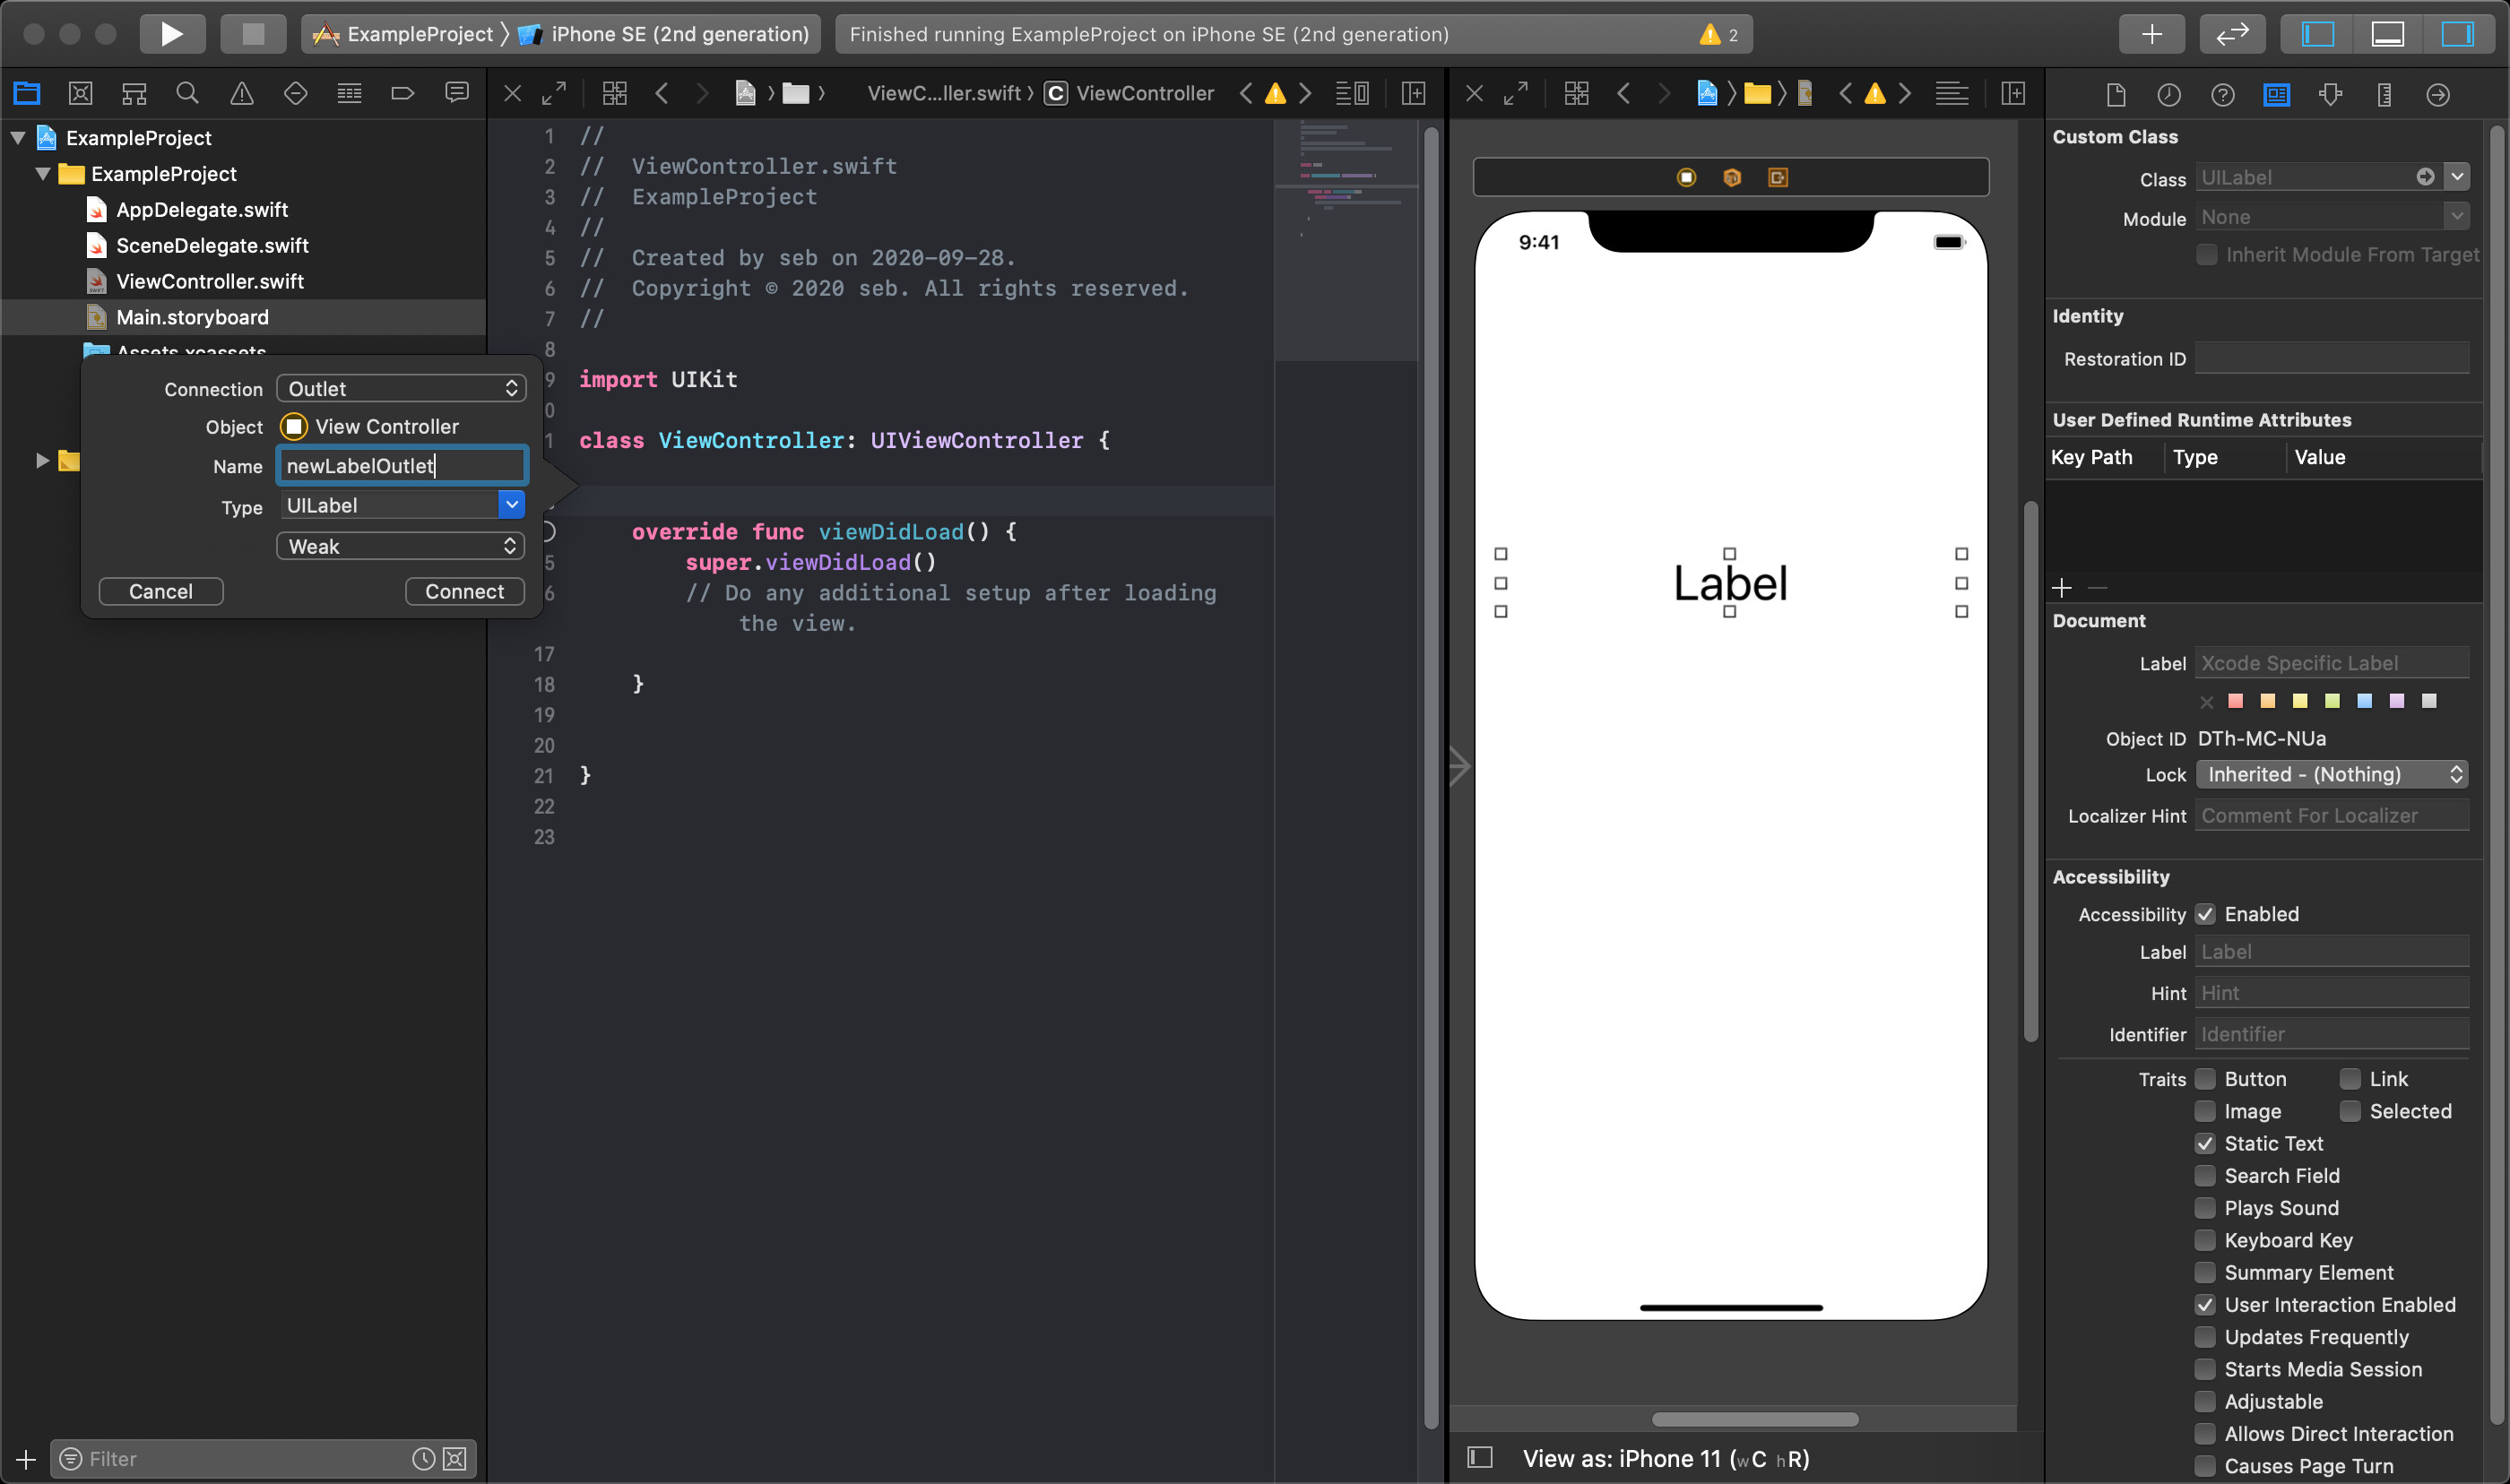
After you control+click and drag from your storyboard UI object to your viewController class, a small pop-up menu will be displayed. Enter the name you would like to use for the Outlet in the name field. Make sure the connection type is set to Outlet, and the type is the same type of UI class as the object you are connecting it to, and then click the Connect button.
In the viewController class you will now have a line of code added that looks similar to this.
@IBOutlet weak var yourNewOutlet: UILabel!
The outletName will be replaced by whatever you called your outlet name, and the UILabel would be whatever type of object you connected to your code. A graphical circle with a dot in it appears to the left of the line of code above when connected correctly.
Once the outlet is properly connected, the code within the viewController class can access and change the properties of the object connected to this outlet. In the example of a UILabel, the text property can update the text that the label displays like this:
yourNewOutlet.text = “Hello World”
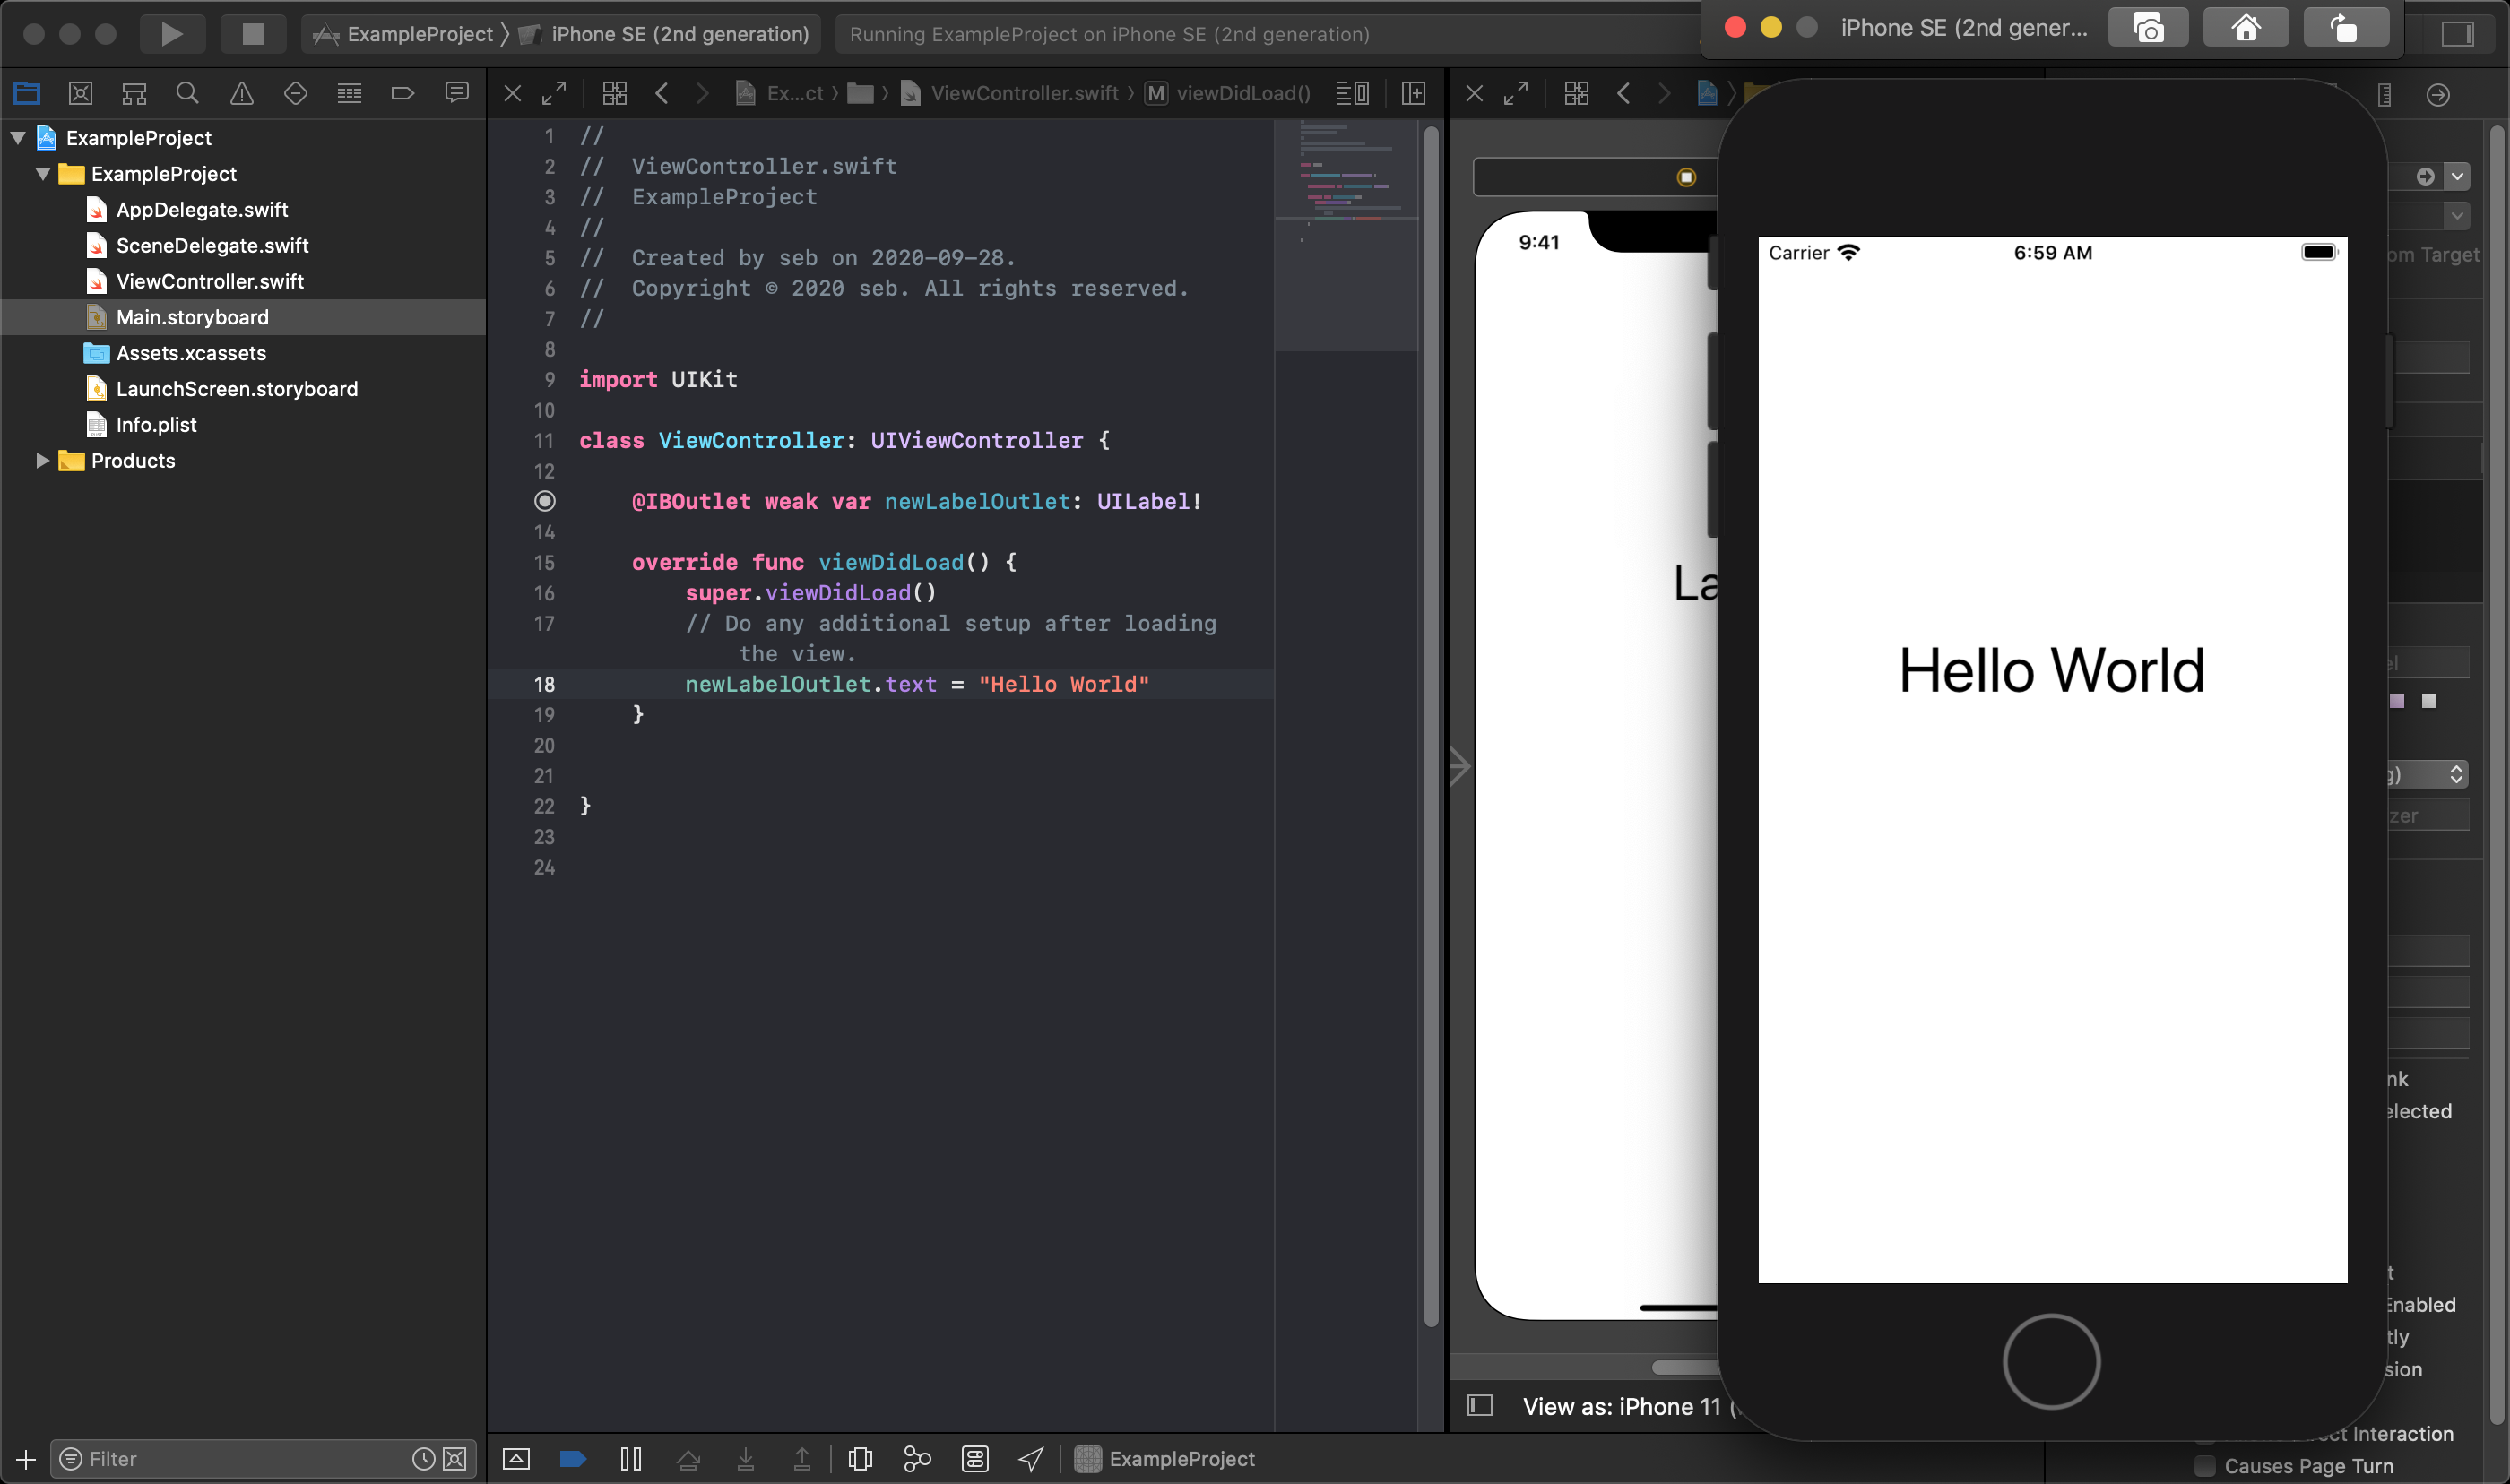
Running the application shows the text of the UILabel that was updated in the viewDidLoad() method of your UIViewController class.
Connect Actions to UI Objects
An IBAction is a function you create in your viewController class that will run when the user interacts with a chosen UI object. This is a special class method, and will be triggered every time UI objects like buttons are pressed. To connect a UI object to an action, you must create the associations manually.
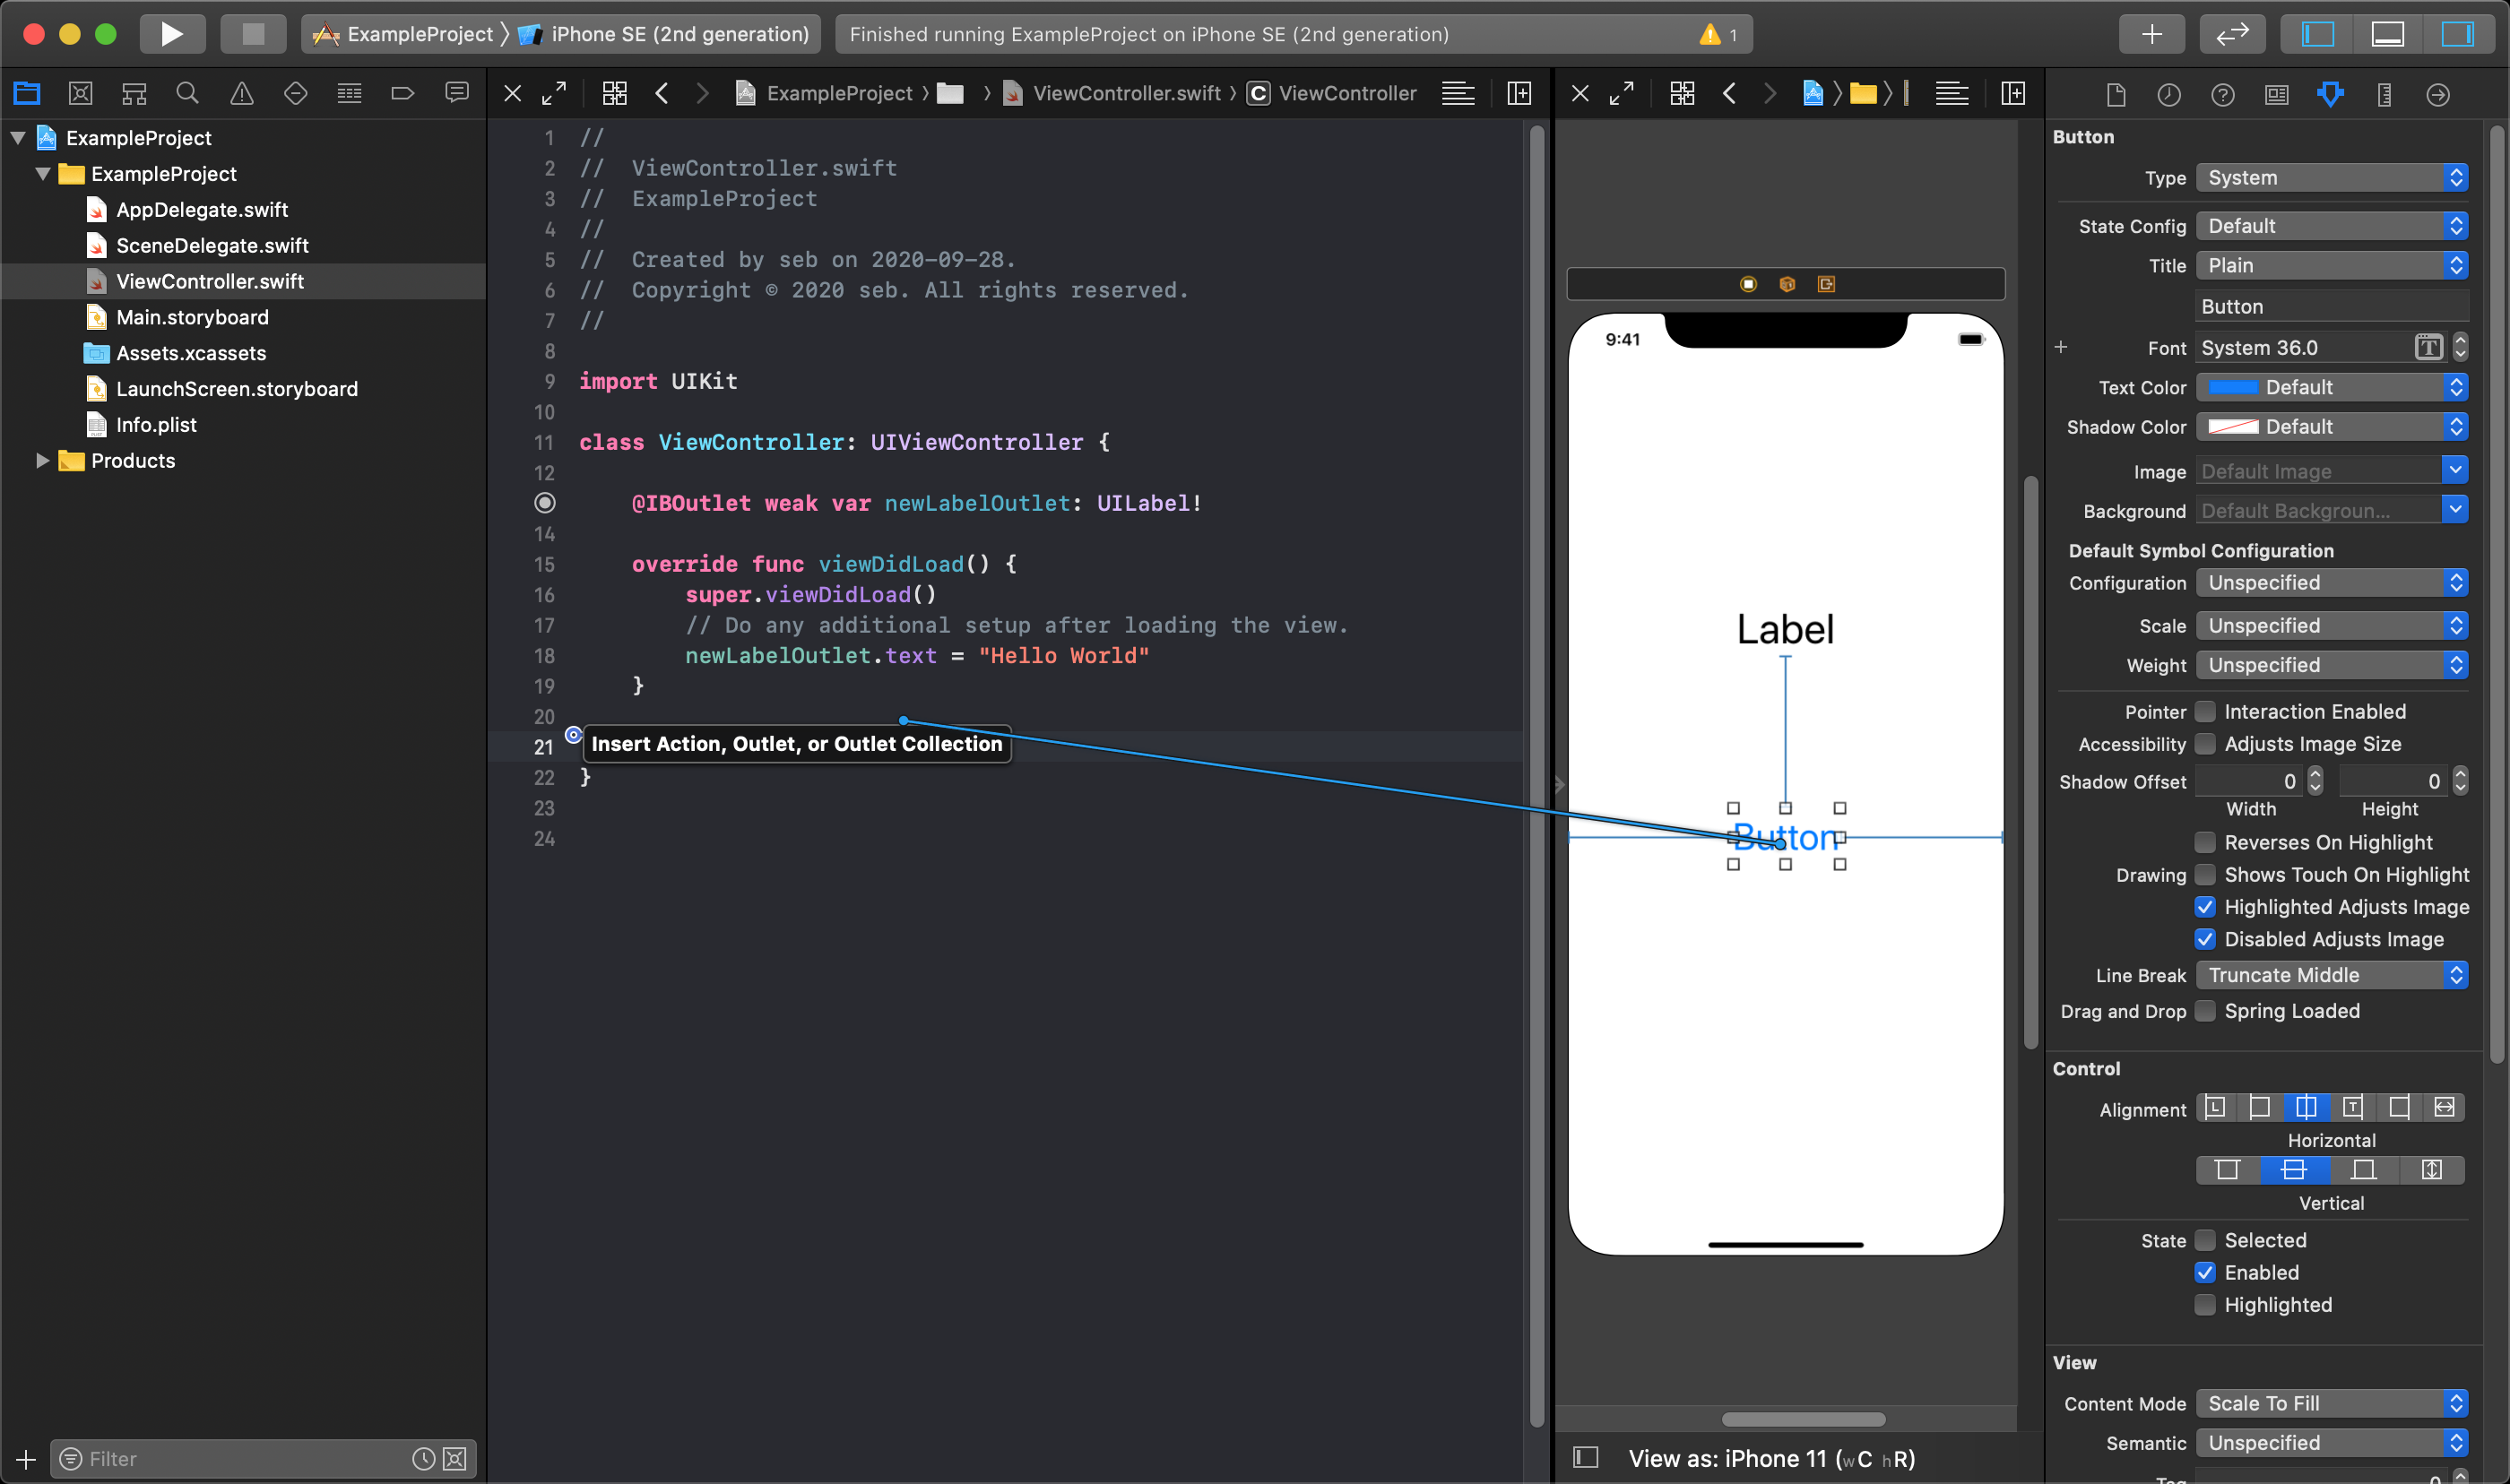
Actions can be made by holding control on the keyboard while clicking on the UI object in the storyboard and dragging down into your viewController class code. You must drag down into the area between the other methods (e.g. under the viewDidLoad function).
By using control+click and dragging the mouse into your code, a blue line will be shown within your code to indicate the appropriate locations where you can create this action. A tool tip will pop up displaying “Insert Outlet, Action, or Outlet Collection” showing locations in your code where the function can be created.
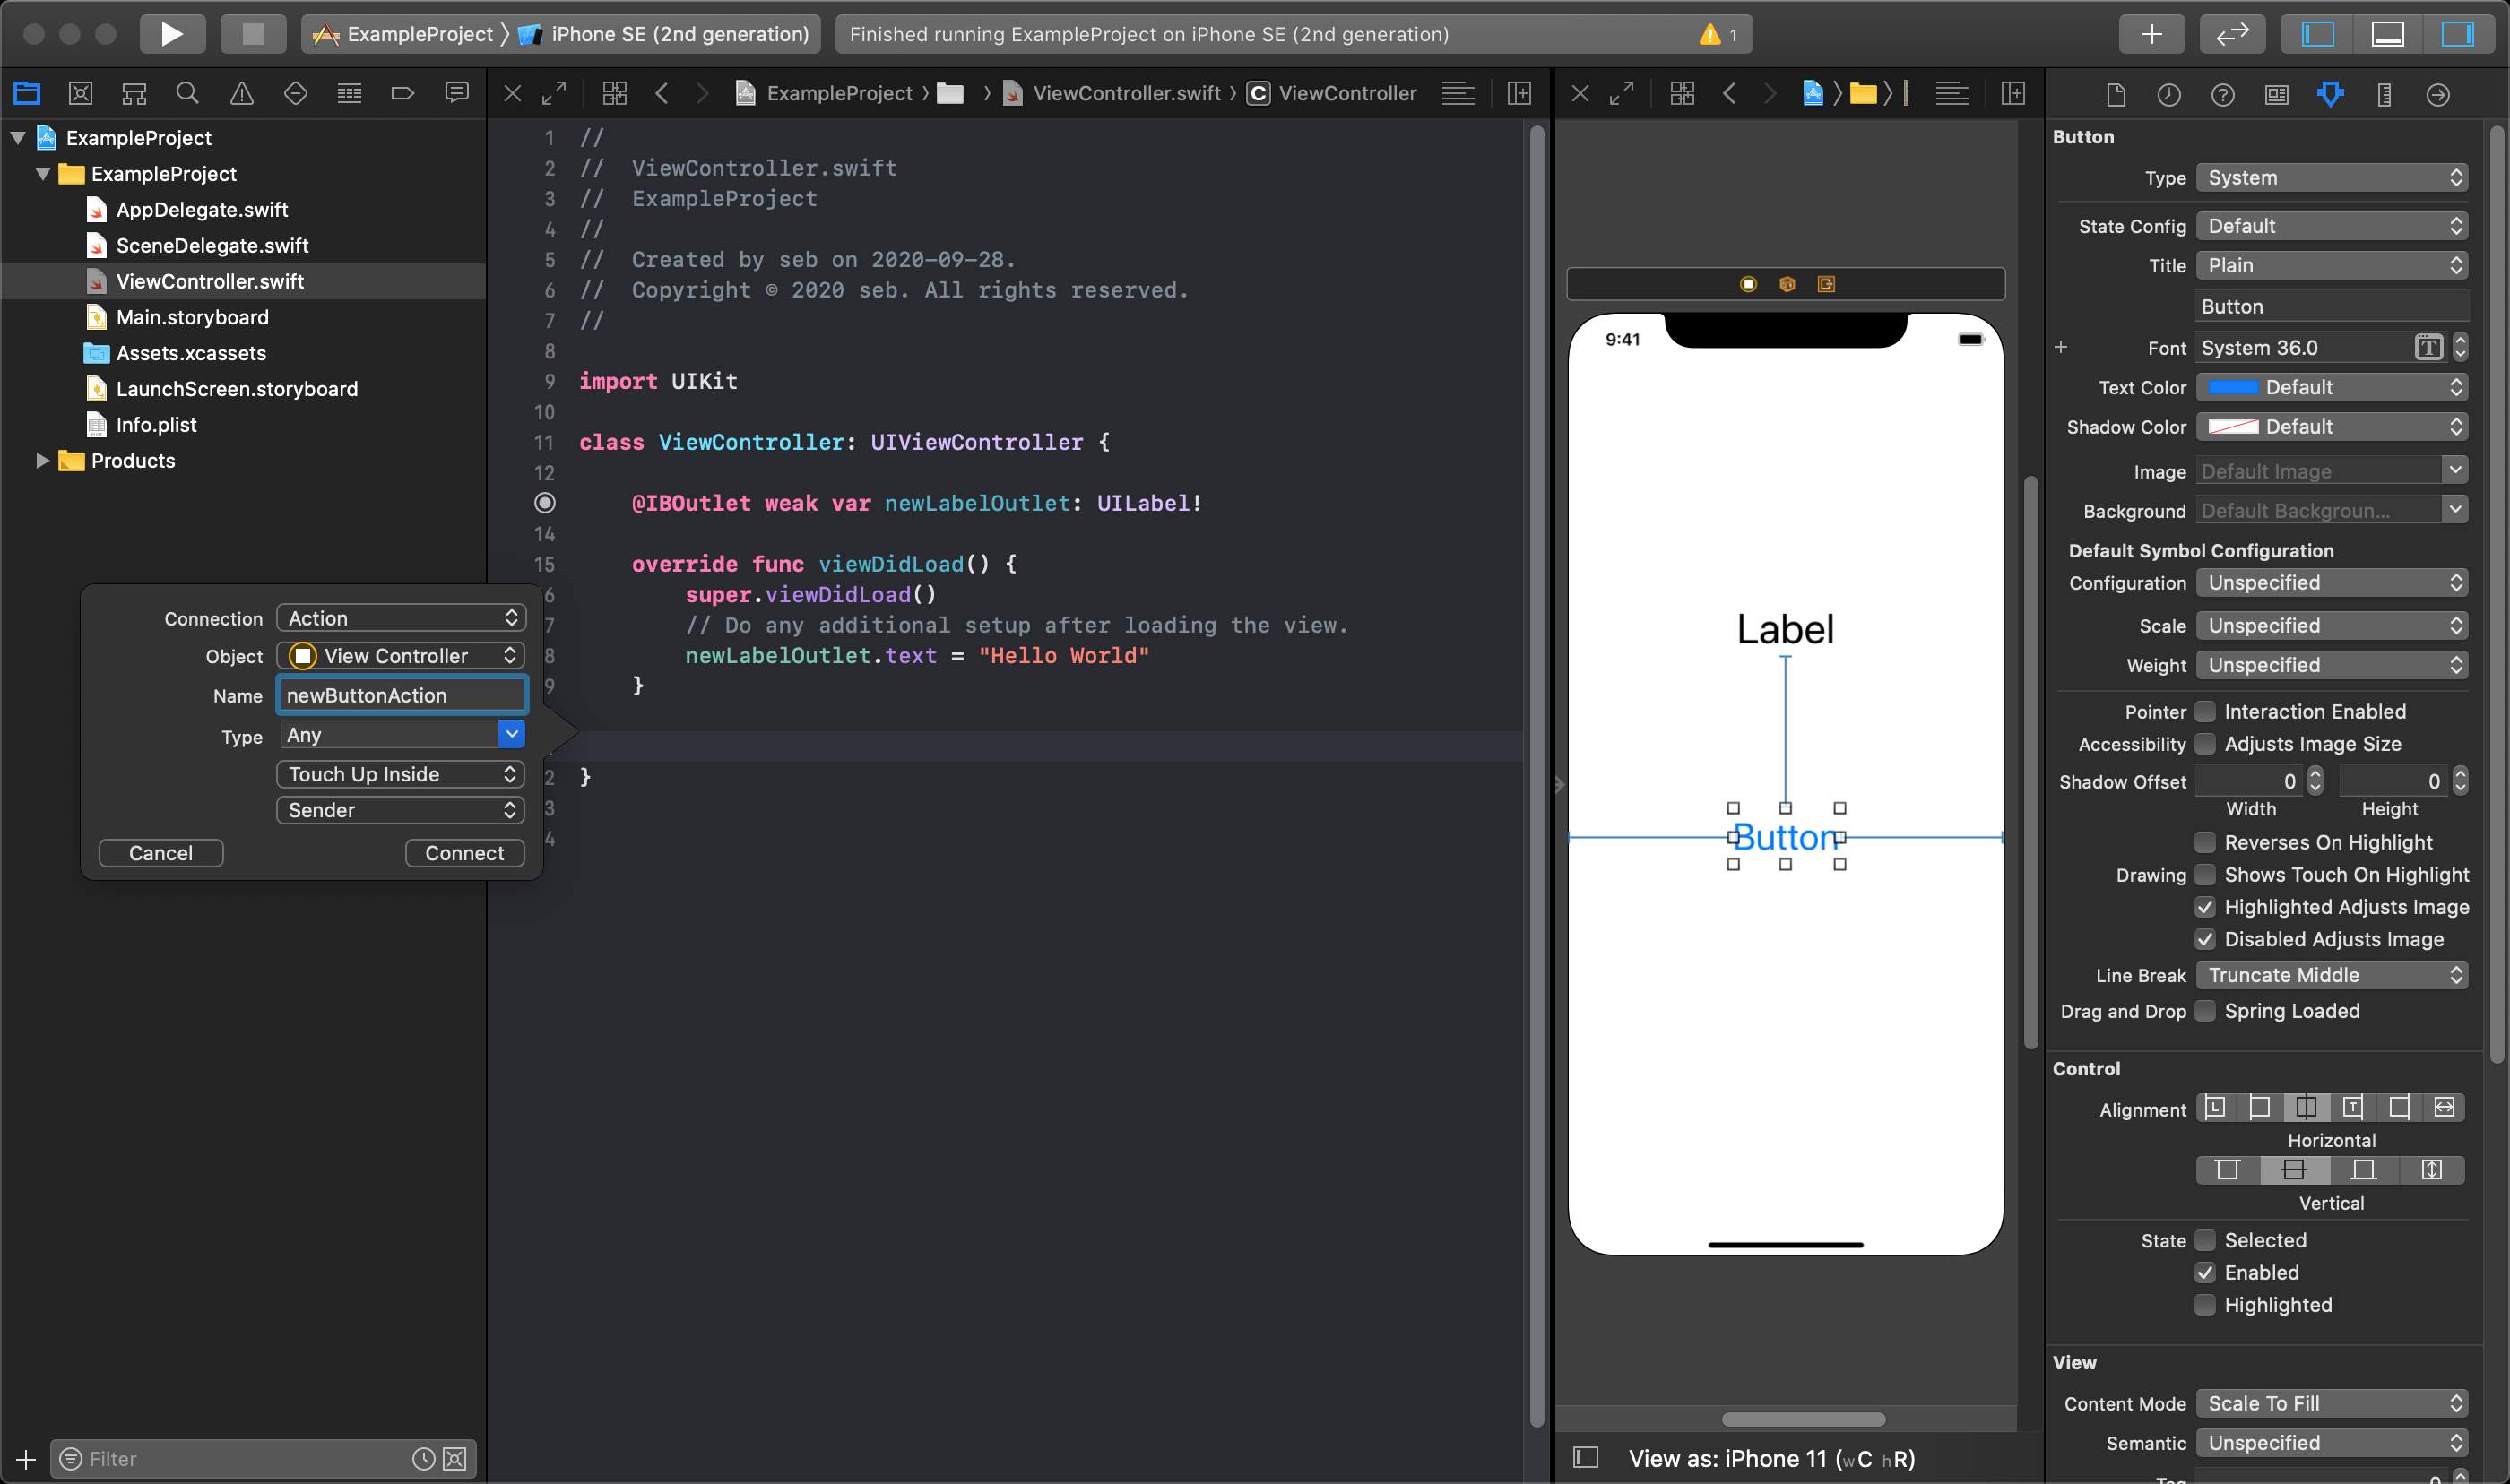
After you control+click and drag from your UI object to your viewController class, a small pop-up menu will be displayed. First, make sure the Connection is set to "Action" (this may attempt to set to "Outlet" by default). Enter the name you would like to use for the Action in the name field. Make sure the type is the same type of UI class as the object you are connecting it to (i.e. UIButton), and then click the Connect button.
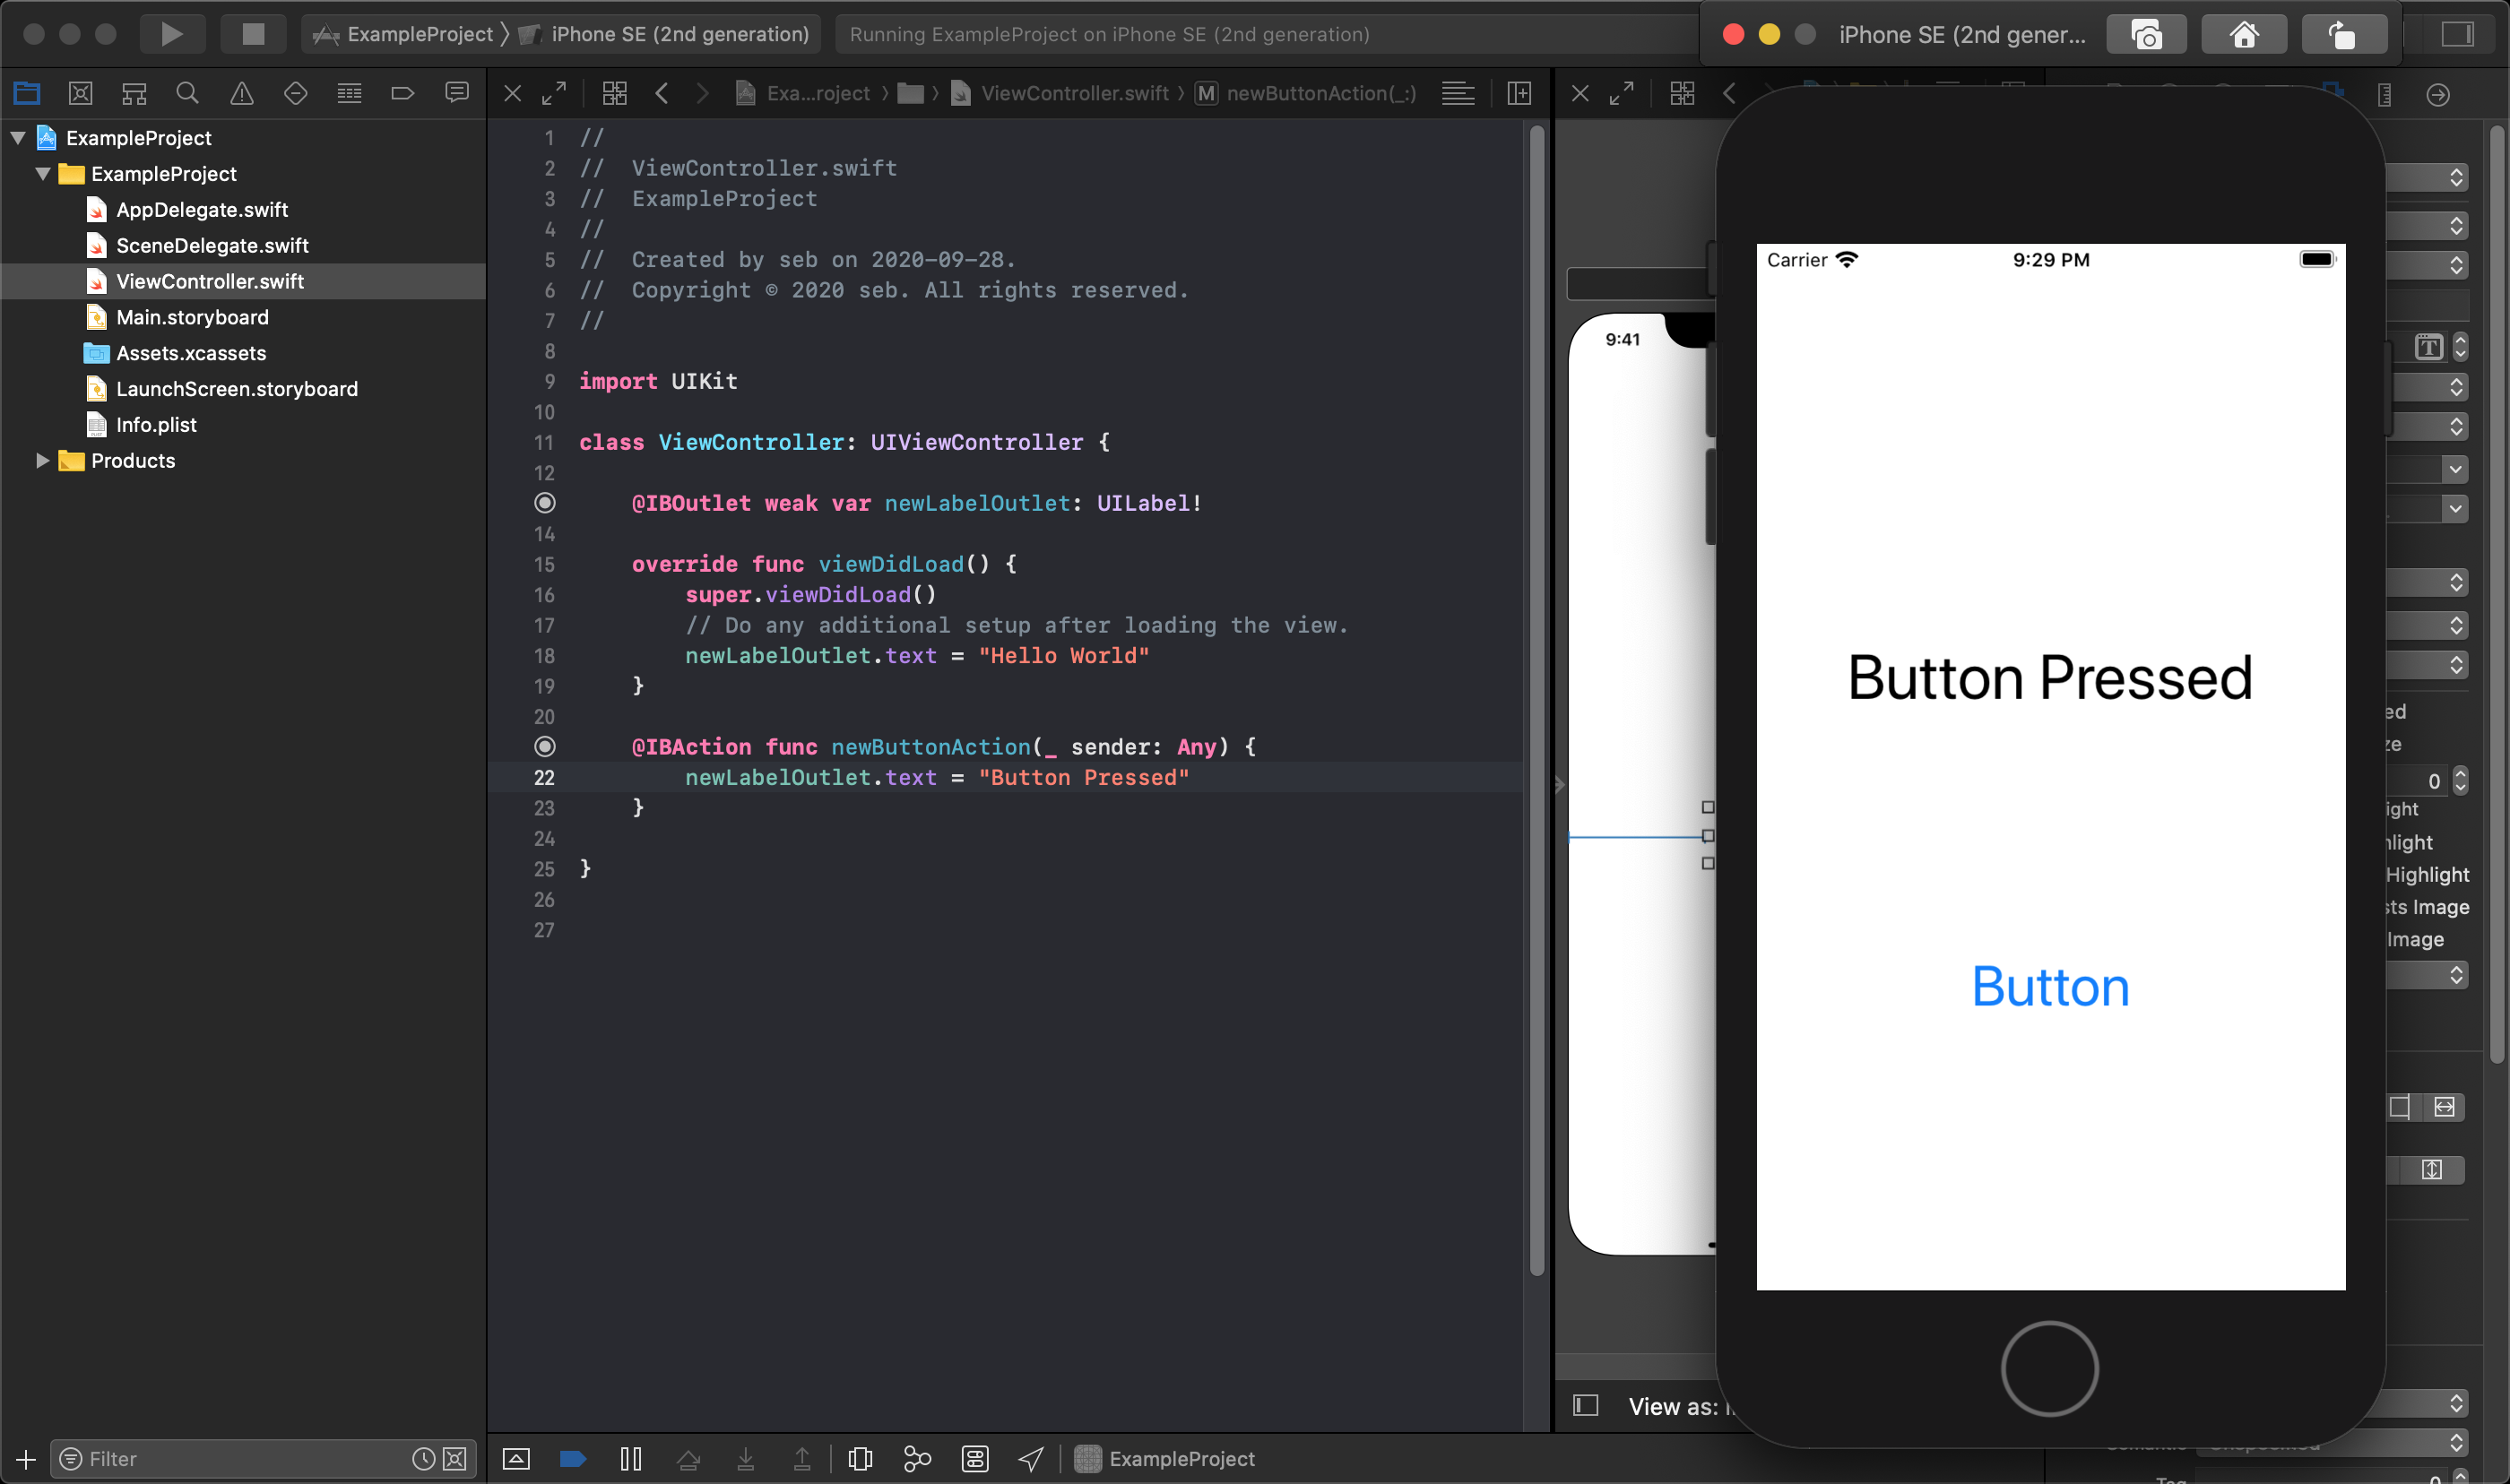
When an action is successfully created, it will generate a block of code similar to this:
@IBAction func yourNewAction(_ sender: Any) {
    // Code here runs when button pressed
}
2
3
In the debug area of the image below, you can see the result of the button being pressed in the simulator.
The next set of videos illustrates how to create an action, and gives you an overview of building layouts with the UIKit:
iOS 11 Fundamentals - Adding and Arranging UI Elements Pluralsight
iOS 11 Fundamentals - Adding Simple Functionality Pluralsight
iOS 11 Fundamentals - Accessing Subviews and Downcasting in Swift Pluralsight
iOS 11 Fundamentals - Connecting View Objects with Actions and Outlets Pluralsight
iOS 11 Fundamentals - Creating and Troubleshooting Actions and Outlets Pluralsight