Create Table Views
The tableView object lets you make a list of similar information (at whatever length is needed), letting the user scroll vertically up and down to view all the items in the tableView. Each row of information in the tableView is stored within an object called a TableViewCell.
Creating and Connecting a TableViewController
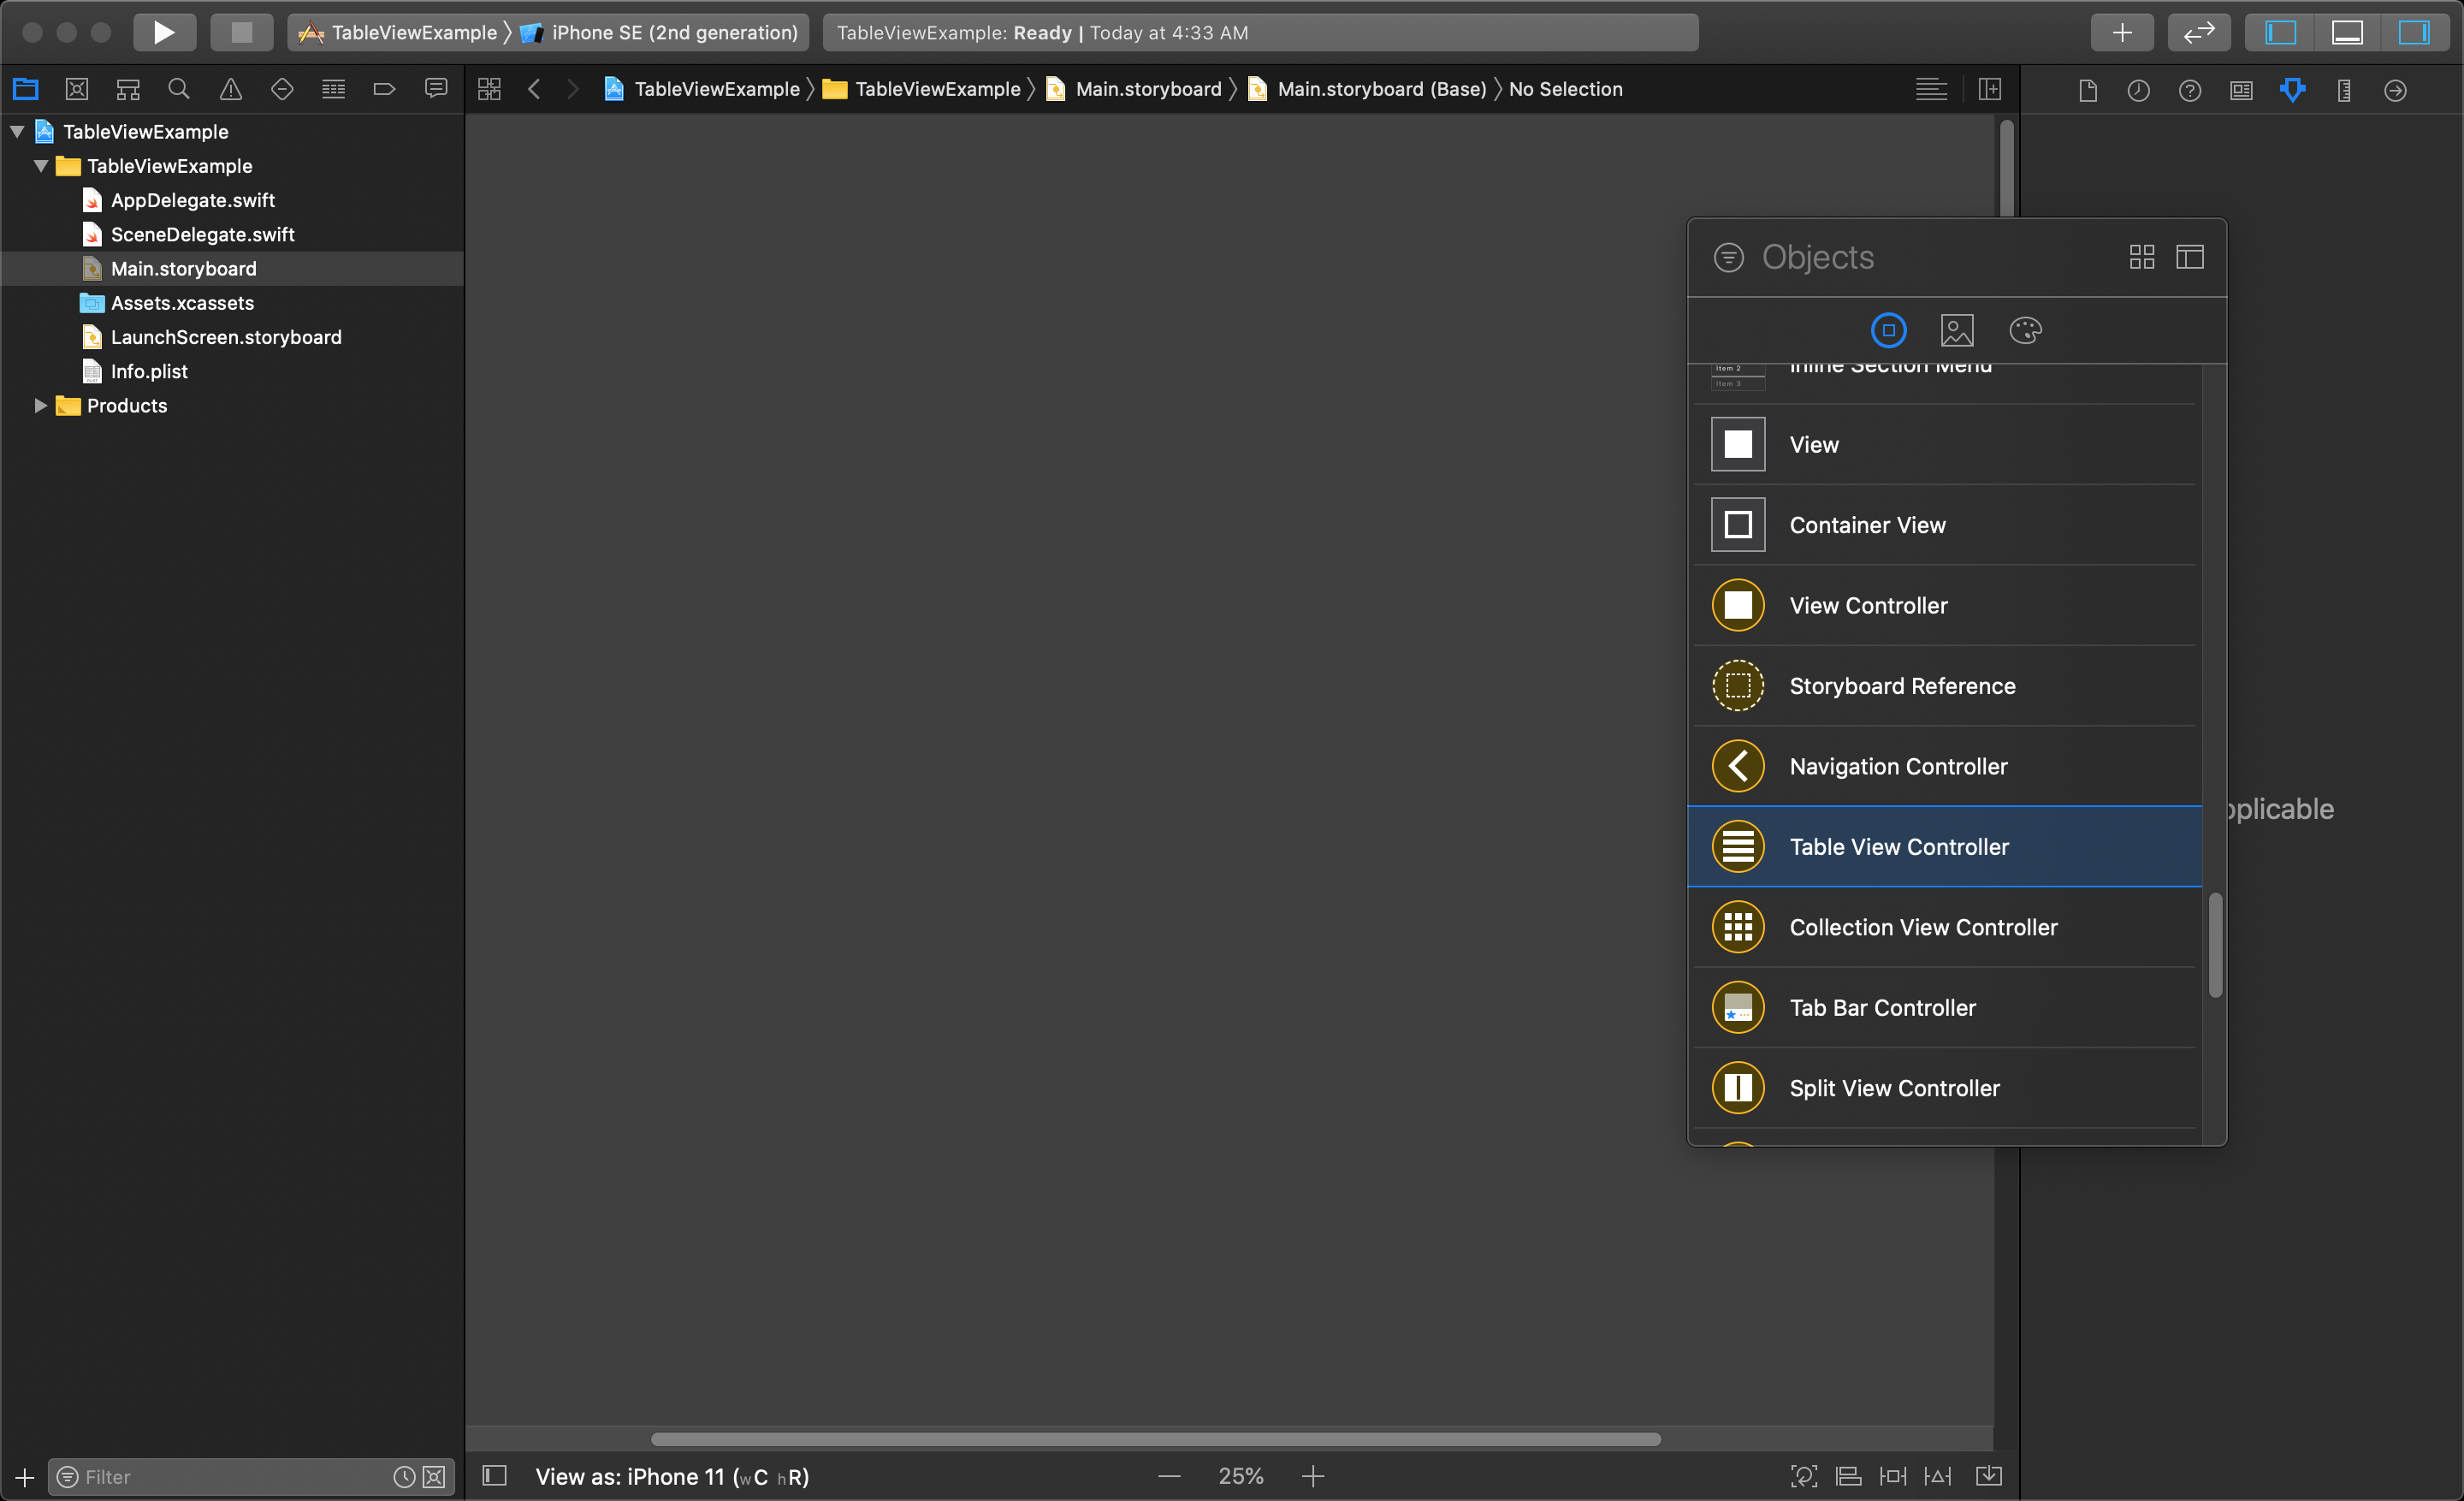
This lesson will demonstrate how to replace a viewController with a tableViewController within an existing Single View Application. Start by creating a new Single View Application, and then delete the original viewController from the storyboard, and the viewController.swift file in the project navigator. Then locate the yellow Table View Controller object in the Object Library and add it to the storyboard.
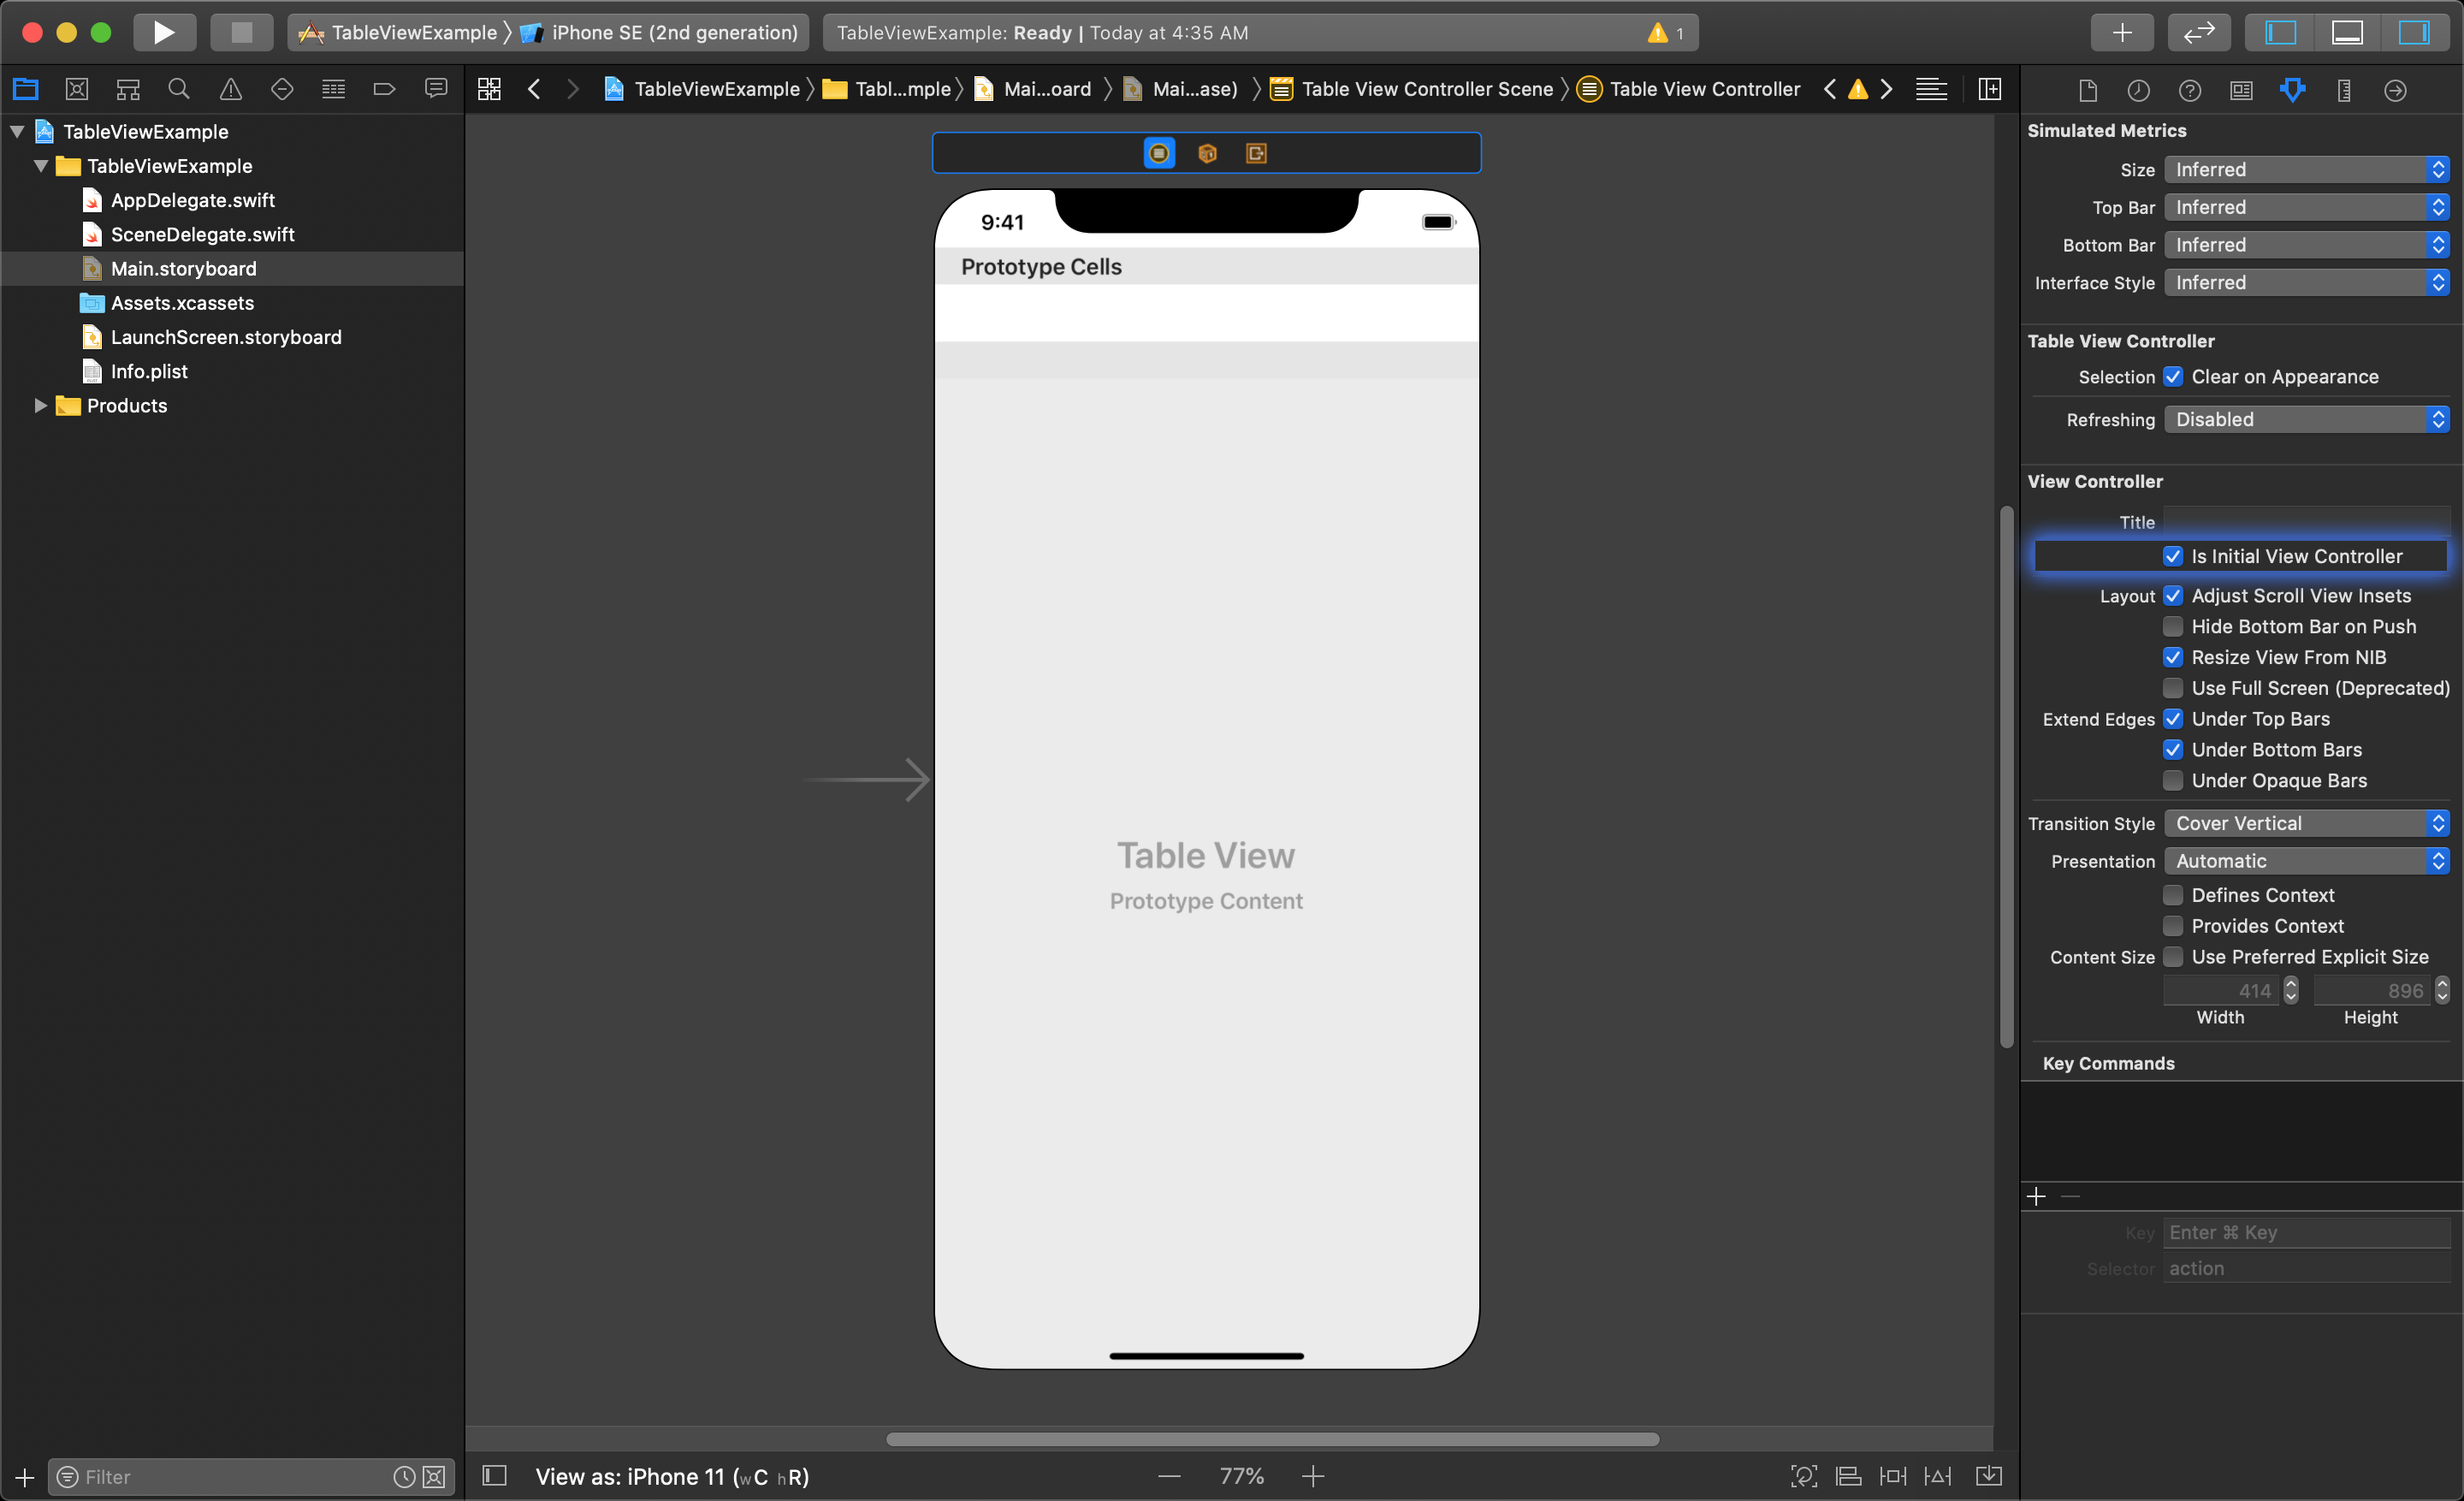
After dragging the Table View Controller to the storyboard, we need to make sure we set it to be the initial view controller for this project. This is done by selecting the new tableView and checking on 'Is Initial View Controller' in the Attributes Inspector on the right side of Xcode.
After that, we need to make a new Cocoa Touch class that is a subclass of the UITableViewController class so it can control the tableViewController.
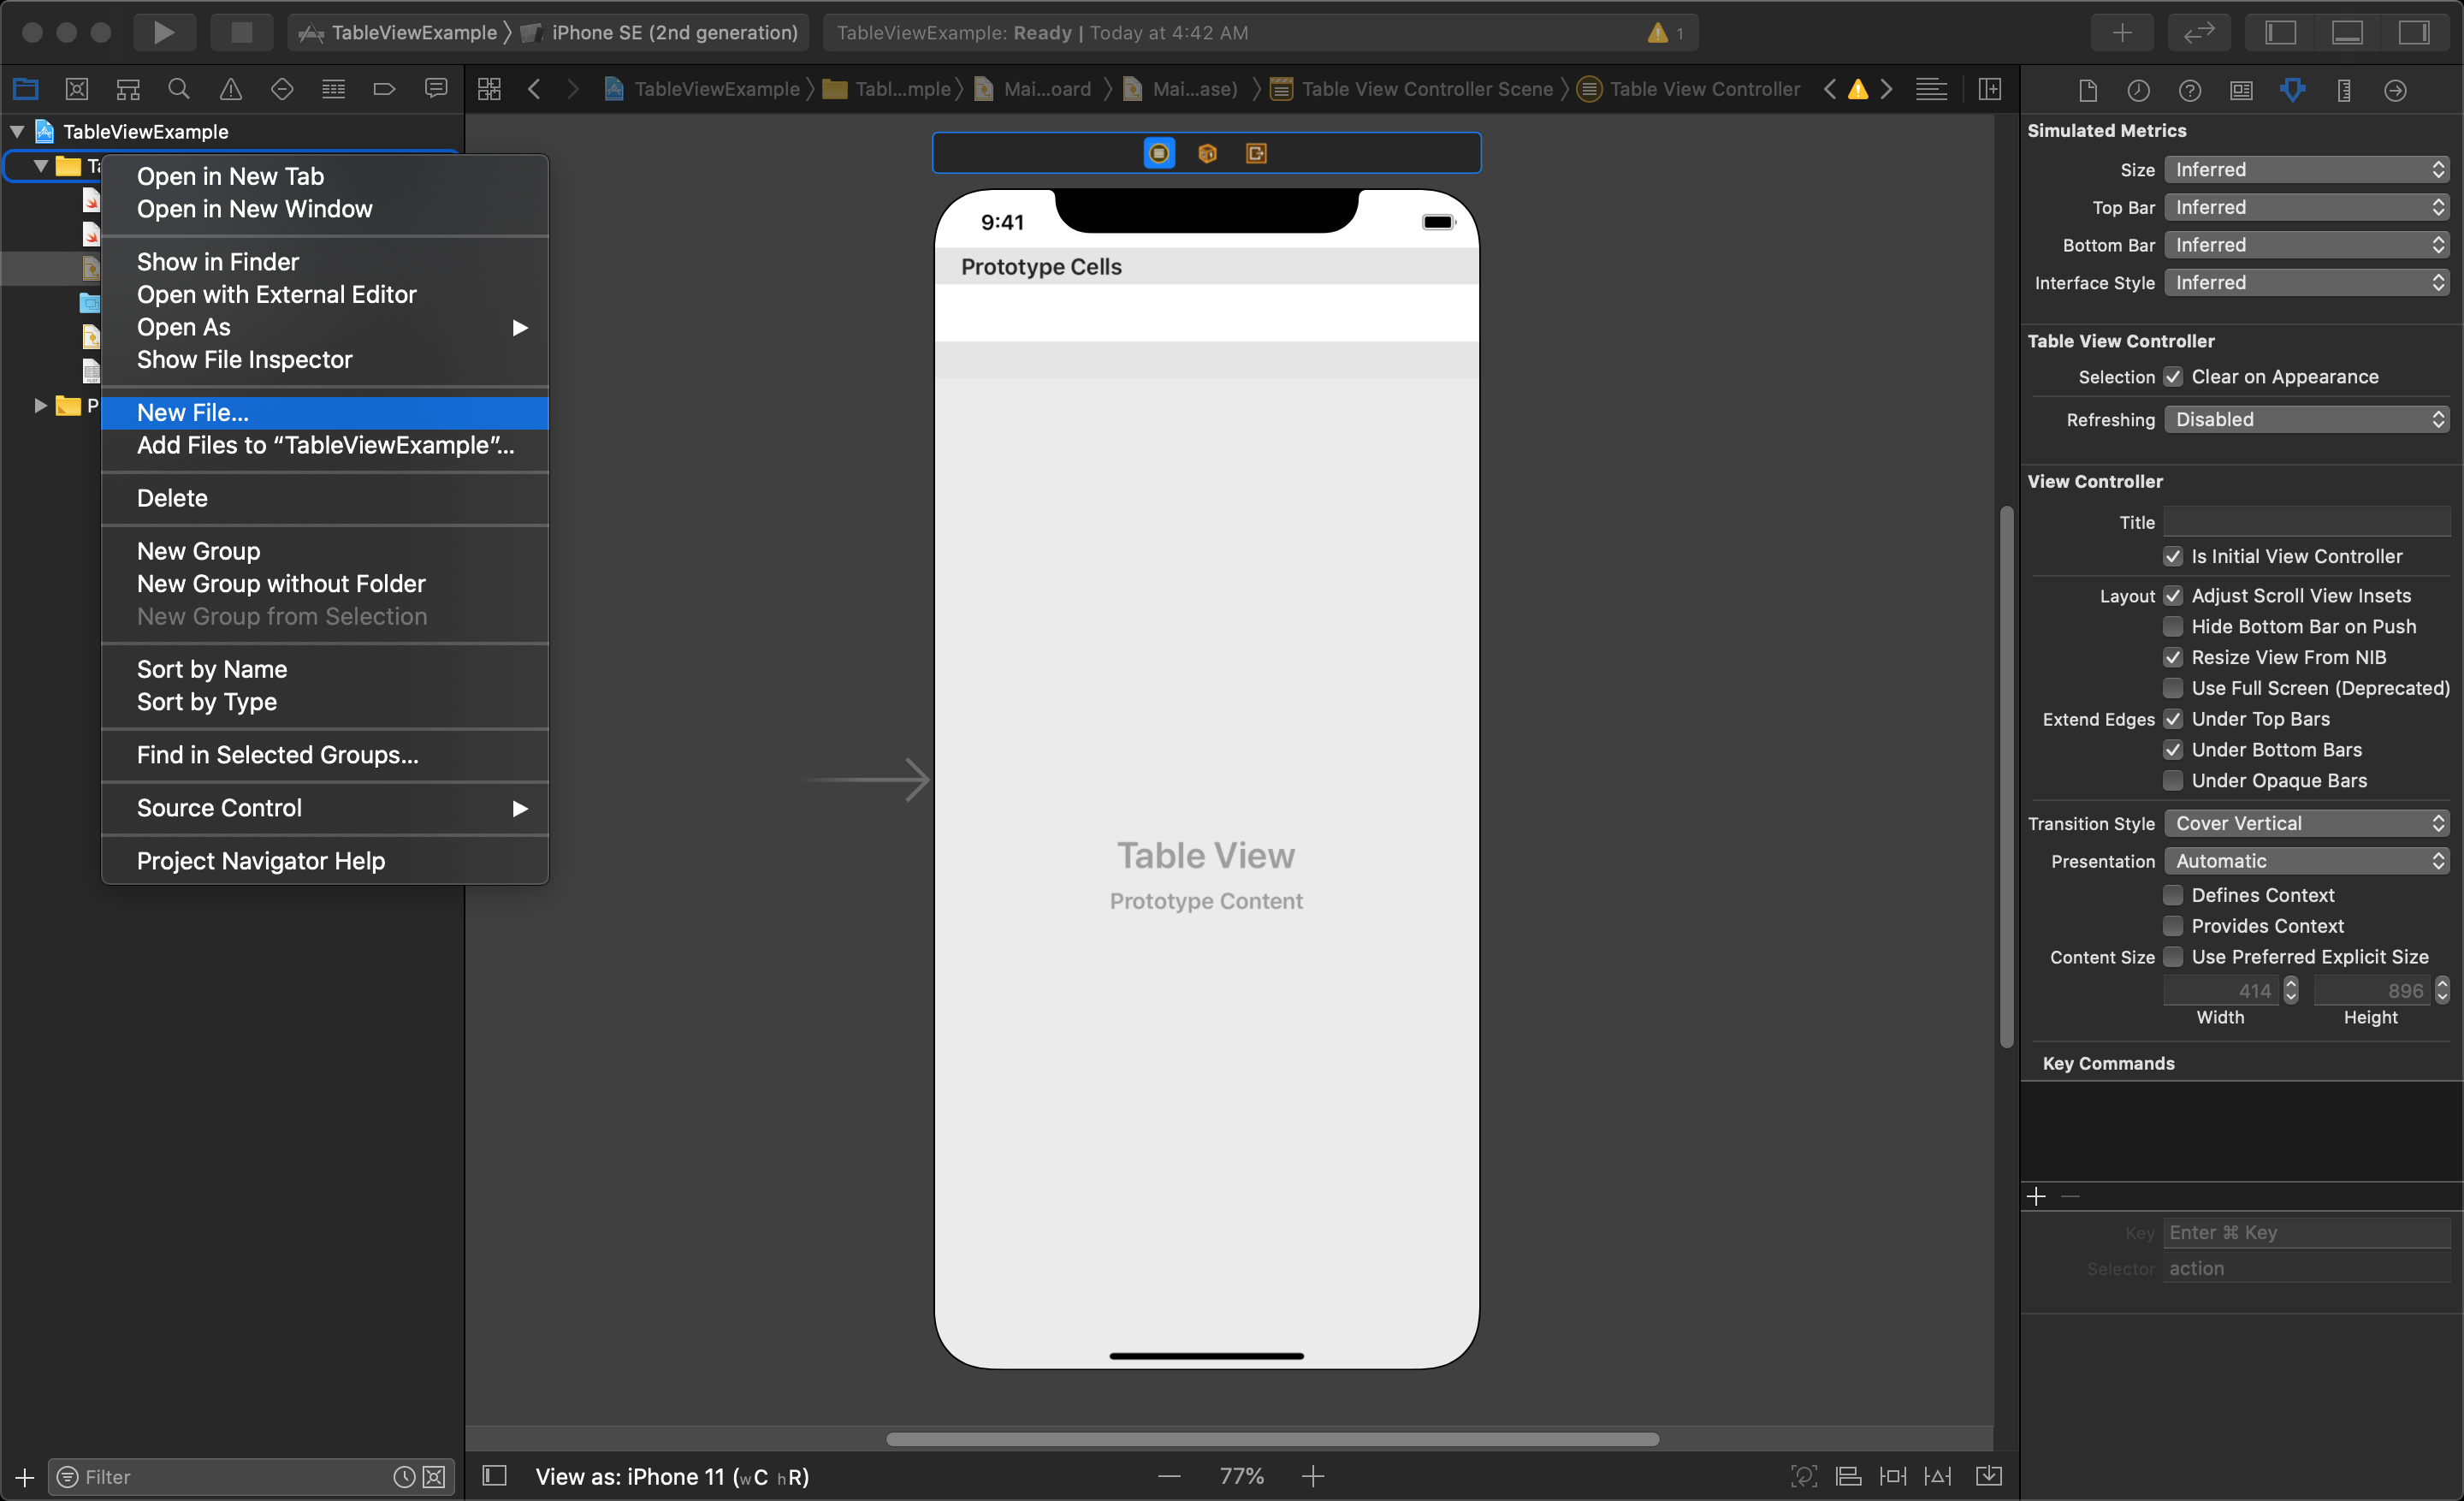
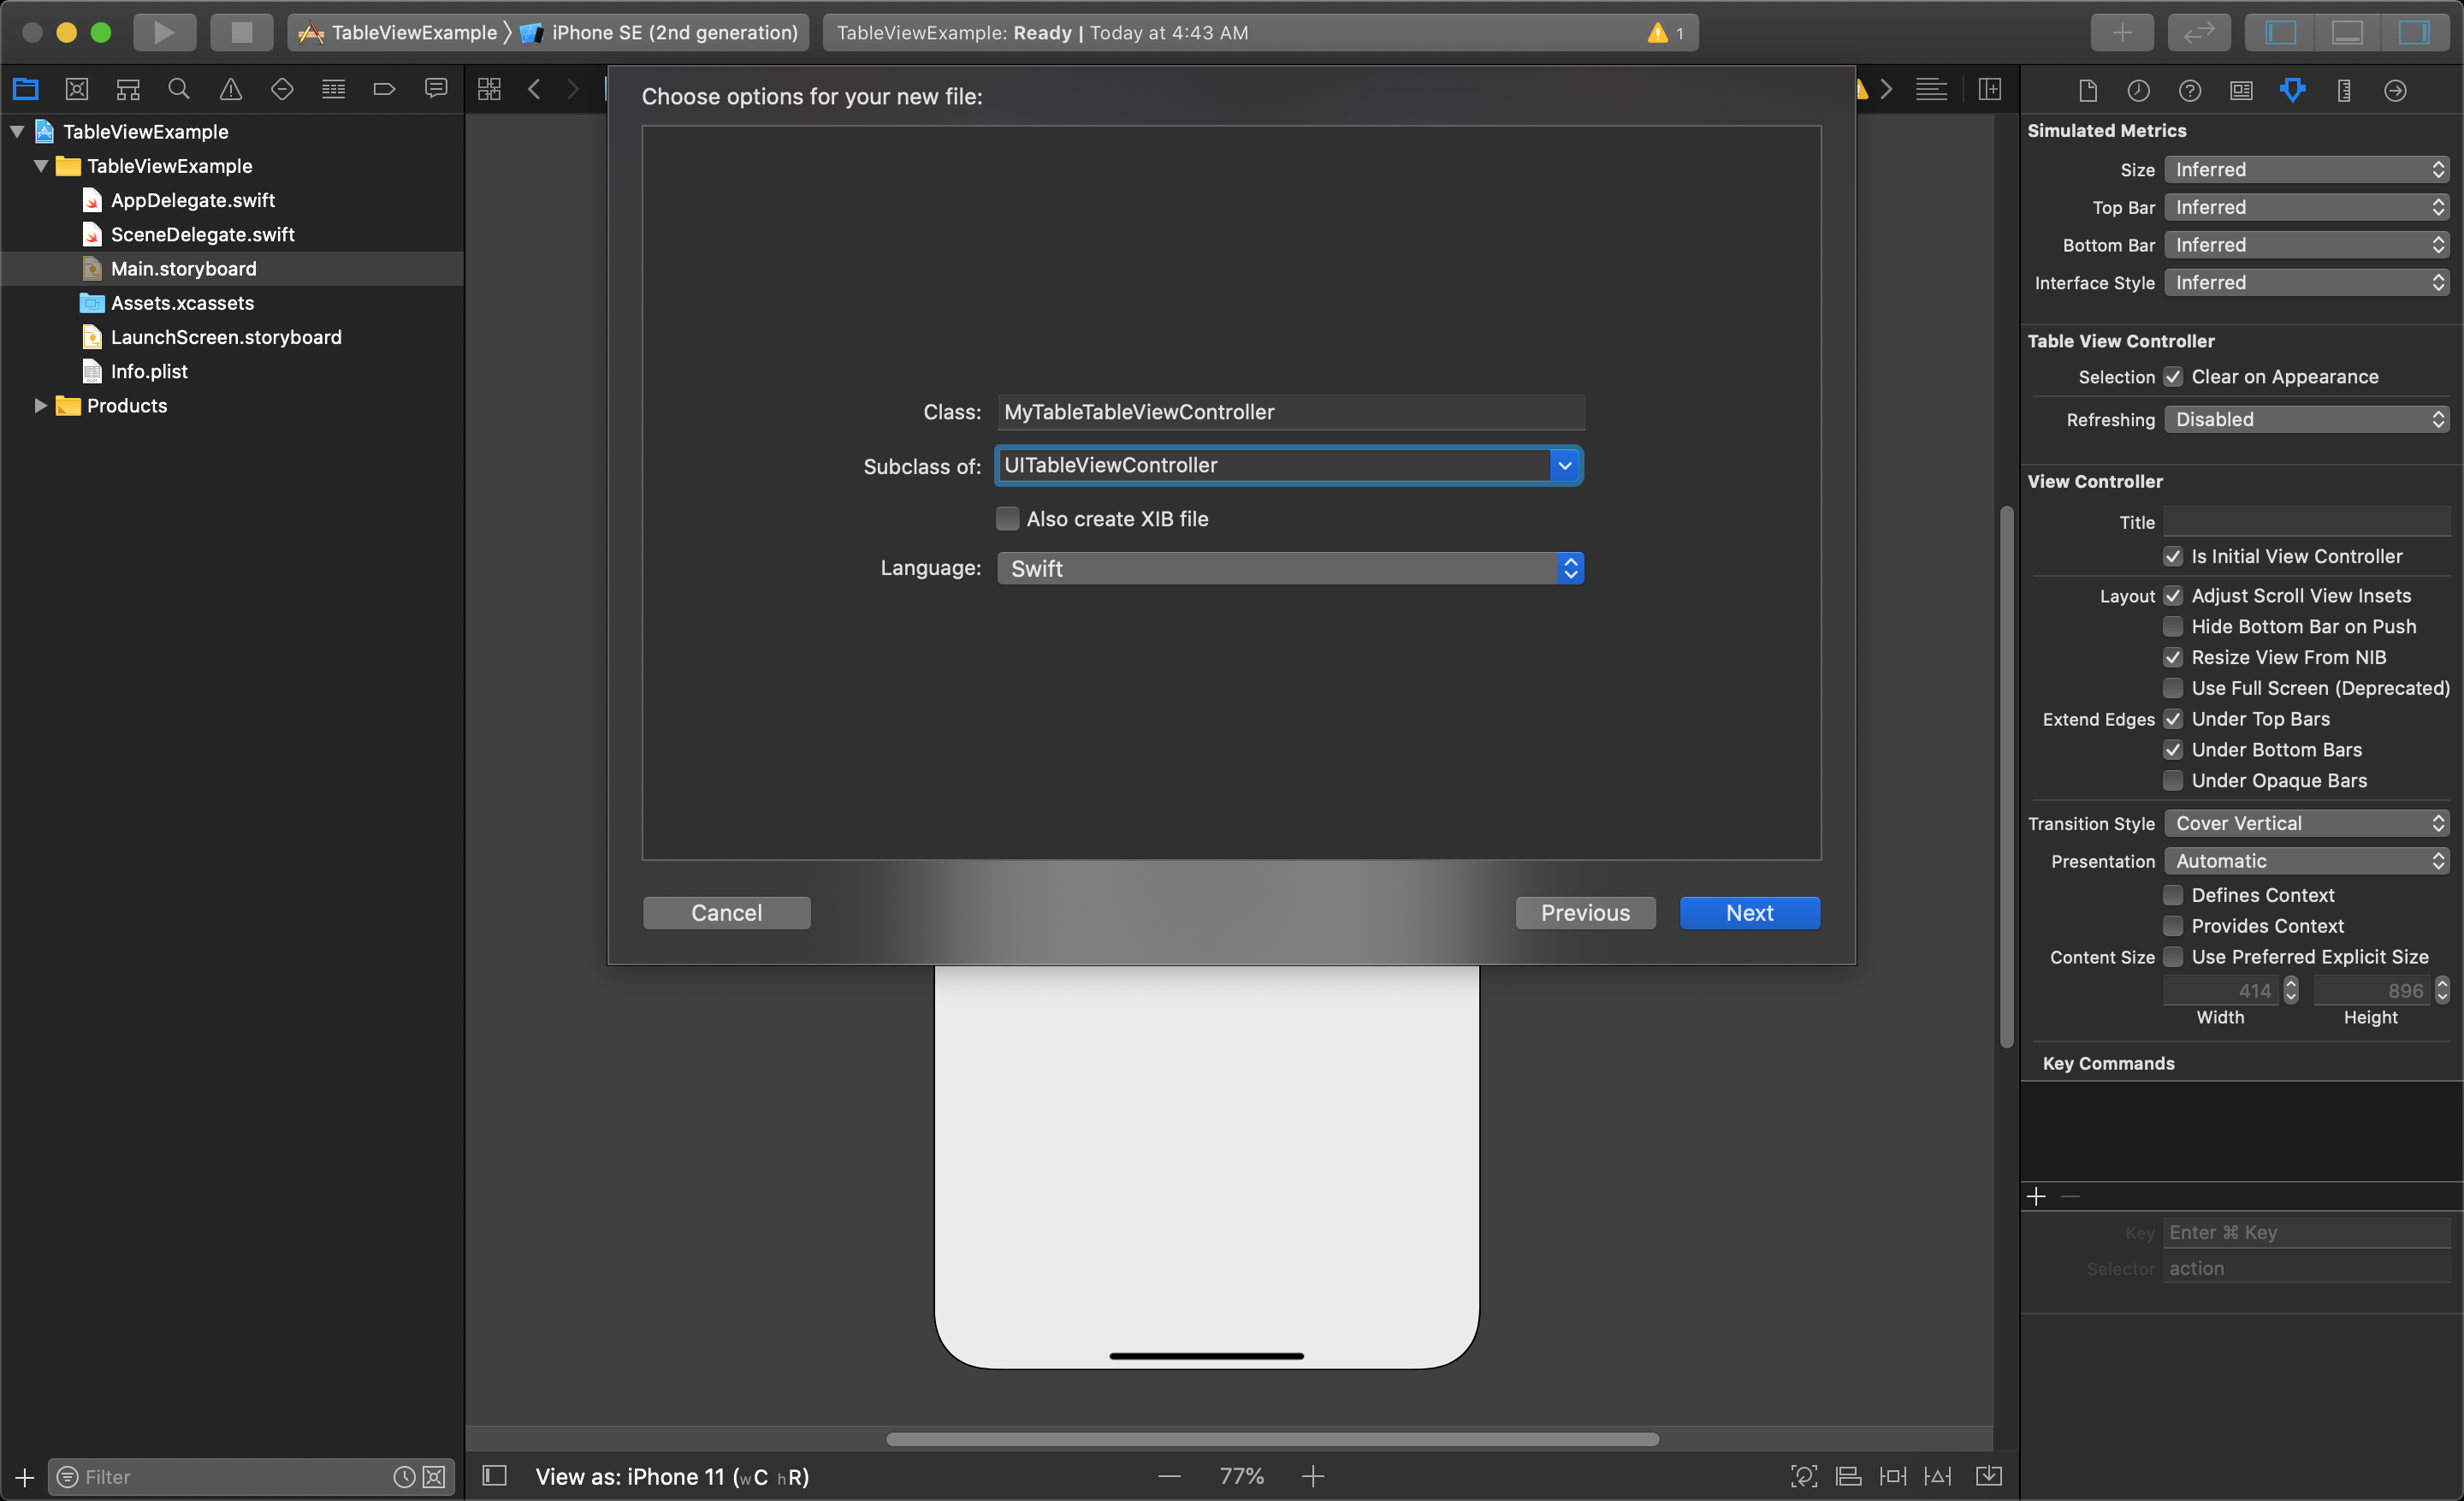
Start by right-clicking on the project folder and select New File..., then select the file type to be Cocoa Touch Class. Click Next and give your new tableViewController class an appropriate name. Make sure you select subclass of UITableViewController, and that the language is Swift, and click the Next button. Choose a location to save your new file and click the Create button when done.
Verify that you have created this properly by ensuring that your class is importing the UIKit, and looks similar to this:
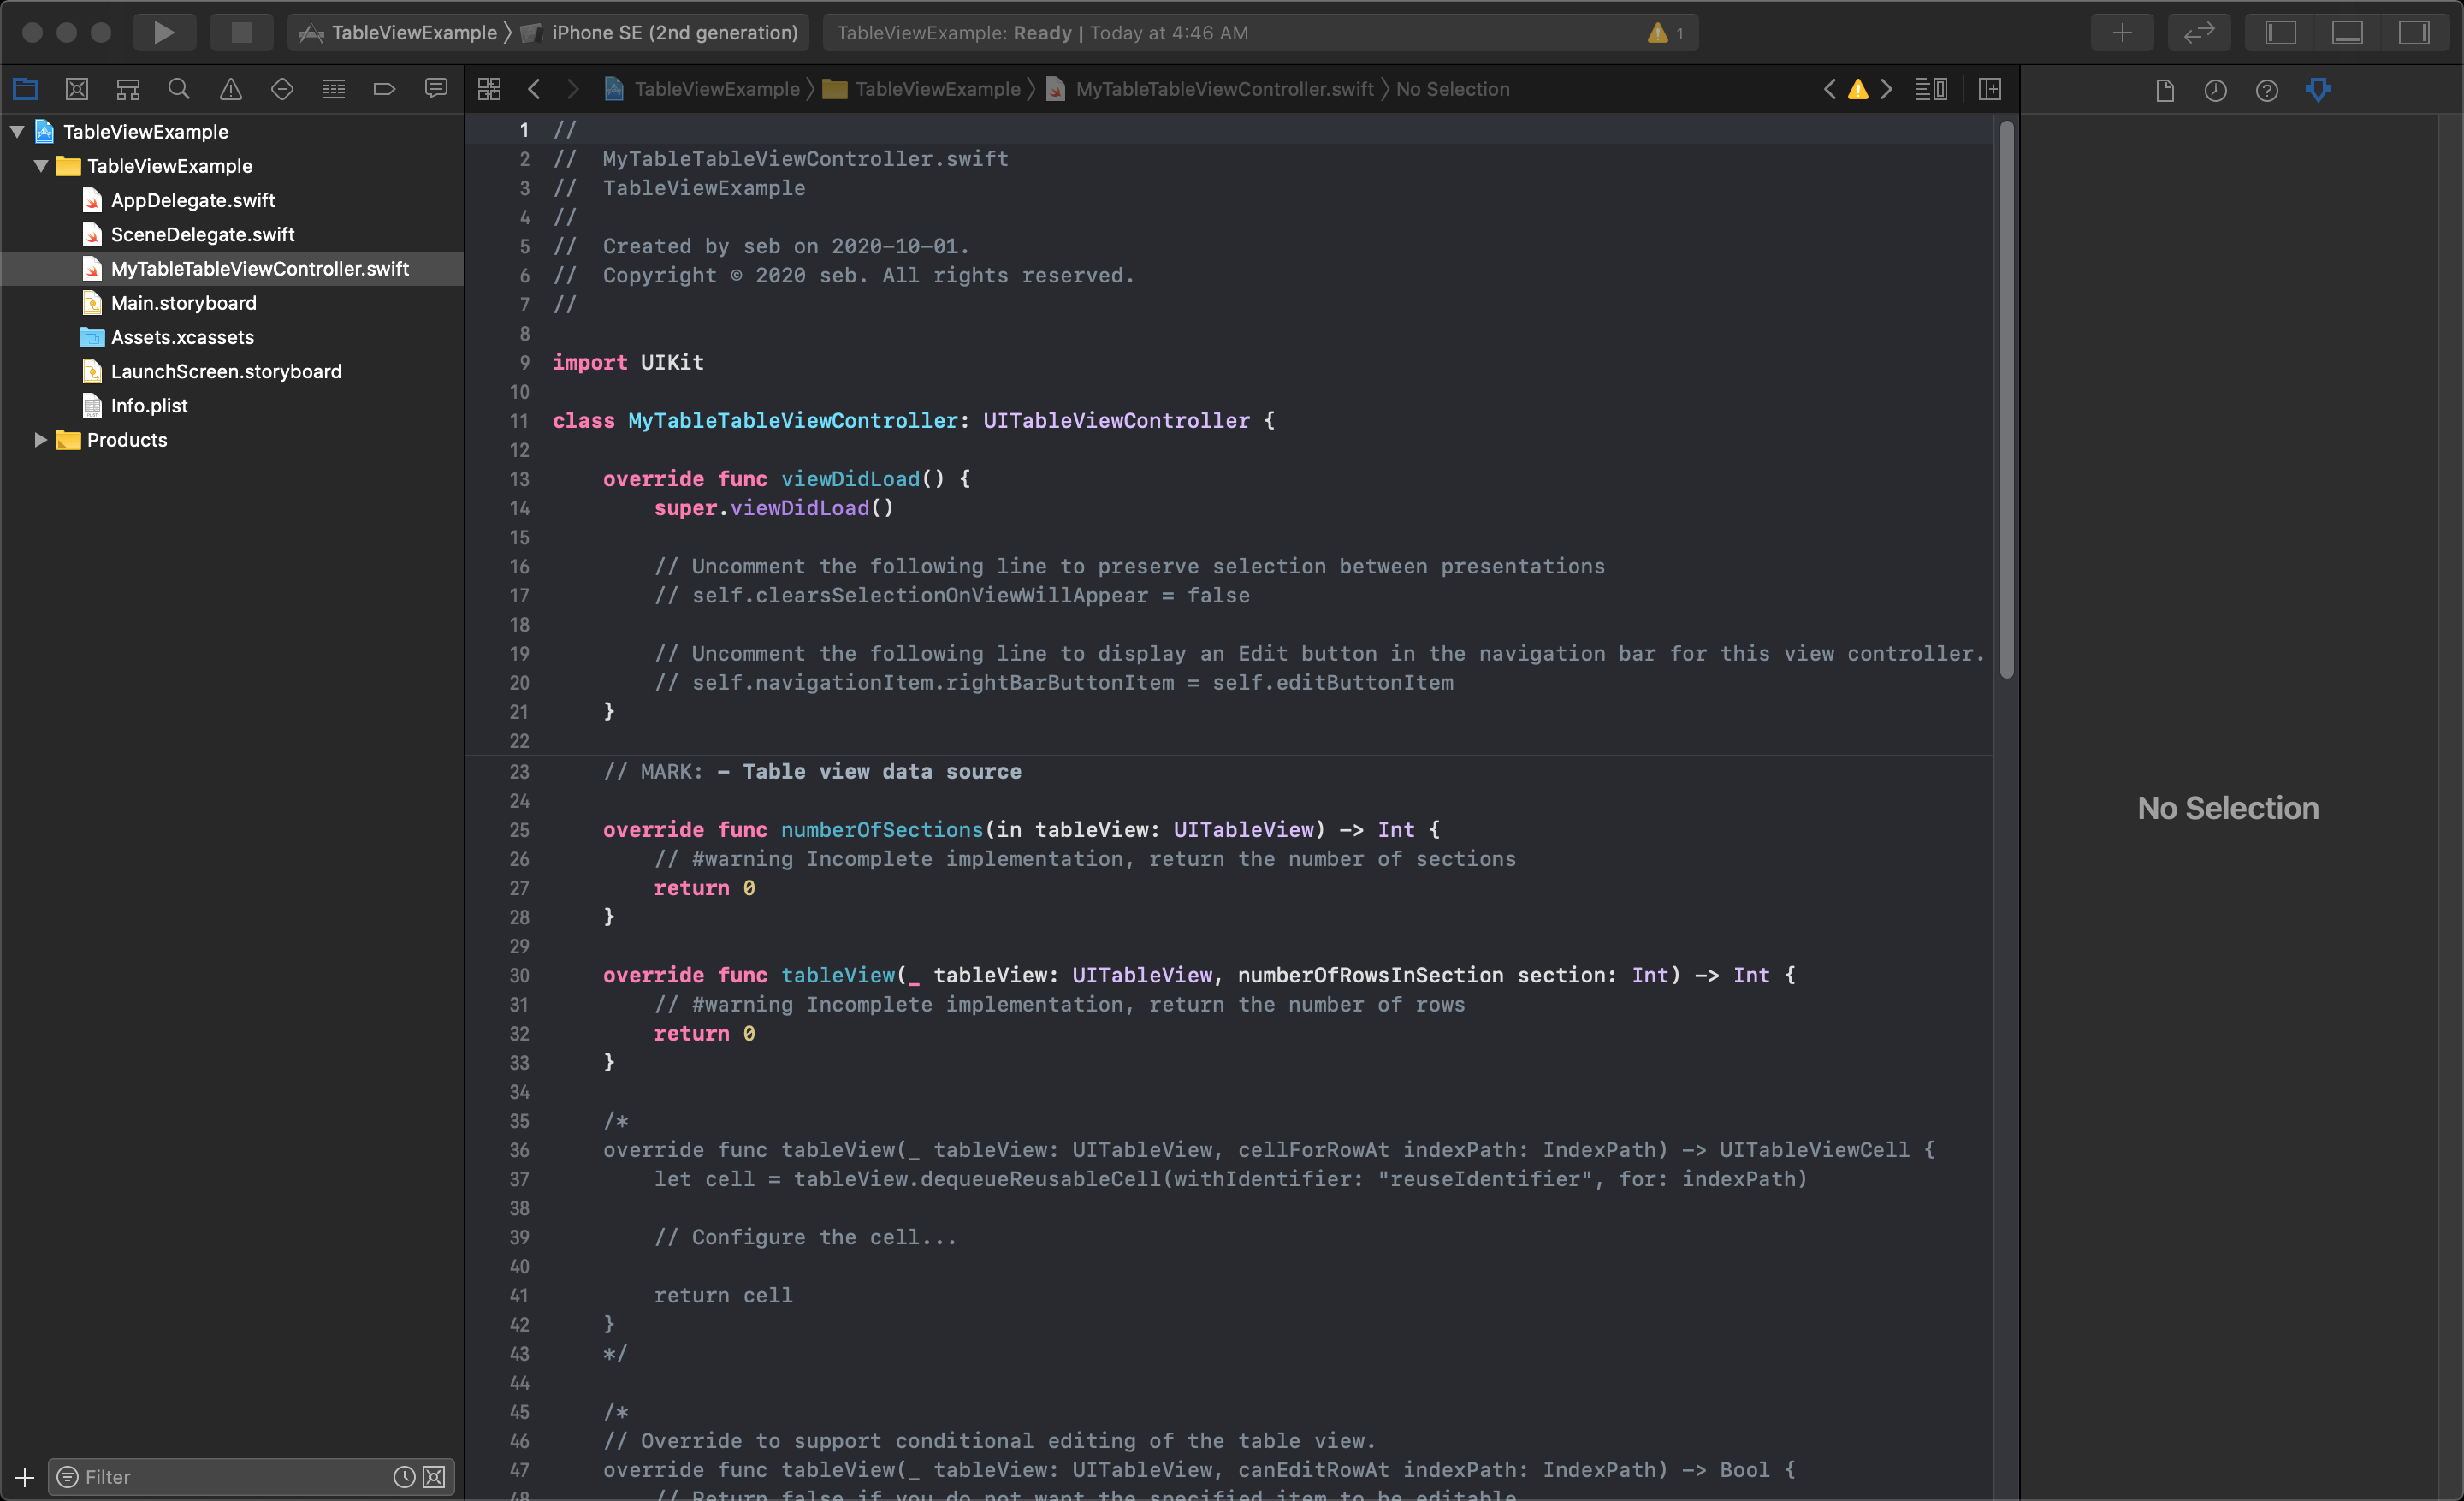
NOTE
The UITableViewController class has many useful functions commented out that are commonly used for setting up and modifying tableViews. We will use some of these in this lesson so do not remove them.
To finish setting up, you must go back to the storyboard and tell the TableViewController object to use your new tableViewController class. In the storyboard, select your Table View Controller object, and open the Identity Inspector on the right side of Xcode. Under the Custom Class heading, choose the name of your new UITableViewController file in the Class drop-down selection.
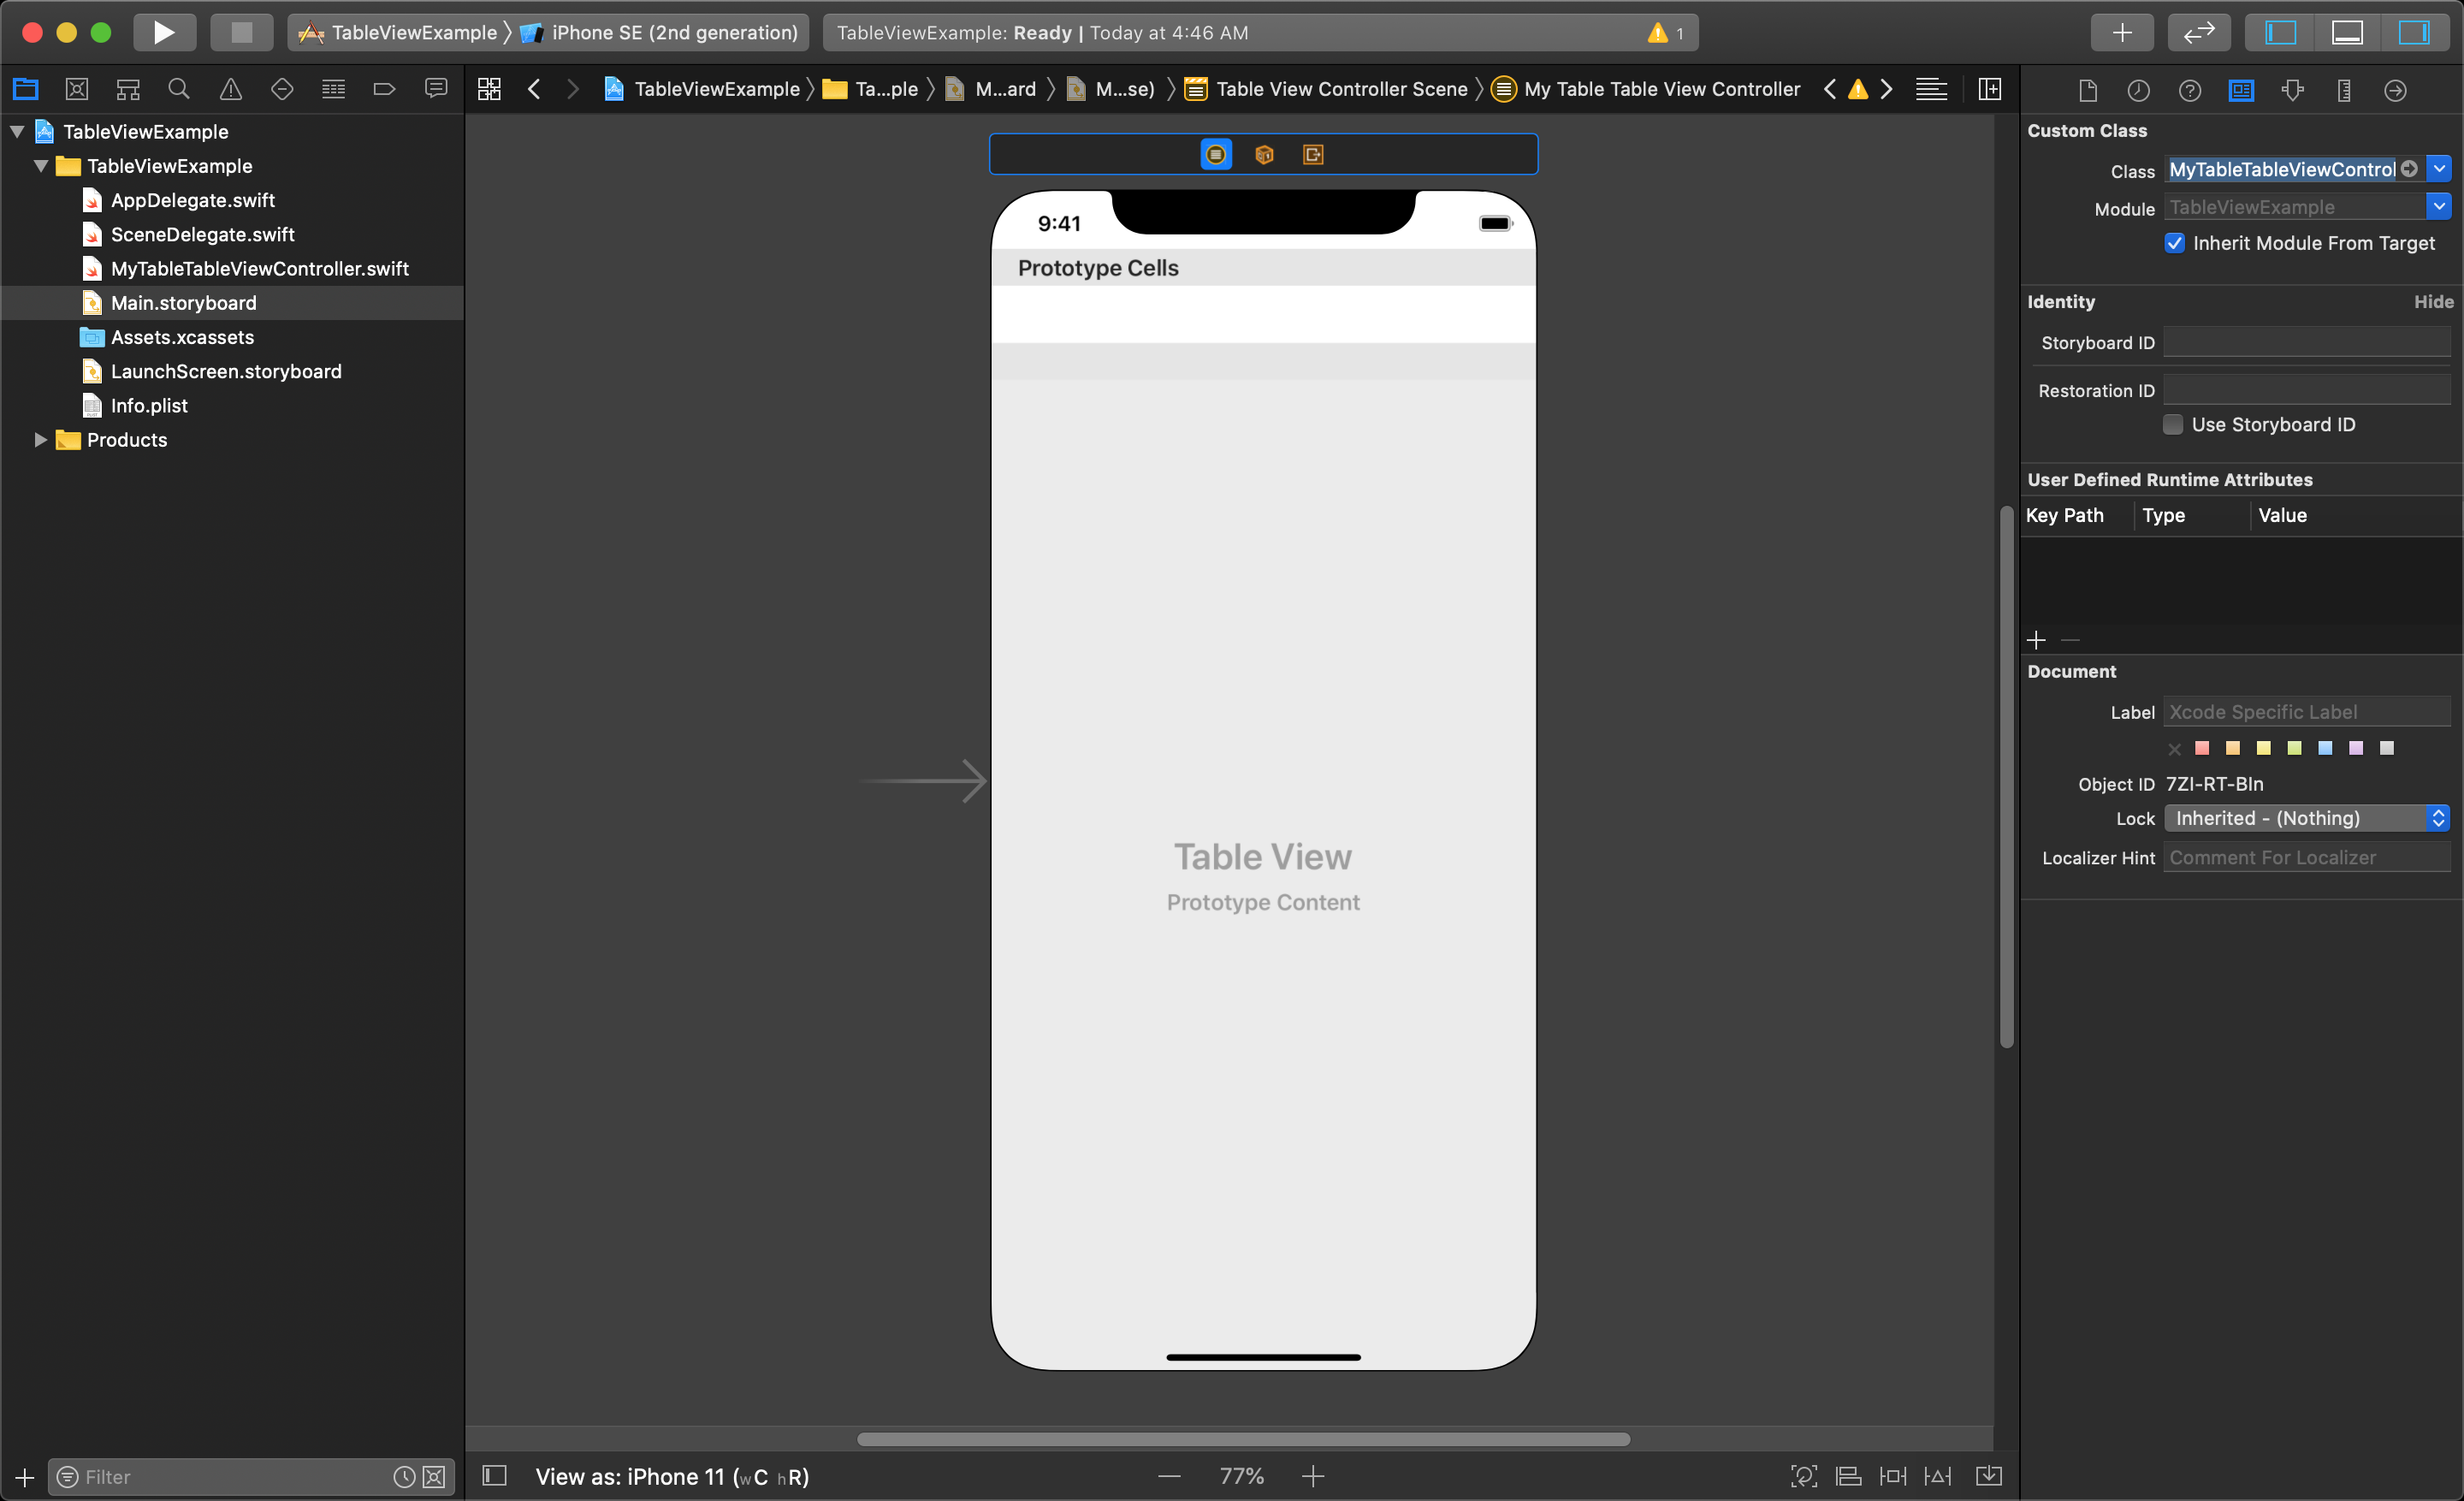
WARNING
If you can not find your new UITableViewController class in the drop-down list, you might have created your Cocoa Touch Class as a sub-class of a different UI-class. If it is not inheriting from the UITableViewController class you should delete the file from your project and create it again.
Setting the Reuse Identifier of the TableViewCell
Each row in a TableView is called a cell, which has its own class to control it called UITableViewCell. The Table View Controller object comes with the Table View Cell prototype added to it: it is the white horizontal space at the top of the Table View Controller object. The prototype cell is duplicated for each cell in the tableView. By default, this prototype cell uses a generic UITableViewCell class, and by modifying the tableViewCell prototype you can set the look and style for all of the cells in the table.
For now, you only need to give a name to the Identifier parameter of the Table View Cell prototype, so this prototype cell can be reference within the code of your tableViewController class.
To do this, you must select the box at the top of your tableView just under the label Prototype Cells and give the identifier a name in the Attributes Inspector. You will know you have selected the prototype cell in the editor when you see the heading labeled "Table View Cell" in the Attributes Inspector.

Modifying the TableViewController class
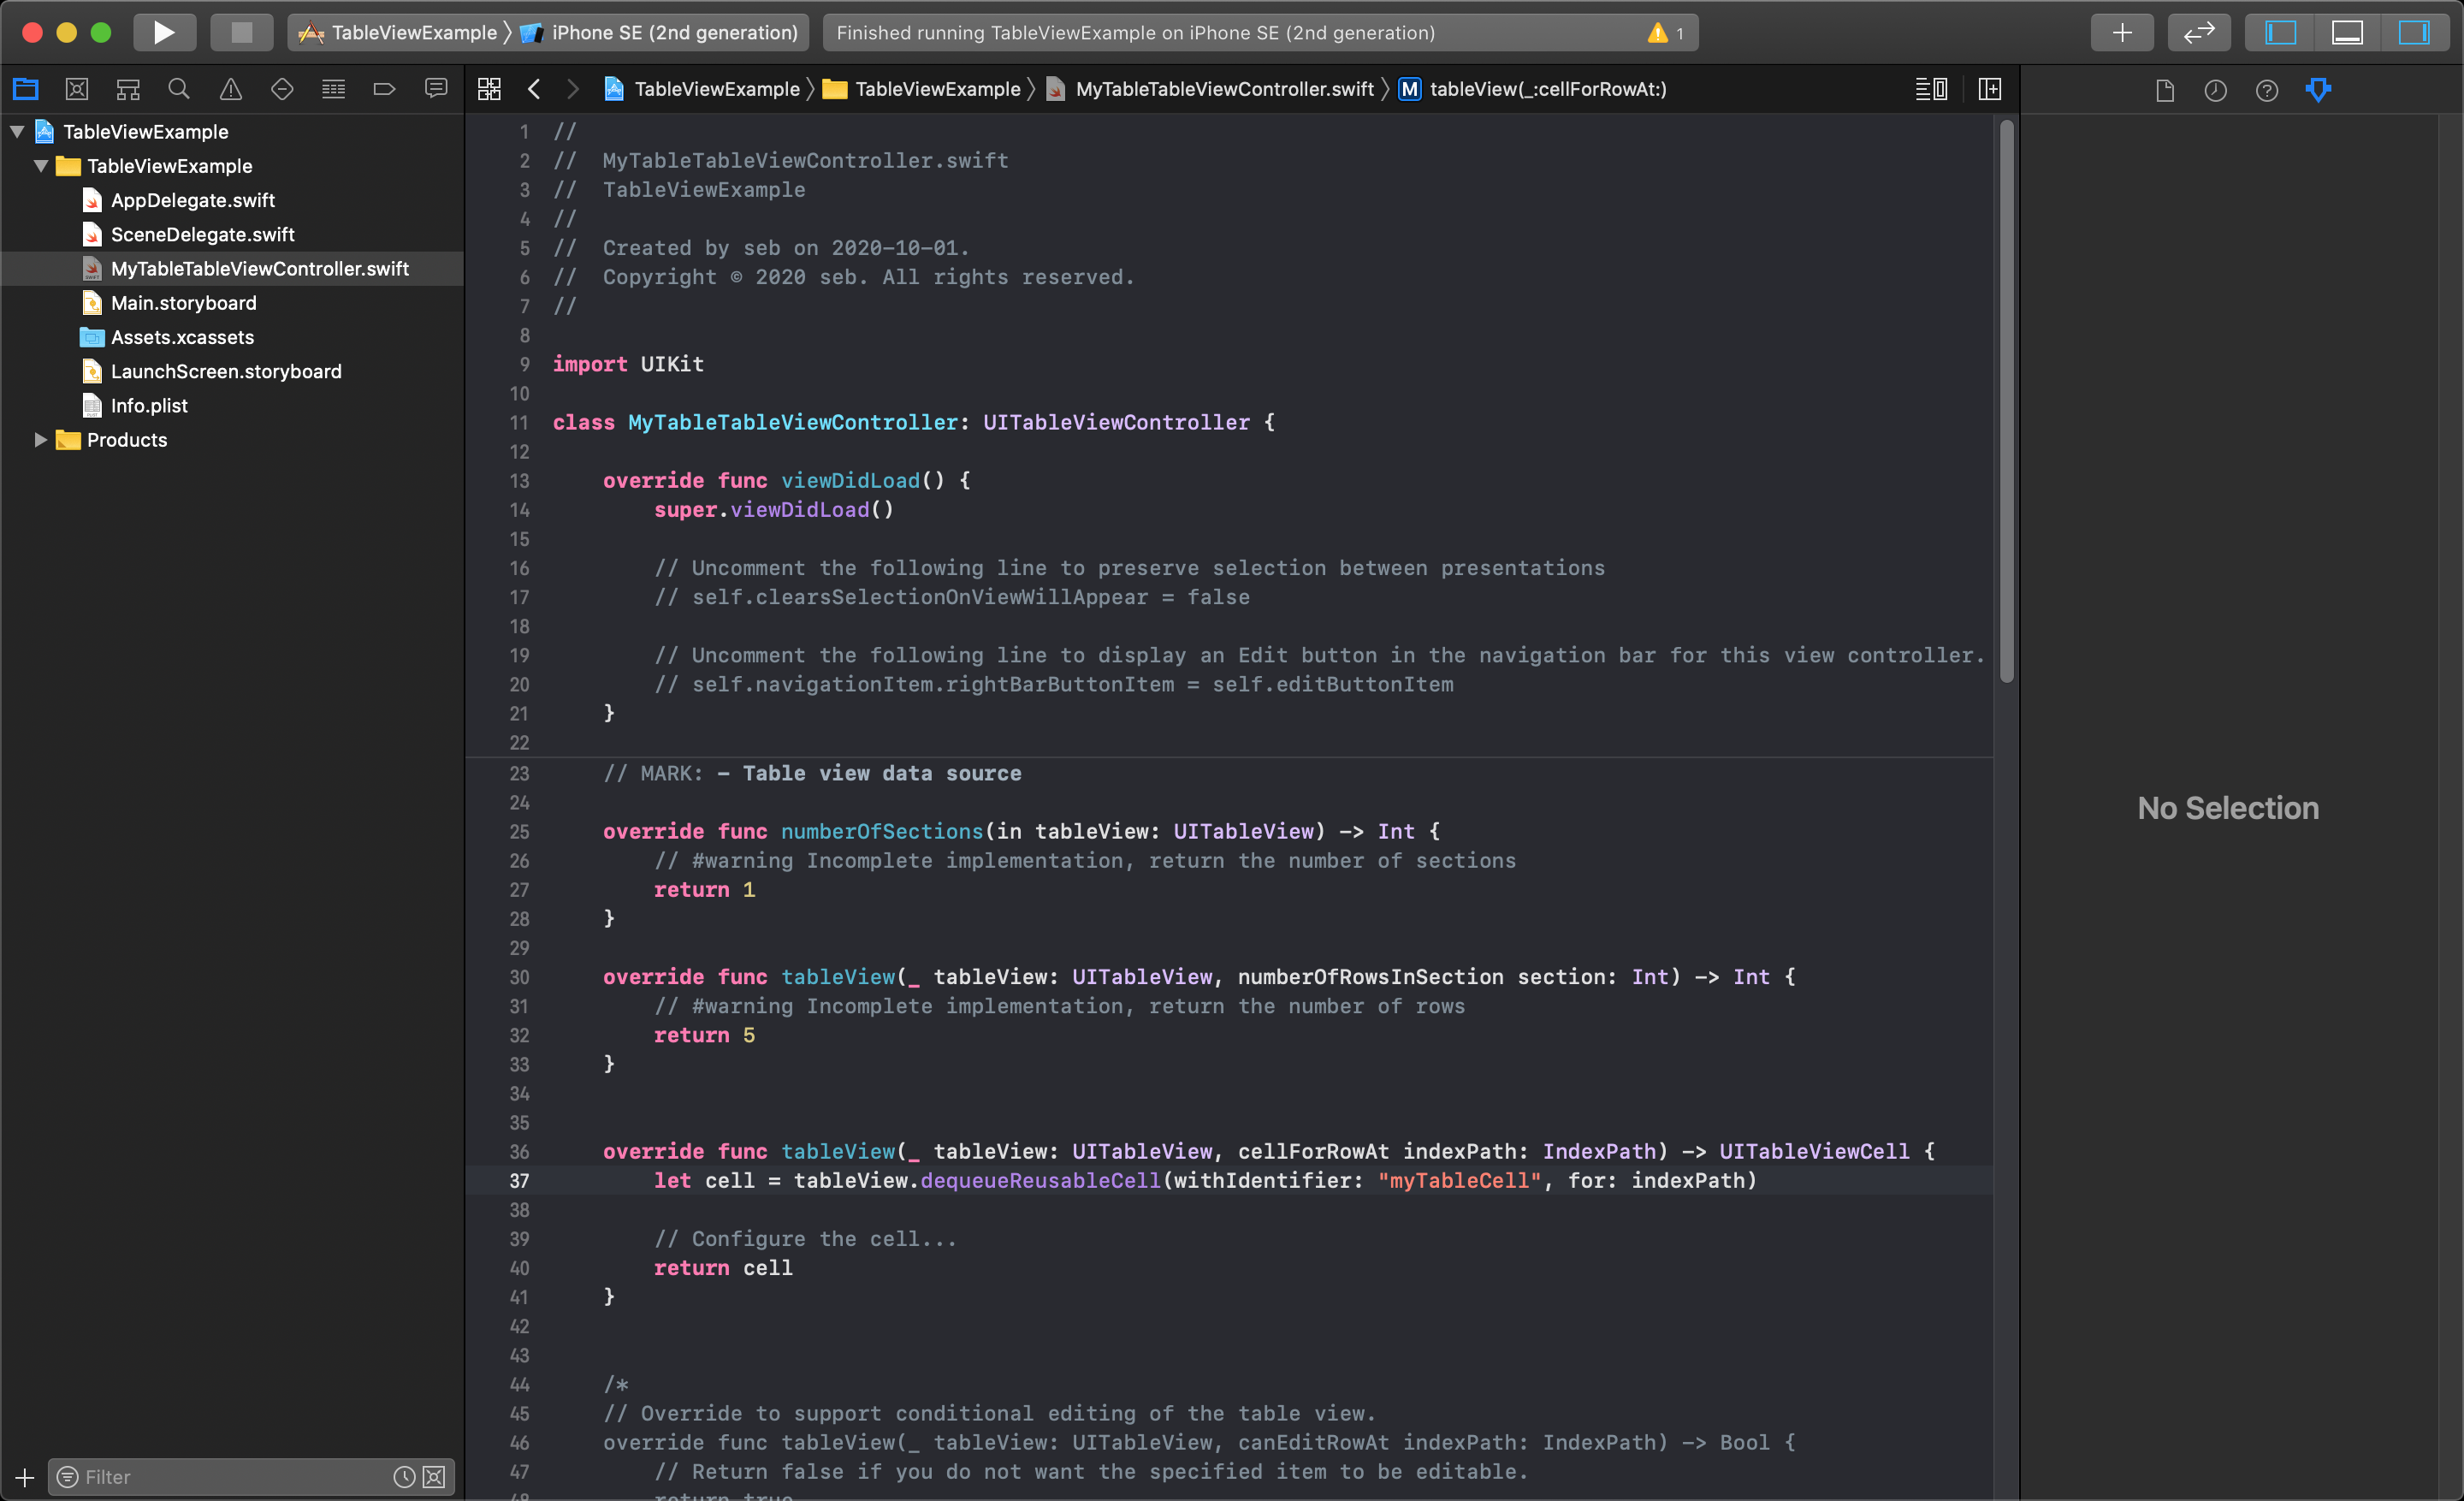
Now, you will need to add 3 things in code to get your TableViewController working. You will override 3 of the function of the TableViewController class to tell it how many sections are going to be in the table, how many cells to create per section, and what information should go in each cell.
First, override the function numberOfSections(in tableView: UITableView) and return an integer for how many sections to add (1 is good for now).
Next you will override two different tableView functions, one with a parameter called numberOfRowsInSection to return the total number of cells the in each section of the table (for now we will just return 5). The second tableView function has a parameter called cellForRowAt indexPath which requires us to make a new table cell object and return it from the function. This is where we specify the tableViewCell Identifier that we created.
That will create the desired number of cells (clones of the Prototype Cell), and initialize them when you launch your application. If you run the application now, you should see the table filled with empty cells. You can swipe and down to scroll through the cells, and try adding more cells to see what this looks like.
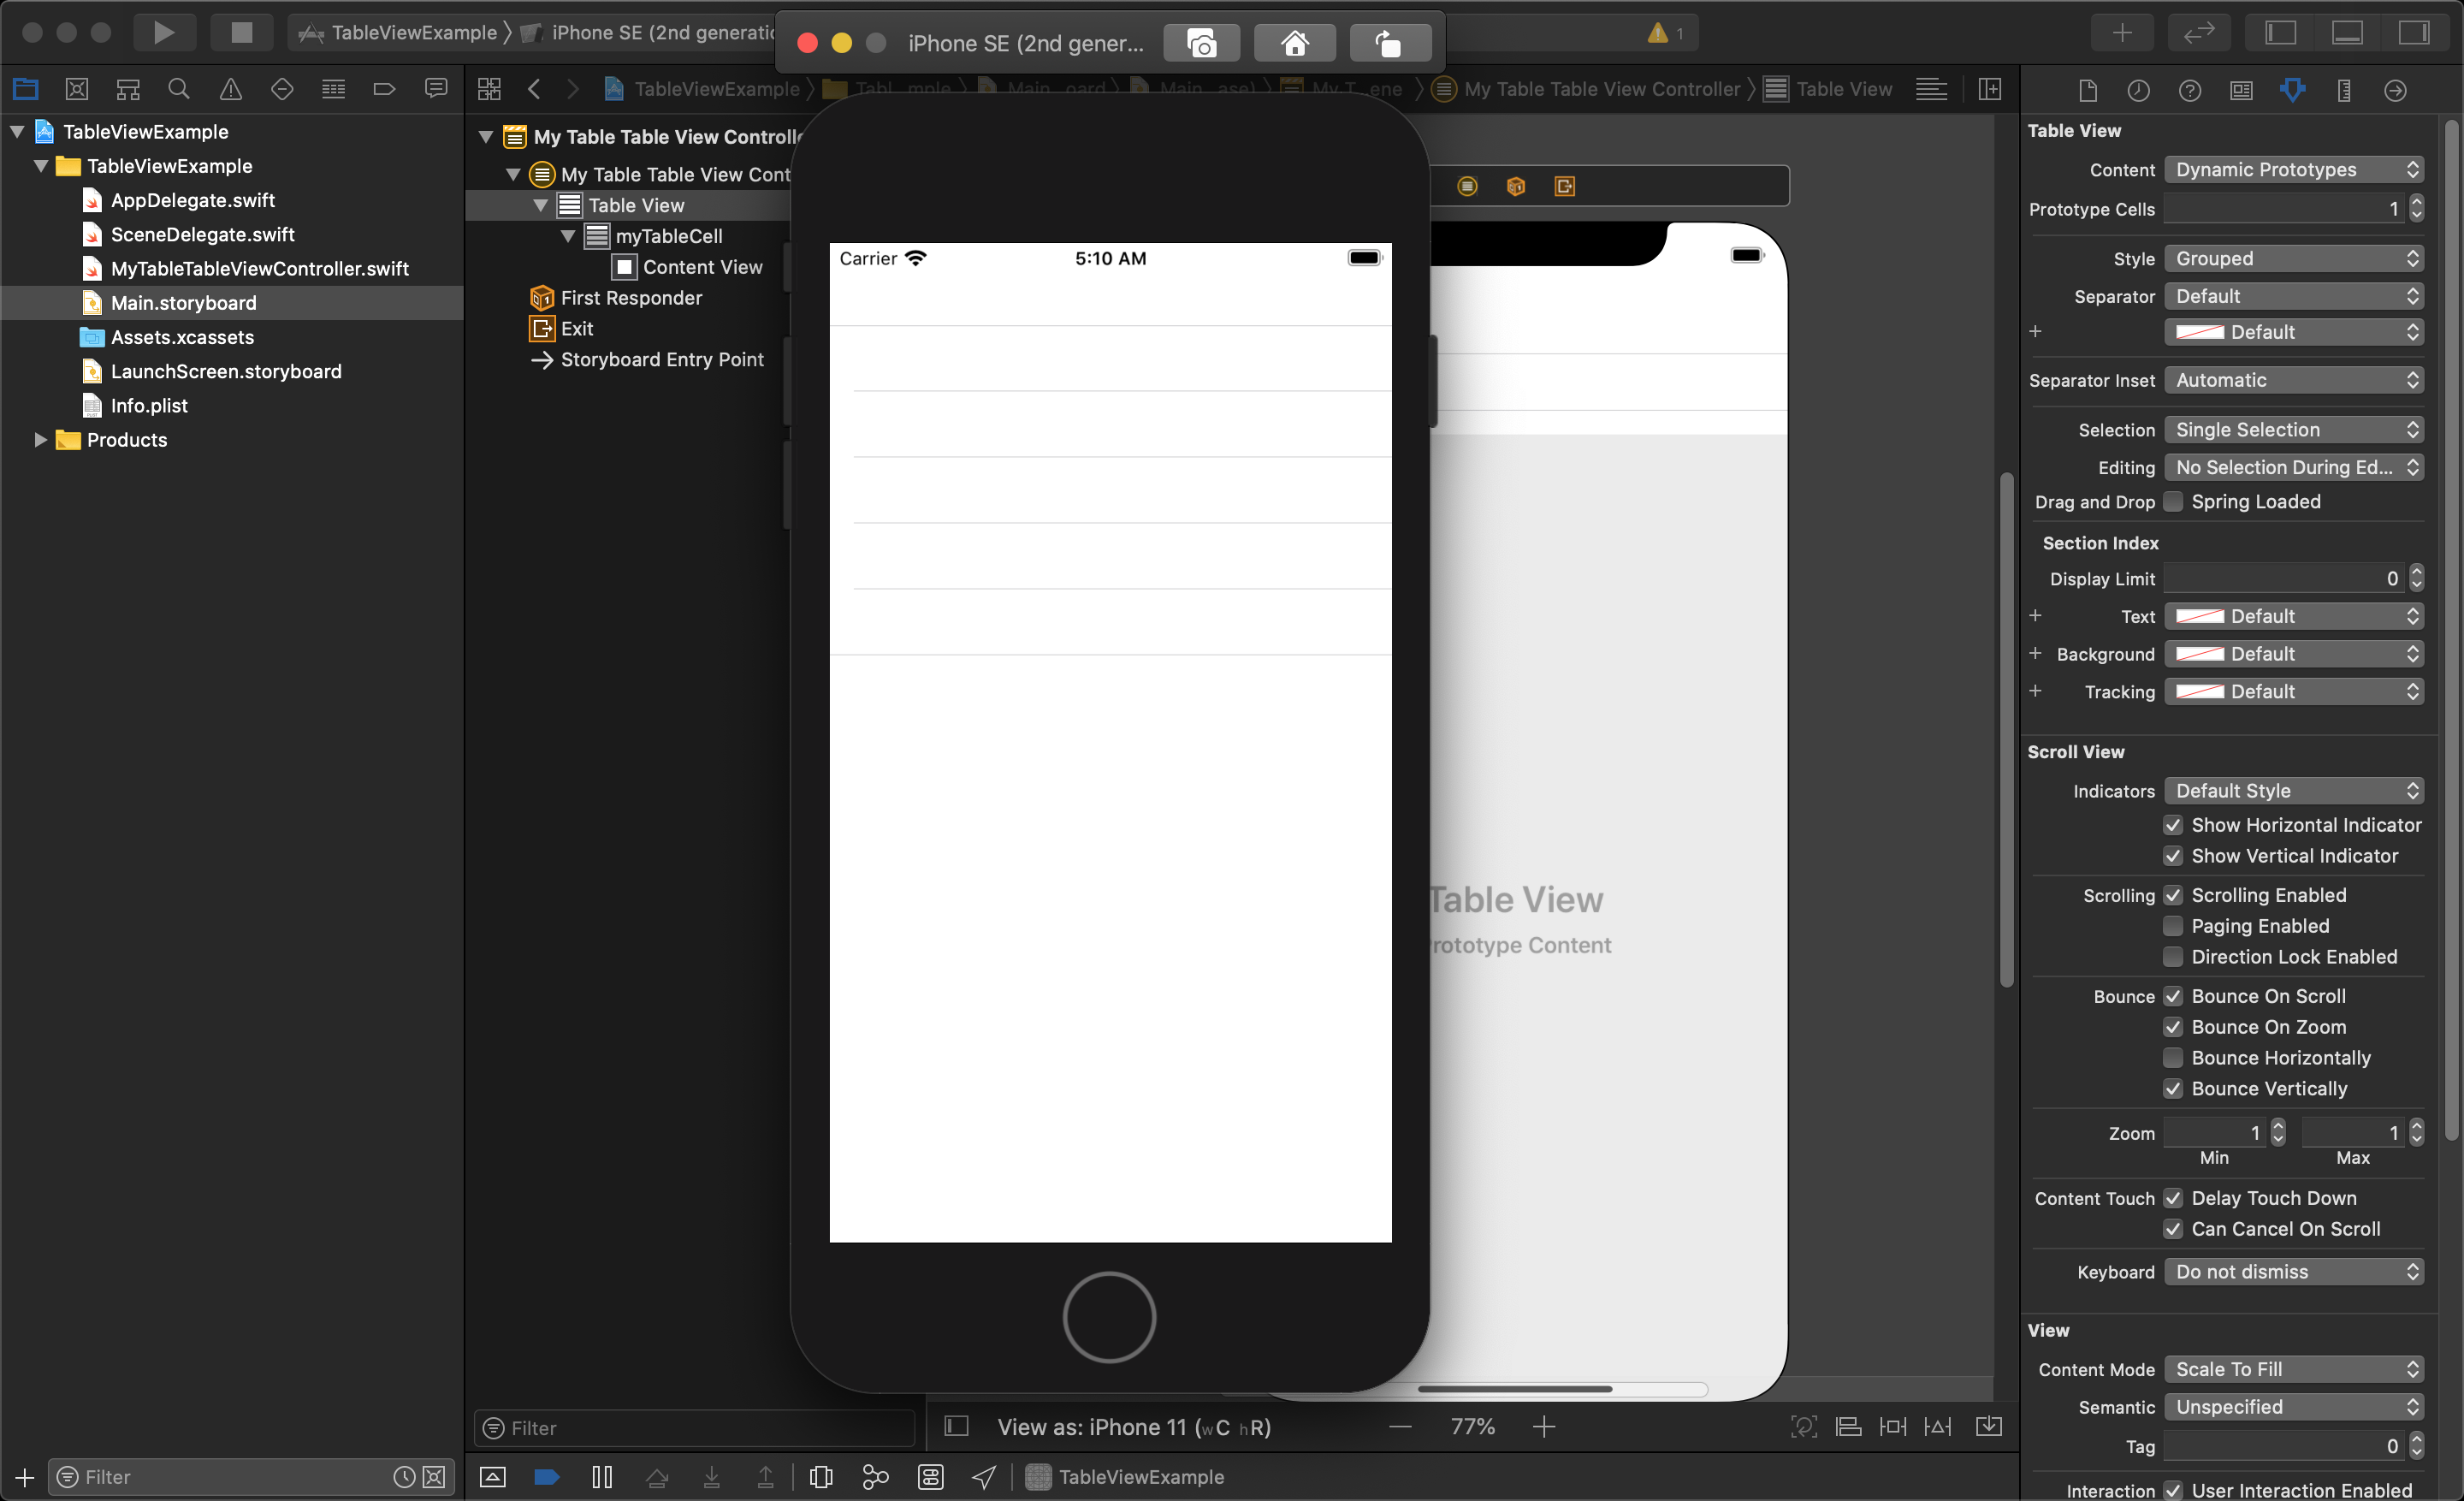
If you want the table to display only the number of cells you created (instead of a continuous list of cells), you must change the style setting of your Table View in the story board. To do this you click and highlight the Table View object itself - then, in the Attributes Inspector, change the Style option from Plain from Grouped.
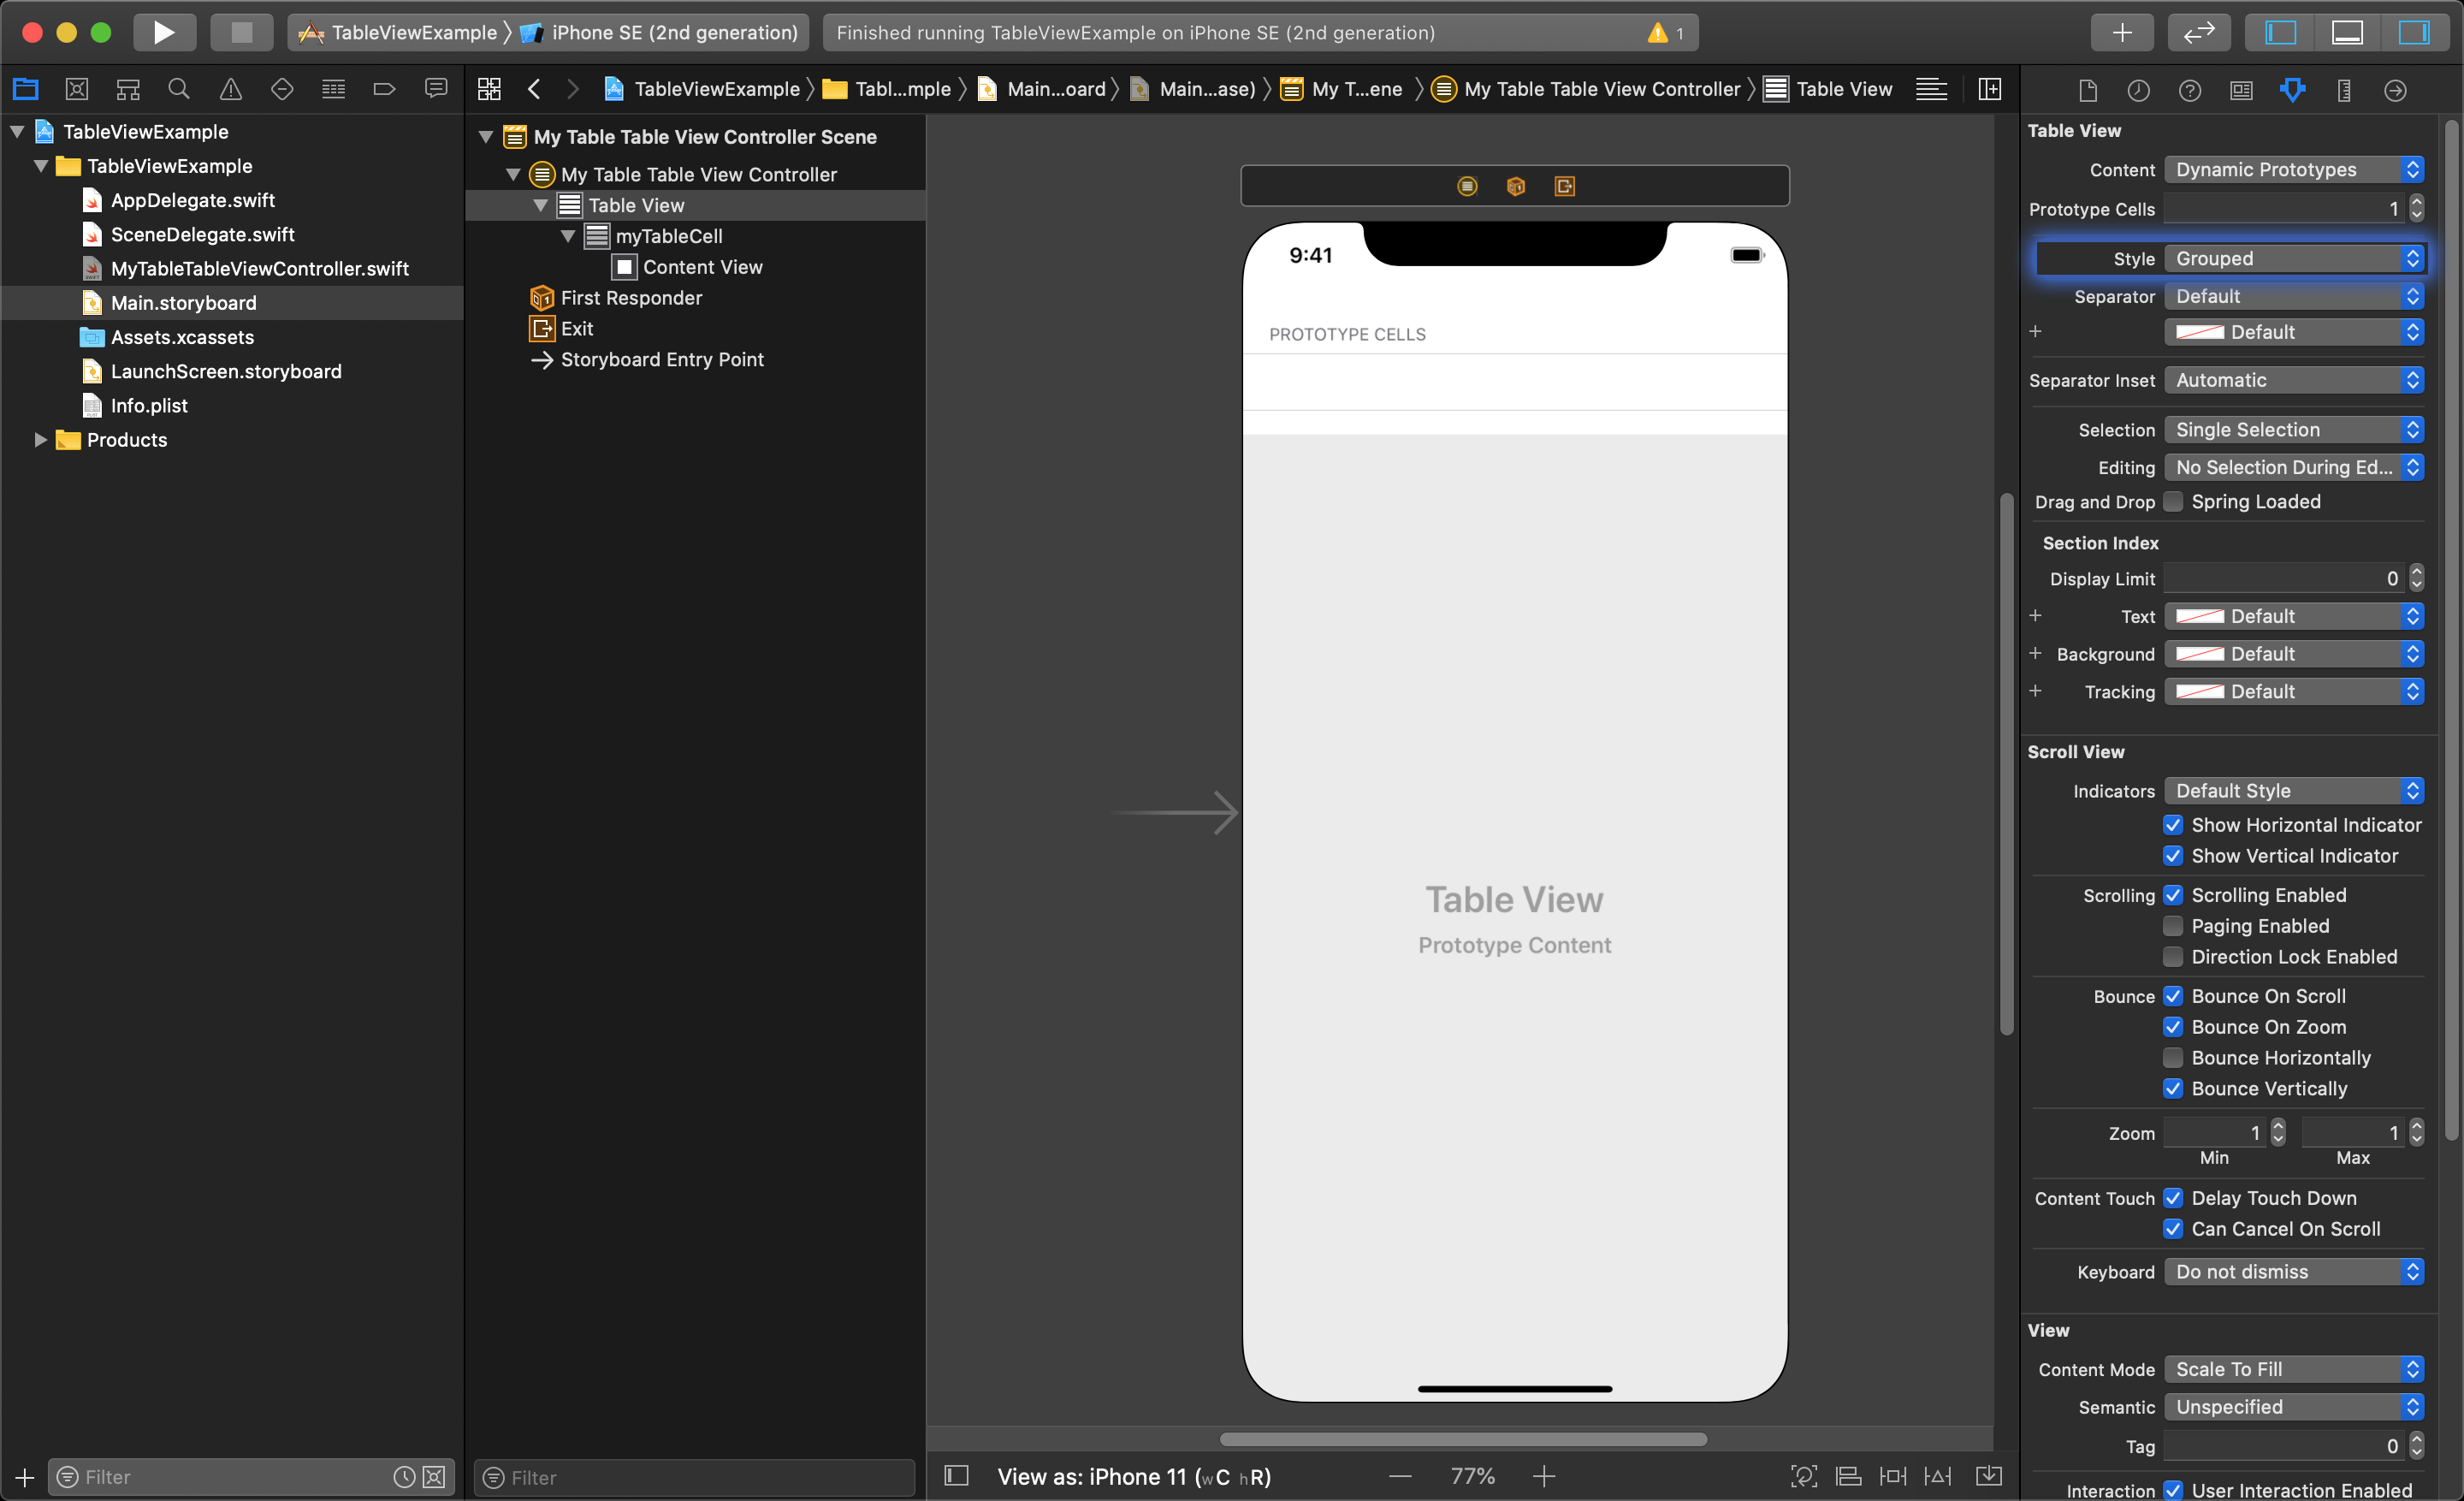
The application should now display the Table View with the selected number of cells created.
Using a TableView in a regular ViewController
So far, the tableView example used a TableViewController added to storyboard and a new tableViewController class added to the project to control it. This class inherits from the UITableViewController class and needed certain functions in the master class to be be overridden to initialize the tableView.
However, it is possible to place a TableView object in an existing regular ViewController that can be sized to take up any portion of the available view.
This is done by having the UIViewController also inherit from the UITableViewDataSource, and UITableViewDelegate protocols. These protocols add to a UIViewController class the same functionality found in the UITableViewController for managing a TableView. The videos below show how to add a TableView into an existing ViewController and write the functionality for it in the ViewController.
iOS 11 Fundamentals - Creating and Configuring iOS Tables Introduction Pluralsight
iOS 11 Fundamentals - Configuring an iOS Table View Pluralsight
iOS 11 Fundamentals - Adding an iOS Table View and Data Source Pluralsight
iOS 11 Fundamentals - Implementing an iOS Table View with Sections and Headings Pluralsight
iOS 11 Fundamentals - Implementing iOS Table View Delegate Behavior Pluralsight
iOS 11 Fundamentals - Creating and Configuring iOS Tables Summary Pluralsight