A Custom Struct for TableViewCell Information
Often, you will have multiple pieces of unique data you want to display in each tableViewCell. For example, you might want a unique title and image to be display in the cell's imageView and textLabel. This could be done by using an number of technologies like a dictionary, or an array of tuples, structs, or class objects.
The best practice is to make a unique object (struct or class) that holds all the pieces of information for each cell - then make an array of those objects. This example with demonstrate how to make an array of simple Struct objects that holds all the properties for each cell.
The first thing is to create a new Swift file in your project folder that will hold the definition for a new struct. Then an array of these struct objects will be created, and filled with the unique data to build the table's cells from.
Create a Swift Struct to Hold Cell Data
To create a new Swift file, right-click (Control+click) on your project folder and select New File.
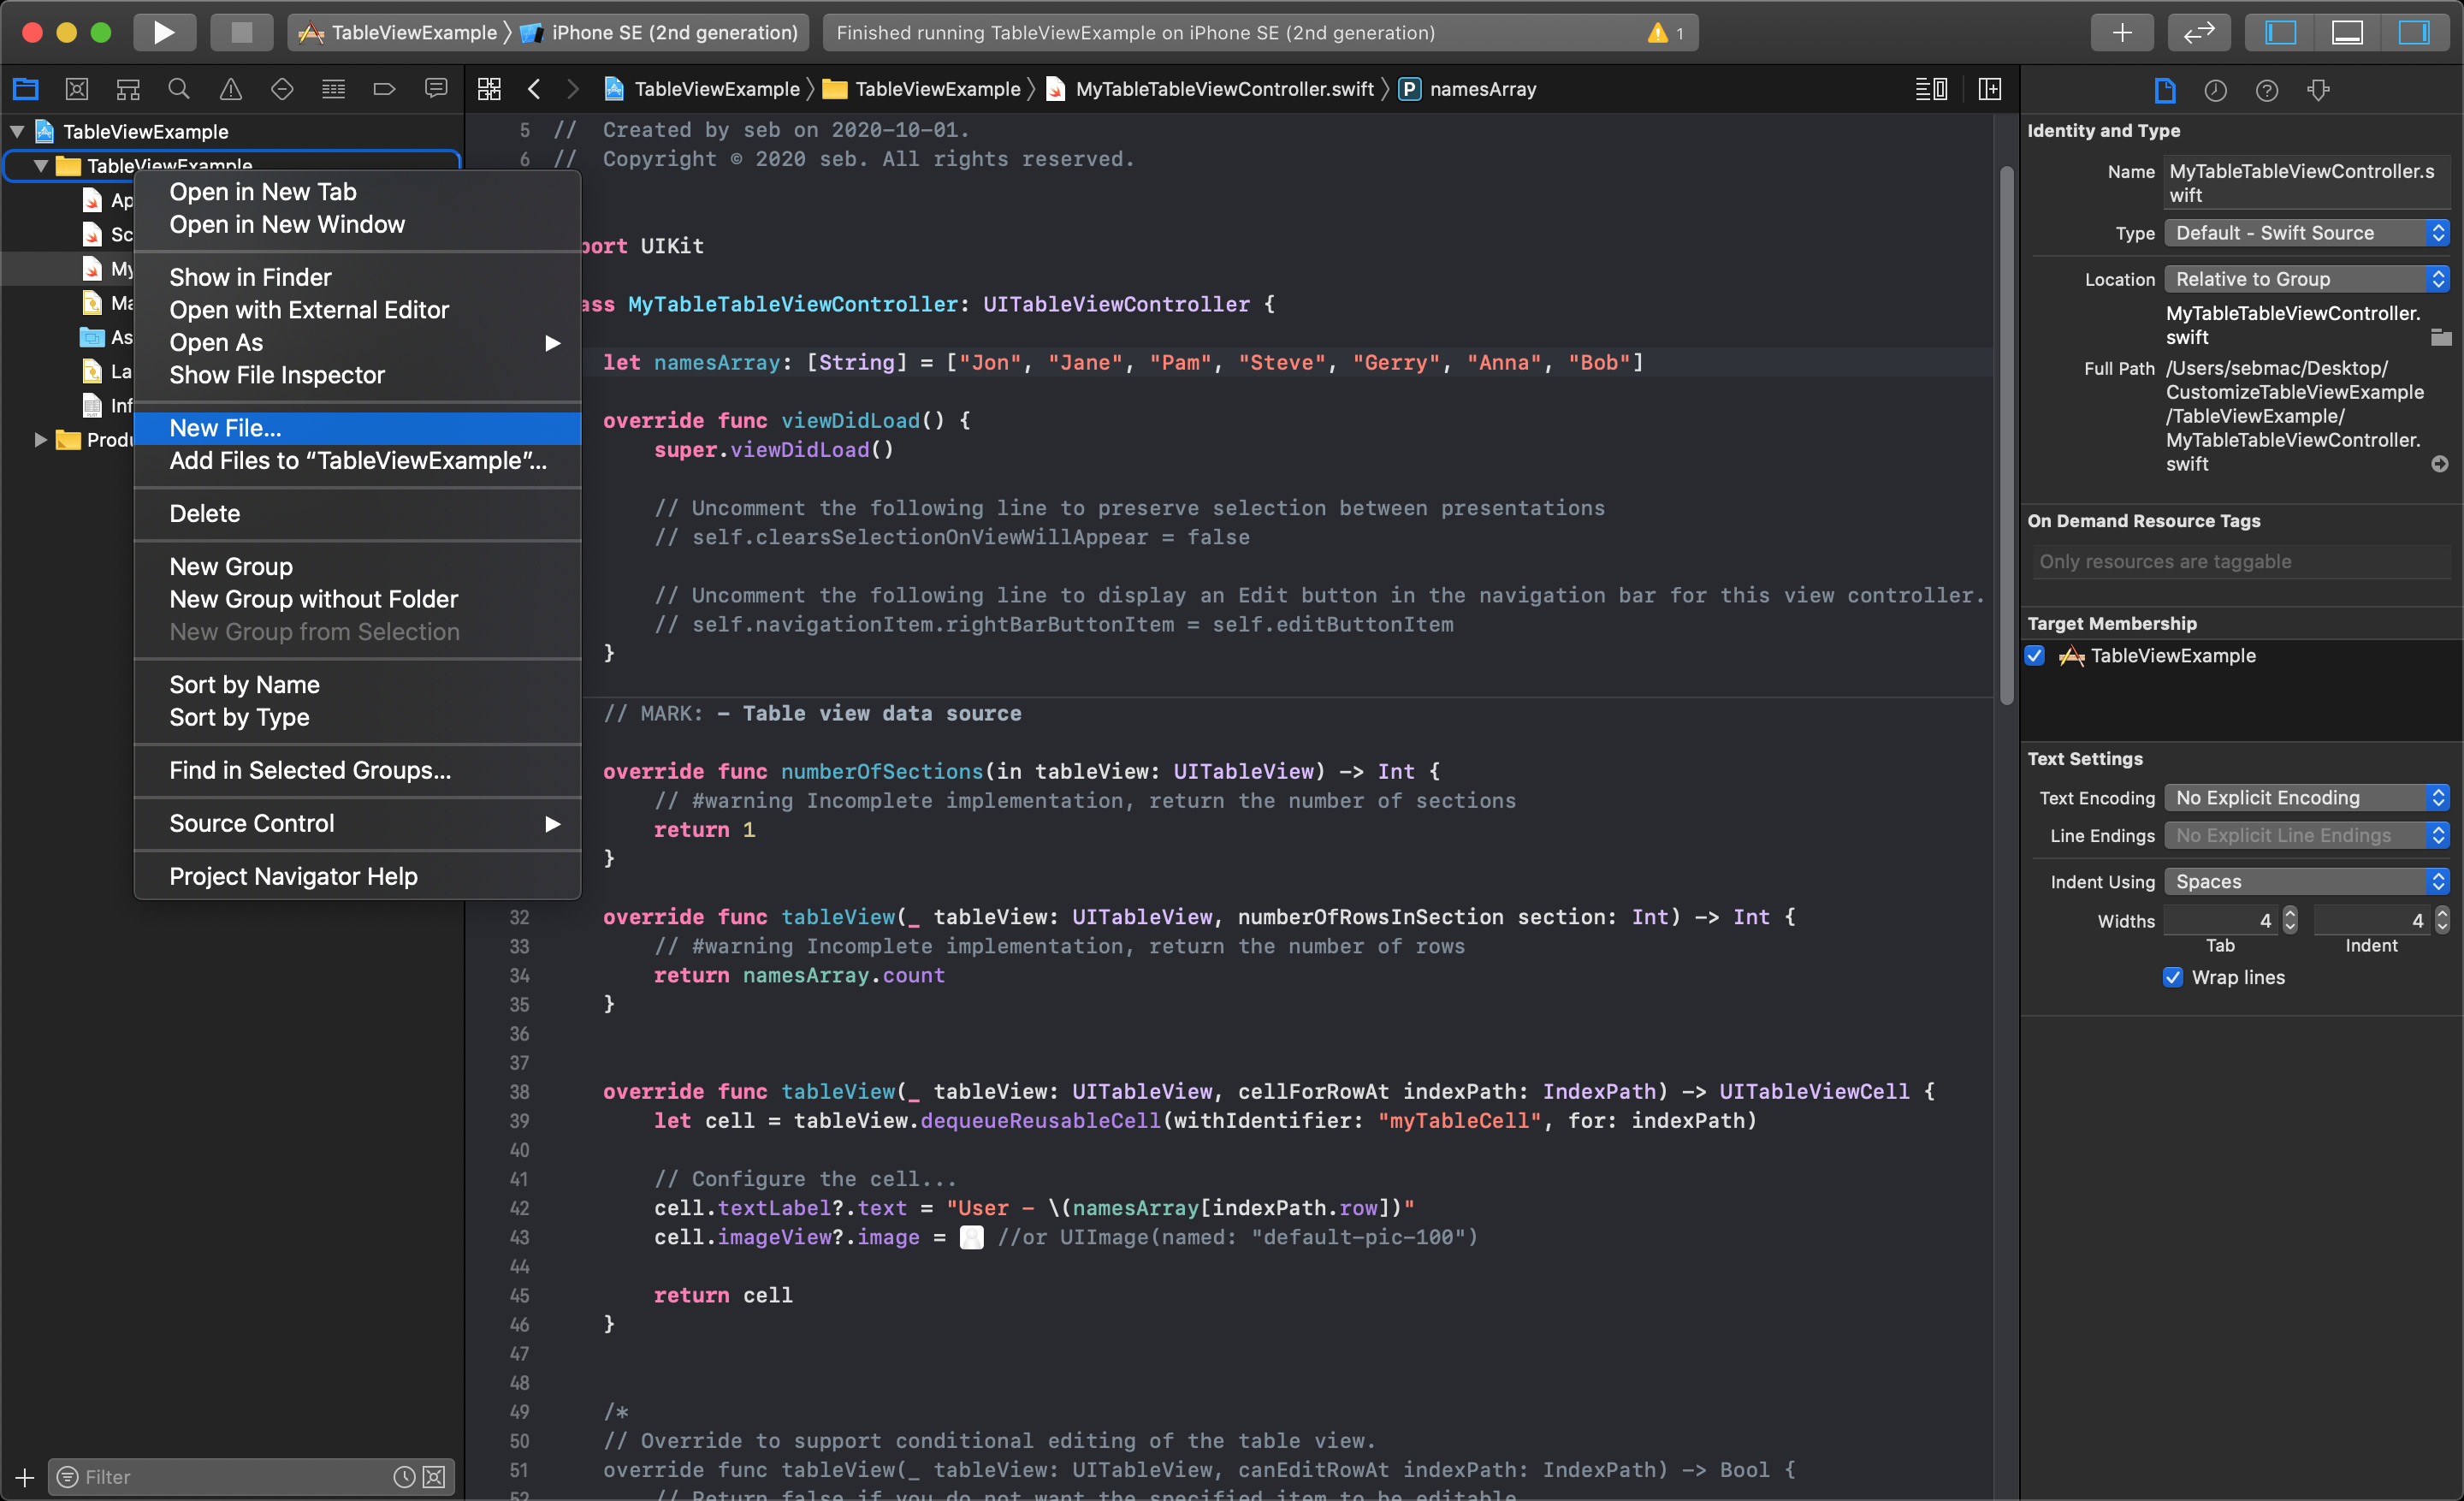
Select a Swift File to make a custom struct that will hold the data, and click Next.
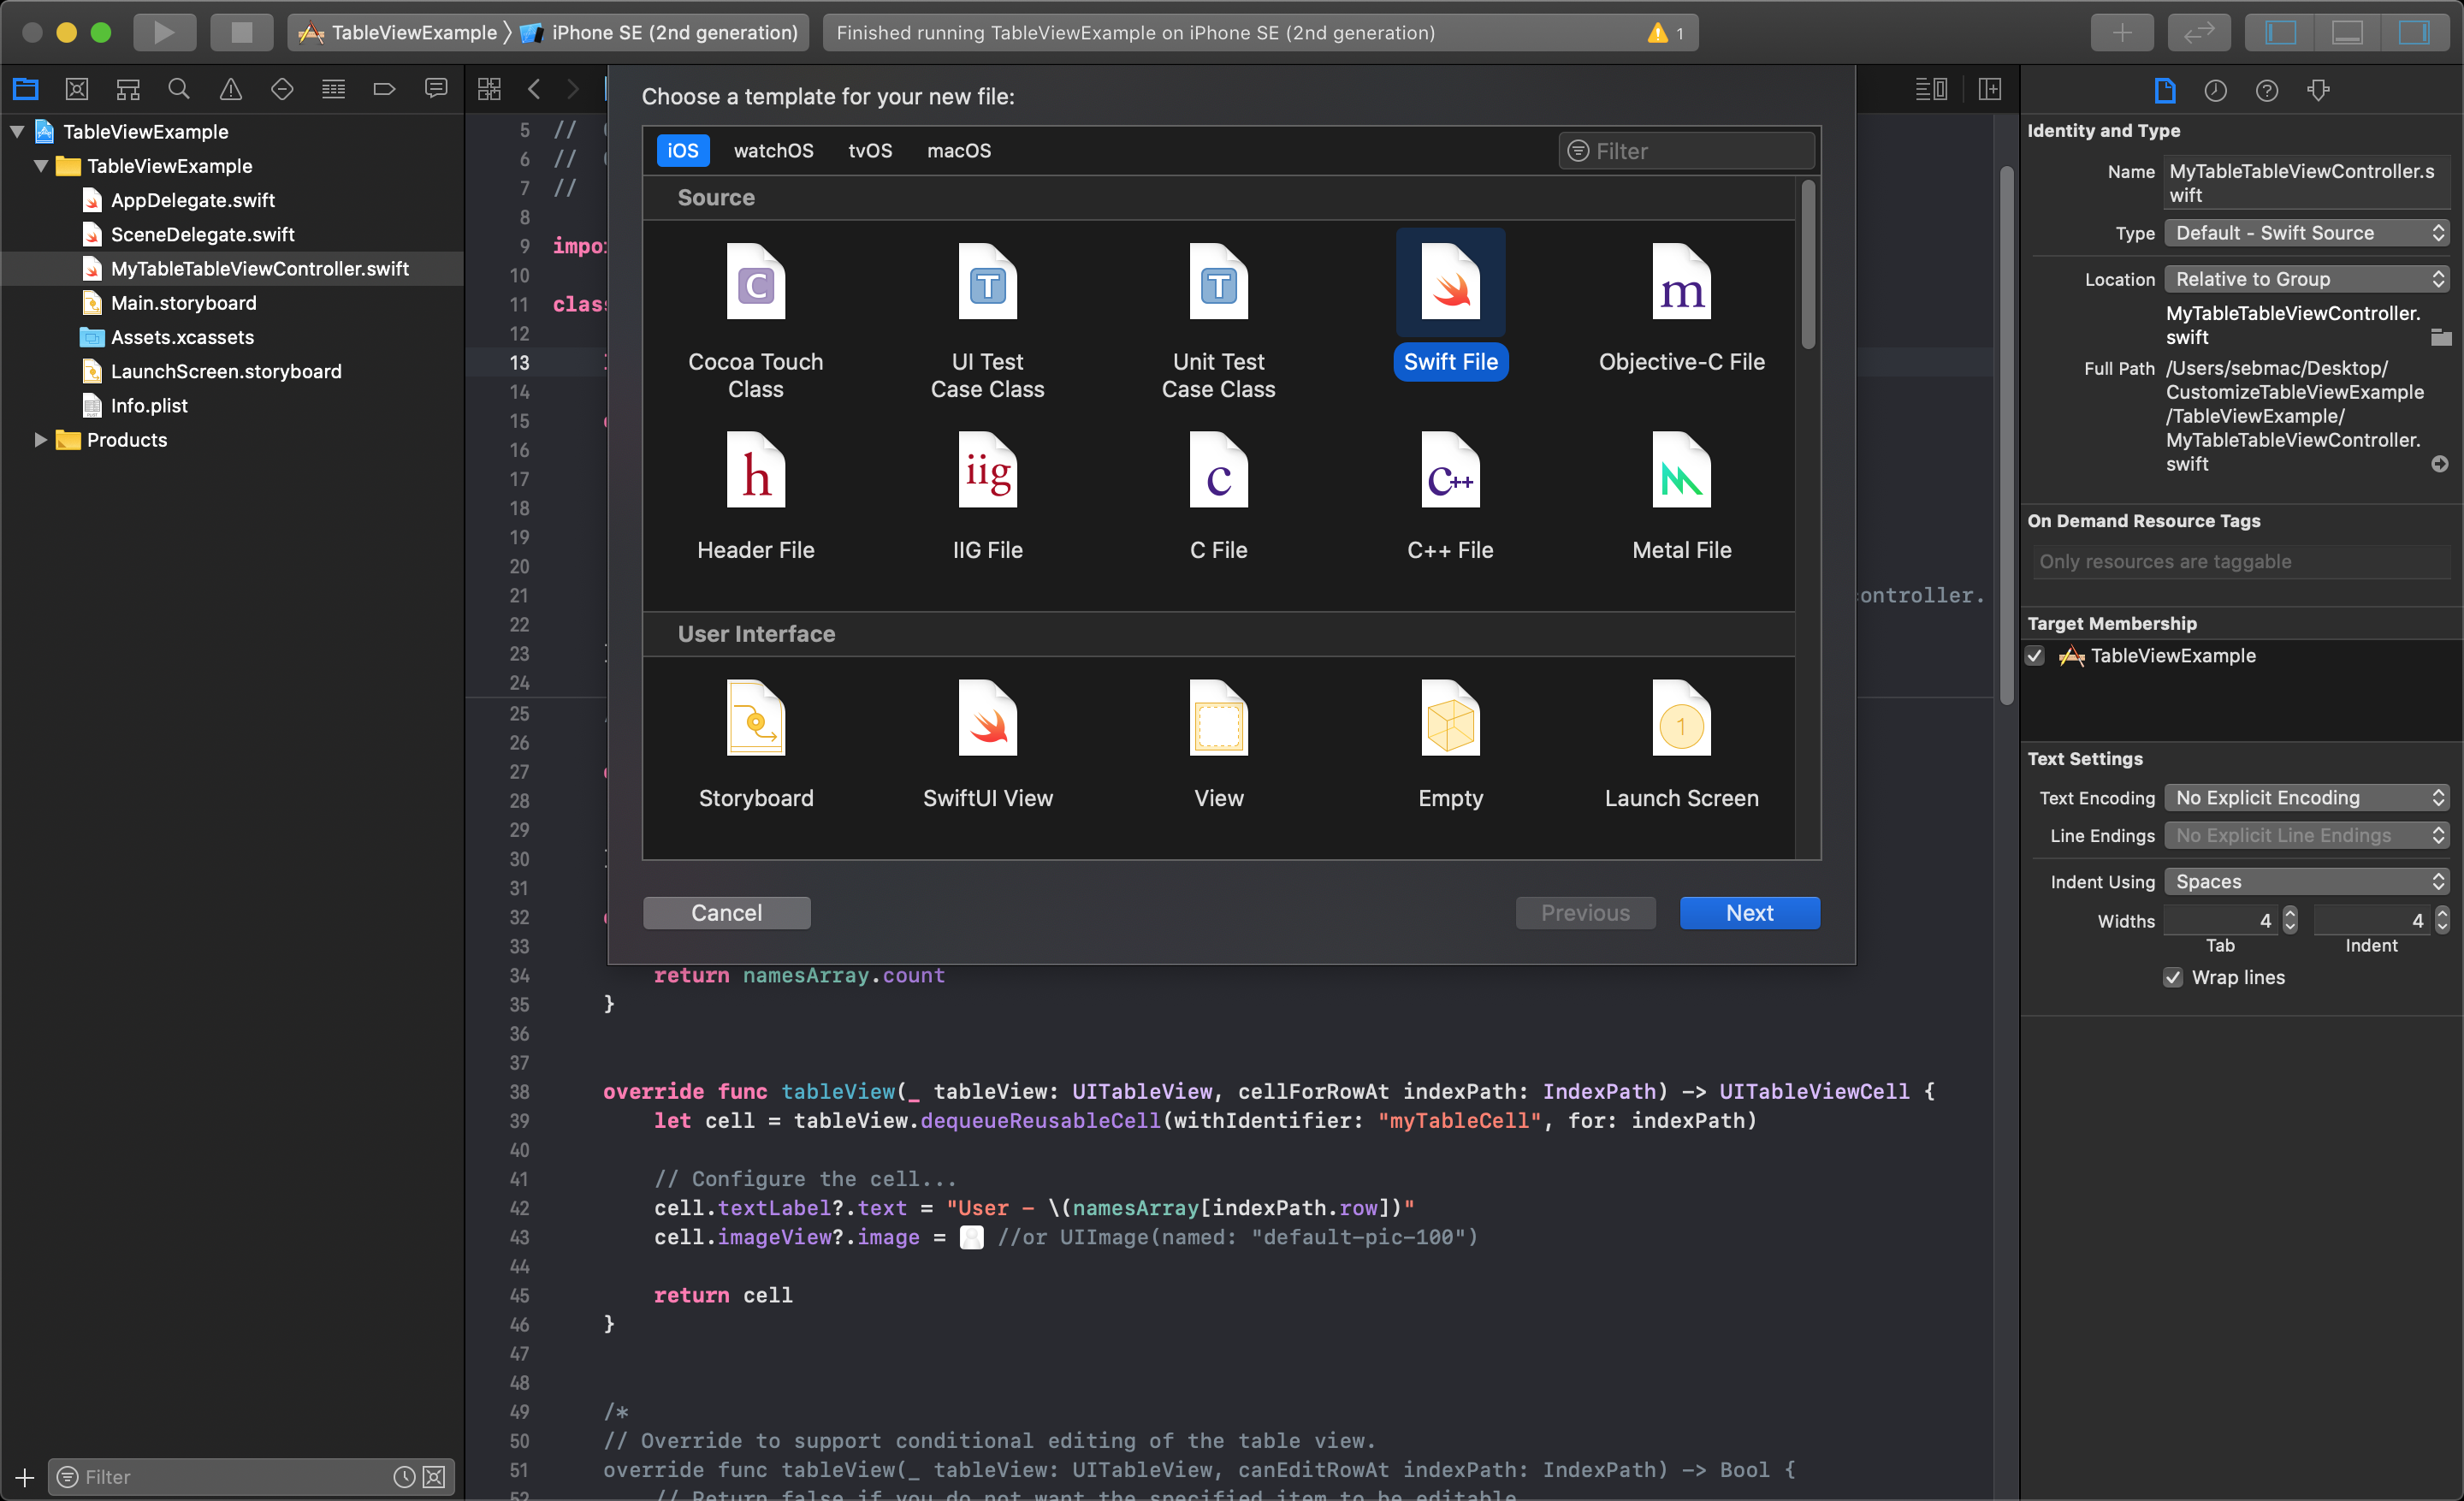
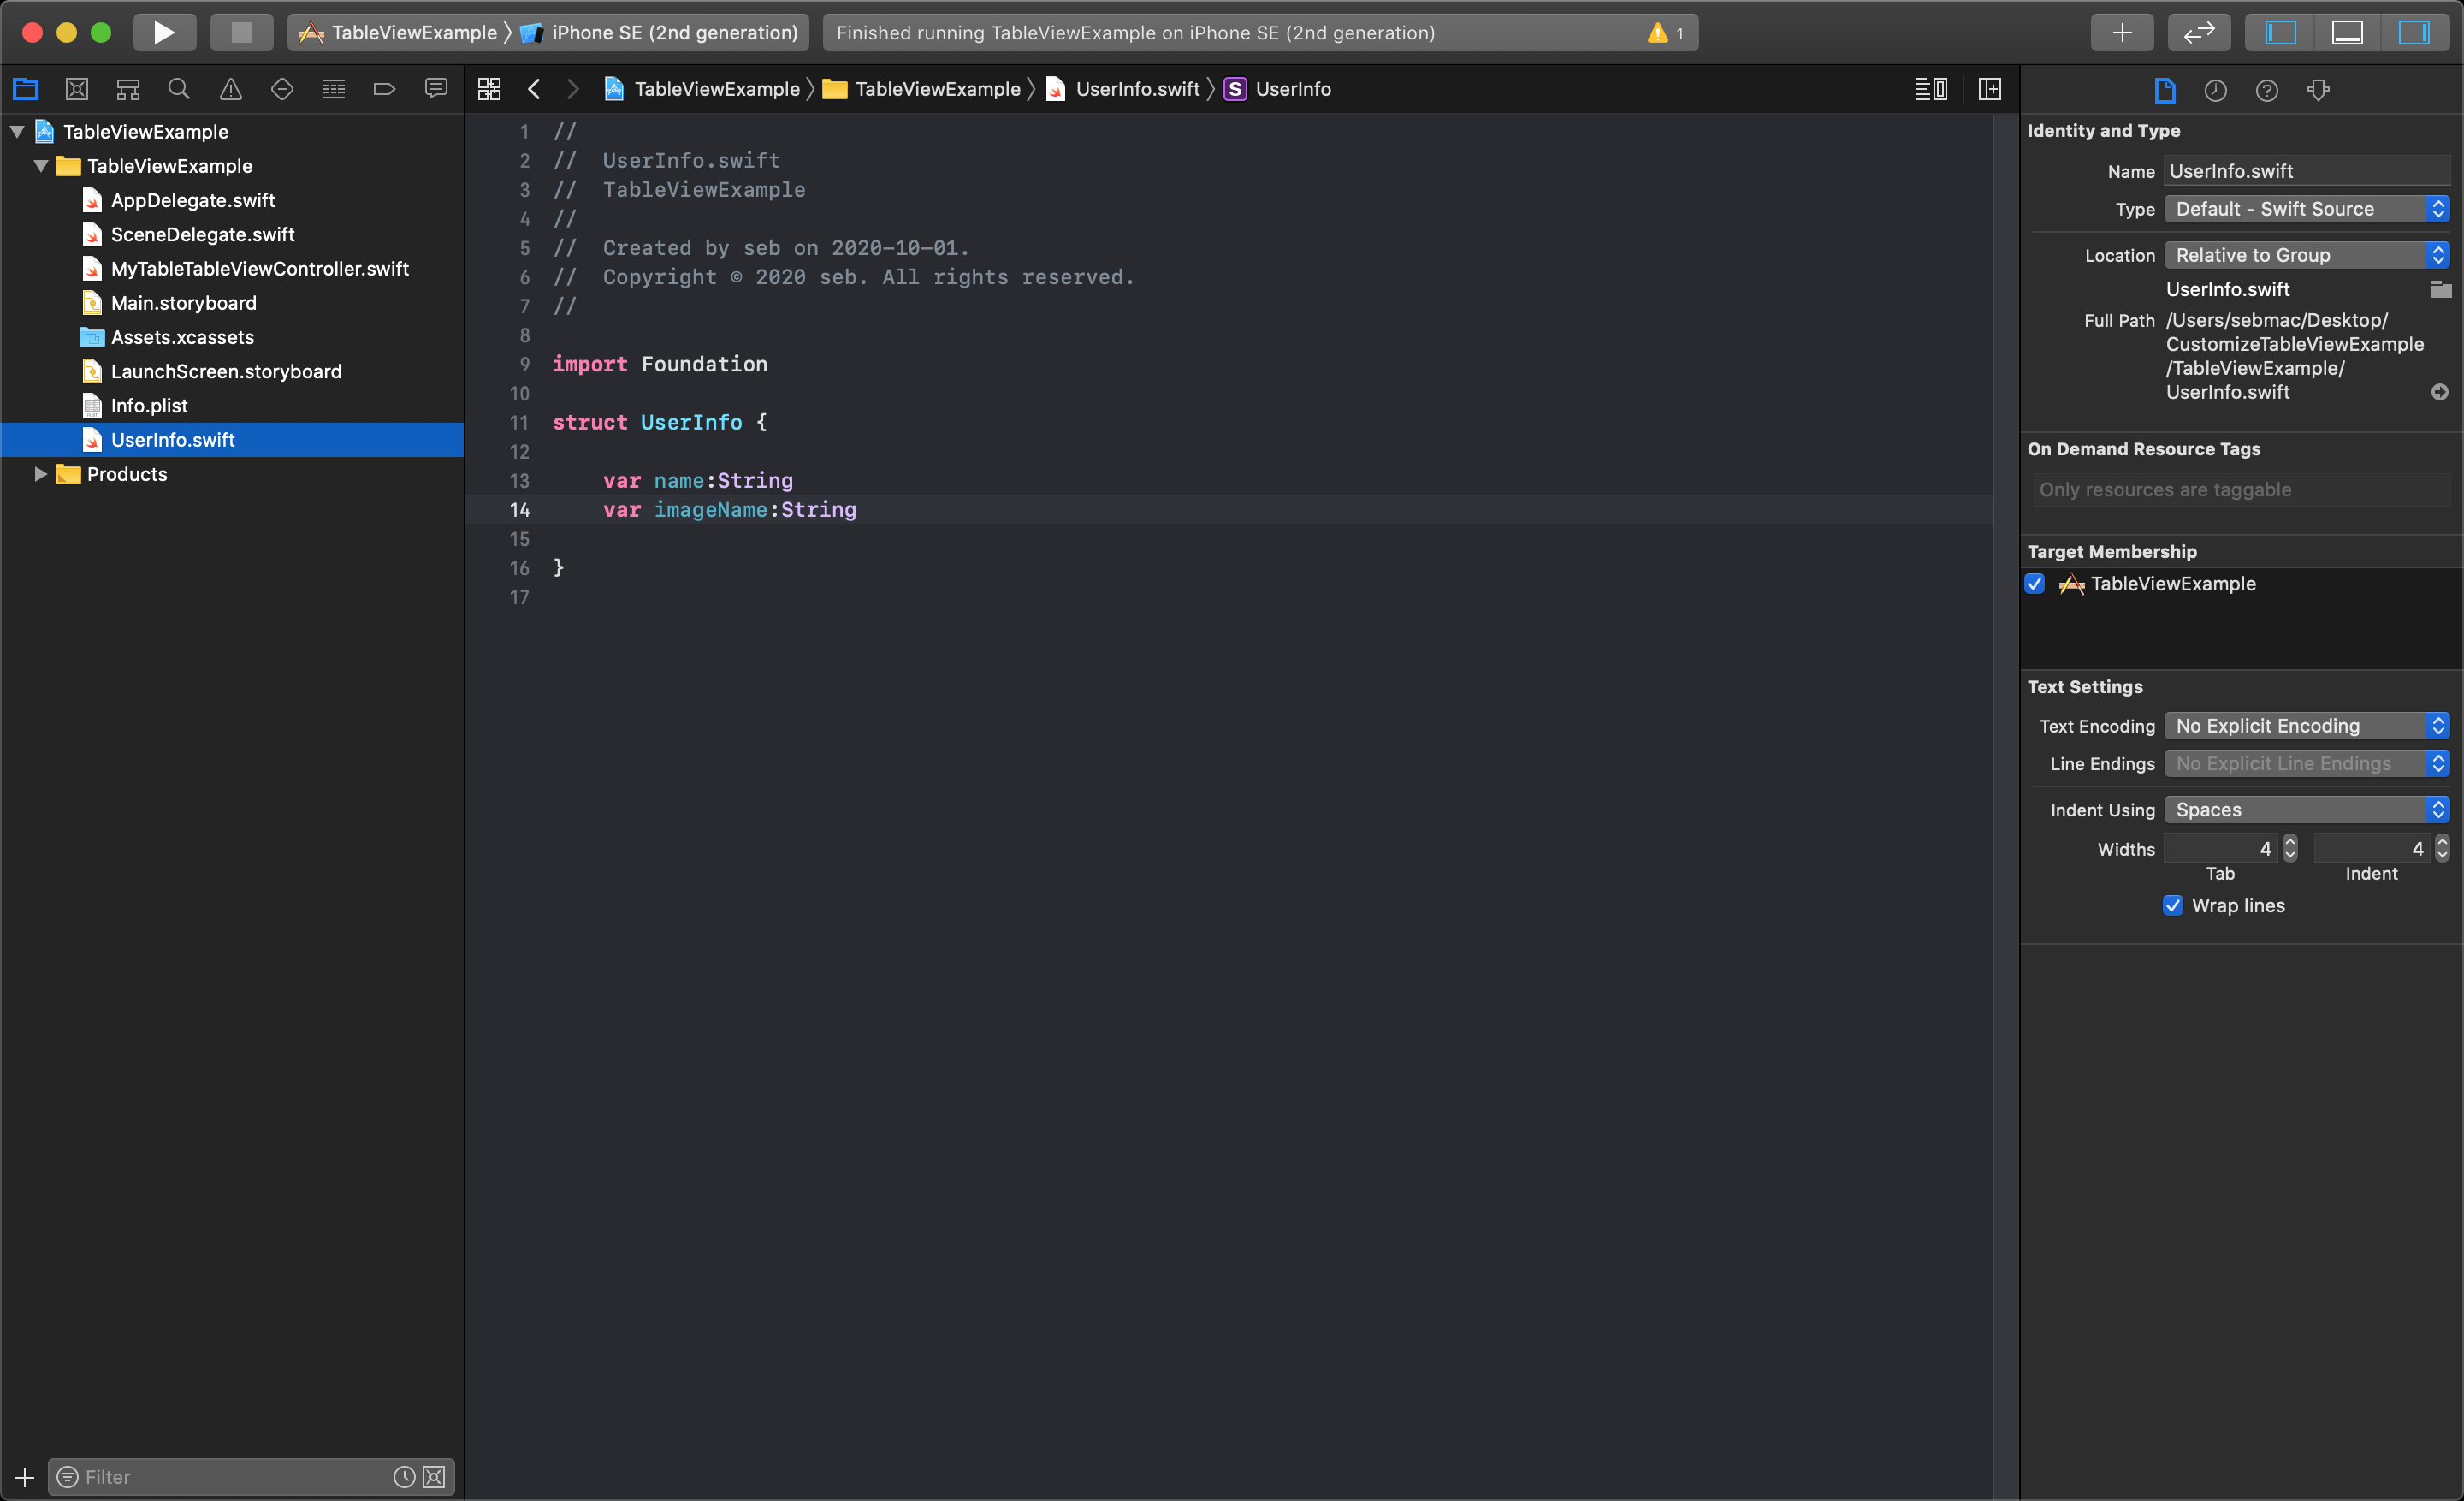
This file will hold the definition for a struct called UserInfo, so the file would also need to be named UserInfo. Then, click the Create button to make the file.
After the struct file is created, you will need to write a Swift struct that has the properties you want passed to each tableViewCell (in this case String variables called name and imageName).
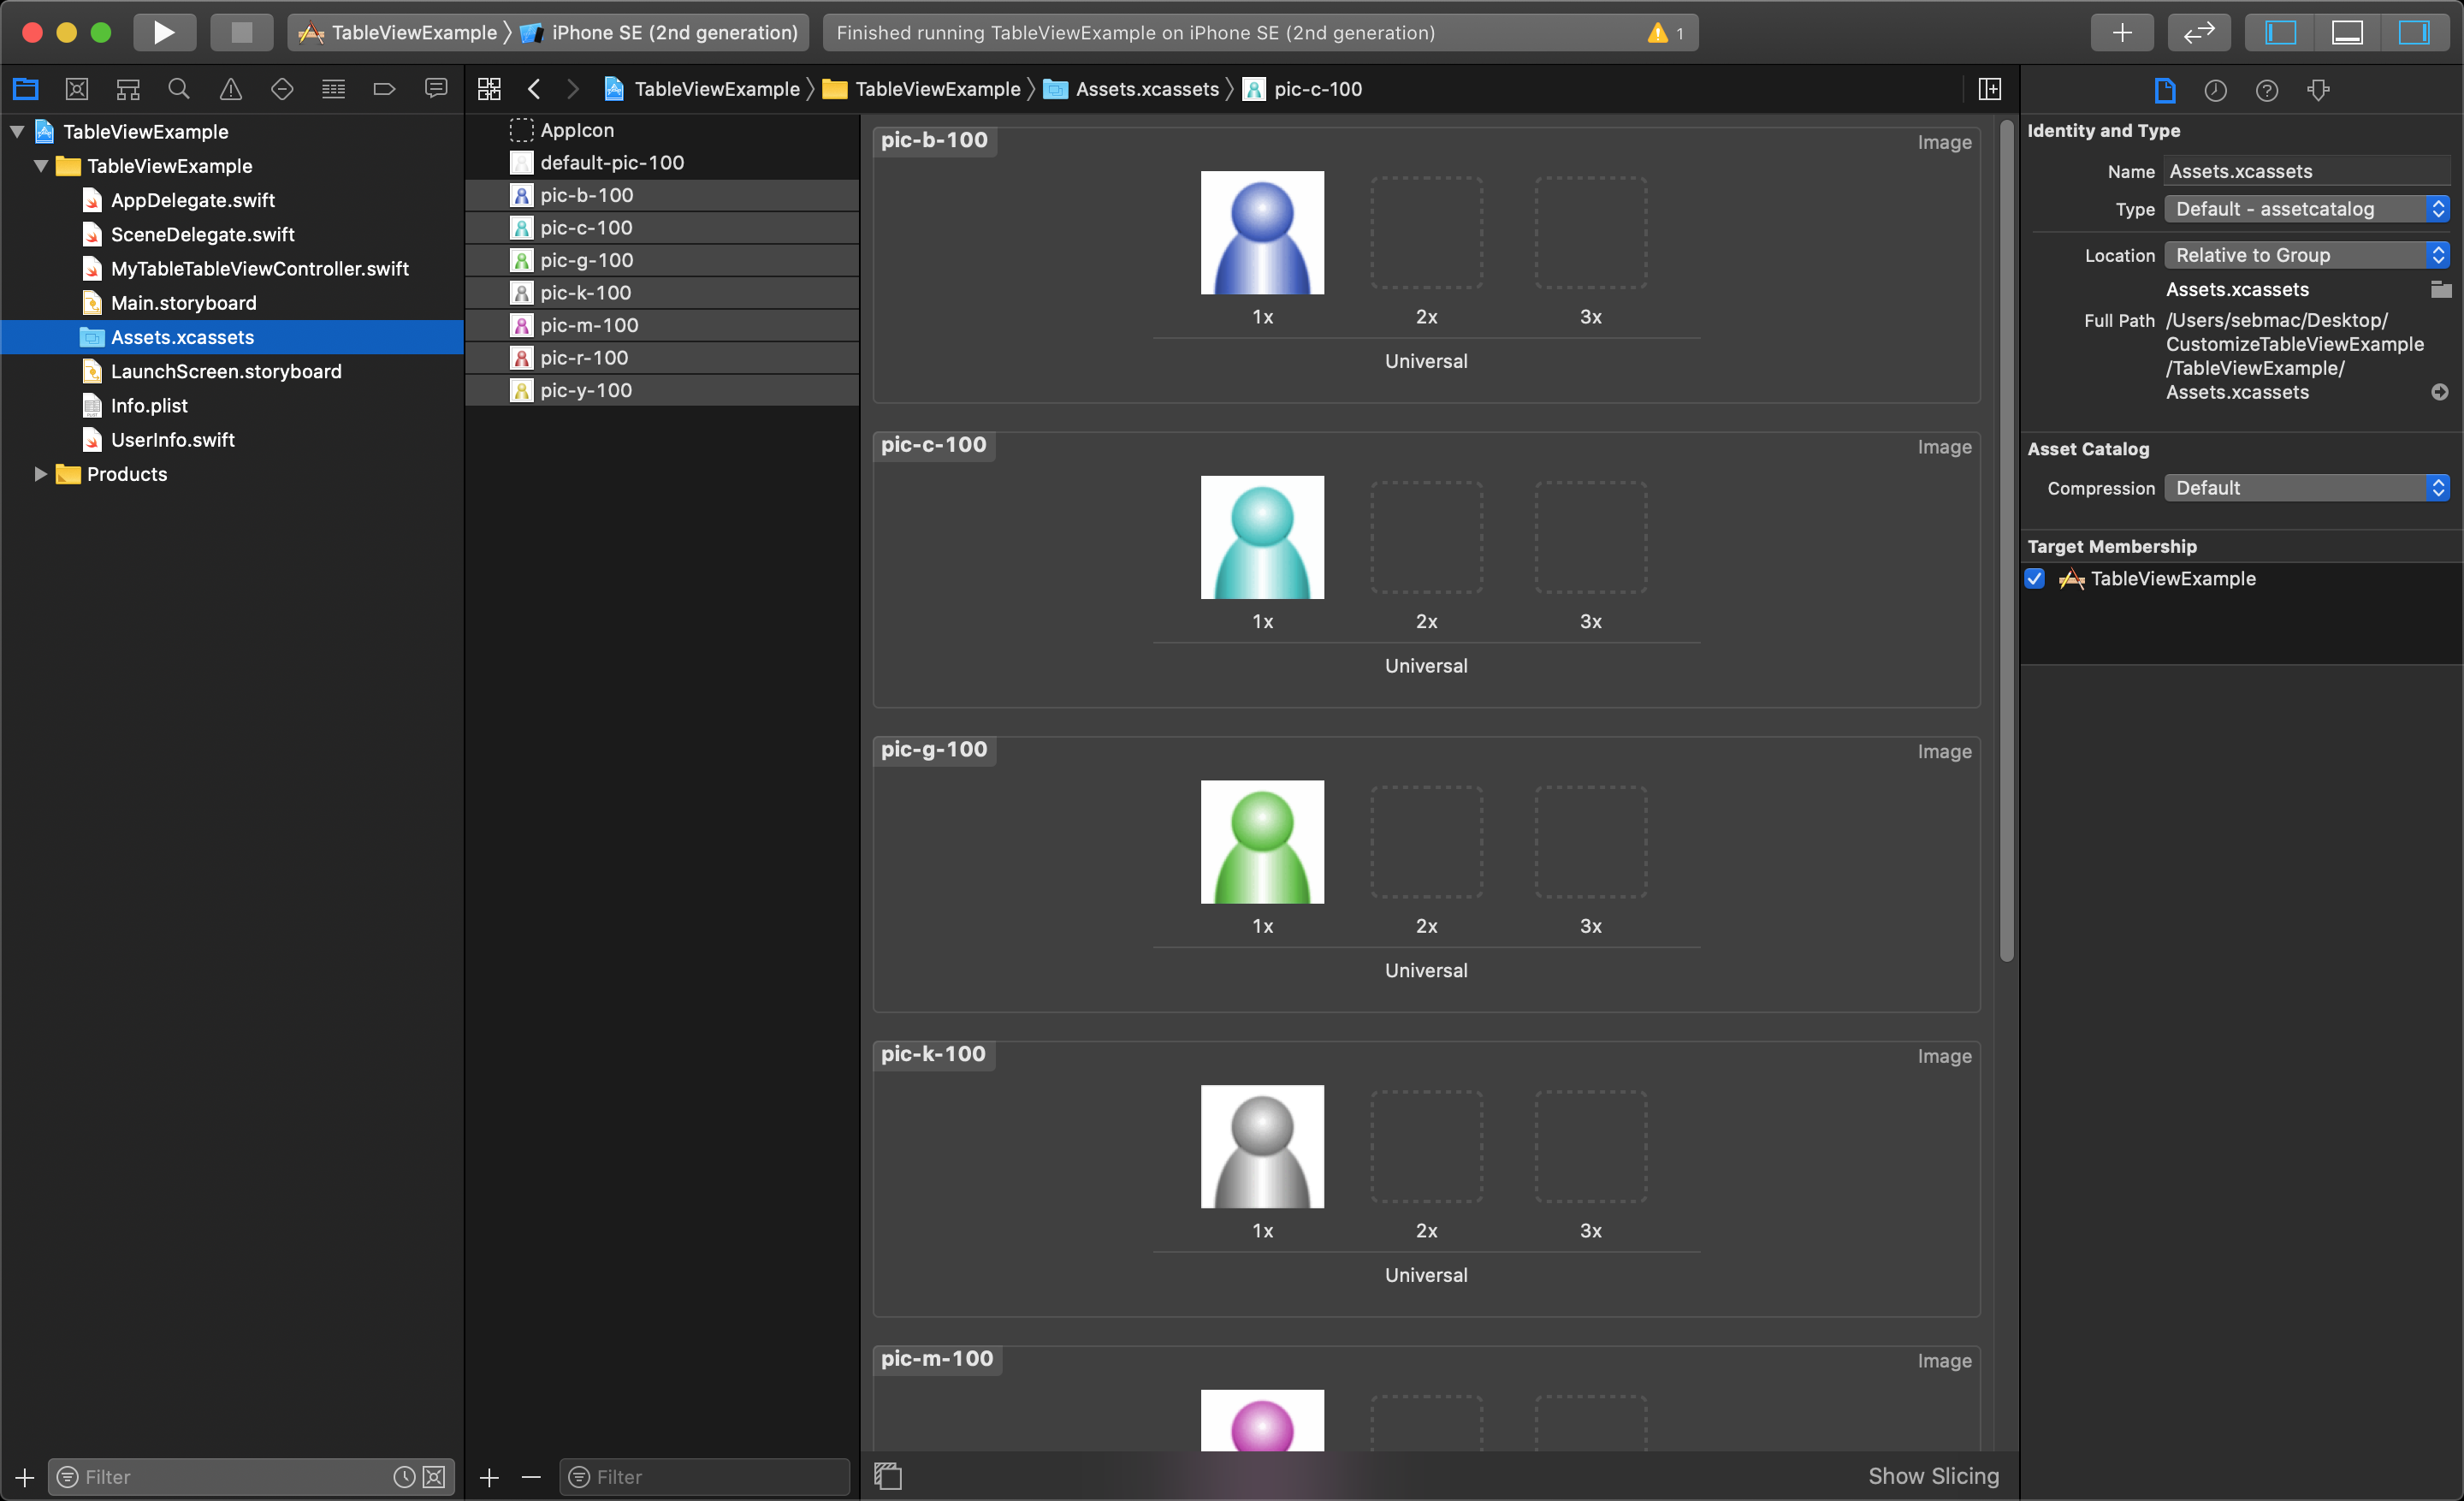
For this example, the rest of the images from last lessons zip file will be added to the Assets.xcassets. Each image will be displayed with an associated name in the cell. The UserInfo objects variable called imageName will be set to the associated image name.
Create an Array of Structs That Hold Cell Data, and Use It
Going back into the tableViewController class, the array must be changed to hold UserInfo objects instead of String variables, and get populated with the information passed into the UserInfo struct init methods. For this example, each UserInfo object has been manually created right in the array with it's unique name and the imageName referring to an image in the assets.
Next, in the tableView(_ tableView: UITableView, numberOfRowsInSection section: Int) function, verify the array name is the same that we are returning the count of (if you chose to changed it).
Lastly, we need to set each new cell to its corresponding data from the array of objects. The image below shows how to access name and imageName properties from the struct in the array using the indexPath.row value, and how to set the cell textLabel and imageView with this data.
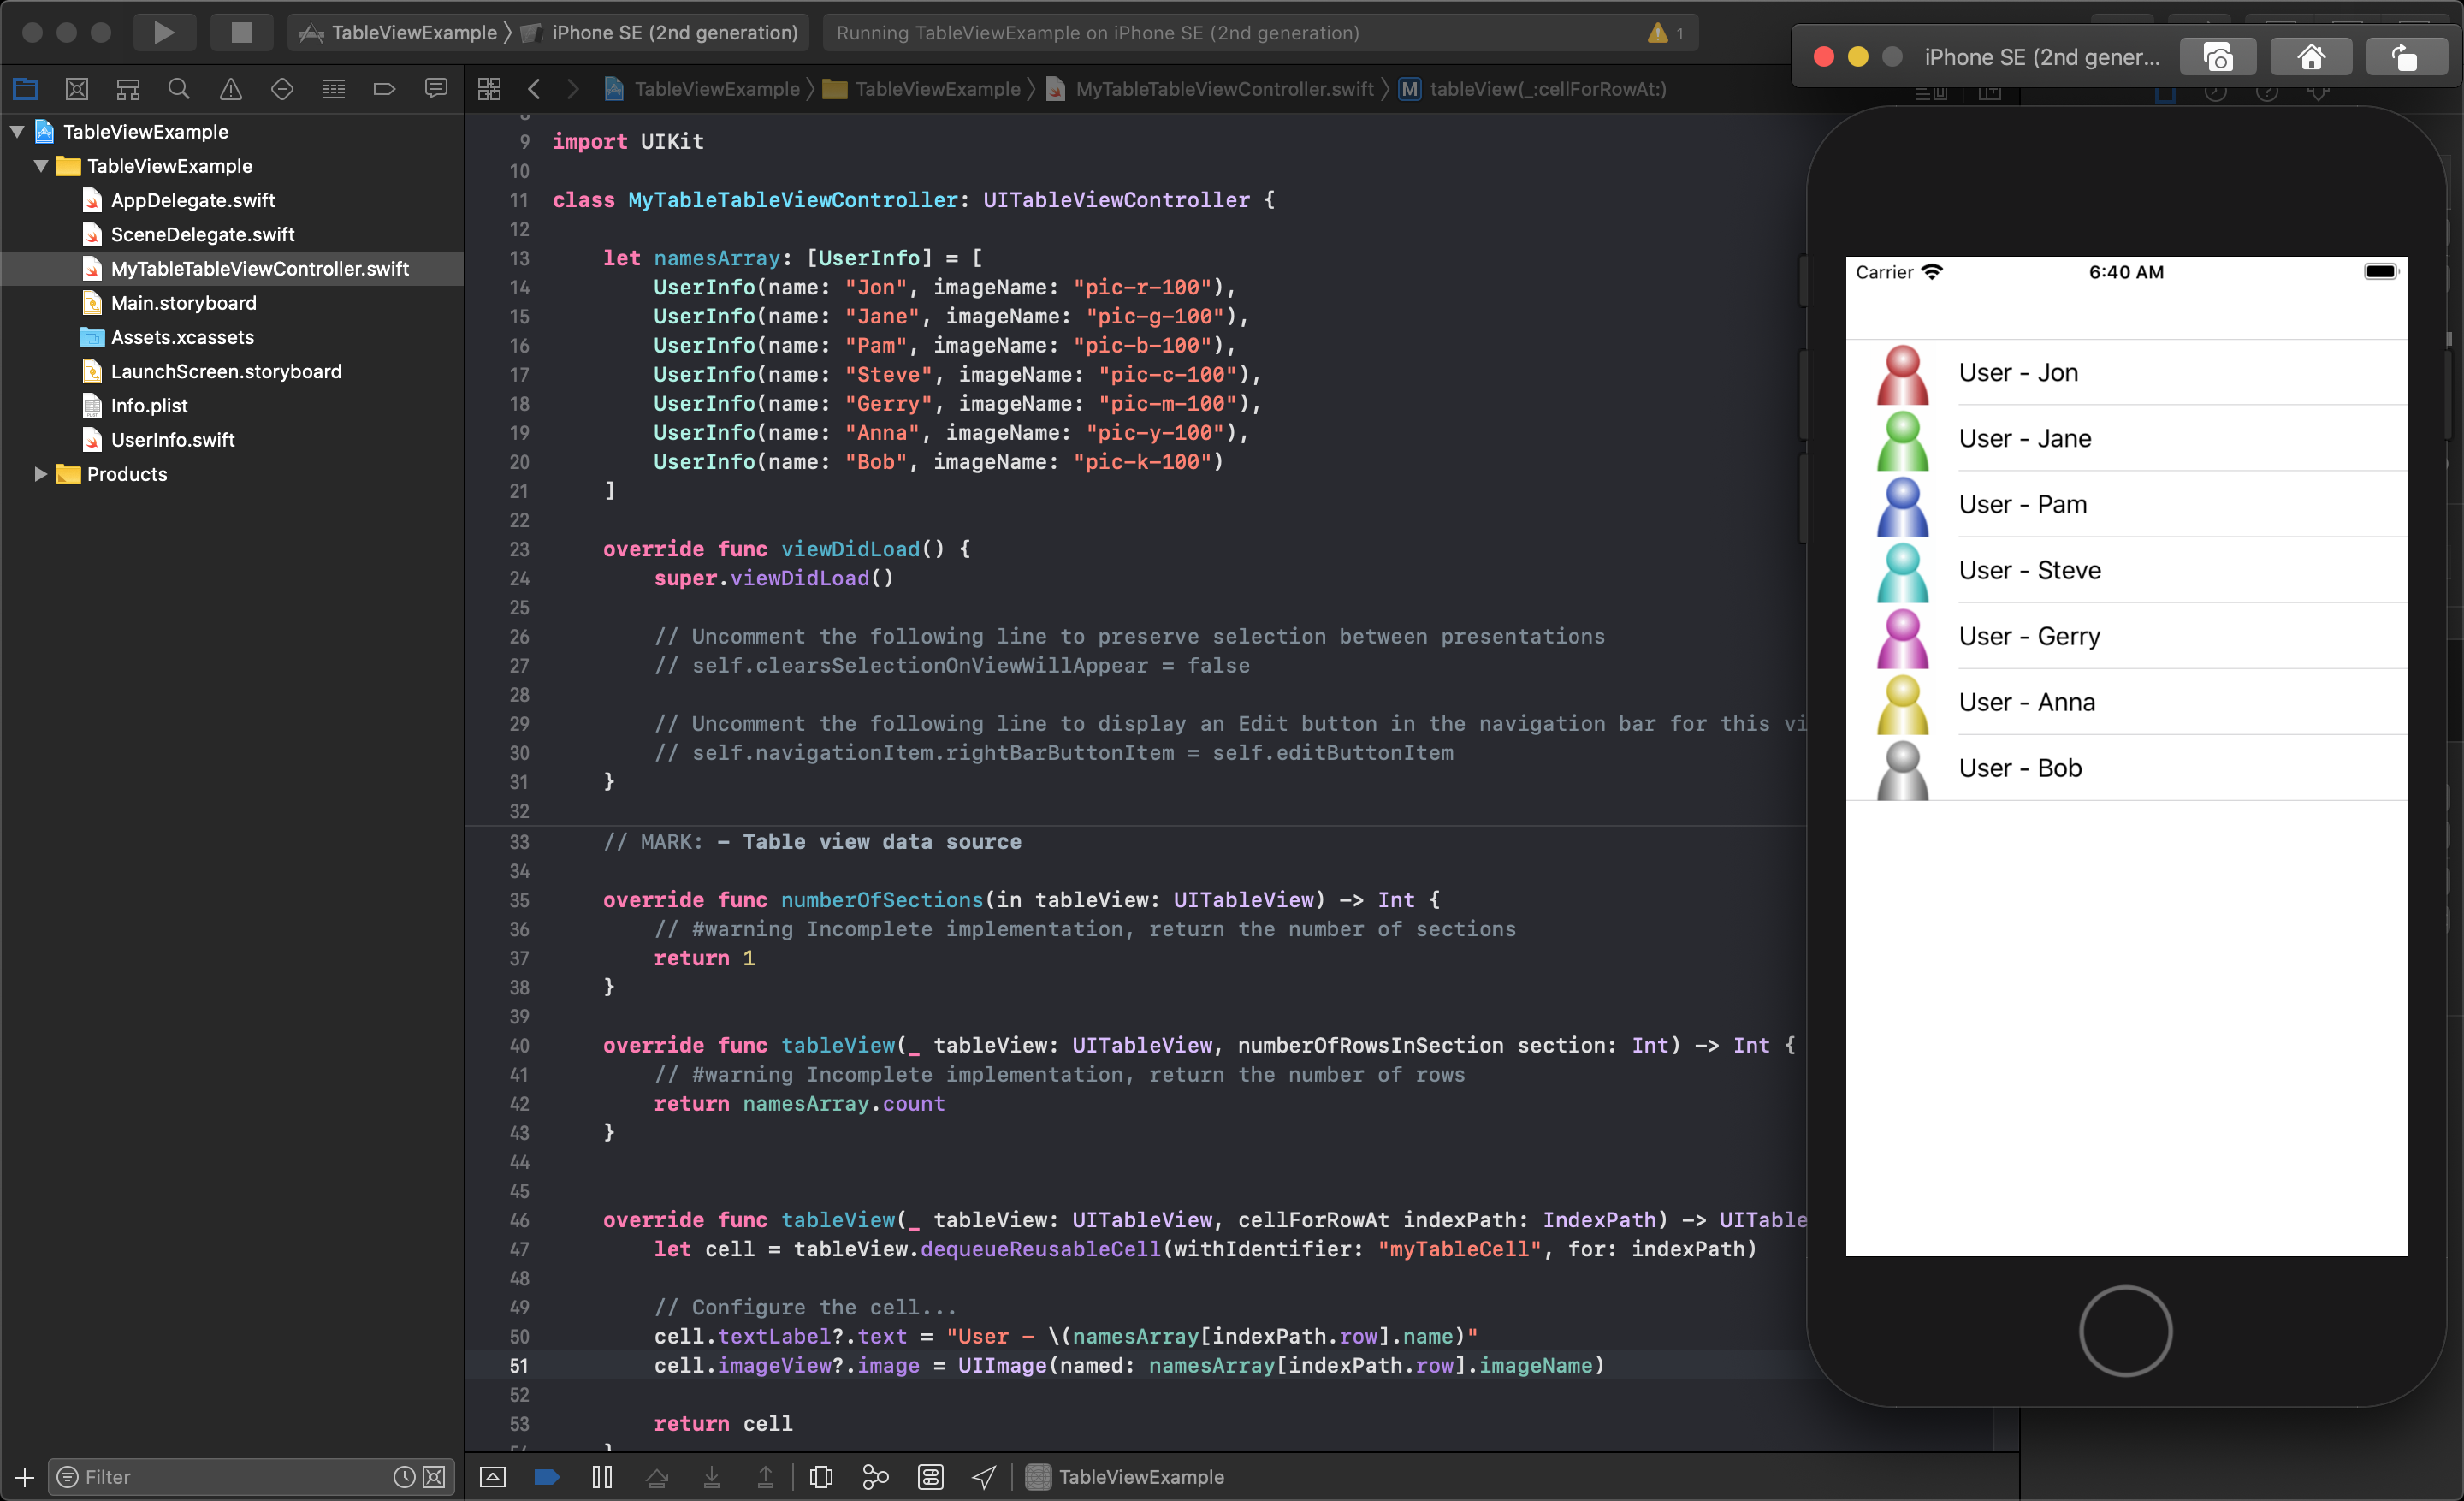
When the application runs, it will now show each piece of custom data displayed properly within each of the tableViewCell objects, but the images have been shrunk to fit inside the slim table cells.
Increase TableViewCell Height
If you want to change the size of each of the tableViewCells, you simply need to change the height of the Prototype Cell.
First, select the tableView and open the Size Inspector on the right of Xcode.
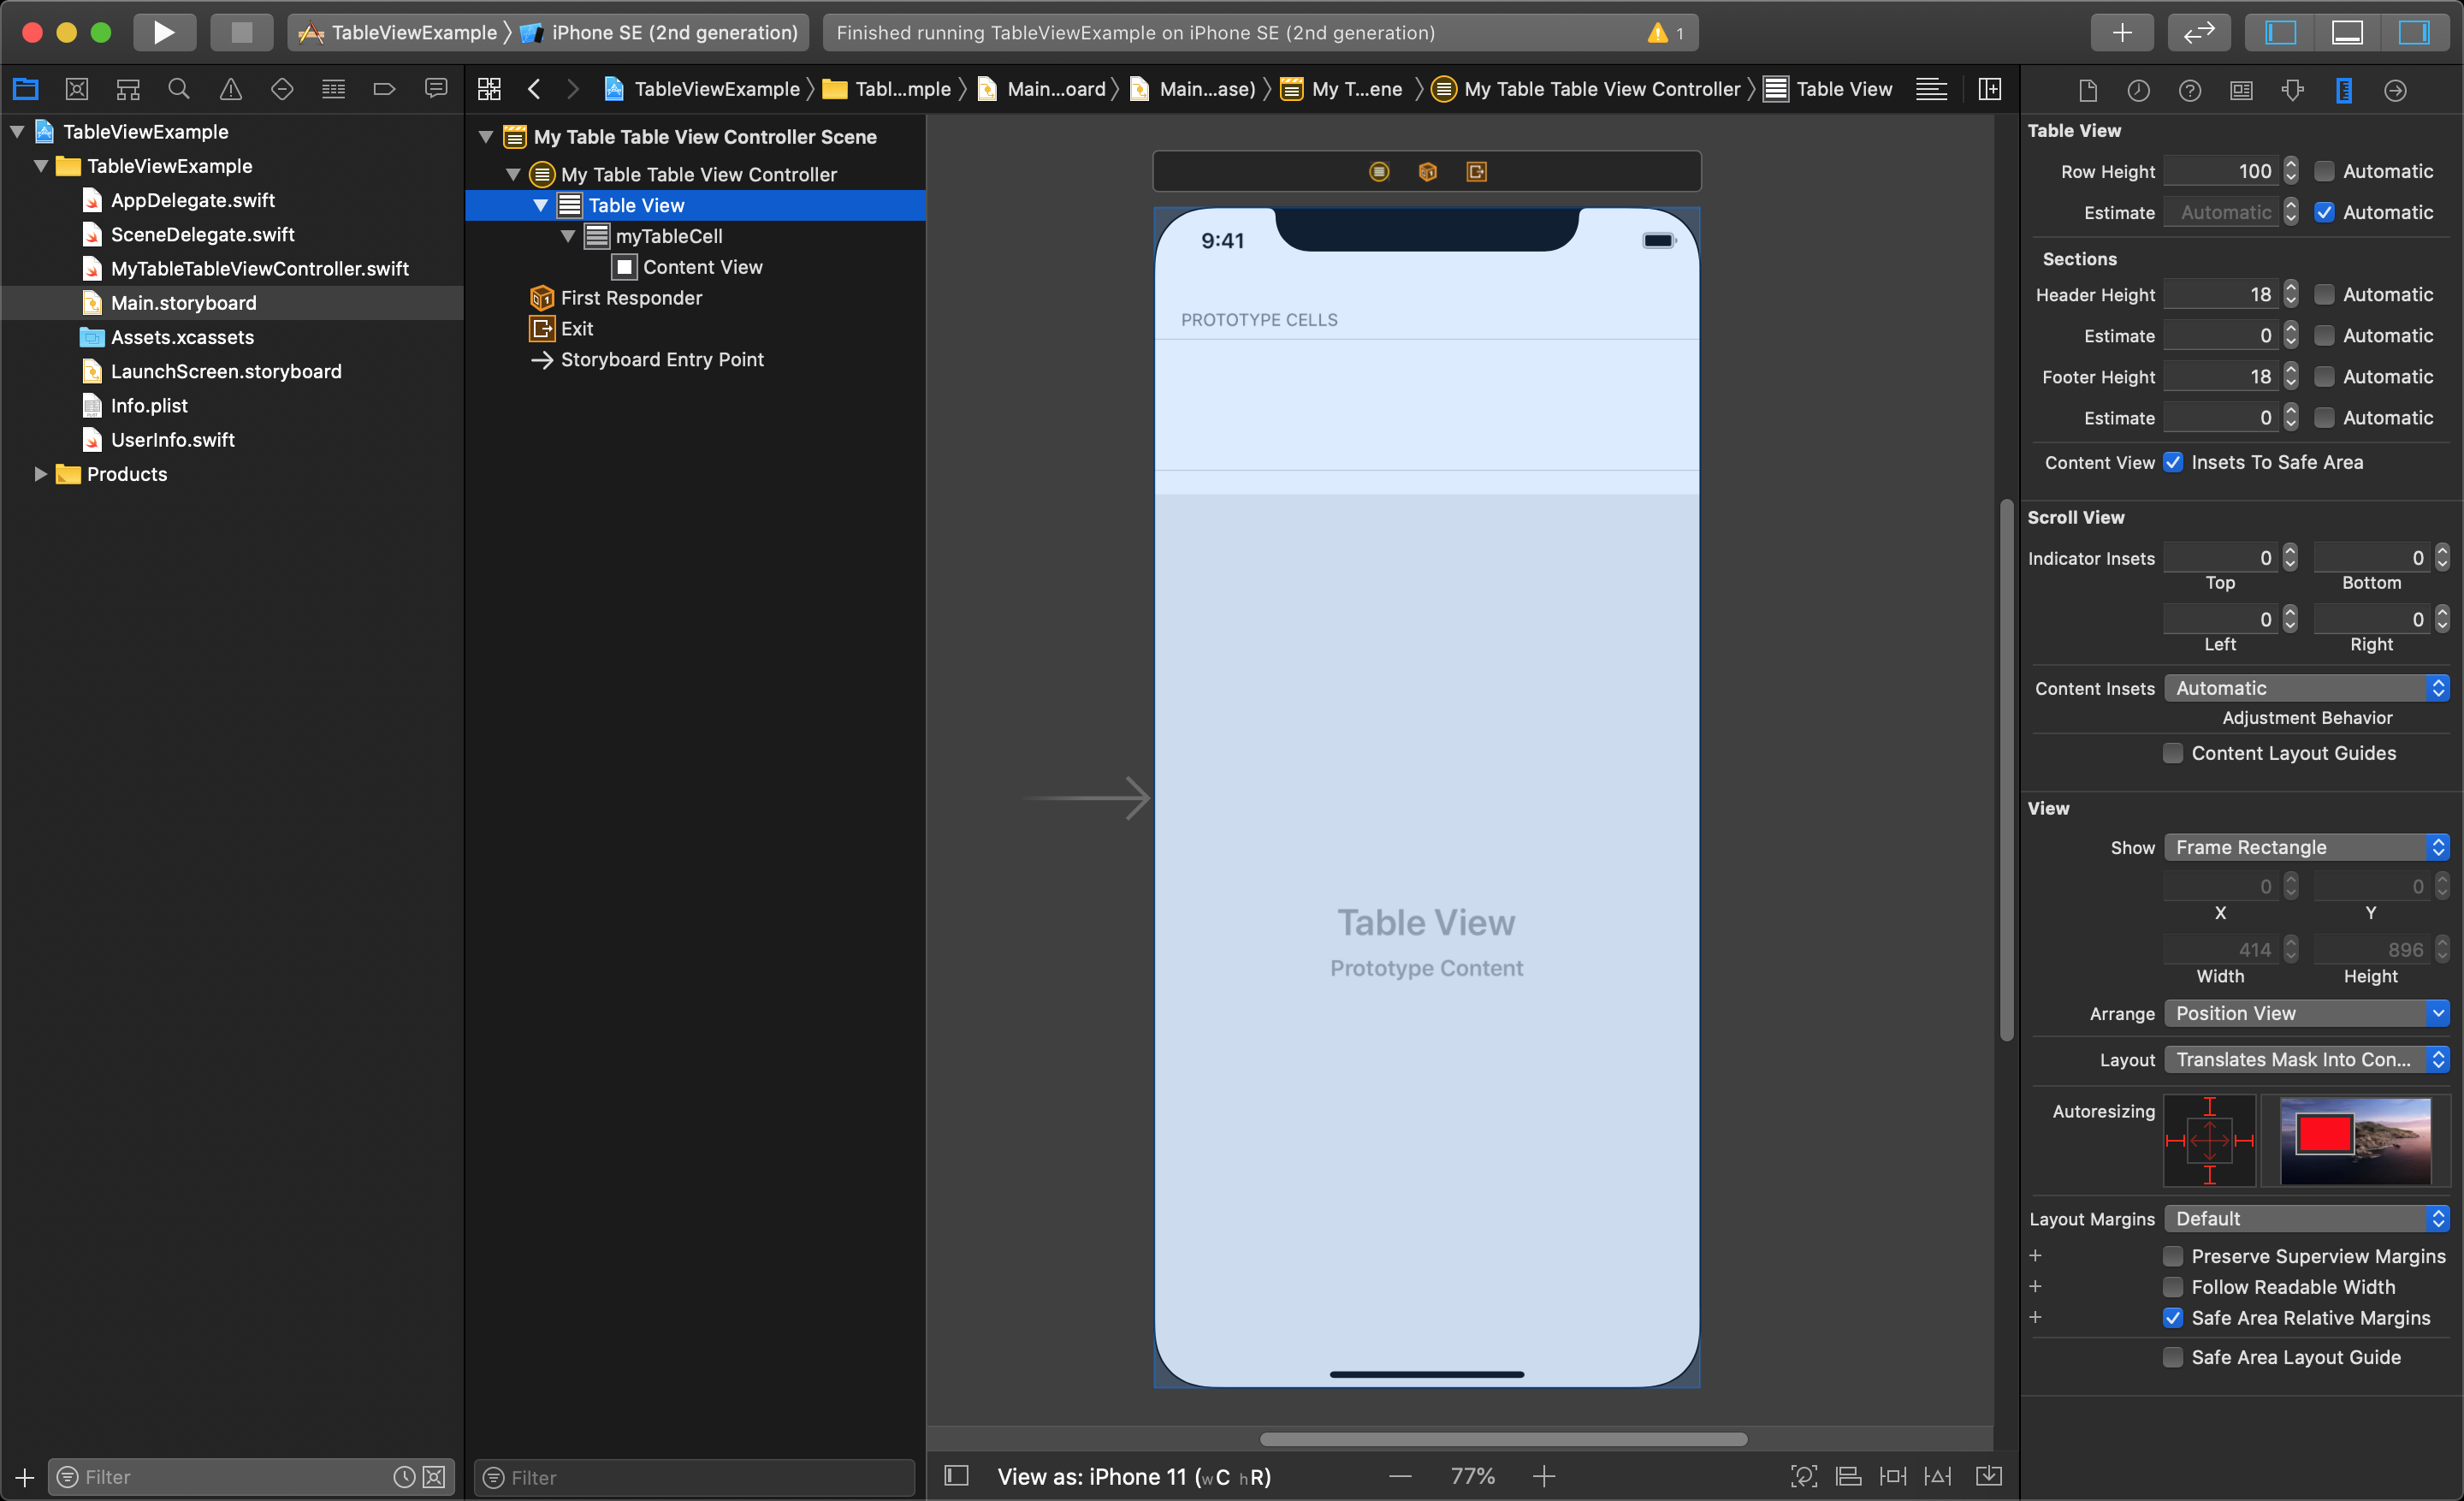
Then, make sure the Automatic box is unchecked beside the Row Height value and type in the exact number of pixels you want for each row's height. You can now see the application running in the iOS simulator with the custom image size in the table cells.
