Customizing TableViewCells
A TableView is a UI object that can display a list of TableViewCells containing information stacked vertically that the user can scroll through. The TableView will only ever create enough Cell objects (cells duplicated from the prototype cell with the unique identifier) to fill the height of the TableView, plus a few more. When there are more cells than will visually fit within the height TableView, the Cell objects get recycled.
As you scroll down through a TableView that contains has more cells than will fit in the TableView, the cells that scroll off the top get dequeued. This means each cell that scrolls off the top of the screen has its contents removed, and is reused as the next cell brought on the bottom the screen with next piece of data displayed in it.
The TableView class has functions built in to it which help create and manage the TableViewCells (remember that the cells are the rows in your tableView). When you want to add different information into each cell of a TableView, you must do it when the cells are being created in the tableView(_ tableView: UITableView, cellForRowAt indexPath: IndexPath) -> UITableViewCell function.
This function gets called once for each Cell object that gets displayed. When the TableView displays each cell, it gets a dequeued copy of the default cell allowing you to add customized information into that specific cell. When the user scrolls through the list this function is called automatically for each cell reused to display the next pice of data. At the end of this function, you are required to return your modified UITableViewCell object as the return type indicates.
Customizing TableViewCells Labels
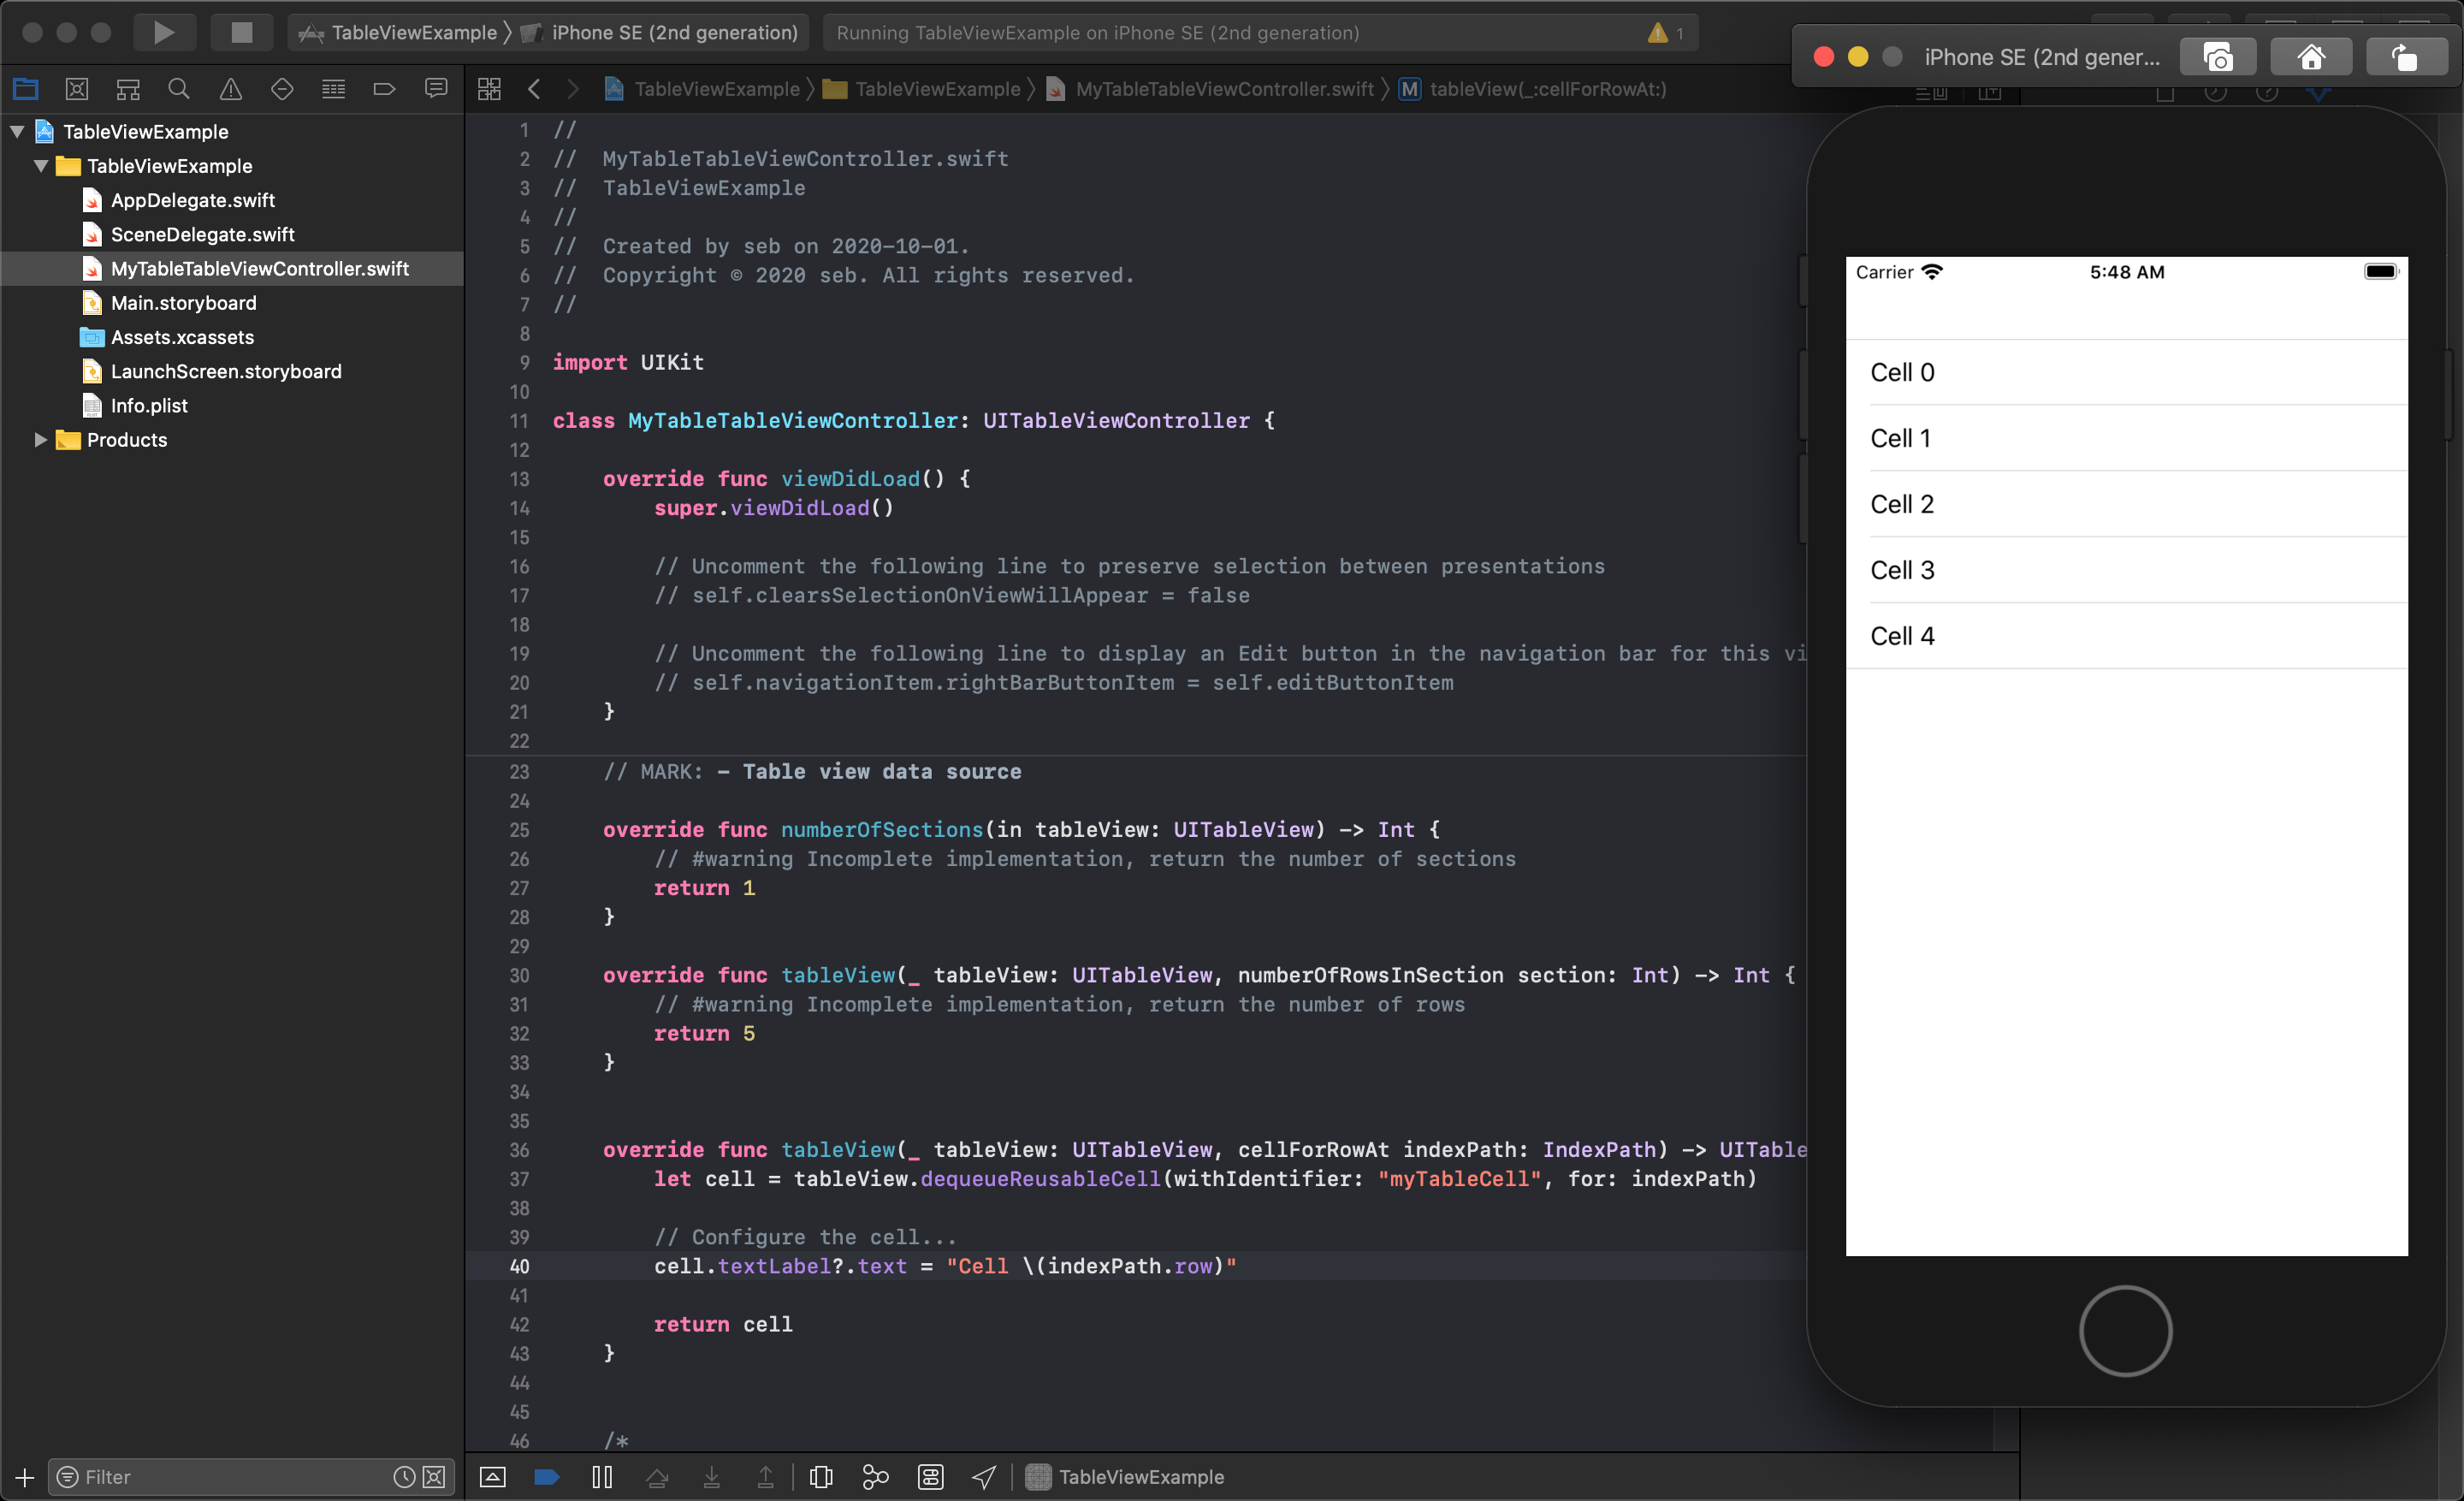
Each TableViewCell object already contains some UI objects that can set to display information. The most commonly used is the textLabel to add some text to each cell in the table. To access and change the cell's properties, you must first create a variable that will equal the specific UITableViewCell object we currently want to edit. You do this by calling a function from your TableView object called dequeueReusableCell(). The parameters passed to this function control what cell is currently being manipulated.
let newCell = tableView.dequeueReusableCell(withIdentifier: "MyTableCell", for: indexPath)
NOTE
The Identifier value used in this function must be the same as the Identifier value you entered in for your Prototype Cell in your storyboard.
The image and label are subviews of a content view, which is a subview within each tableViewCell object. The imageView and textLabel are defined as optional values, and must be accessed in a safe way. It is most common to see Optional Chaining used as a way to check, and then access, optionals all in one step. Optional chaining is done by adding the question mark (?) at the end of the optional value, before the dot operator to access the parameter like this.
newCell.textLabel?.text = “Test Student”
You can see the optional chaining using the question mark (?) to safely access the cell's textLabel. You can also see the application running in the simulator displaying the cell's content.
TIP
The number of the current cell being created is found in the indexPath.row value, which is automatically passed into this function for you.
Using Images in your iOS project
For this example, you will see how to edit the cell's image, but to do this you will need to import an image into our project. You can start by downloading this zip file containing test images to work with. After unzipping the images to a folder on your computer, you will need to open the project you built in the previous lesson.
In your Project Navigator, select your Assets.xcassets file: it will display all the assets currently in this project. Currently, the empty AppIcon is the only thing in your list of assets. Click the plus (+) icon at the bottom of the assets list and choose the Import option.
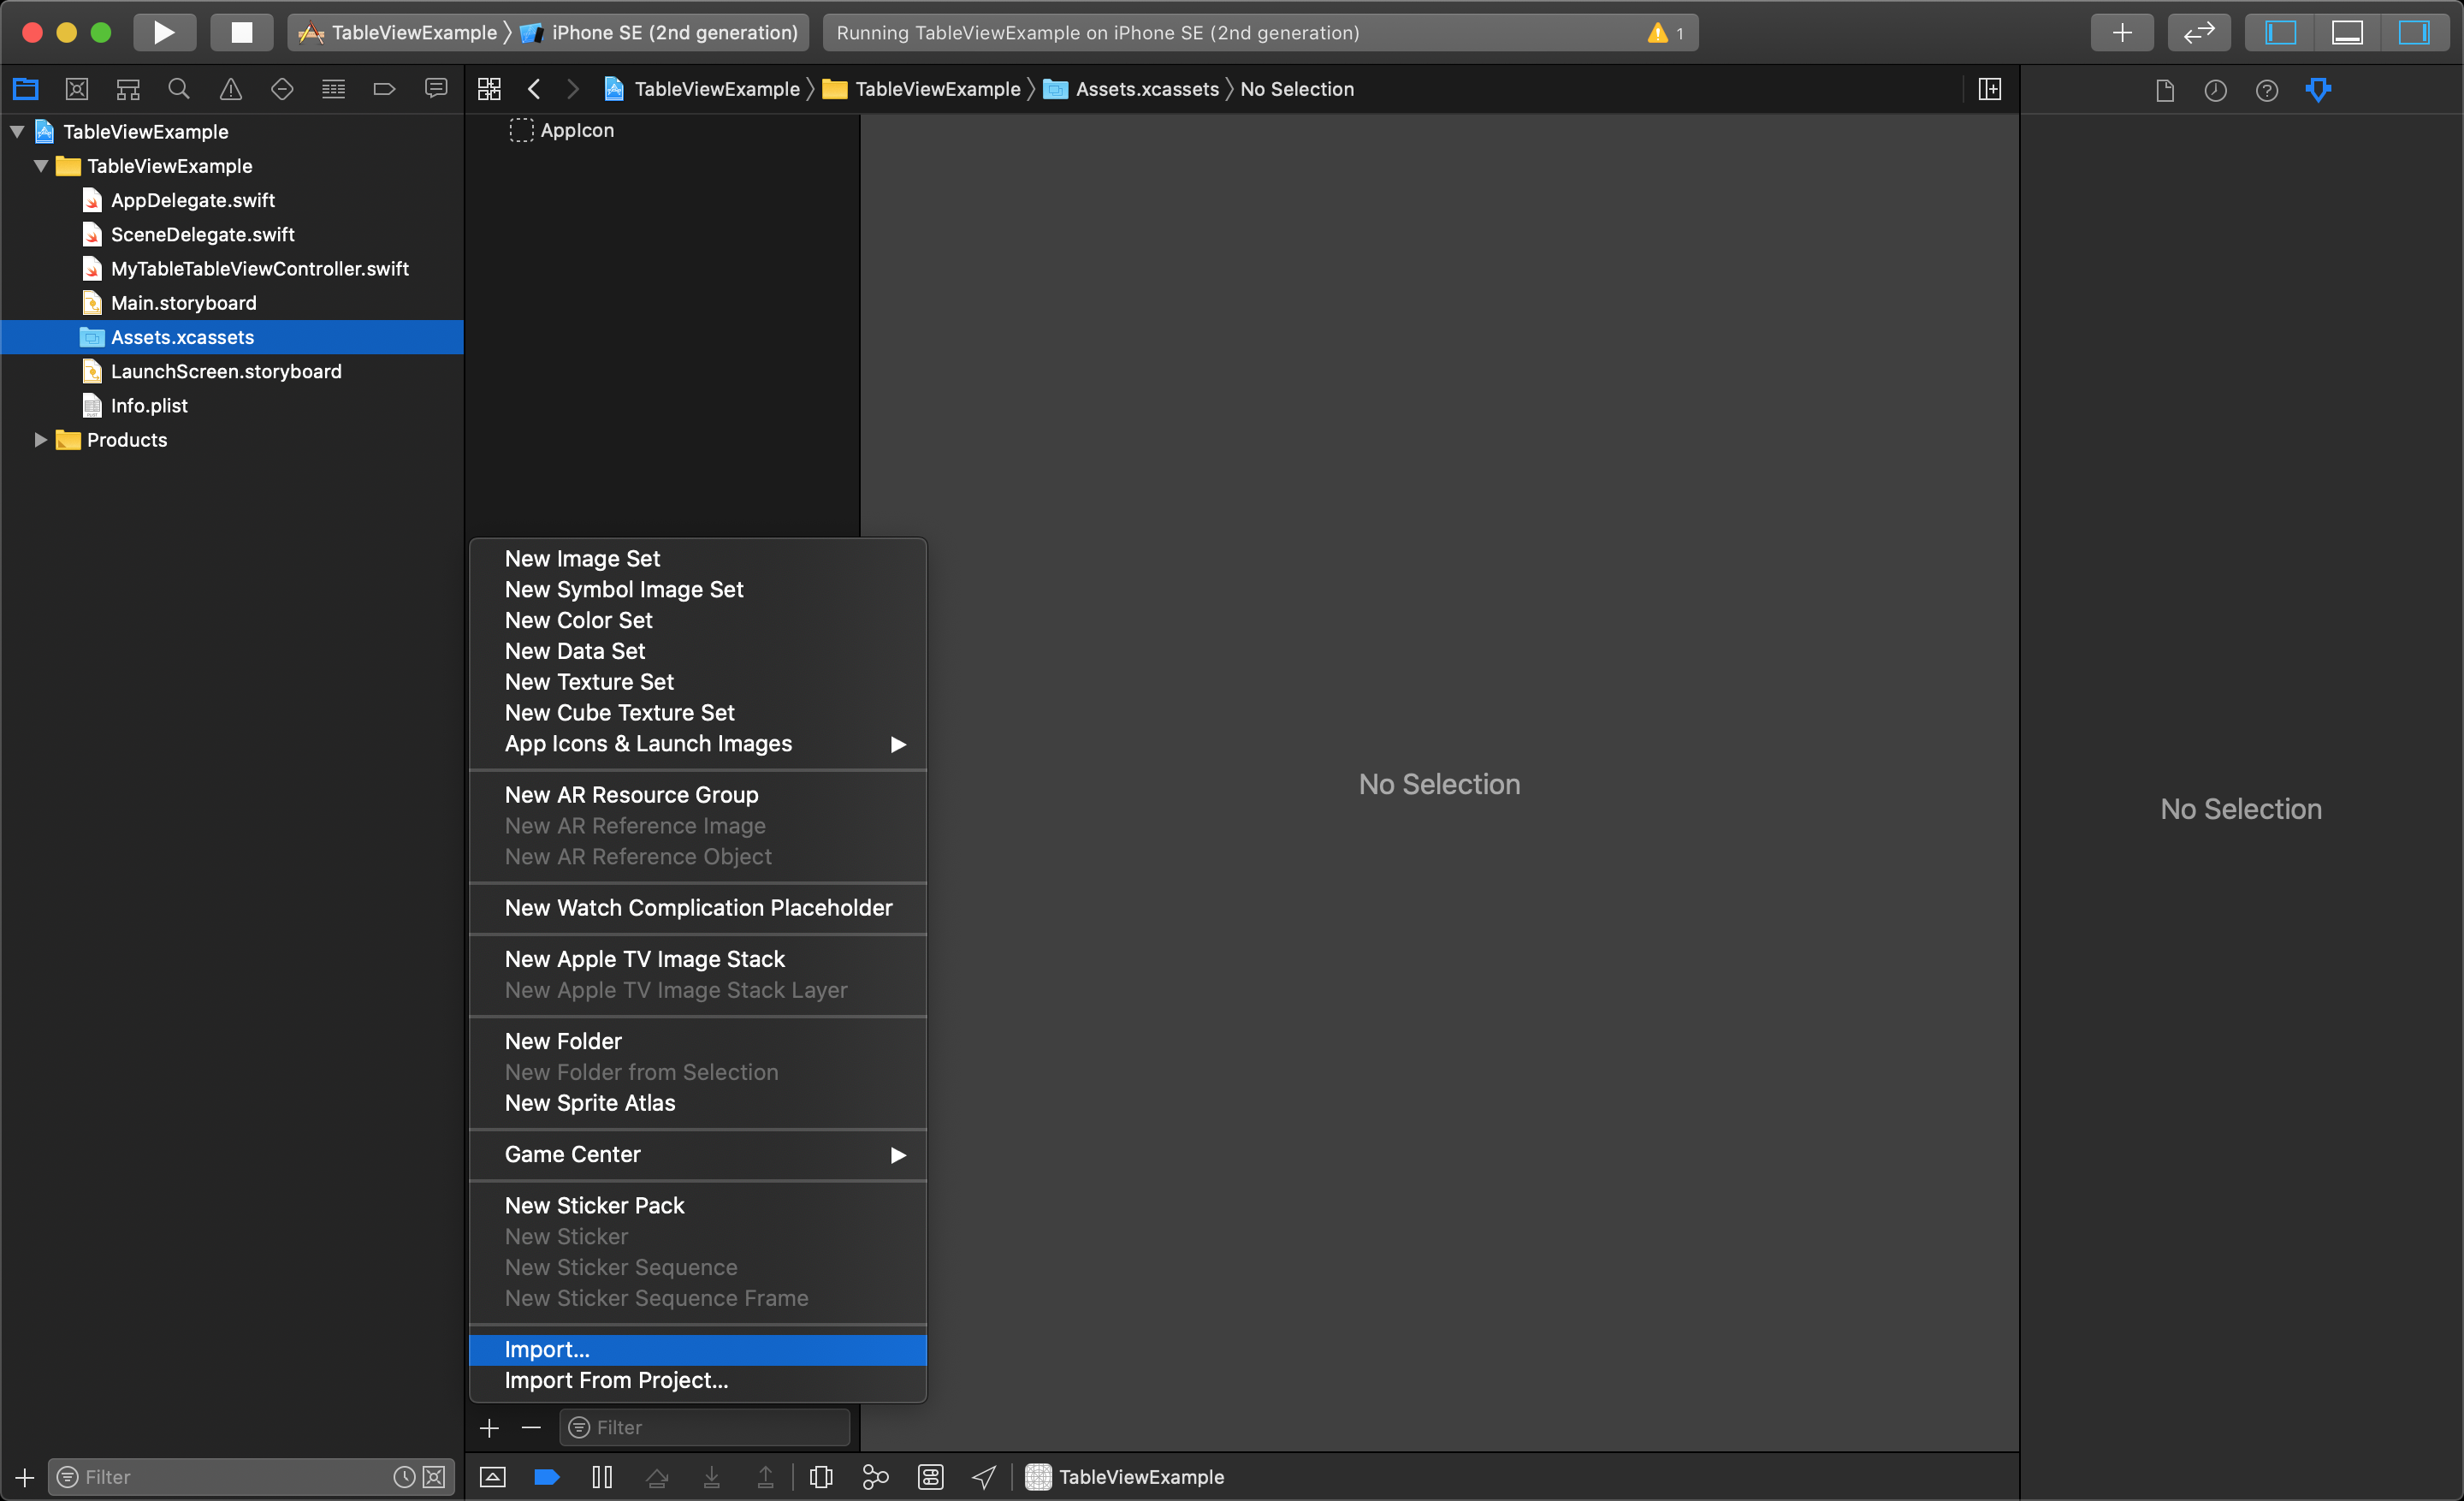
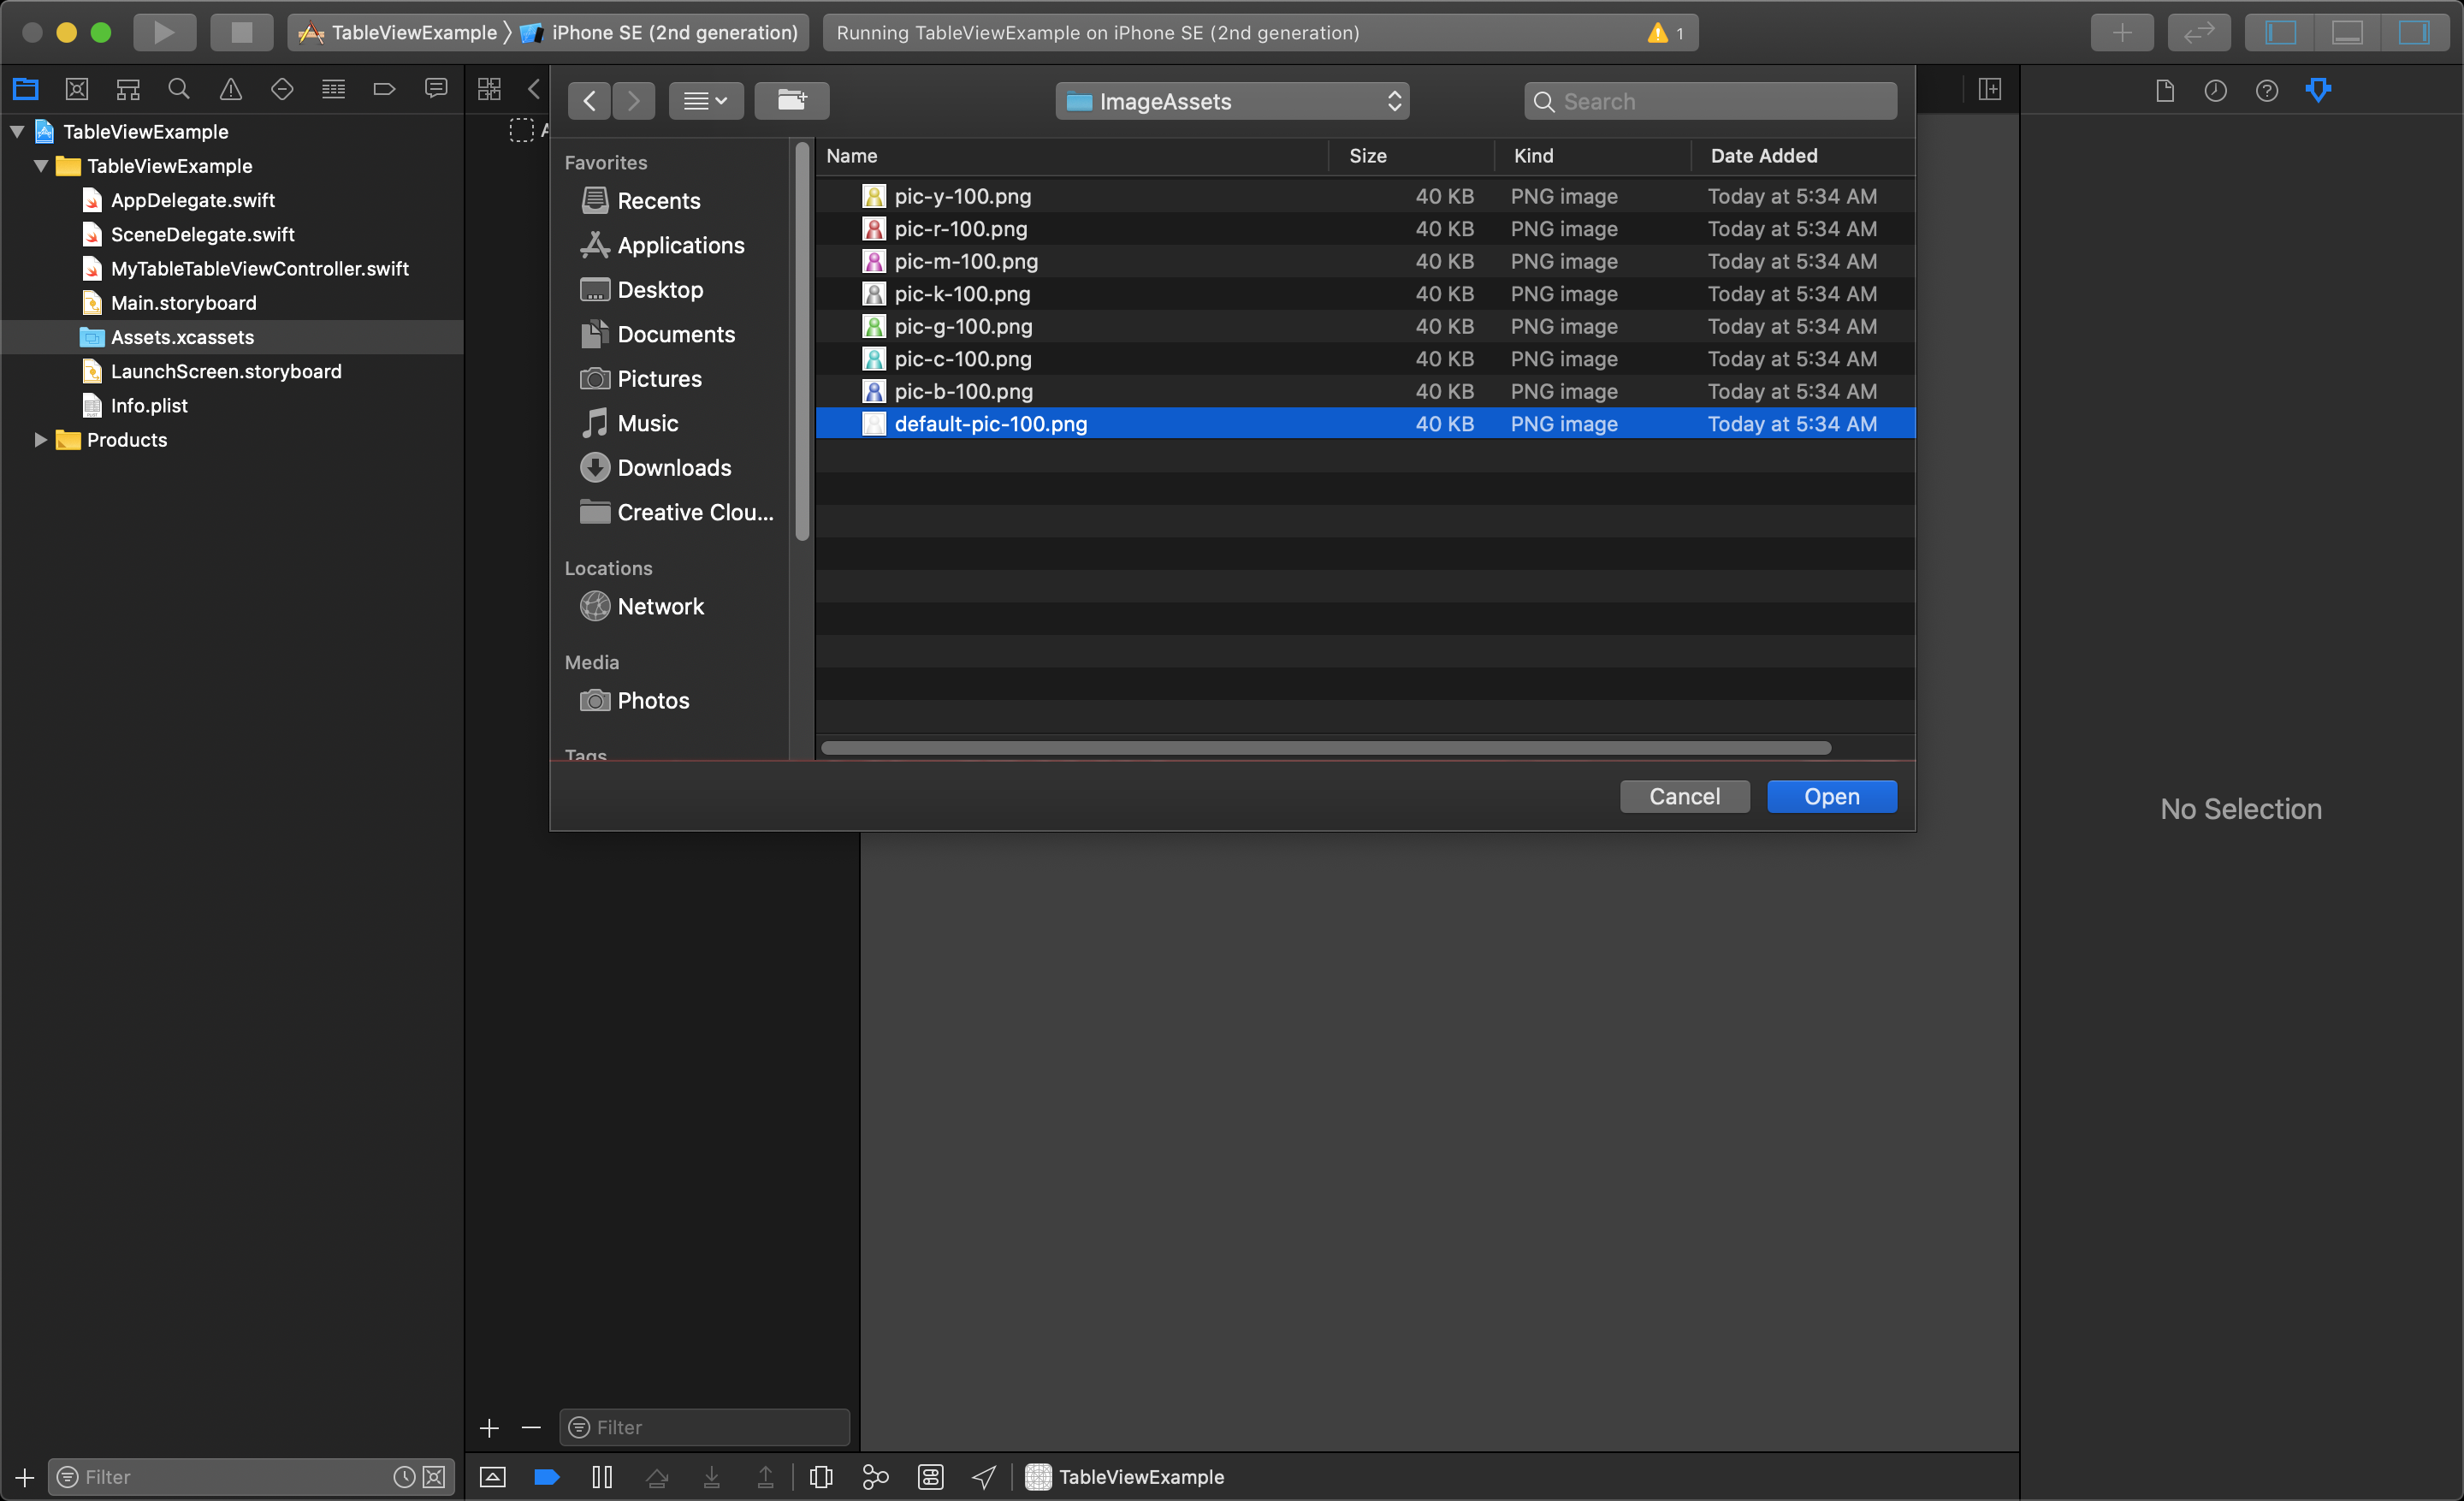
Navigate to the folder you just uncompressed the images to and select the default-pic-100.png and click open.
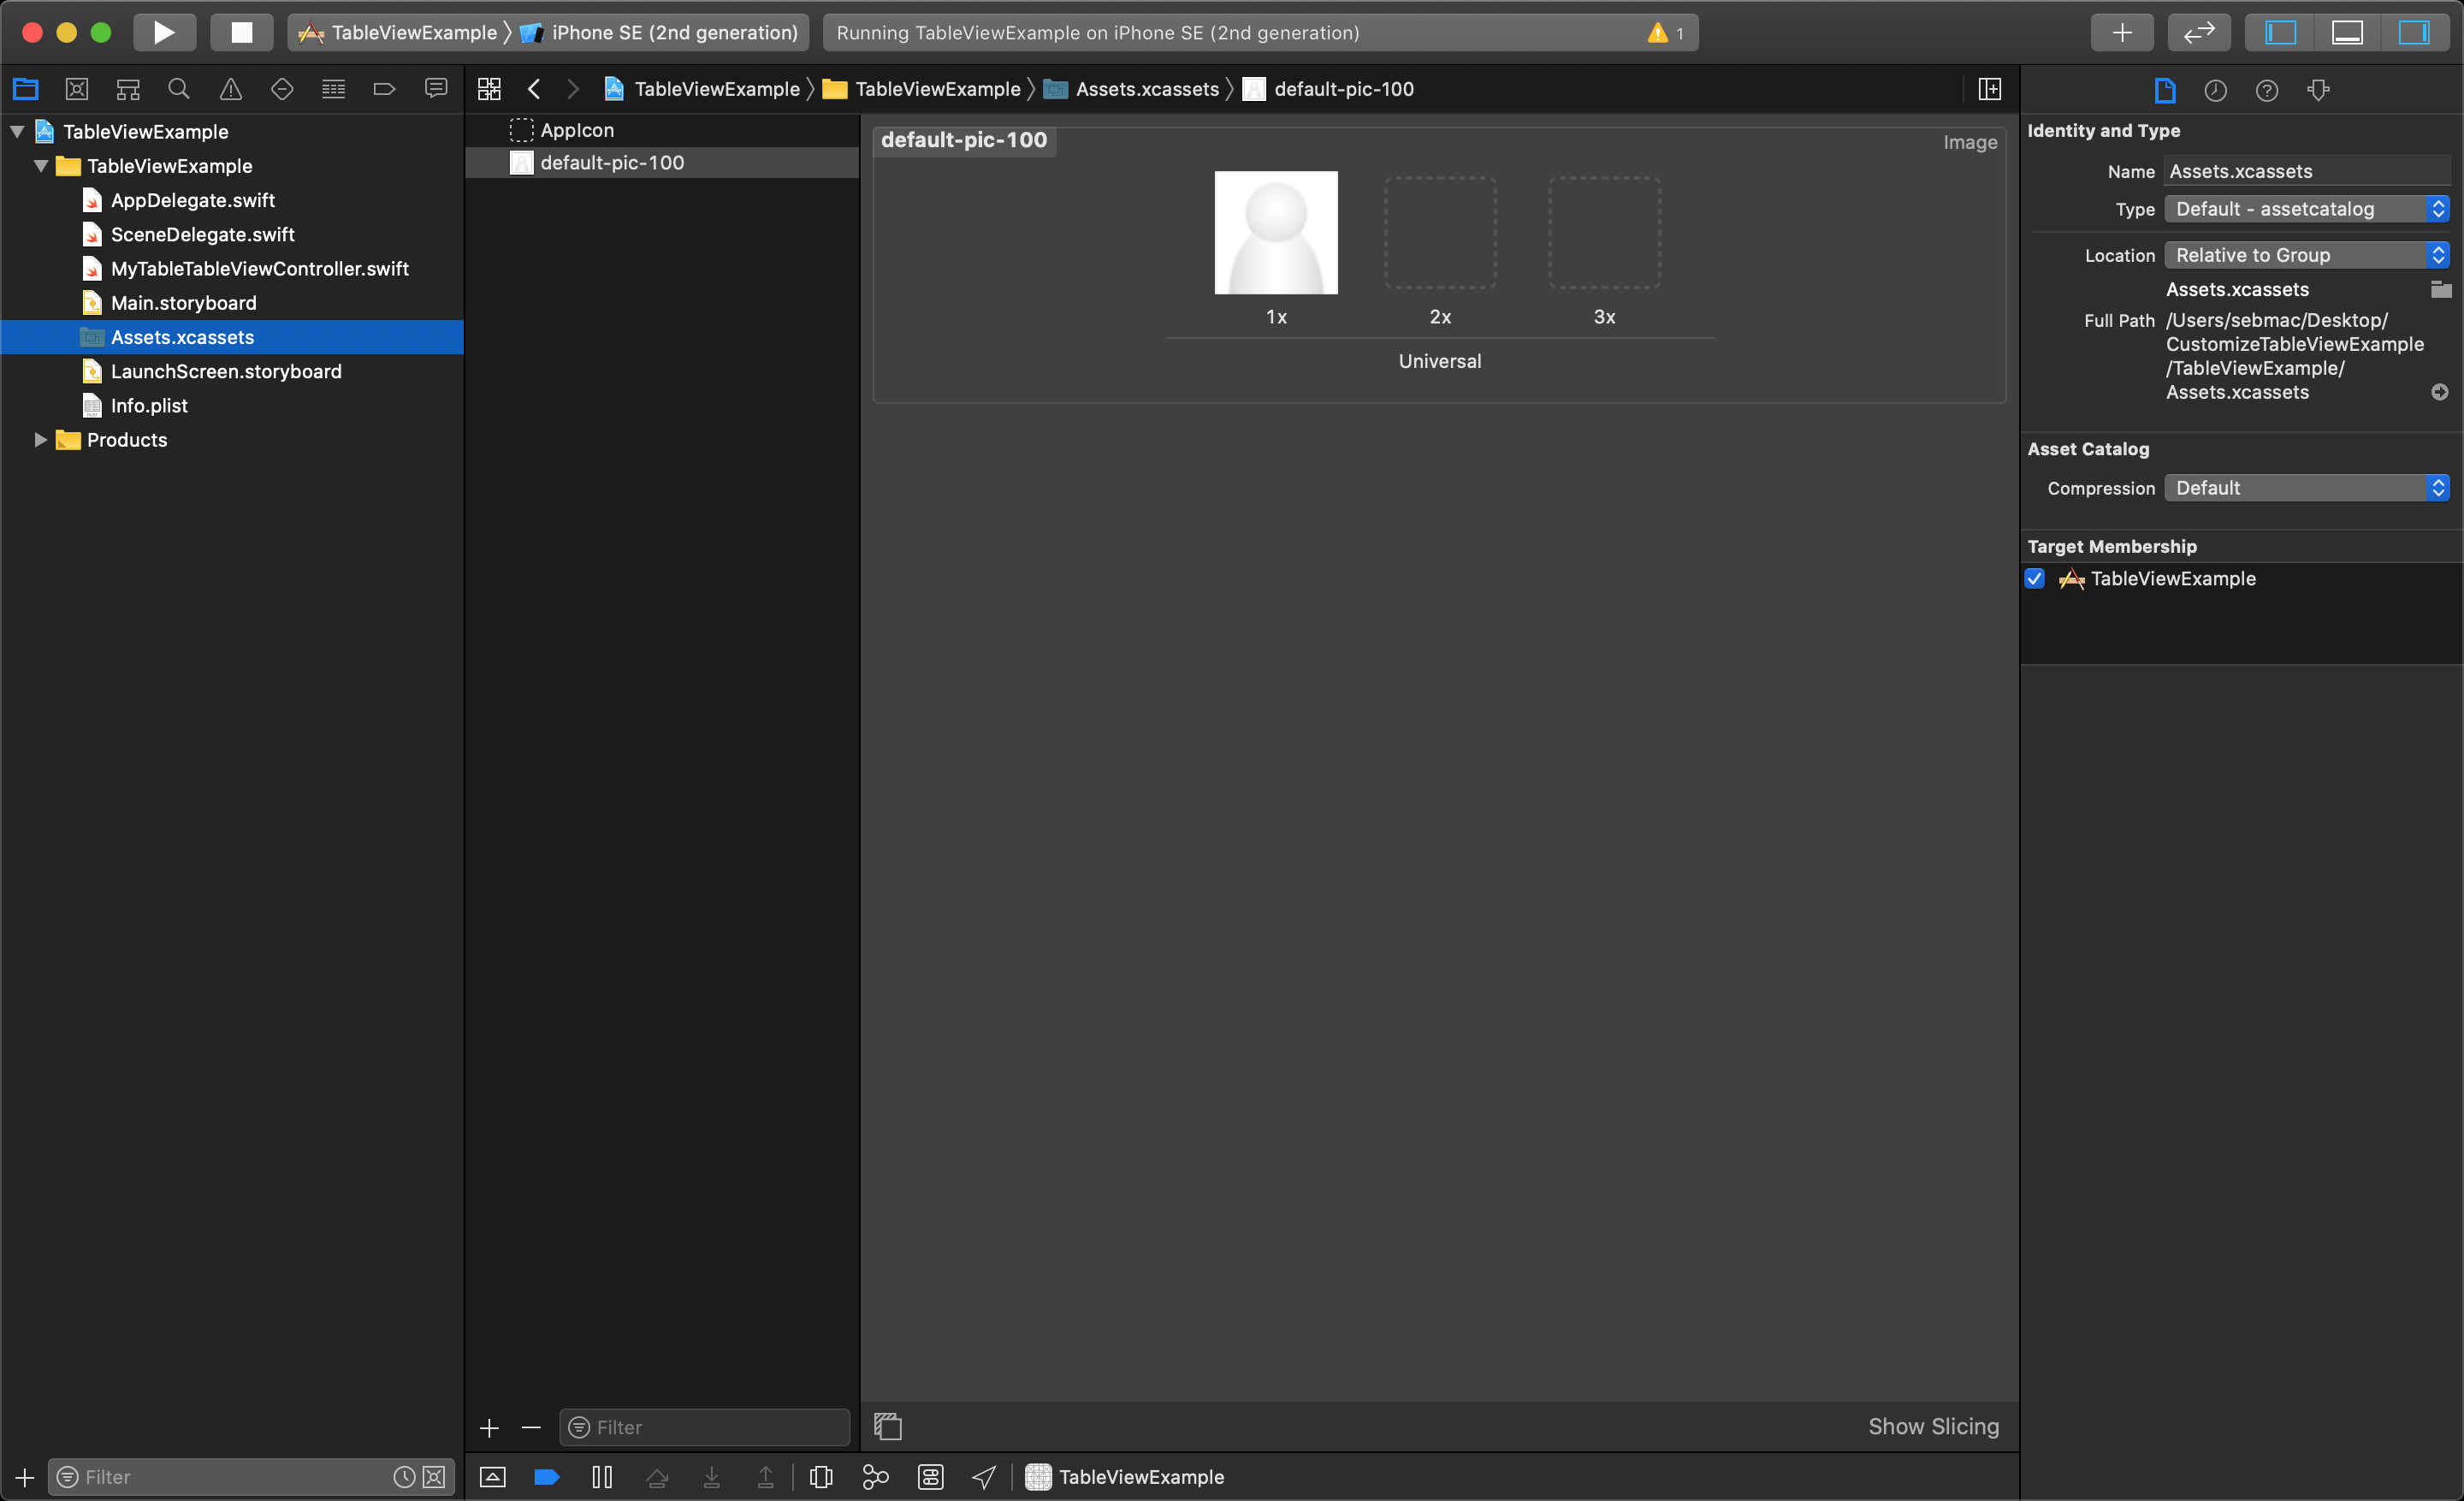
You will now see the image added to your assets folder, and will be able to access it in your code.
Then, in your tableView(_ tableView: UITableView, cellForRowAt indexPath: IndexPath) -> UITableViewCell function, after you modify the textLabel's text you can add the following line of code to set the image.
newCell.imageView?.image = UIImage(named: "default-pic-100")
There are a variety of ways to set a UIImage object in Swift. You can use what is called an Image Literal. When you start typing Image the tool tip will show you an option for Image Literal that you can choose.
Image Literal
When you select Image Literal from the tool tip the text "Image Literal" will be replaced with a small icon in your code. By double-clicking on this icon a dialog pop-up window will show you a list of thumbnails of all the images in your Assets folder. Selecting the image you want will change the small icon in your code into a small icon of your chosen image right in xCode's editor. If you ever comment it out, you will see the markup for an image literal looks like this:
// #imageLiteral(resourceName: "default-pic-100")
Using Arrays to hold TableViewCell content
The most common use for a TableView is to display the data stored in an array or dictionary. Each piece of data in the array or dictionary will hold the information for a single cell.
You can then use the count of the array elements to define the number of rows in the TableView when you override the tableView(_ tableView: UITableView, numberOfRowsInSection section: Int) -> Int. As you learned in the previous lesson, this function is called to set the number of tableViewCell objects, and you want to set this equal to the number of elements in your array.
The tableView(_ tableView: UITableView, cellForRowAt indexPath: IndexPath) -> UITableViewCell function has a parameter passed in called indexPath that tells this function which row of the table the cell is being created for. The value of indexPath.row gives you an integer value out of the IndexPath object that's a 0-based index reference to the cell that is being setup at that moment. This can be used to access the array element needed for the associated tableCell.
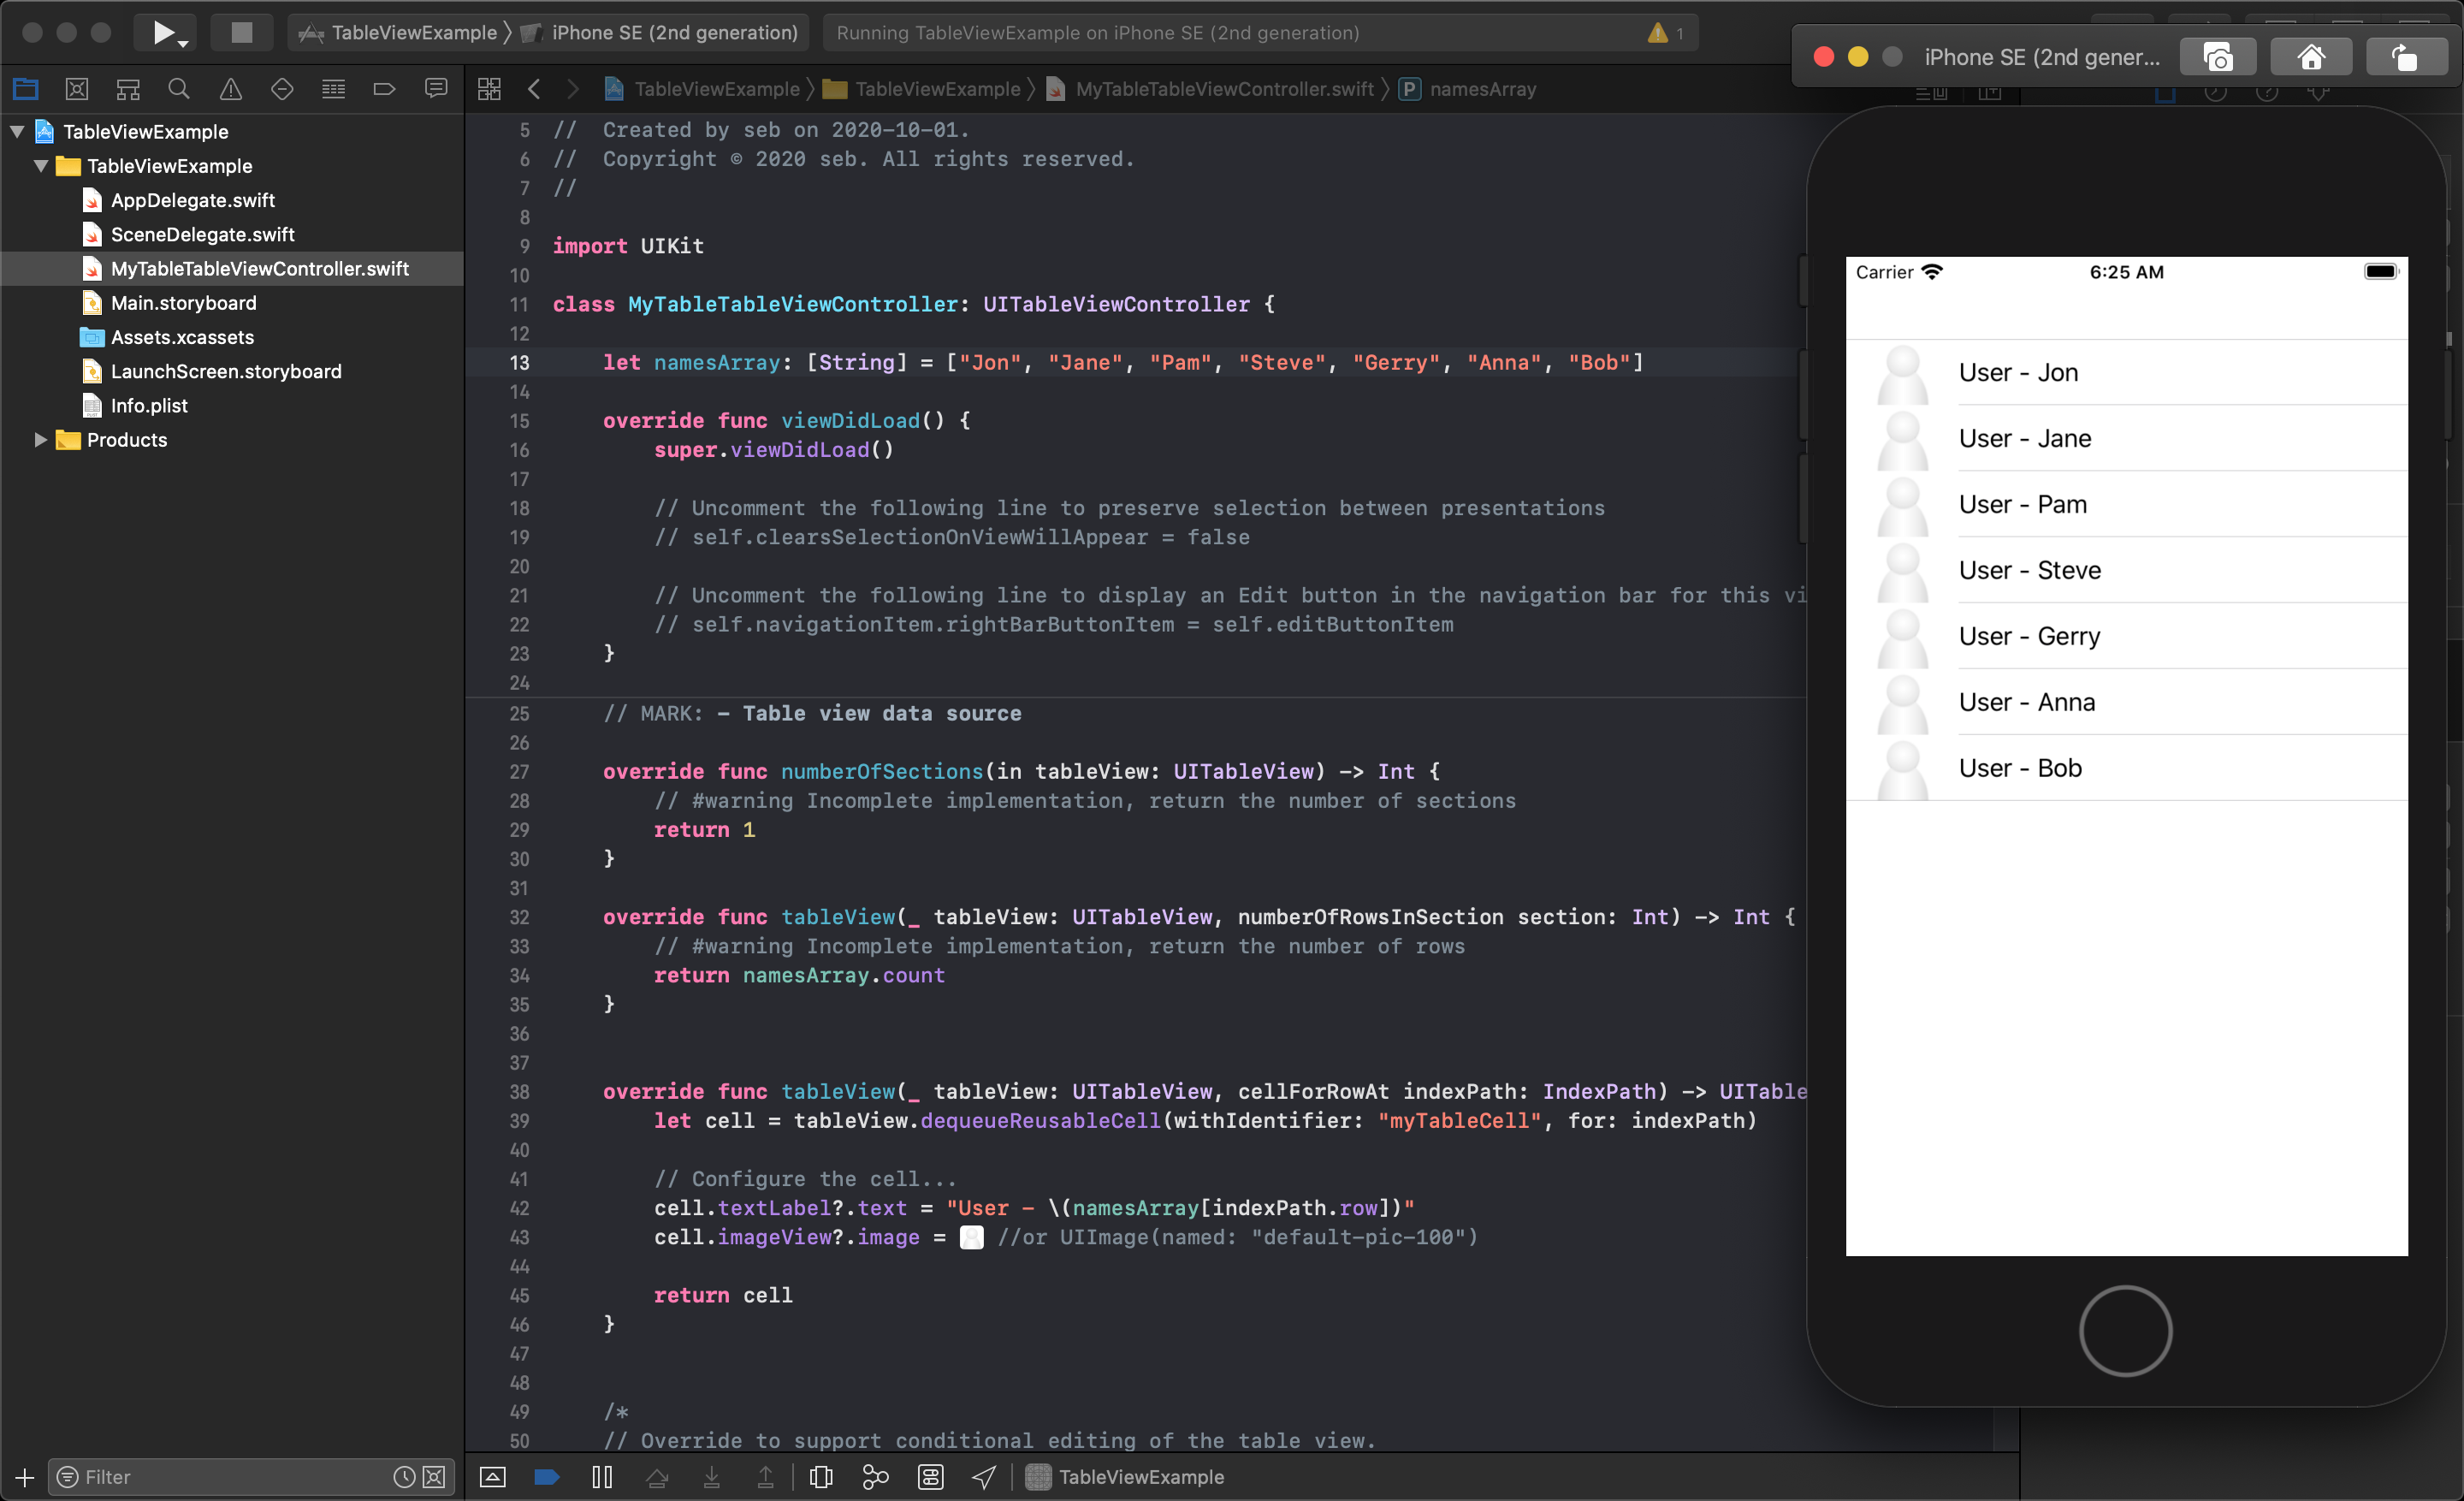
The image below shows a modified tableViewController file from the previous example. Added to the class was an array of strings called namesArray with some example names in it. This example data will be used to populate the tableViewCells with custom data.
TIP
Notice the namesArray.count is now being returned from the tableView(_ tableView: UITableView, numberOfRowsInSection section: Int) -> Int function telling the tableView how many cells to make. This makes one cell for each element in the array.
Now, in the tableView(_ tableView: UITableView, cellForRowAt indexPath: IndexPath) -> UITableViewCell function the namesArray[indexPath.row] gets the correct piece of data for the current cell being created and sets the textLabel?.text with it using optional chaining. This also sets the cell's image to a new UIImage with the name of the file imported into the Assets.xcassets folder by using an Image Literal (followed by the alternate method of calling the UIImage init method and passing in a referencing the file's name without the extension).
Now, when the app is run in the iOS simulator, you can see the 7 names from the array are in their own cell of the tableView.
The following videos show more options for modifying TableViewCell objects to design its style to fit your application. These videos continue from last lesson building onto the TableView that was added into a normal ViewController. You will see how to manually add a custom TableViewCell object into a TableView to be used as the Prototype Cell, adding images, and choosing accessory icons to table cells.
iOS 11 Fundamentals - Dequeuing and Reusing iOS Table View Cells Pluralsight
iOS 11 Fundamentals - Reusing iOS Table View Cells Pluralsight
iOS 11 Fundamentals - Switching iOS Table View Cell Styles Pluralsight
iOS 11 Fundamentals - Configuring iOS Table View Cell Styles Pluralsight