Navigating with a Navigation Controller
Yet another commonly used way to control navigation from one view to another is to embed a NavigationController in the main view of your application. A NavigationController embedded in a view can manage navigation to additional views connected by segues, and back to the initial view that contains the NavigationController.
Embedding a NavigationController in a View
To learn how to use a NavigationController, we will continue from the tableView example project built in this weeks lessons. A NavigationController embedded in a view can manage navigation to additional views connected by a segue, and back to the initial view the navigationController is embedded in.
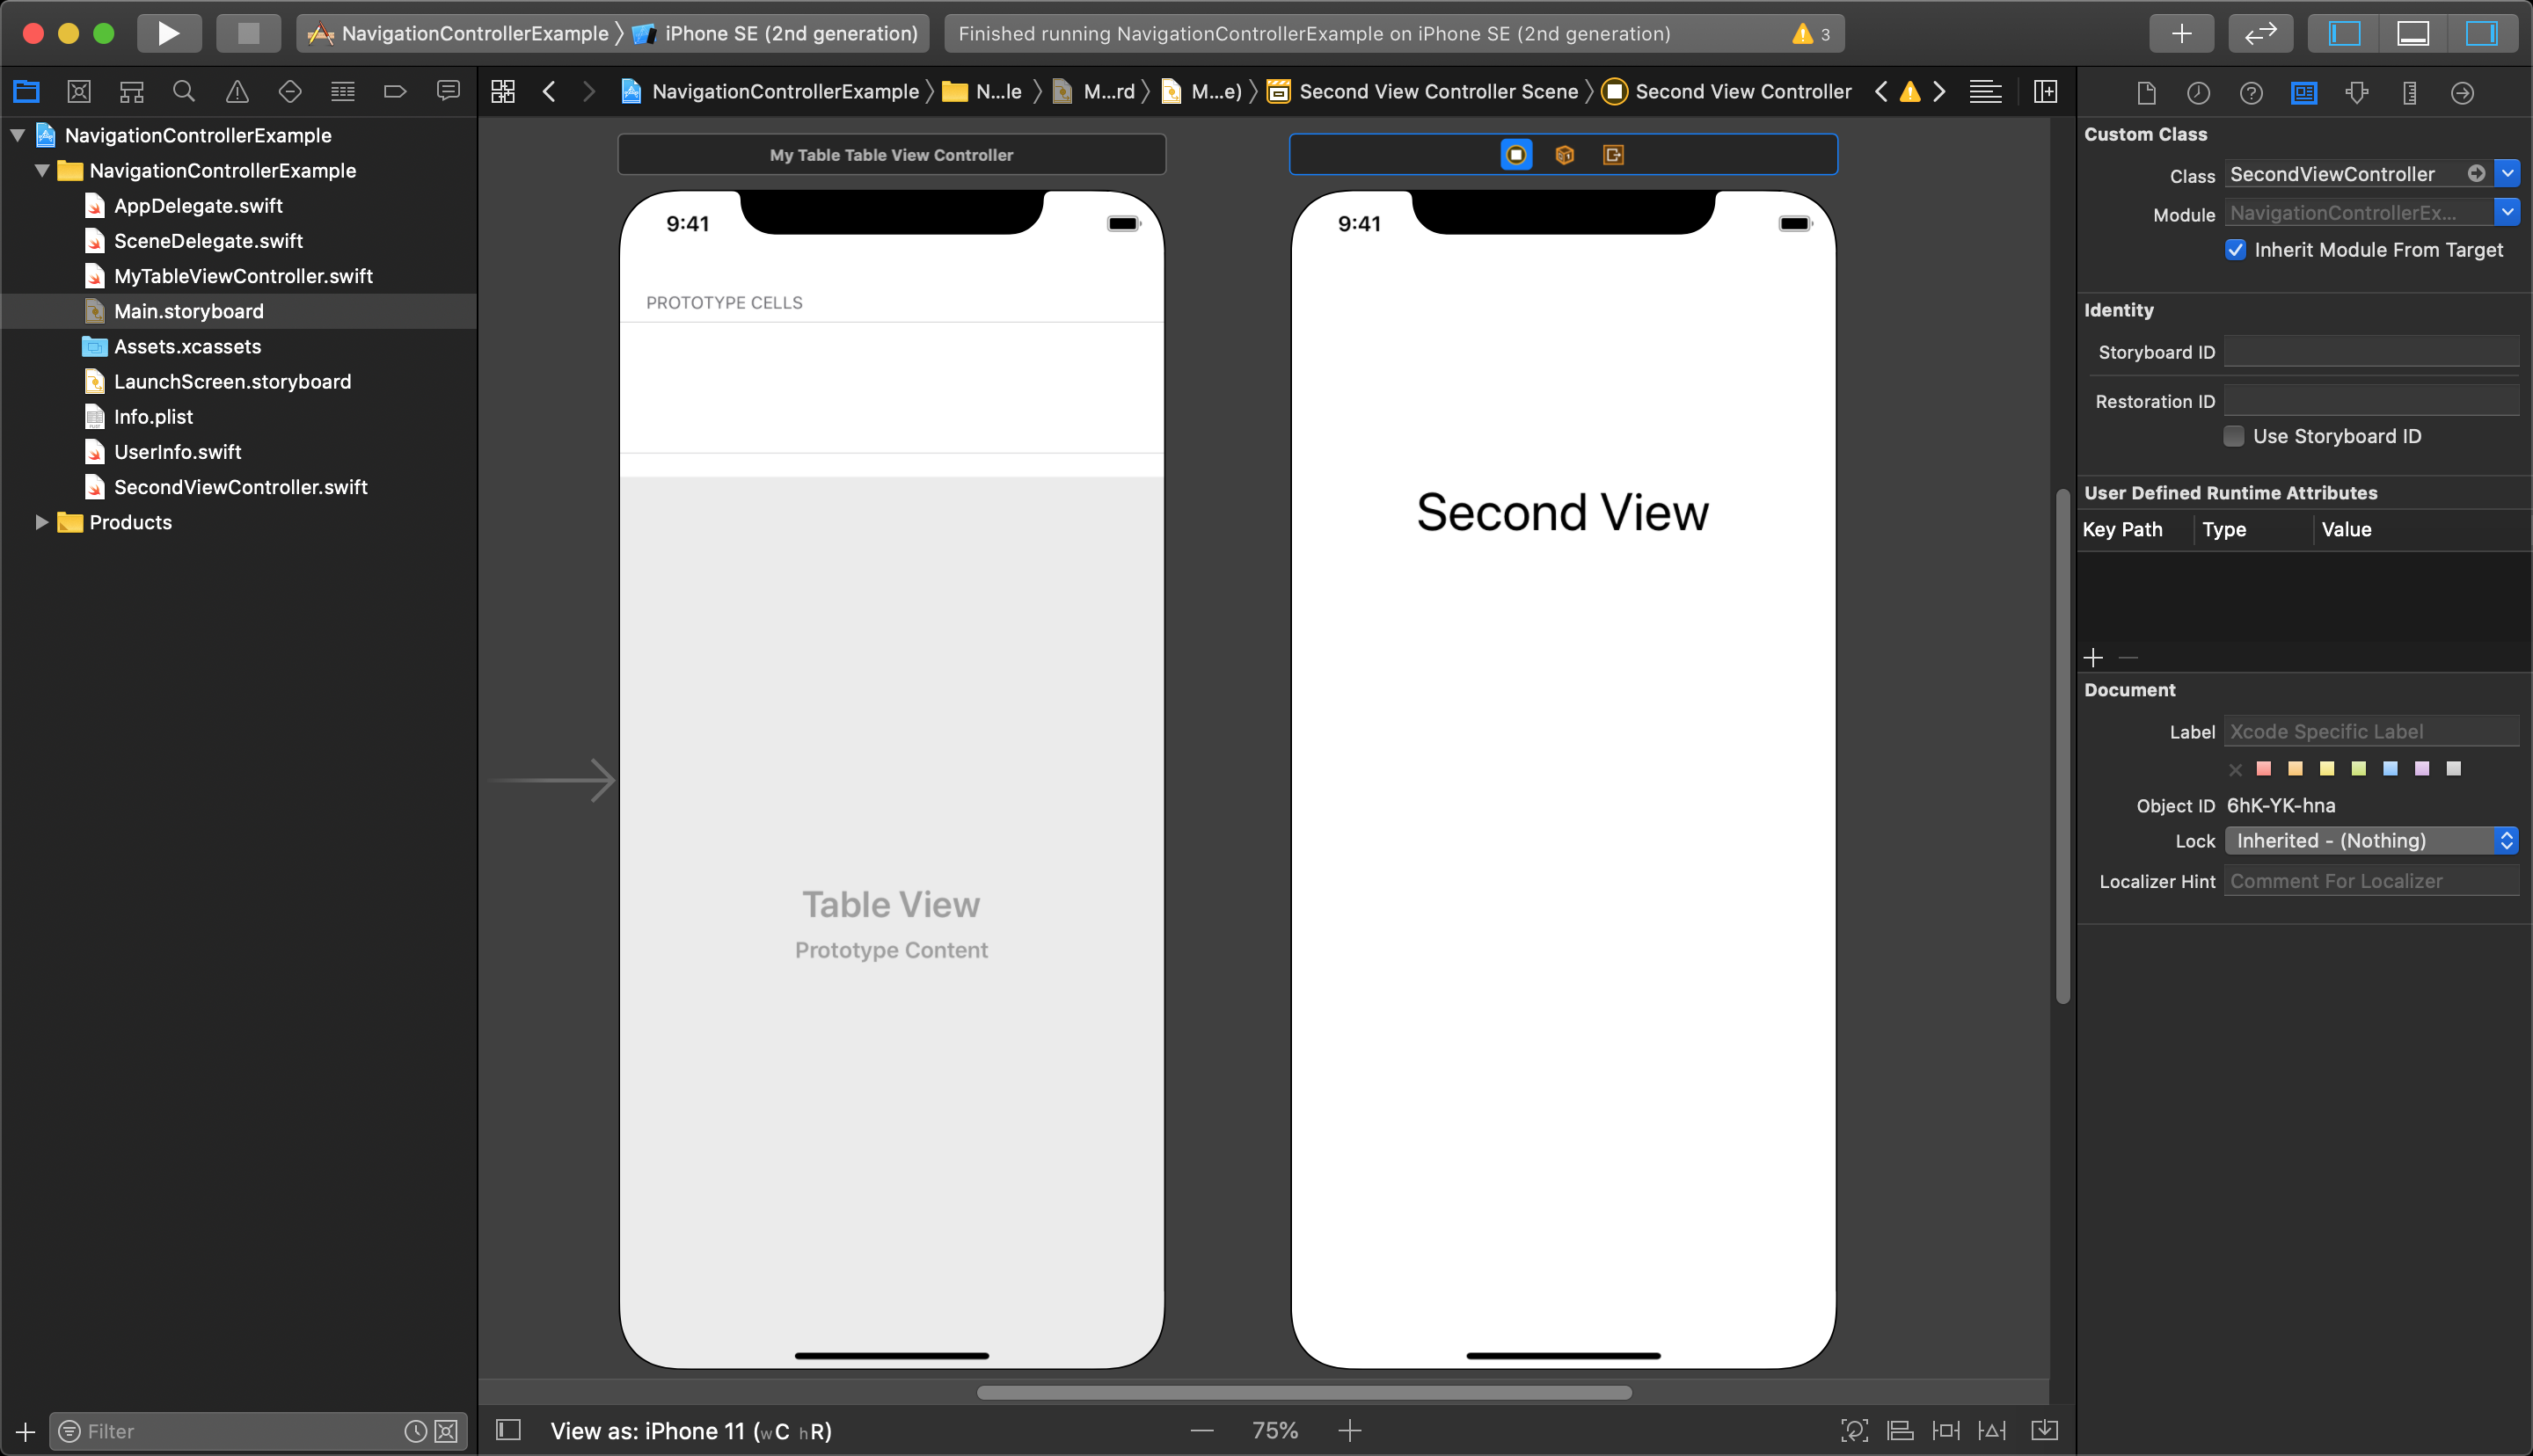
The following image shows the project's storyboard with the existing tableView and a new second basic viewController added to the storyboard. This new viewController has a label displaying the text “Second View”. It also has a new viewController class called SecondViewController that has been setup to control this new view.
TIP
Always remember to set your new view's Custom Class in the Identity Inspector within your storyboard.
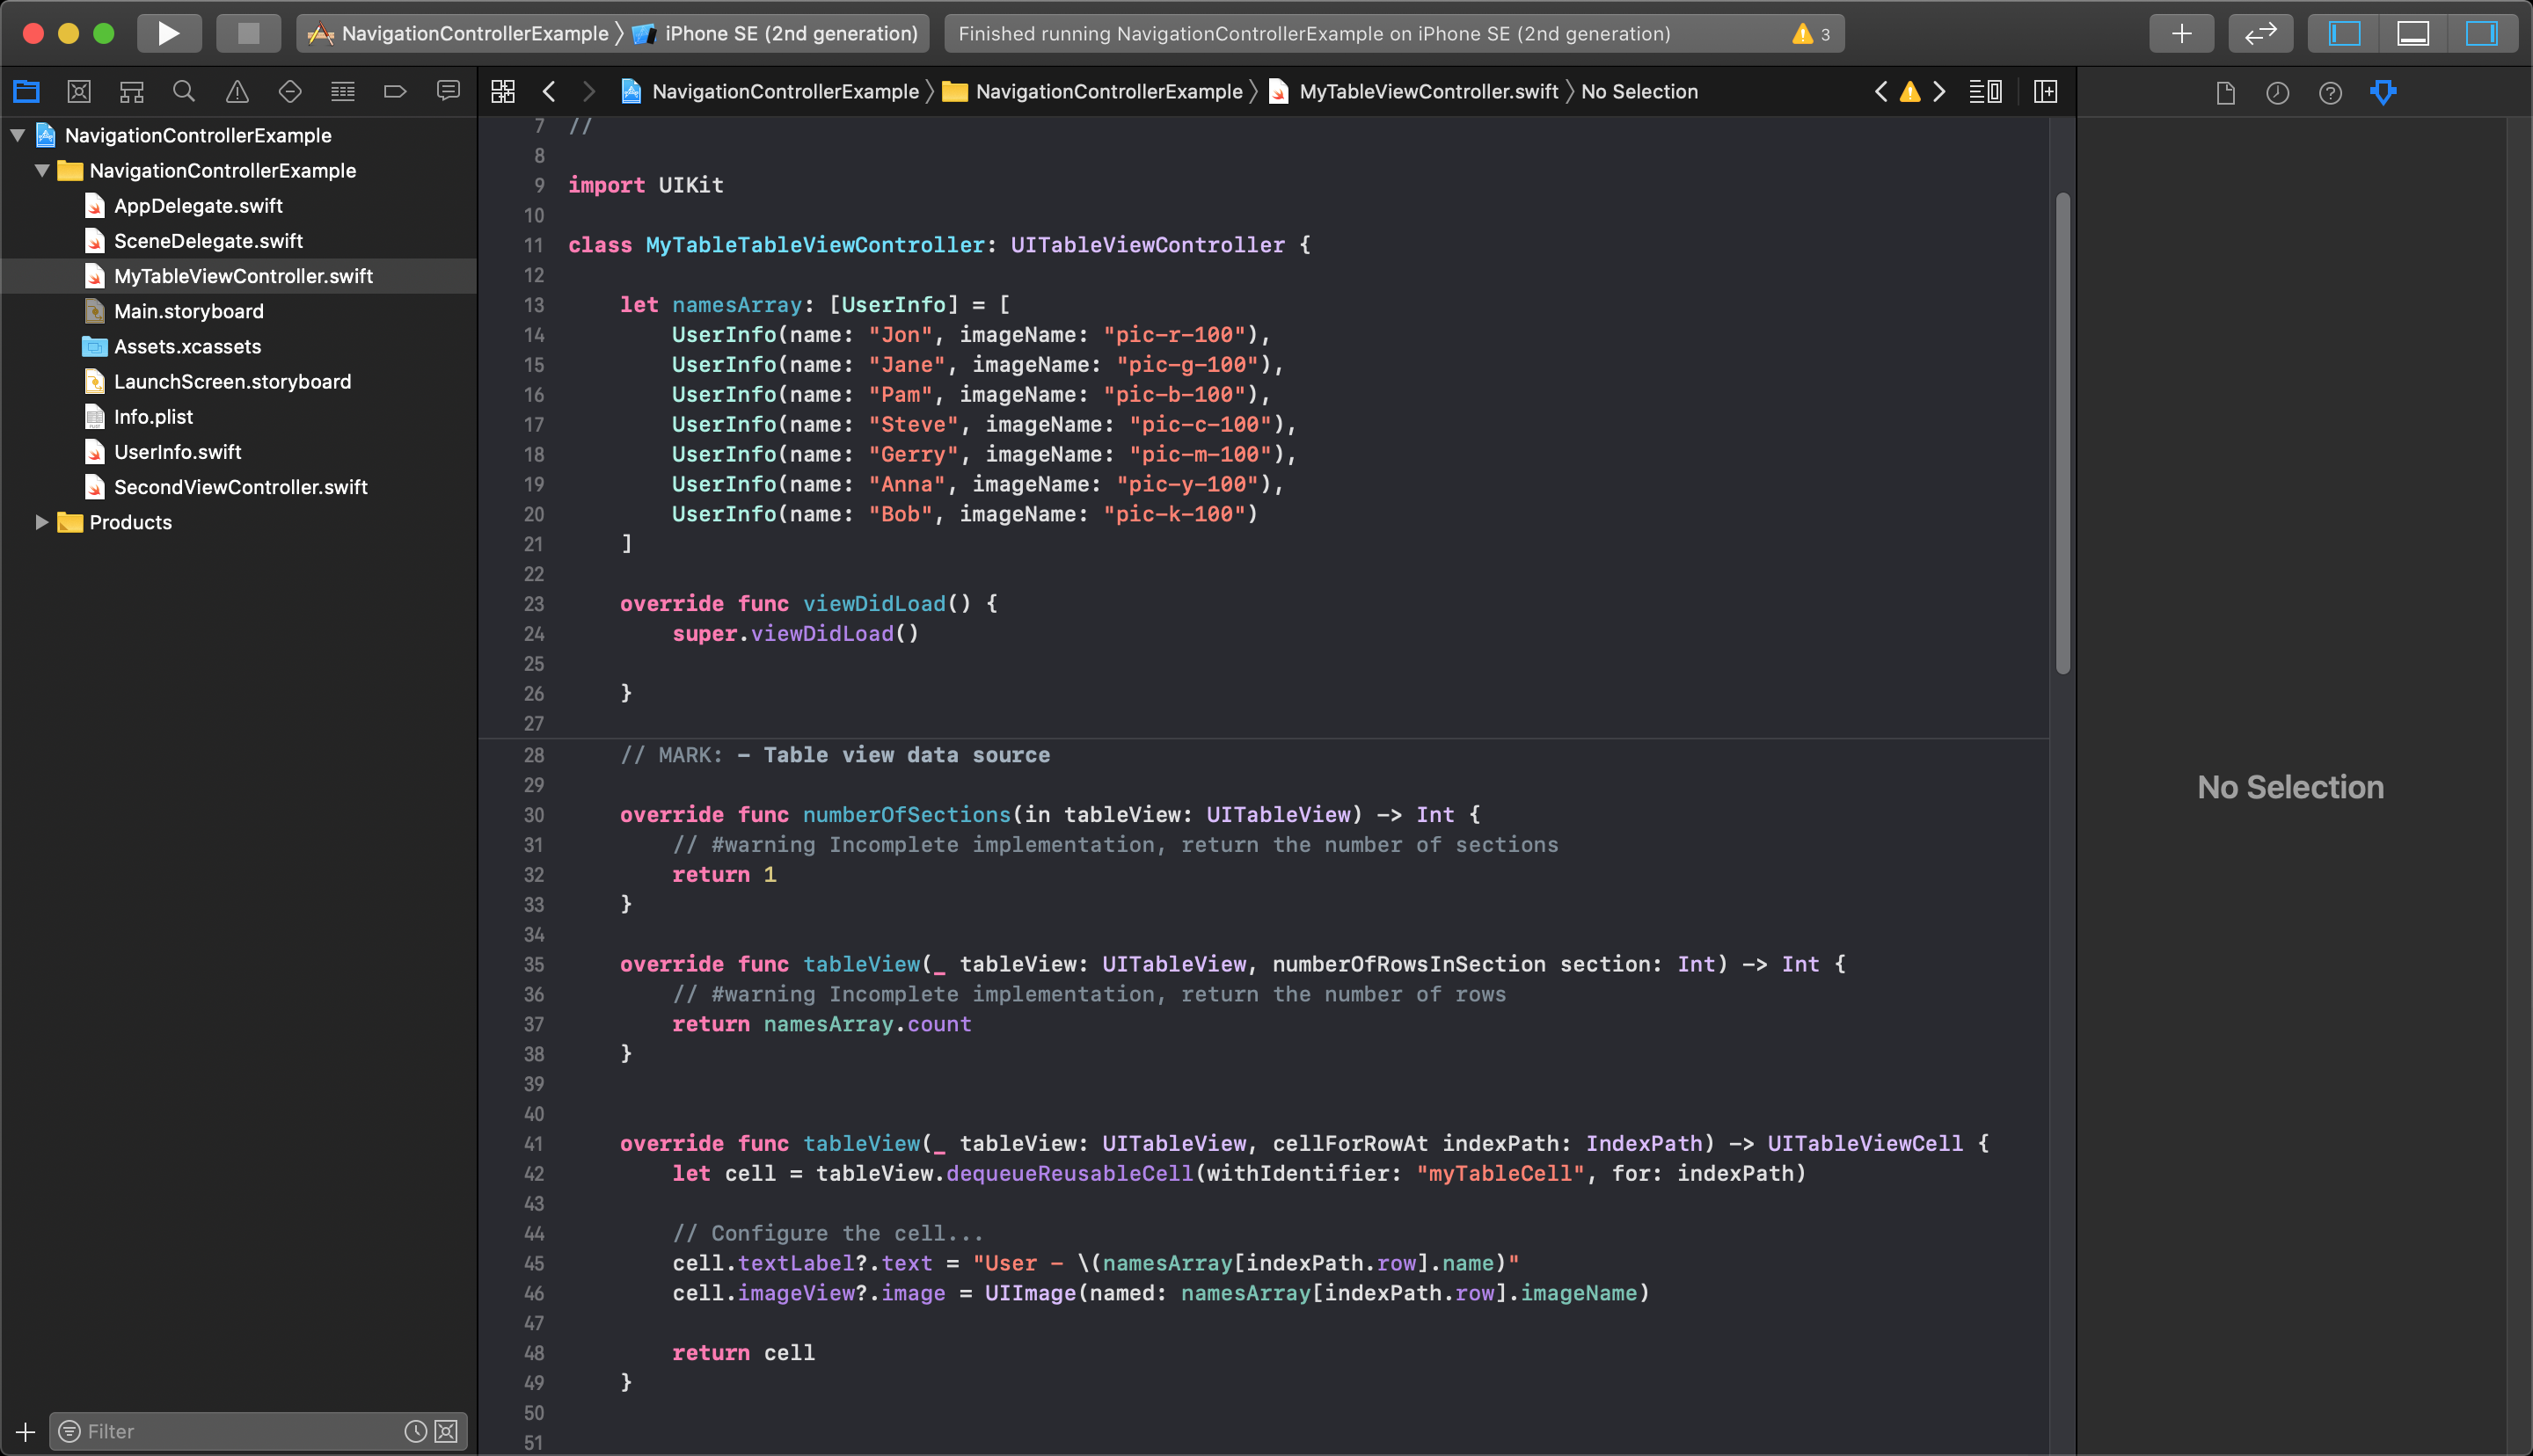
Just to review, in your existing custom tableViewController class in the sample project, you have the array with 7 elements that is used to create the tableViewCells.
The idea here is that you want to have each cell in the table be a clickable button that will navigate to the next view. We want the NavigationController to add and manage the interface to let us navigate to the next view and back.
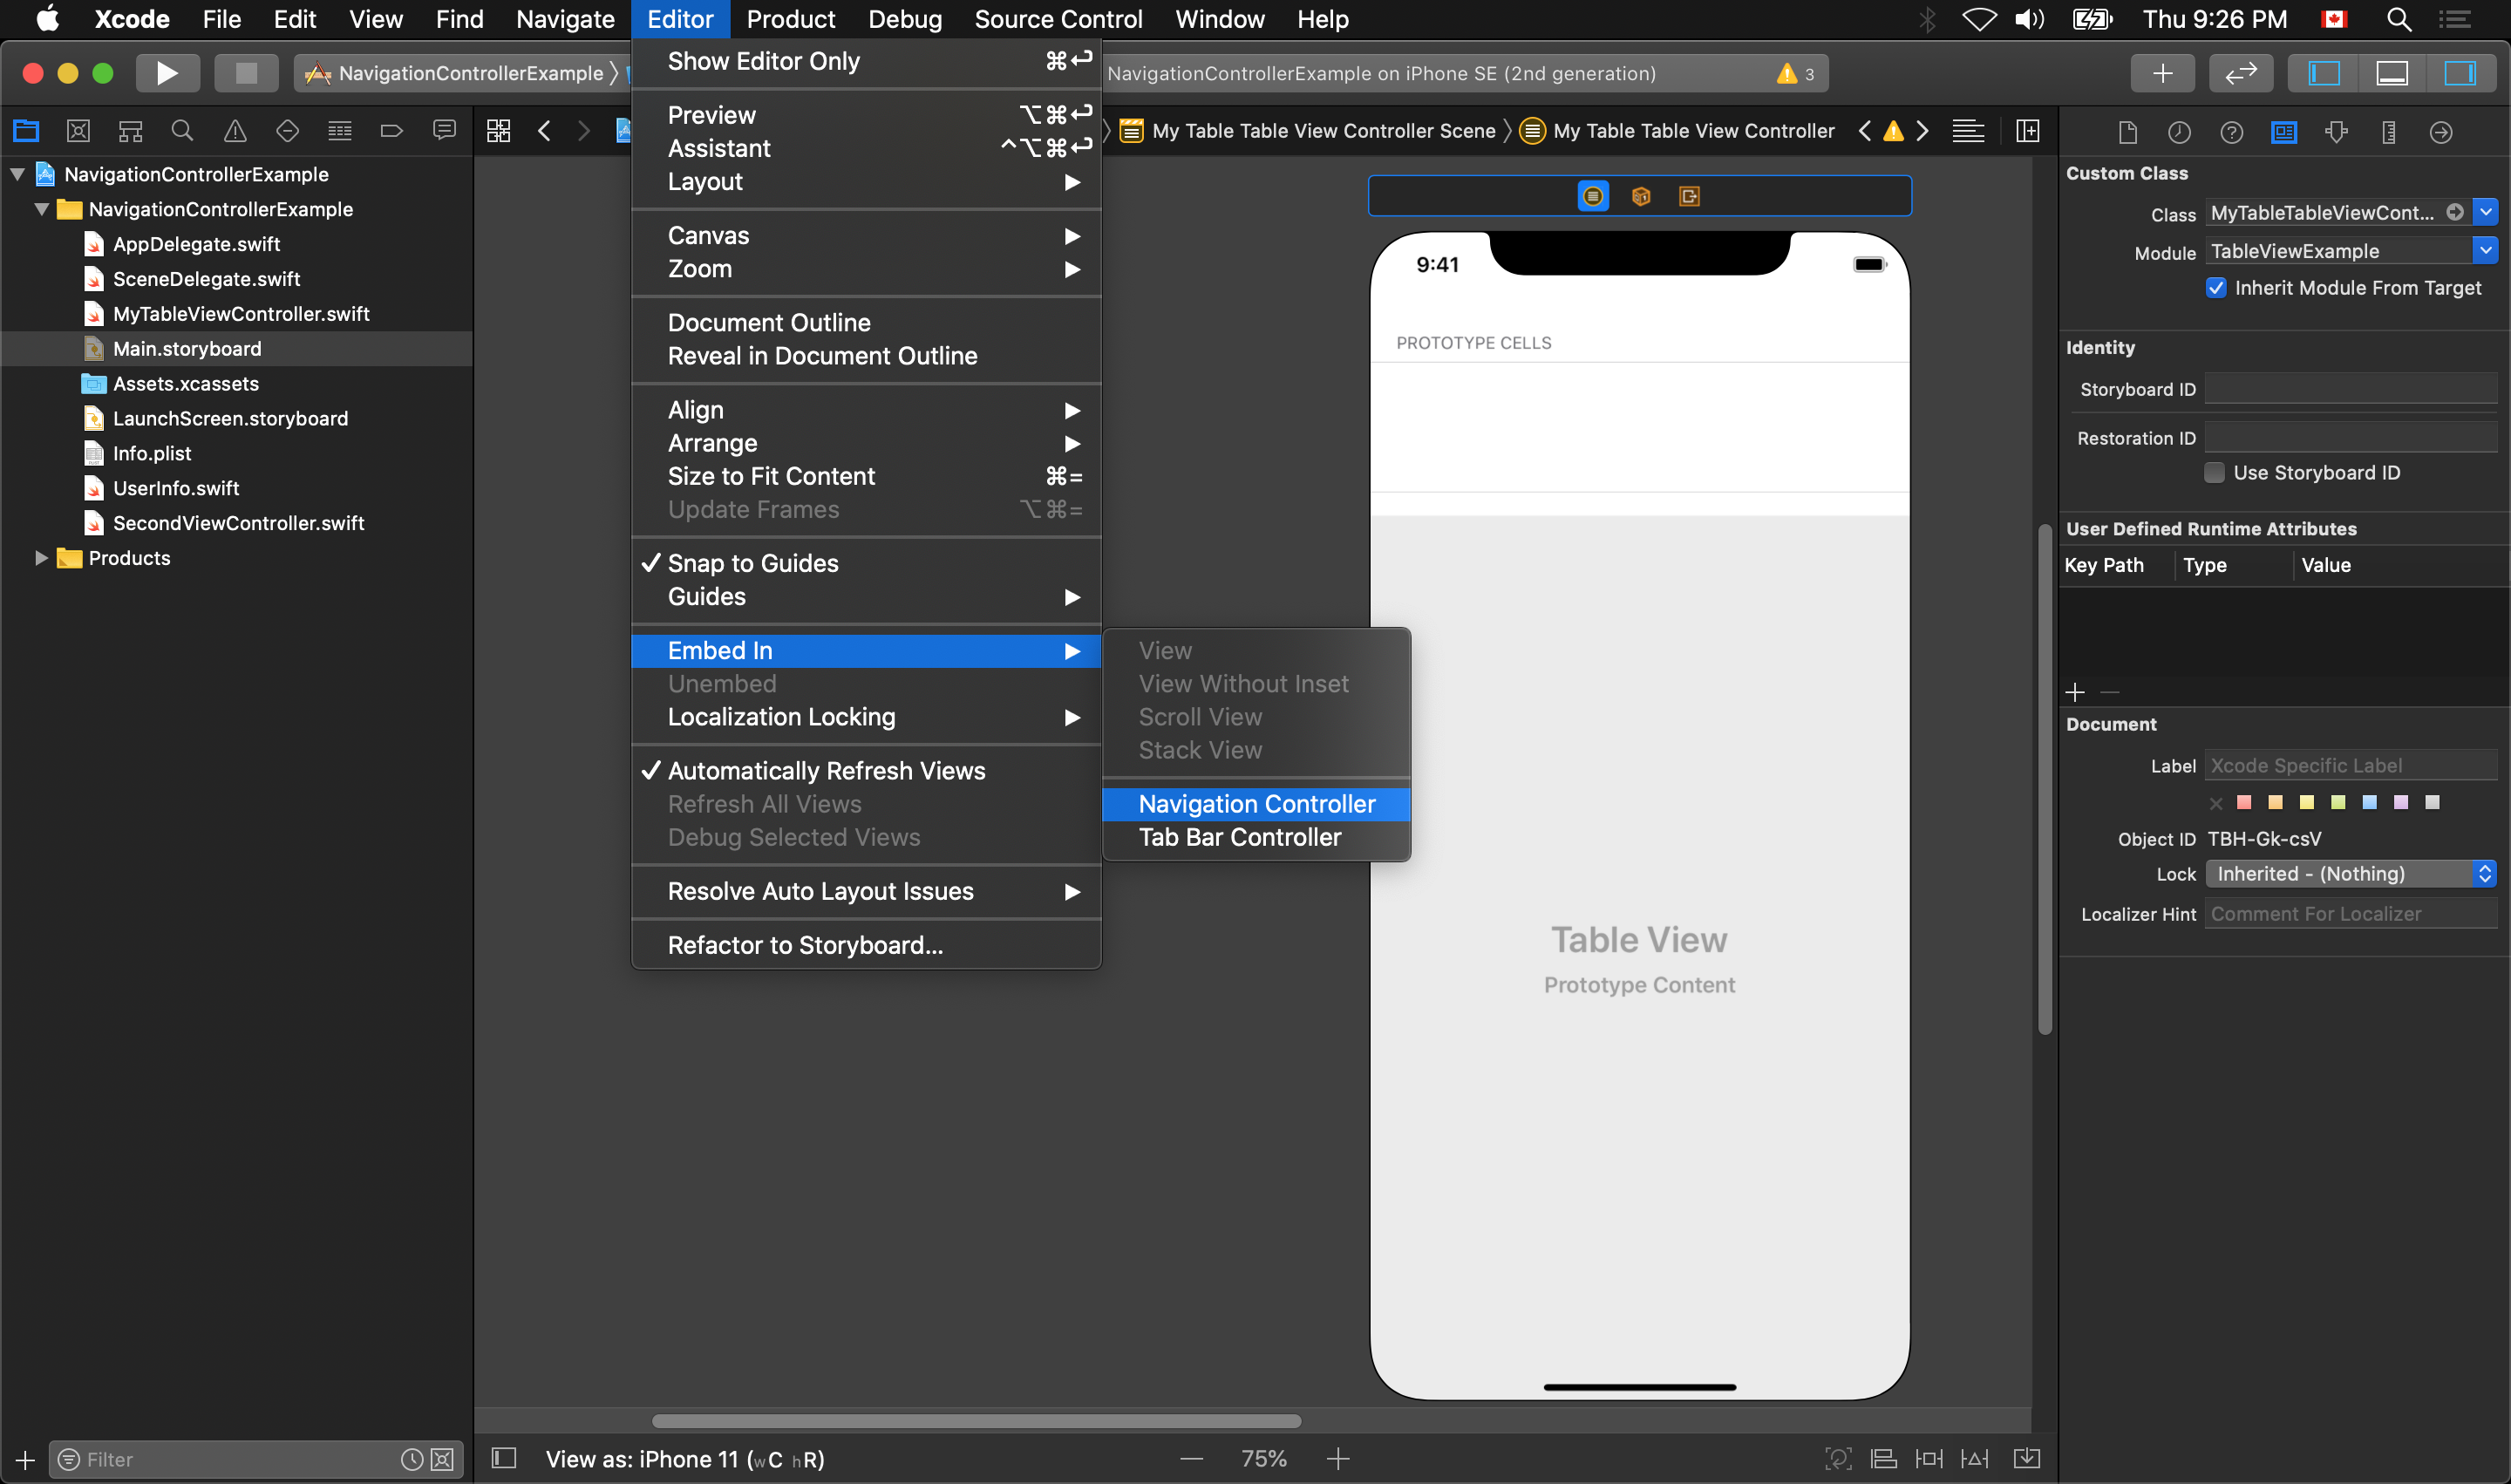
Embed a NavigationController in View
Start by selecting the view in the storyboard you want as the initial root view for the navigation - in this case the tableView. Then, click on the Editor menu at the top and selection Embed In -> Navigation Controller.
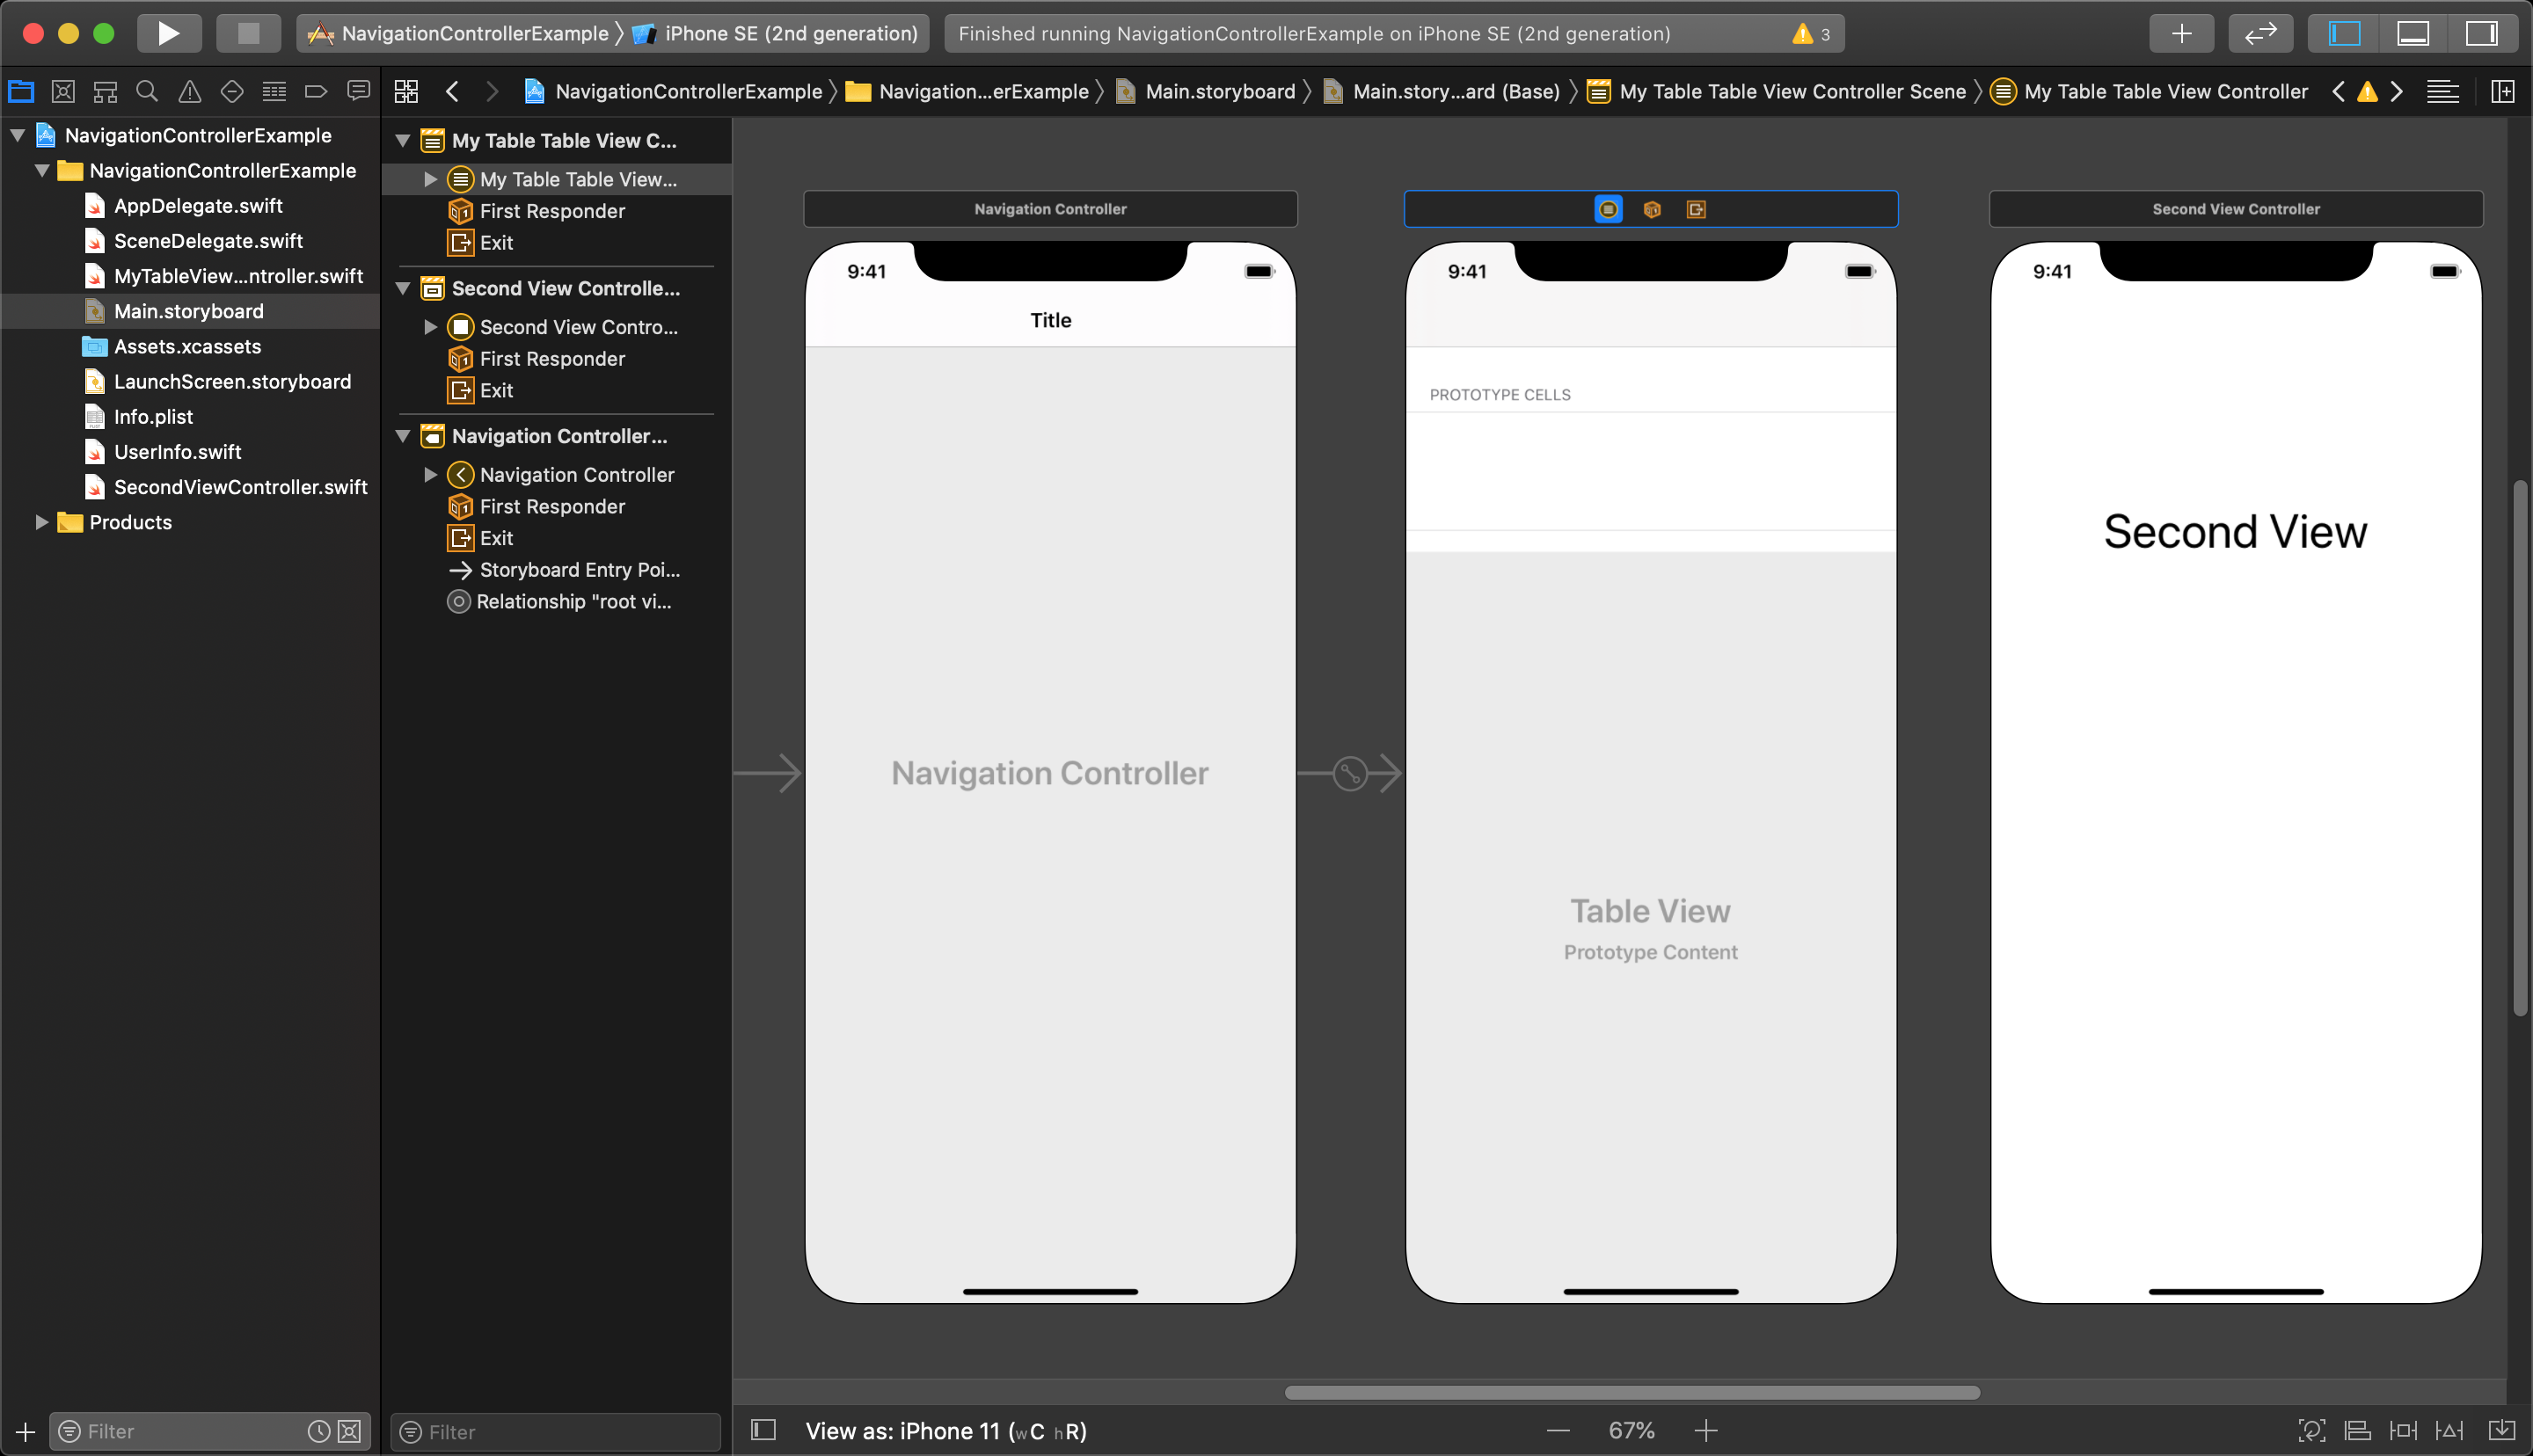
You will see a few things change in your storyboard, the first of which is that the new navigationController has been added, looking like an entirely new view that is grey with the words "Navigation Controller" written on it.
If the original view had previously been set to the initial view, the navigationController will instead be set to the initial view of the application. You can also see the navigationController is connected to the tableView by an arrow with a symbol on it. This is called a Segue and will navigate to the first view of the tableView when the application loads the navigationController.
Connecting a Segue
Next, we want to connect the tableView's prototype cell with a segue to the second view. When you connect the Prototype Cell of a table to another view it will make a segue connection for each cell created in the table to that second view.
To connect this segue, start by selecting your tableView's prototype cell in the storyboard.
Press and hold the control key and mouse click (Control+click) on the selected cell and drag the connection out from the cell. Drag it to the view you want to connect to - in this case the one labeled Second View.
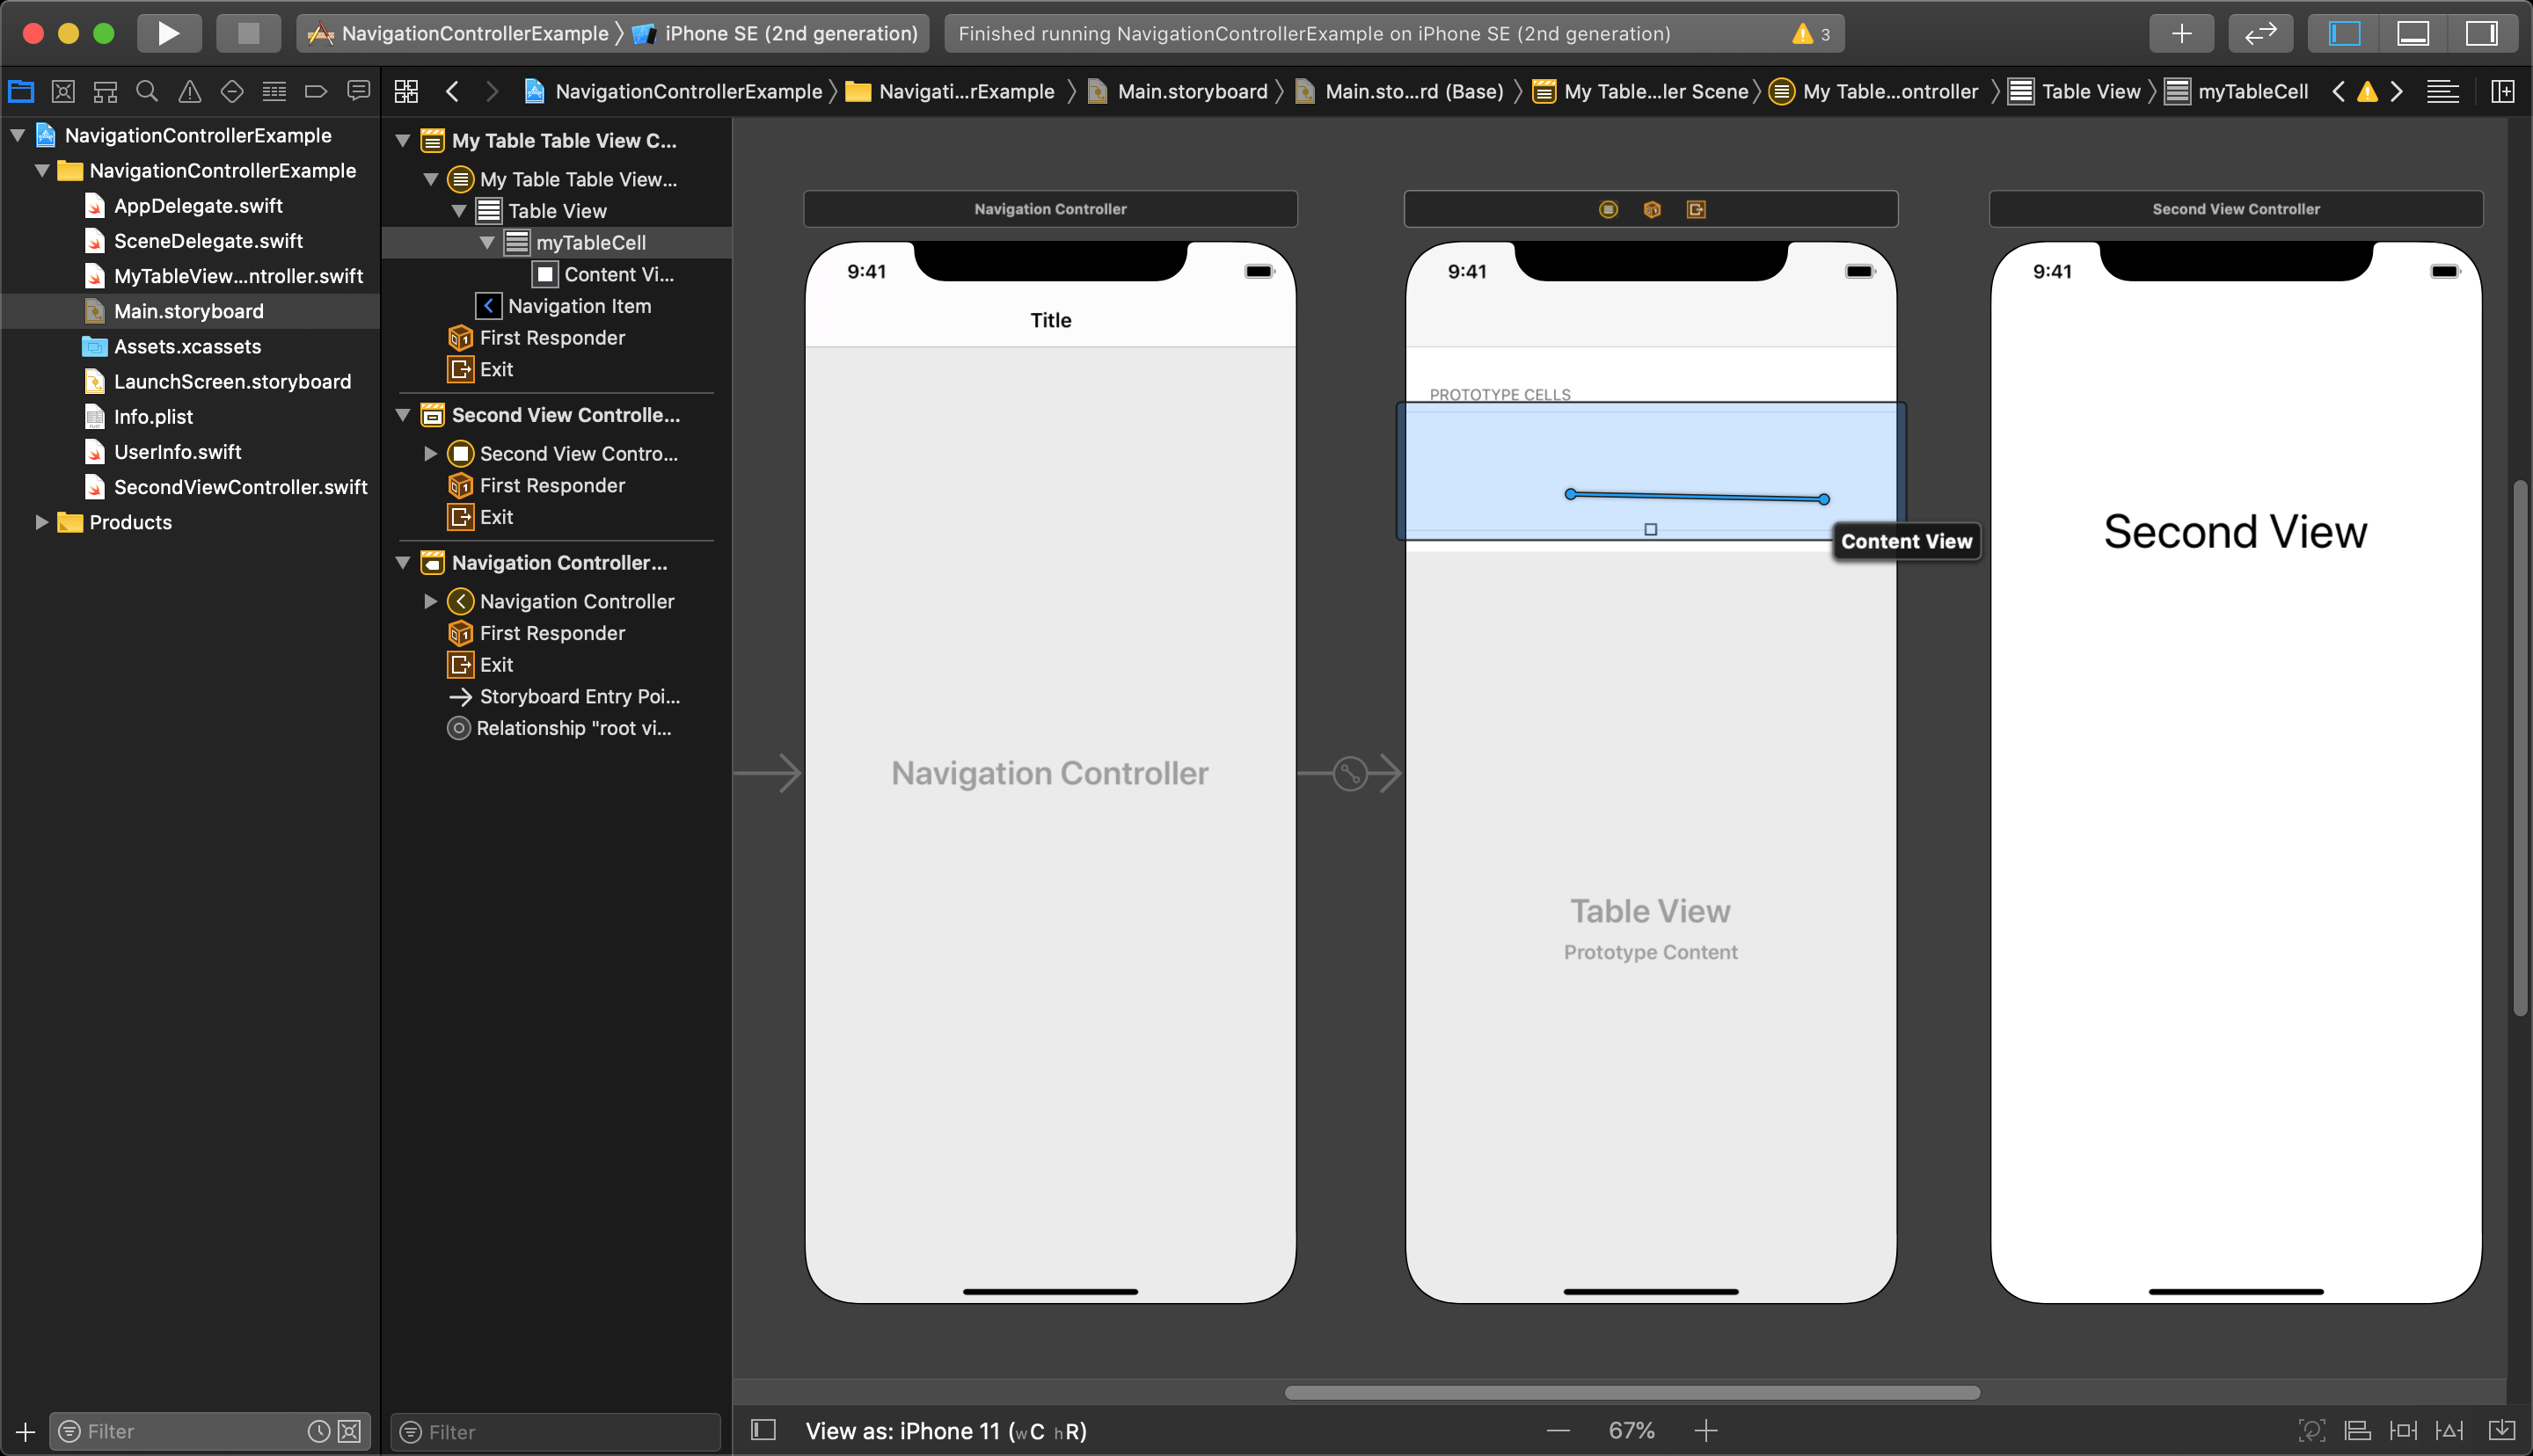
When it highlights the second view in blue, let go of the mouse button and a menu will pop up.
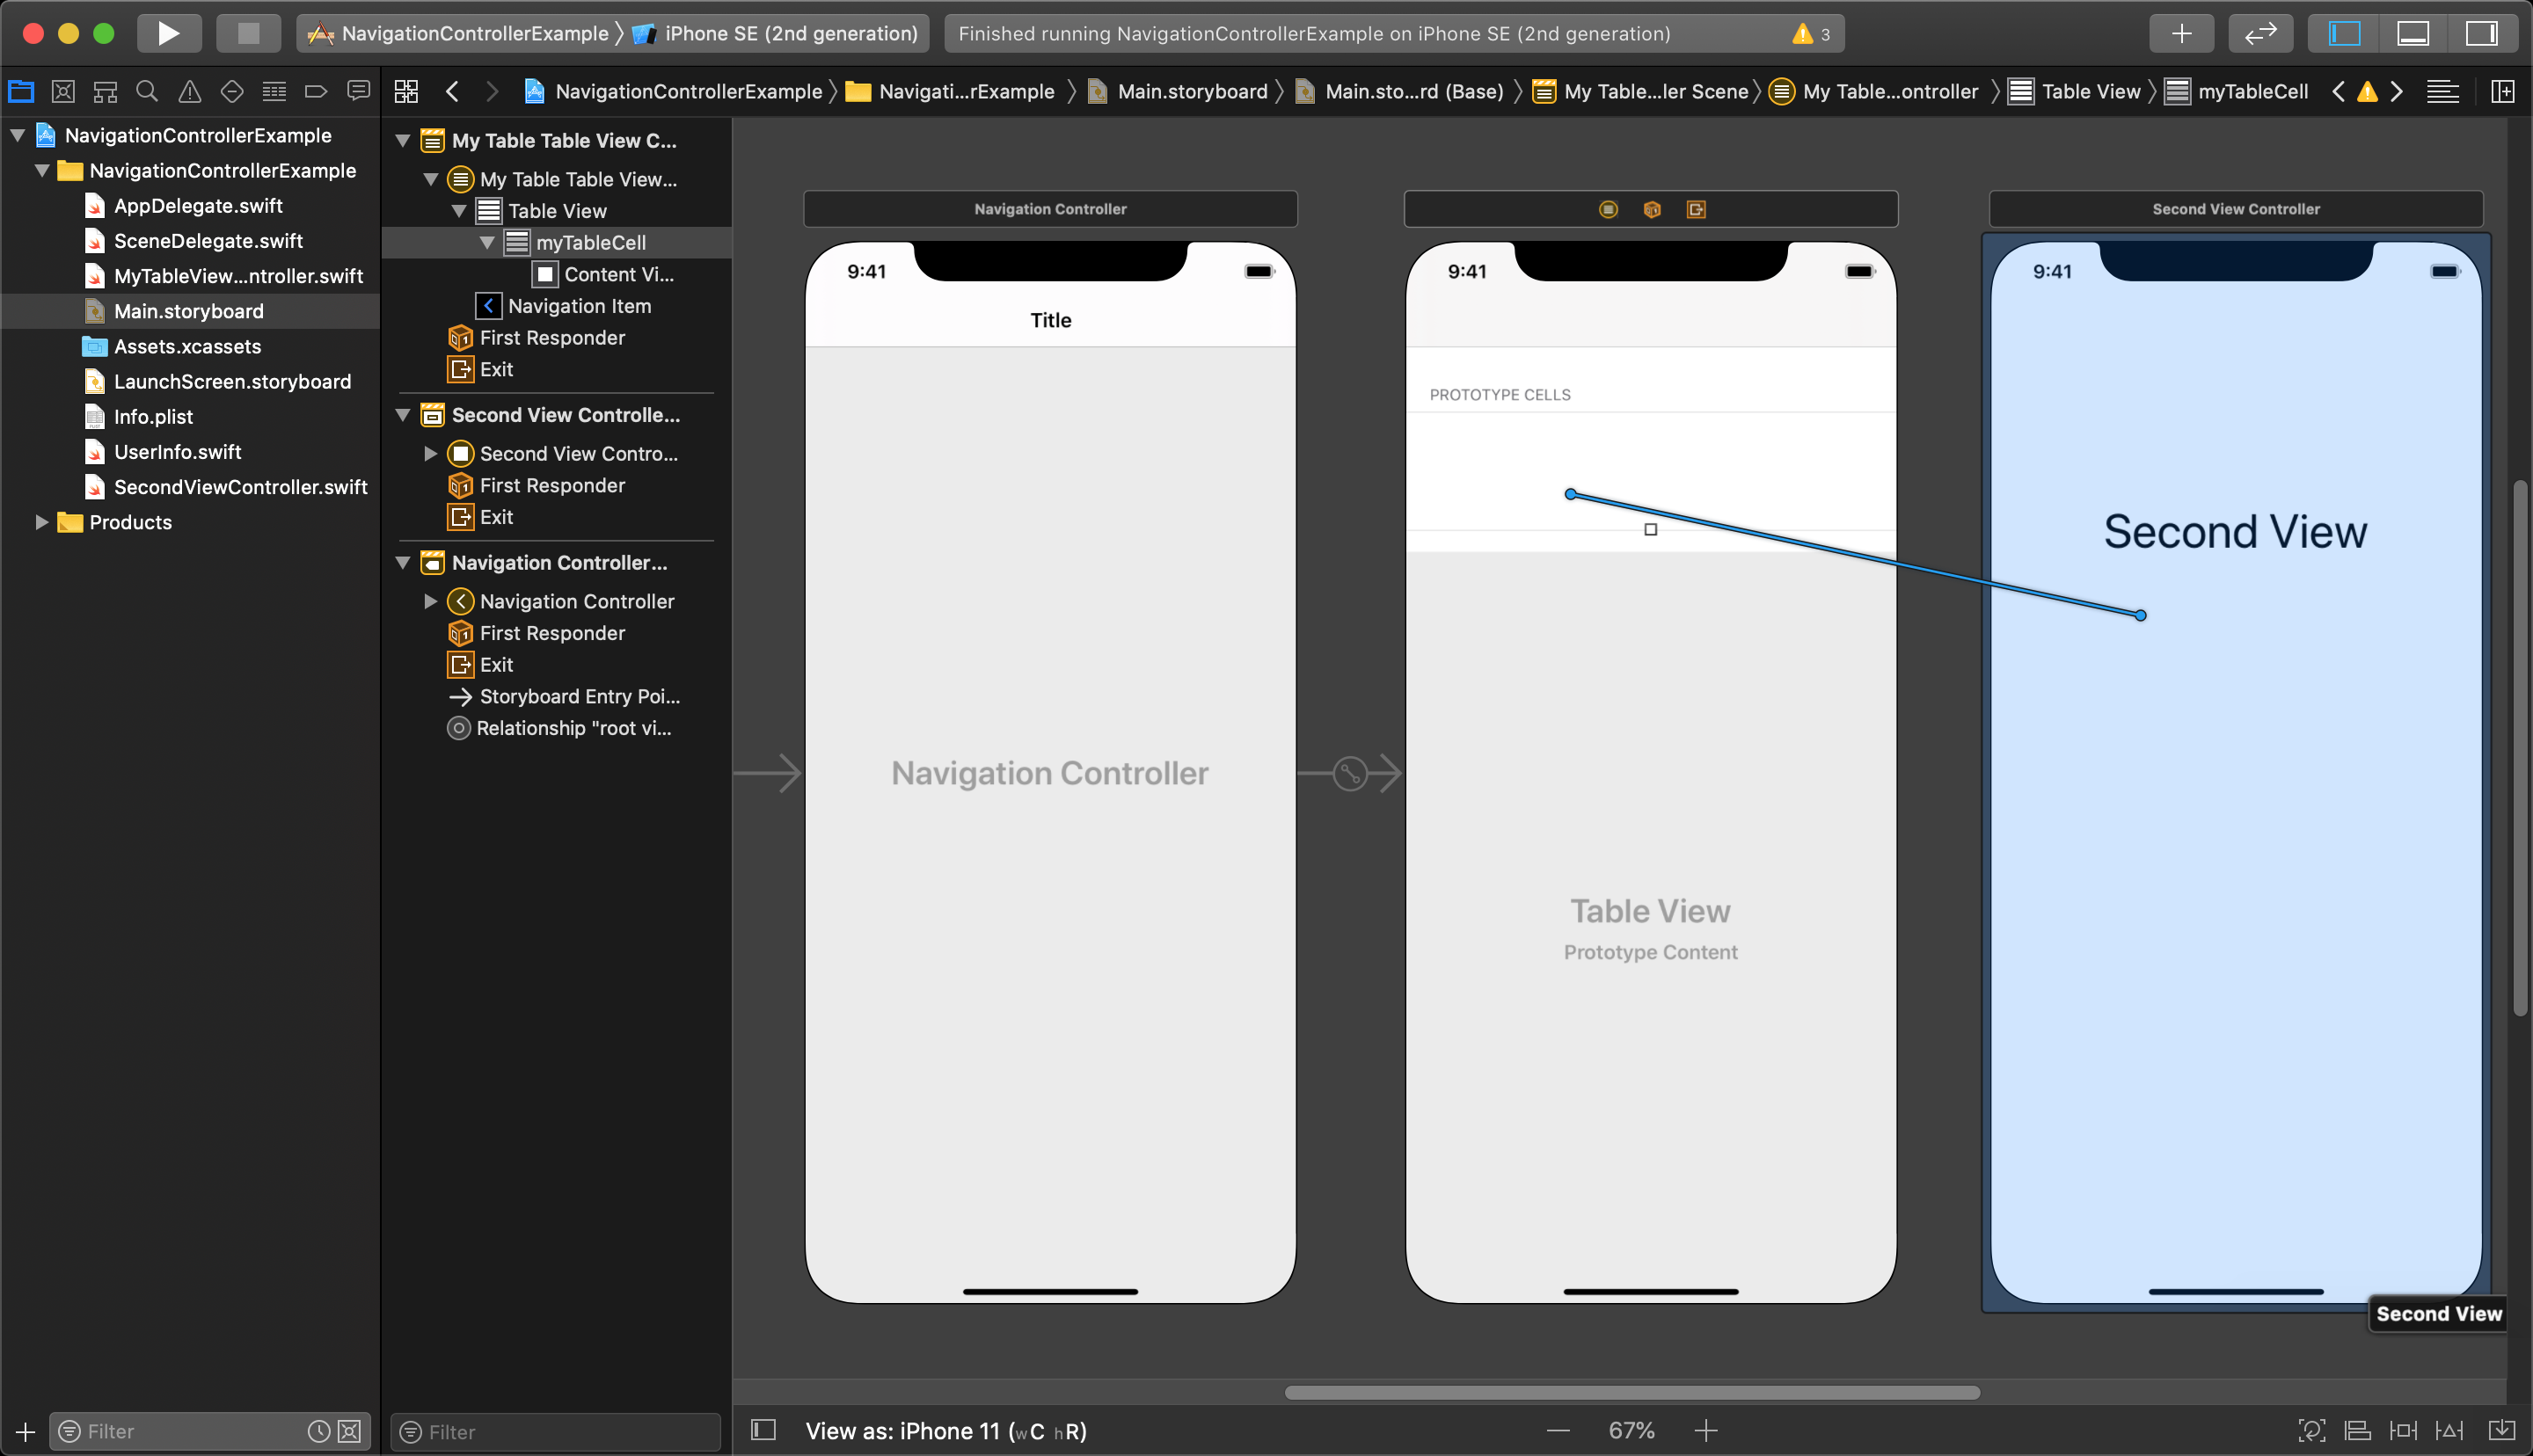
In the menu that opens up, under the Segue Selection heading, select the Show option.

Now, when you run the application the will see the tableView has a grey horizontal bar across the top of it. This is the navigationController and will show buttons as you navigate away from the initial view.

Each cell in the tableView will now work as a button letting the user click on it and segue to the second view.
The second view will also show the grey navigationController bar that has persisted at the top, now with a Back button in it created by the navigation. This button has been created by the navigationController, and pressing it tells the navigationController to unwind the segue back to the previous view.
Unwinding Segue with Navigation Controller
If you want to programmatically unwind a segue in your code while using a NavigationController, you need to call the following function:
navigationController?.popViewController(animated: true)
If you want to unwind all the segues back to the initial view, you can simply call this:
navigationController?.popToRootViewController(animated: true)
Passing values from a TableViewCell to a second ViewController
In the last lesson, you used the IndexPath.row value passed into the tableView(tableView, cellForRowAt indexPath) function to access each array object and get information for each cell in the tableView. When using a TableView where you have your Prototype Cell connected to segue to another view and you want to pass information about that specific cell the user tapped, you will need the identify what cell was tapped as you prepare to segue to the next view.
In your override func prepare(for segue: UIStoryboardSegue, sender: Any?) function you can get the number of the cell that was tapped to triggered the segue using the following code:
let indexPathRow = tableView.indexPathForSelectedRow?.row
This gets the currently selected tableViewCell's row number as an Int, which can be used to as an index for getting that cell's data from an array like this:
let currentUser = userArray[indexPathRow]
This will let you access the corresponding data to pass to the next viewController class.
The following videos give you more knowledge about navigating between multiple views in your application.
iOS 11 Fundamentals - Choosing a Navigation Method for Multiple View Controllers Pluralsight
iOS 11 Fundamentals - Adding a Navigation Controller to an Existing Project Pluralsight
iOS 11 Fundamentals - Creating a Tabbed Application Pluralsight
iOS 11 Fundamentals - Creating iOS Apps with Multiple Screens Summary Pluralsight