Segues and Passing Data
There are many ways to navigate from one view to another in an iOS application, but the basic principles are always the same: the initial view of the application will have a connection (called a Segue object) that connects it to the second (destination) view. If something in your application tells the Segue object to perform the segue, it transitions (with an animation) from the first view to the second. When the user wishes to transition from the second view back to the first, the segue can be 'unwound' to transition back to the first view again.
You can use a button action to trigger a segue hooked up between an initial view and the second view of your application. Then, to get back to the first view, the second view could use its own button to tell the segue to unwind and go back to initial view.
TIP
With the functions shown below, the segue can be triggered almost anywhere within the ViewController class. Instead of triggering the segue in a button action you can have any other code trigger it if you want.
Connecting Views with a Segue
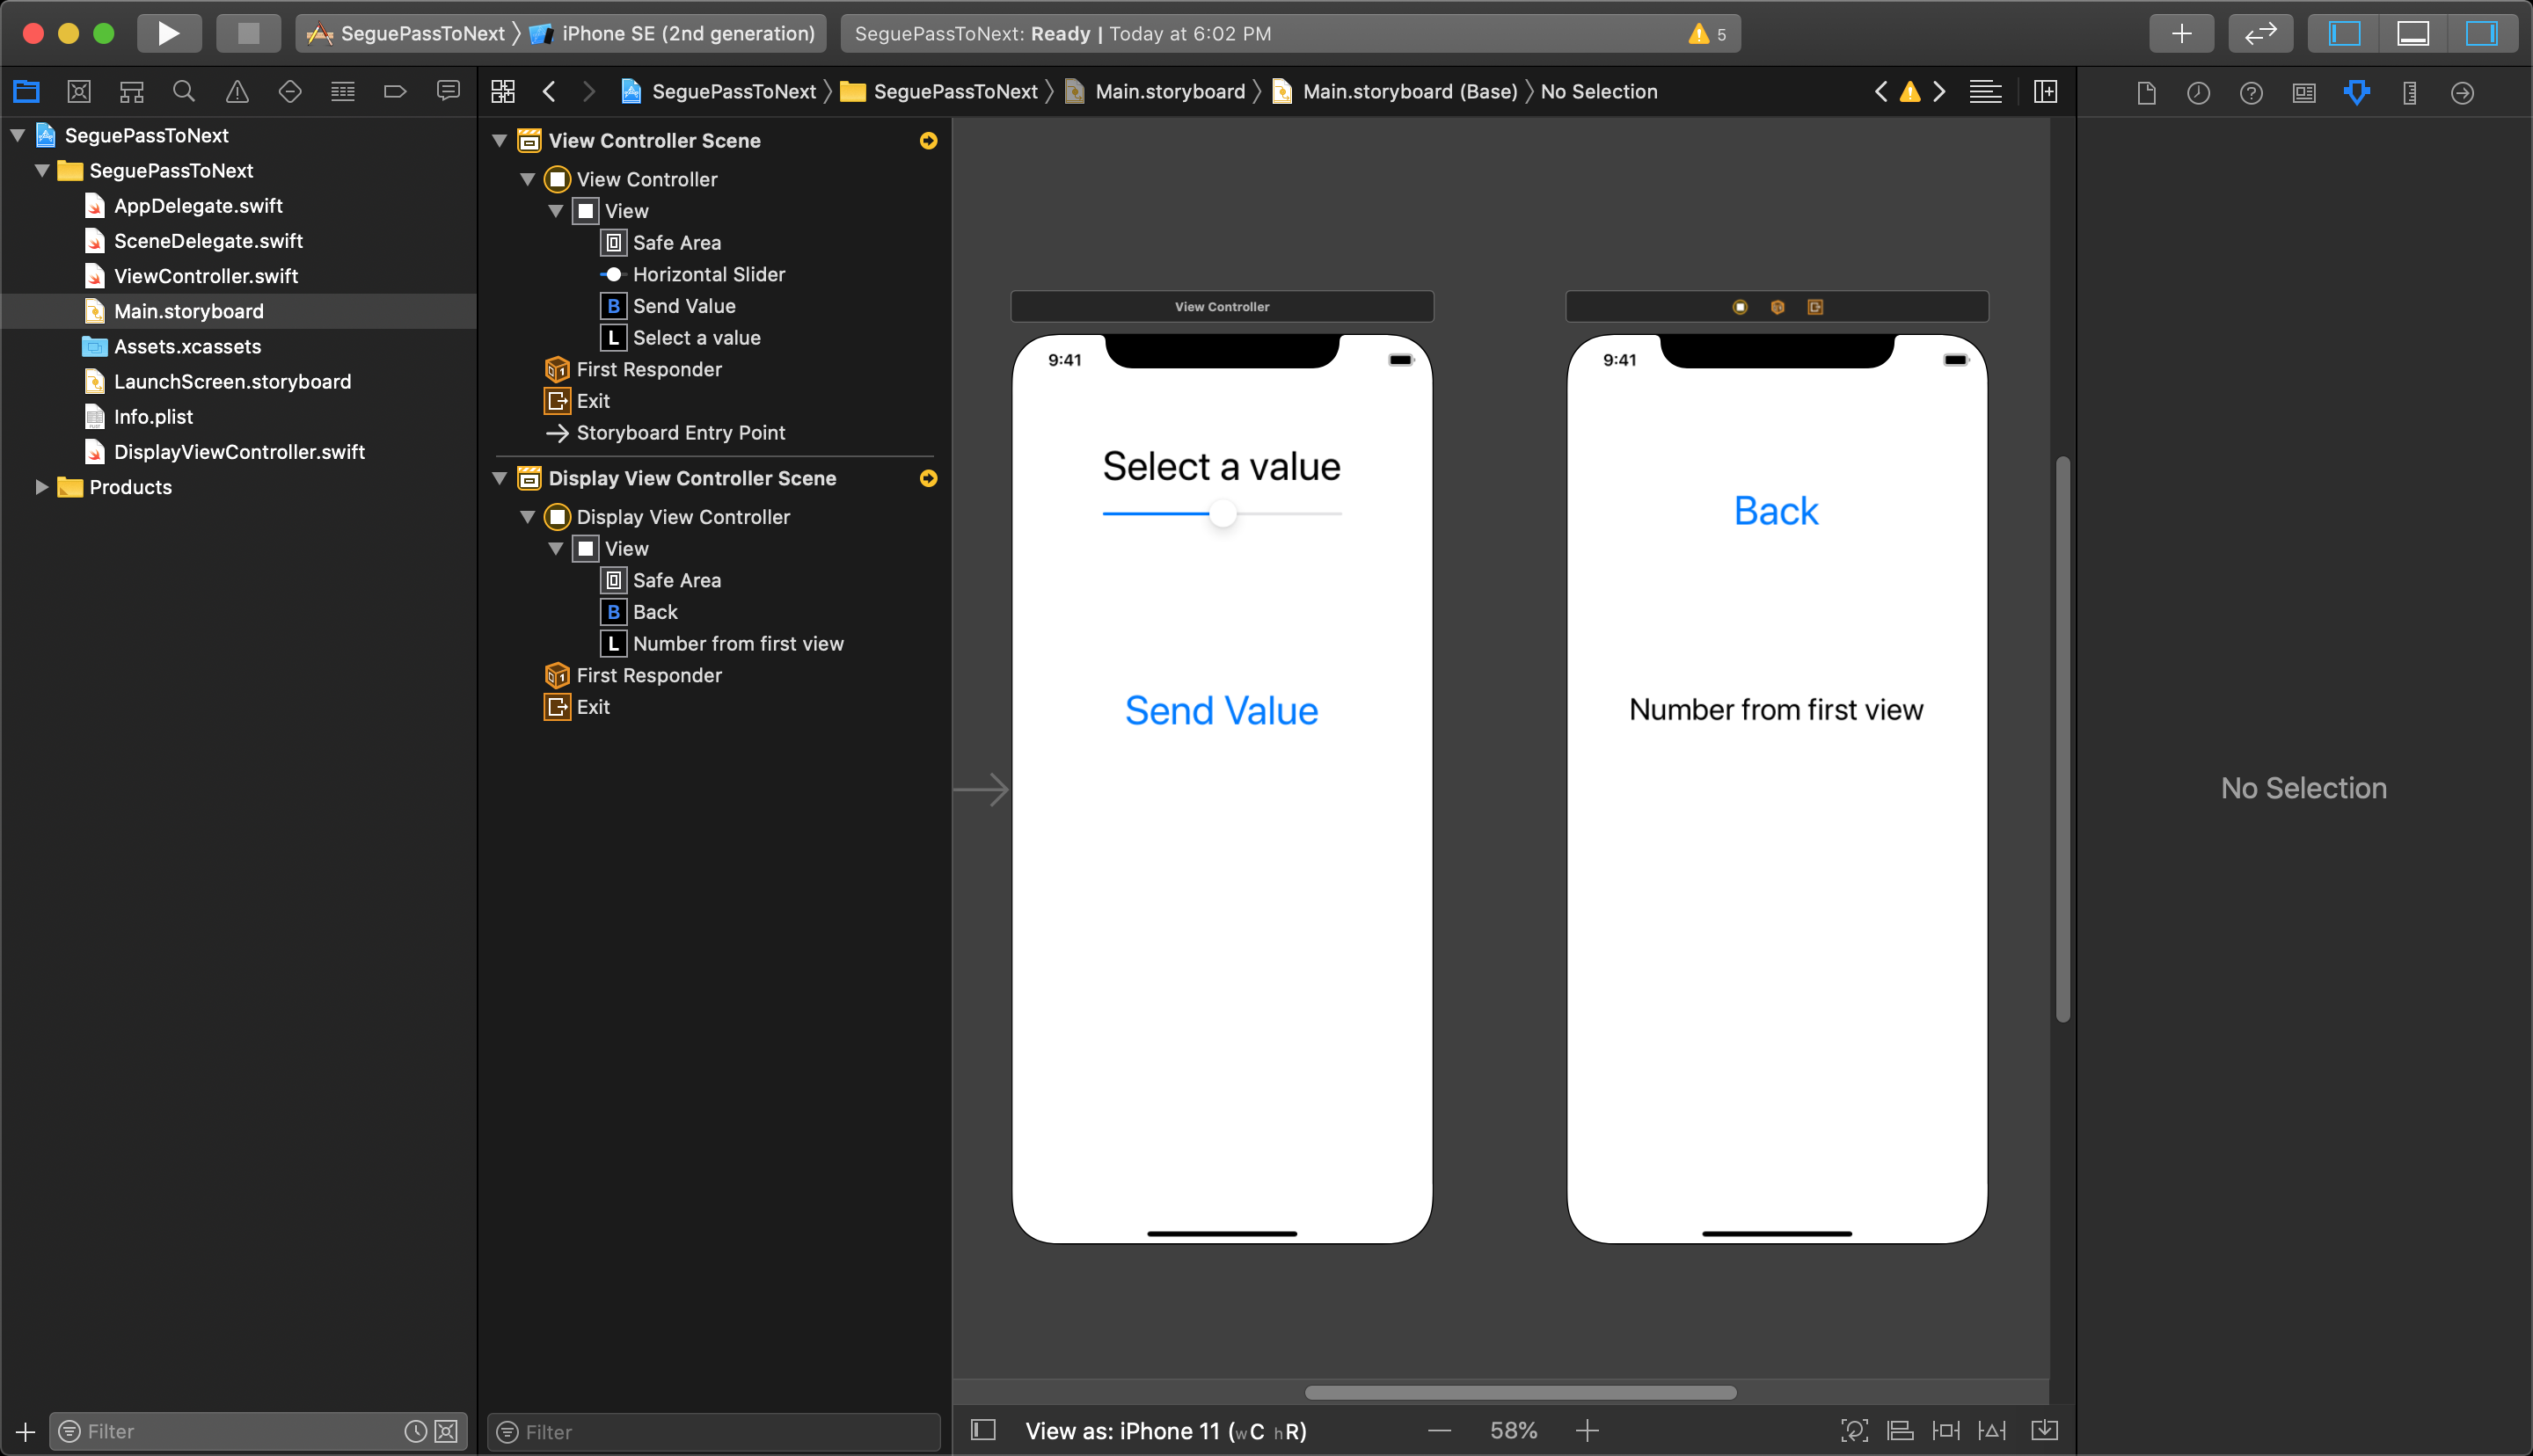
Let's look at an example where we have two views we want to connect with a segue and pass the value of the slider from the first view to the second to have it displayed in the text label. In this case the segue will be triggered by a button in the first view, and will be unwound when the button in the second view is pressed.
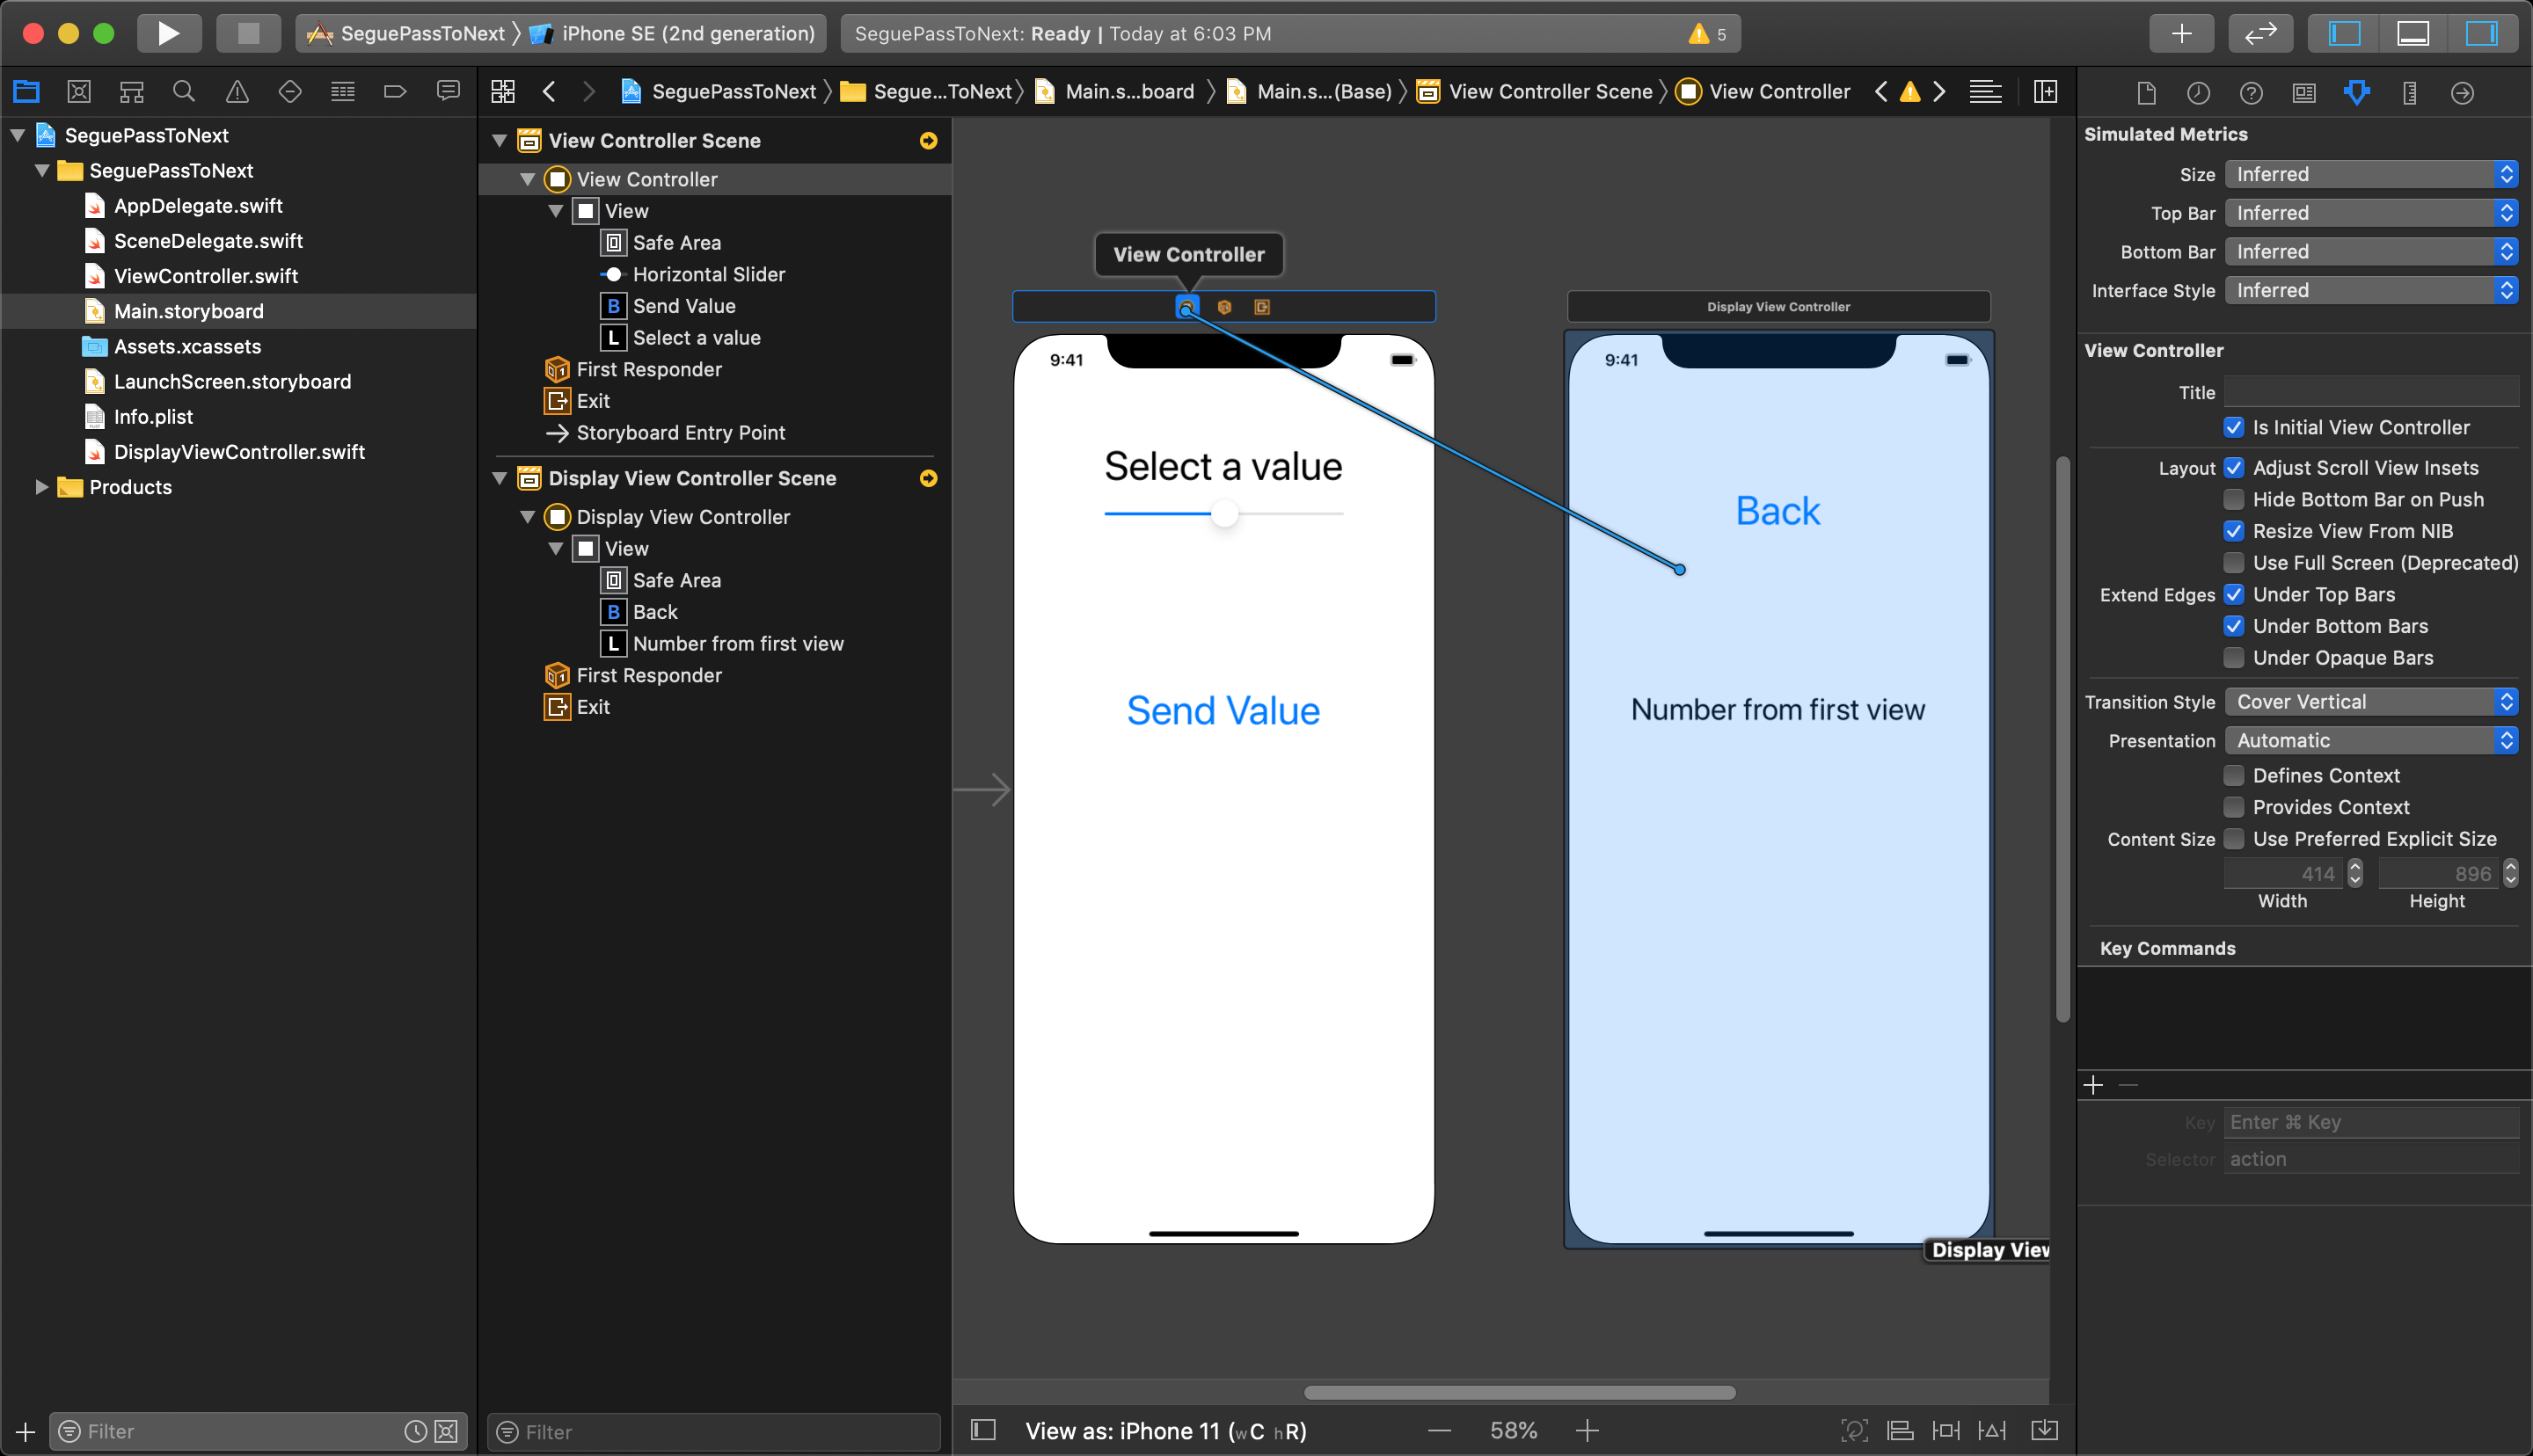
Start in the storyboard by holding Control+click and dragging from the top viewController of the first view with the blue line to the background of the second view (so the whole second view highlights blue) and let go of the mouse button.
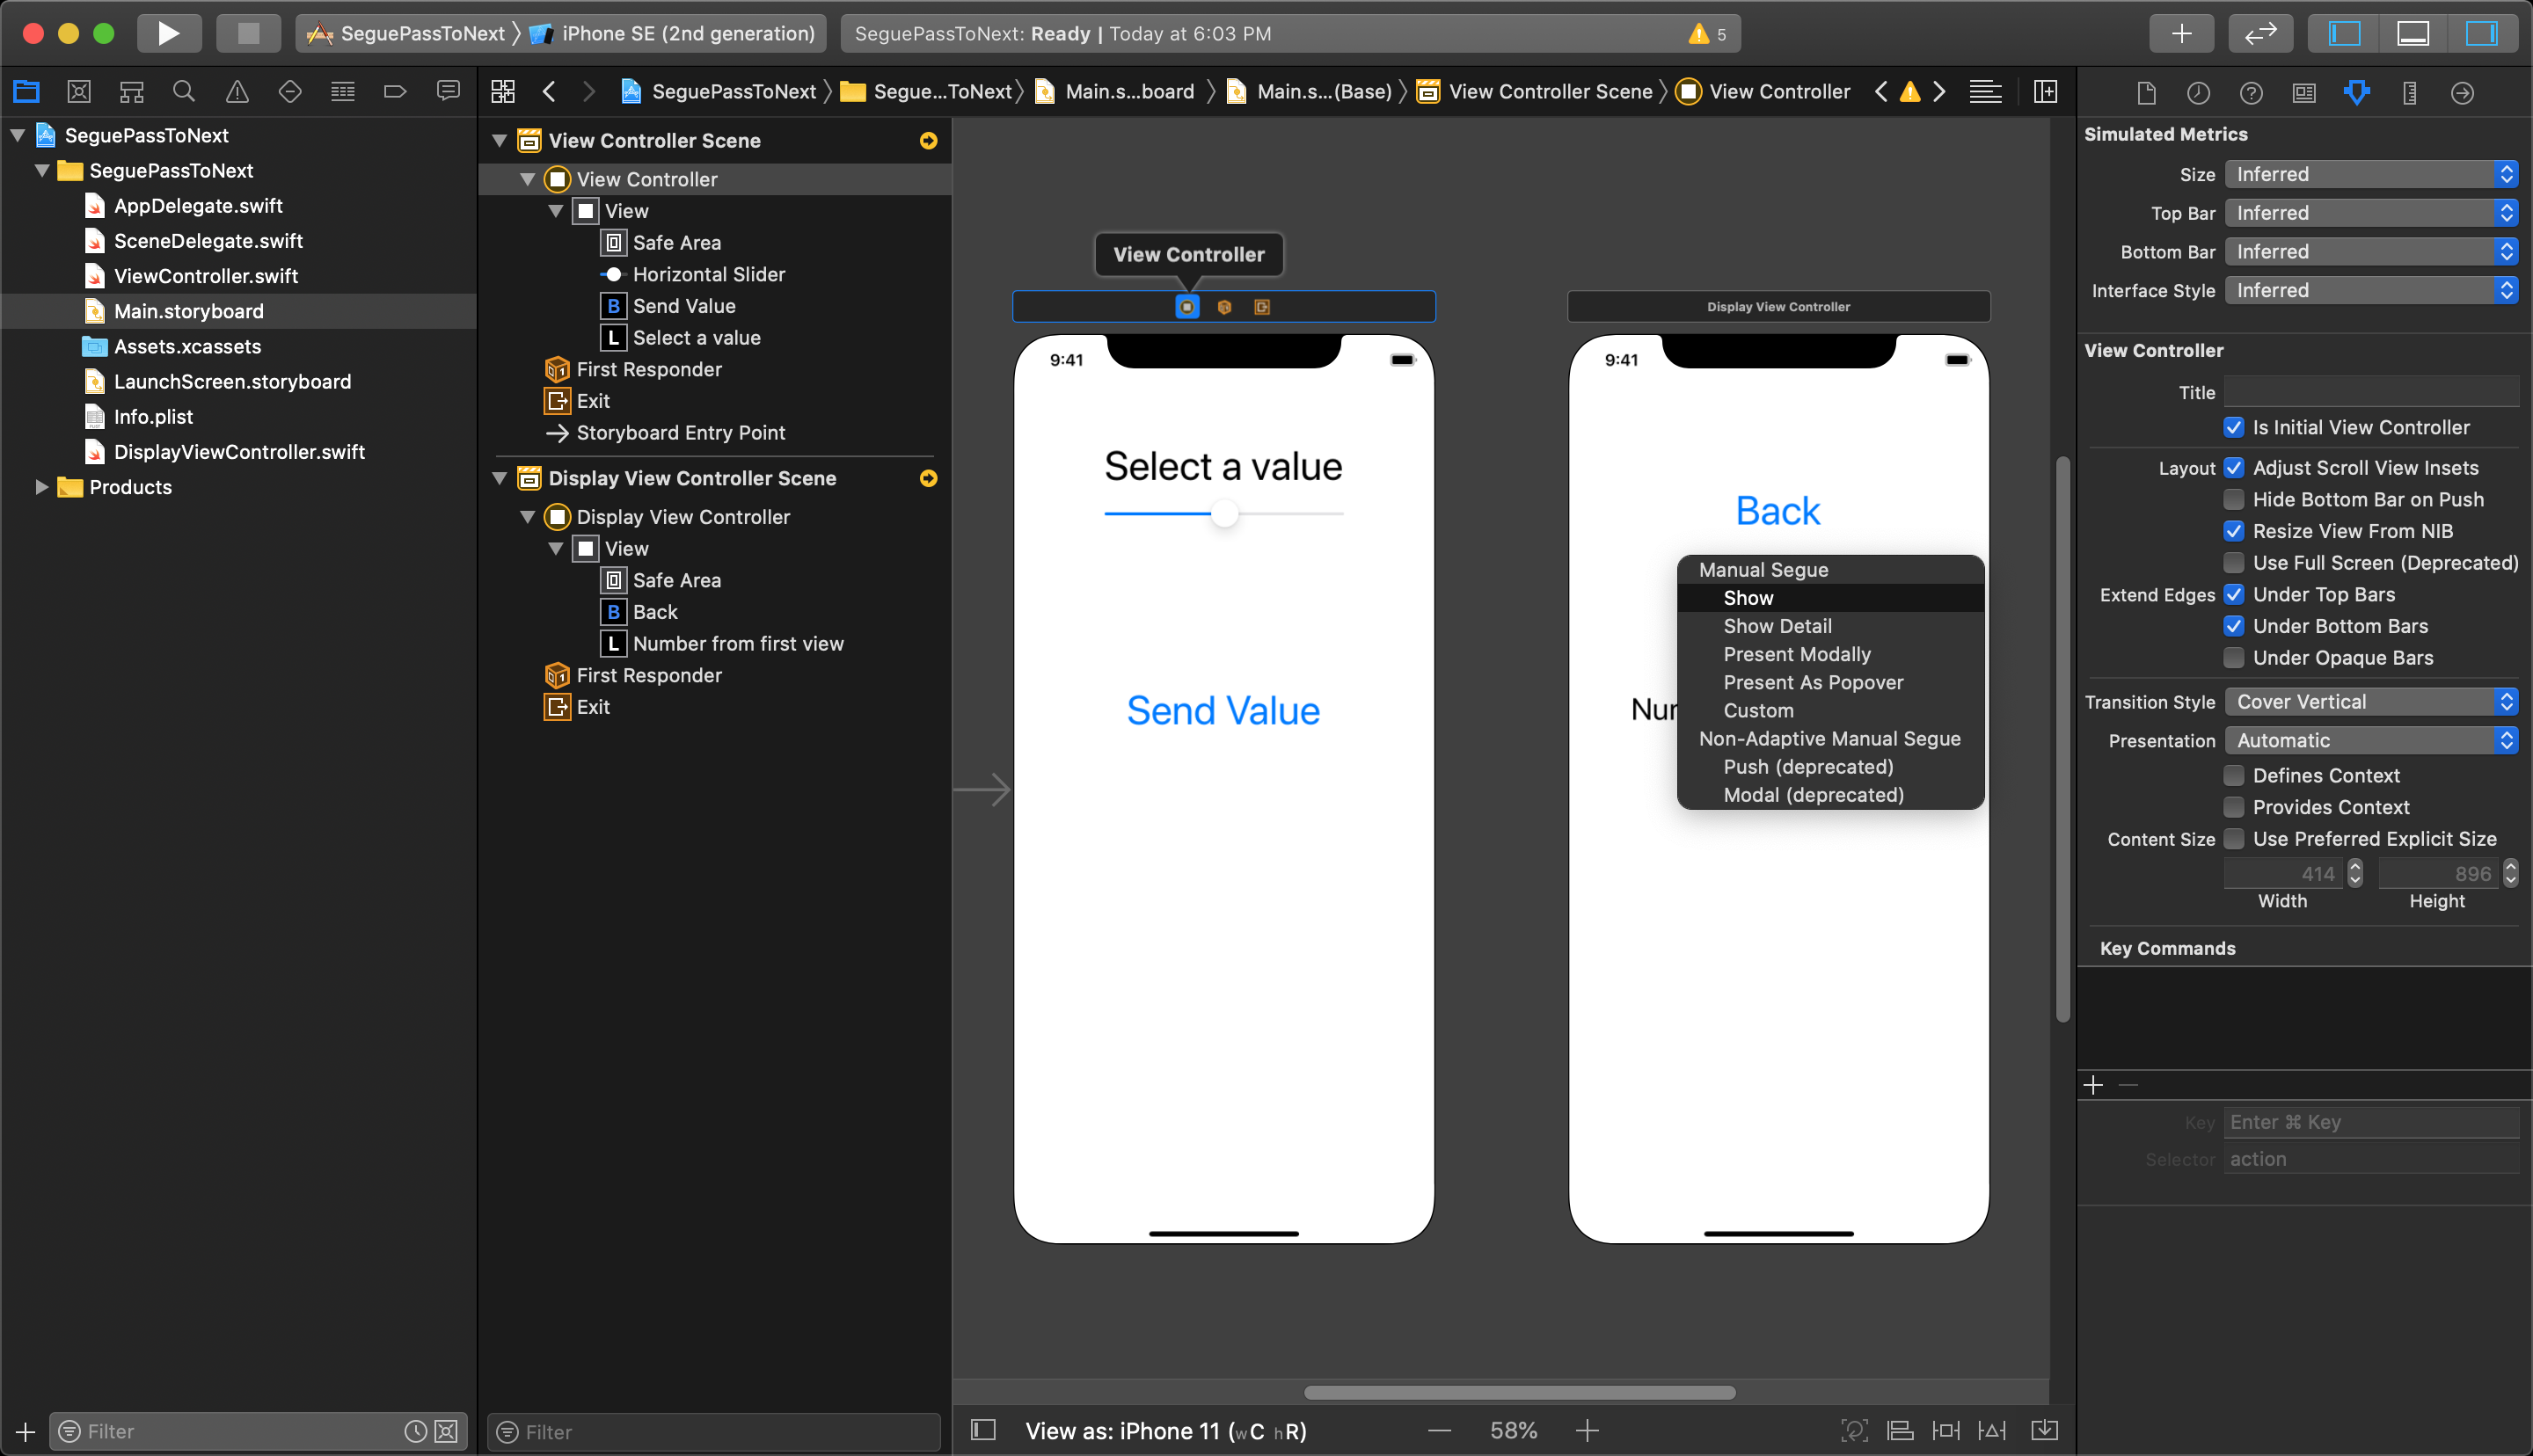
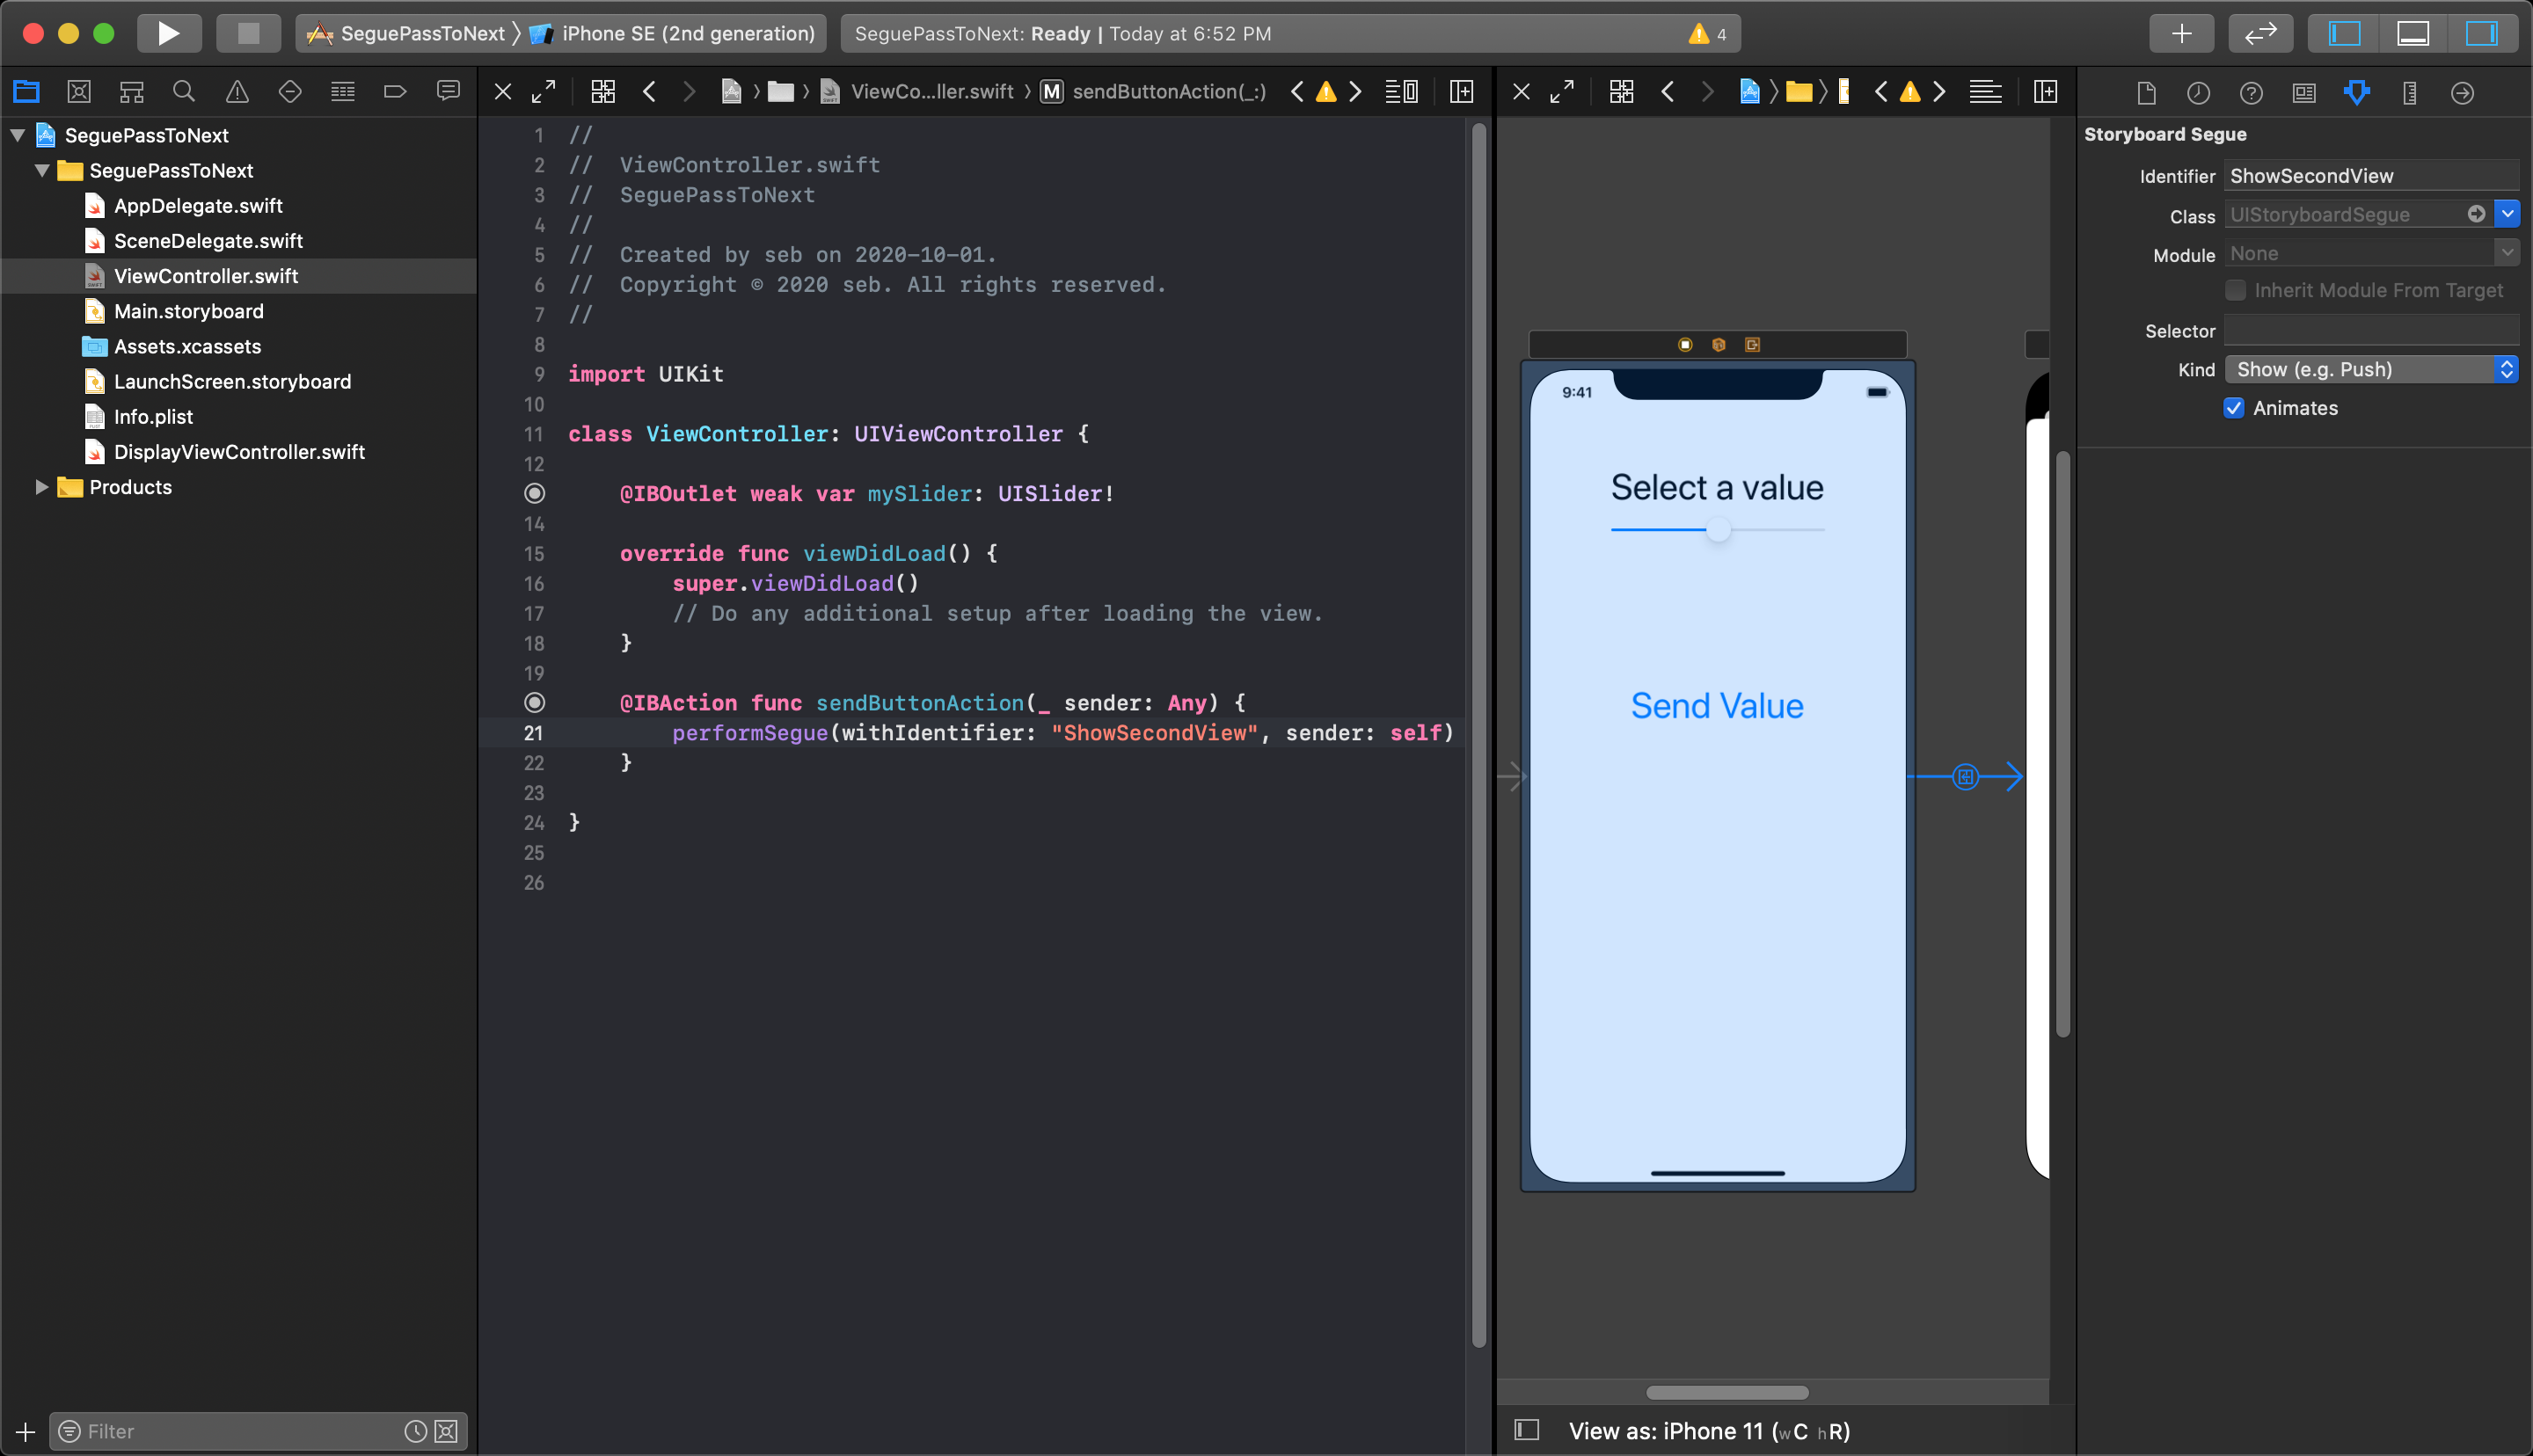
A small menu will pop up, letting you choose what type of manual segue you want to create. Select the Show option.
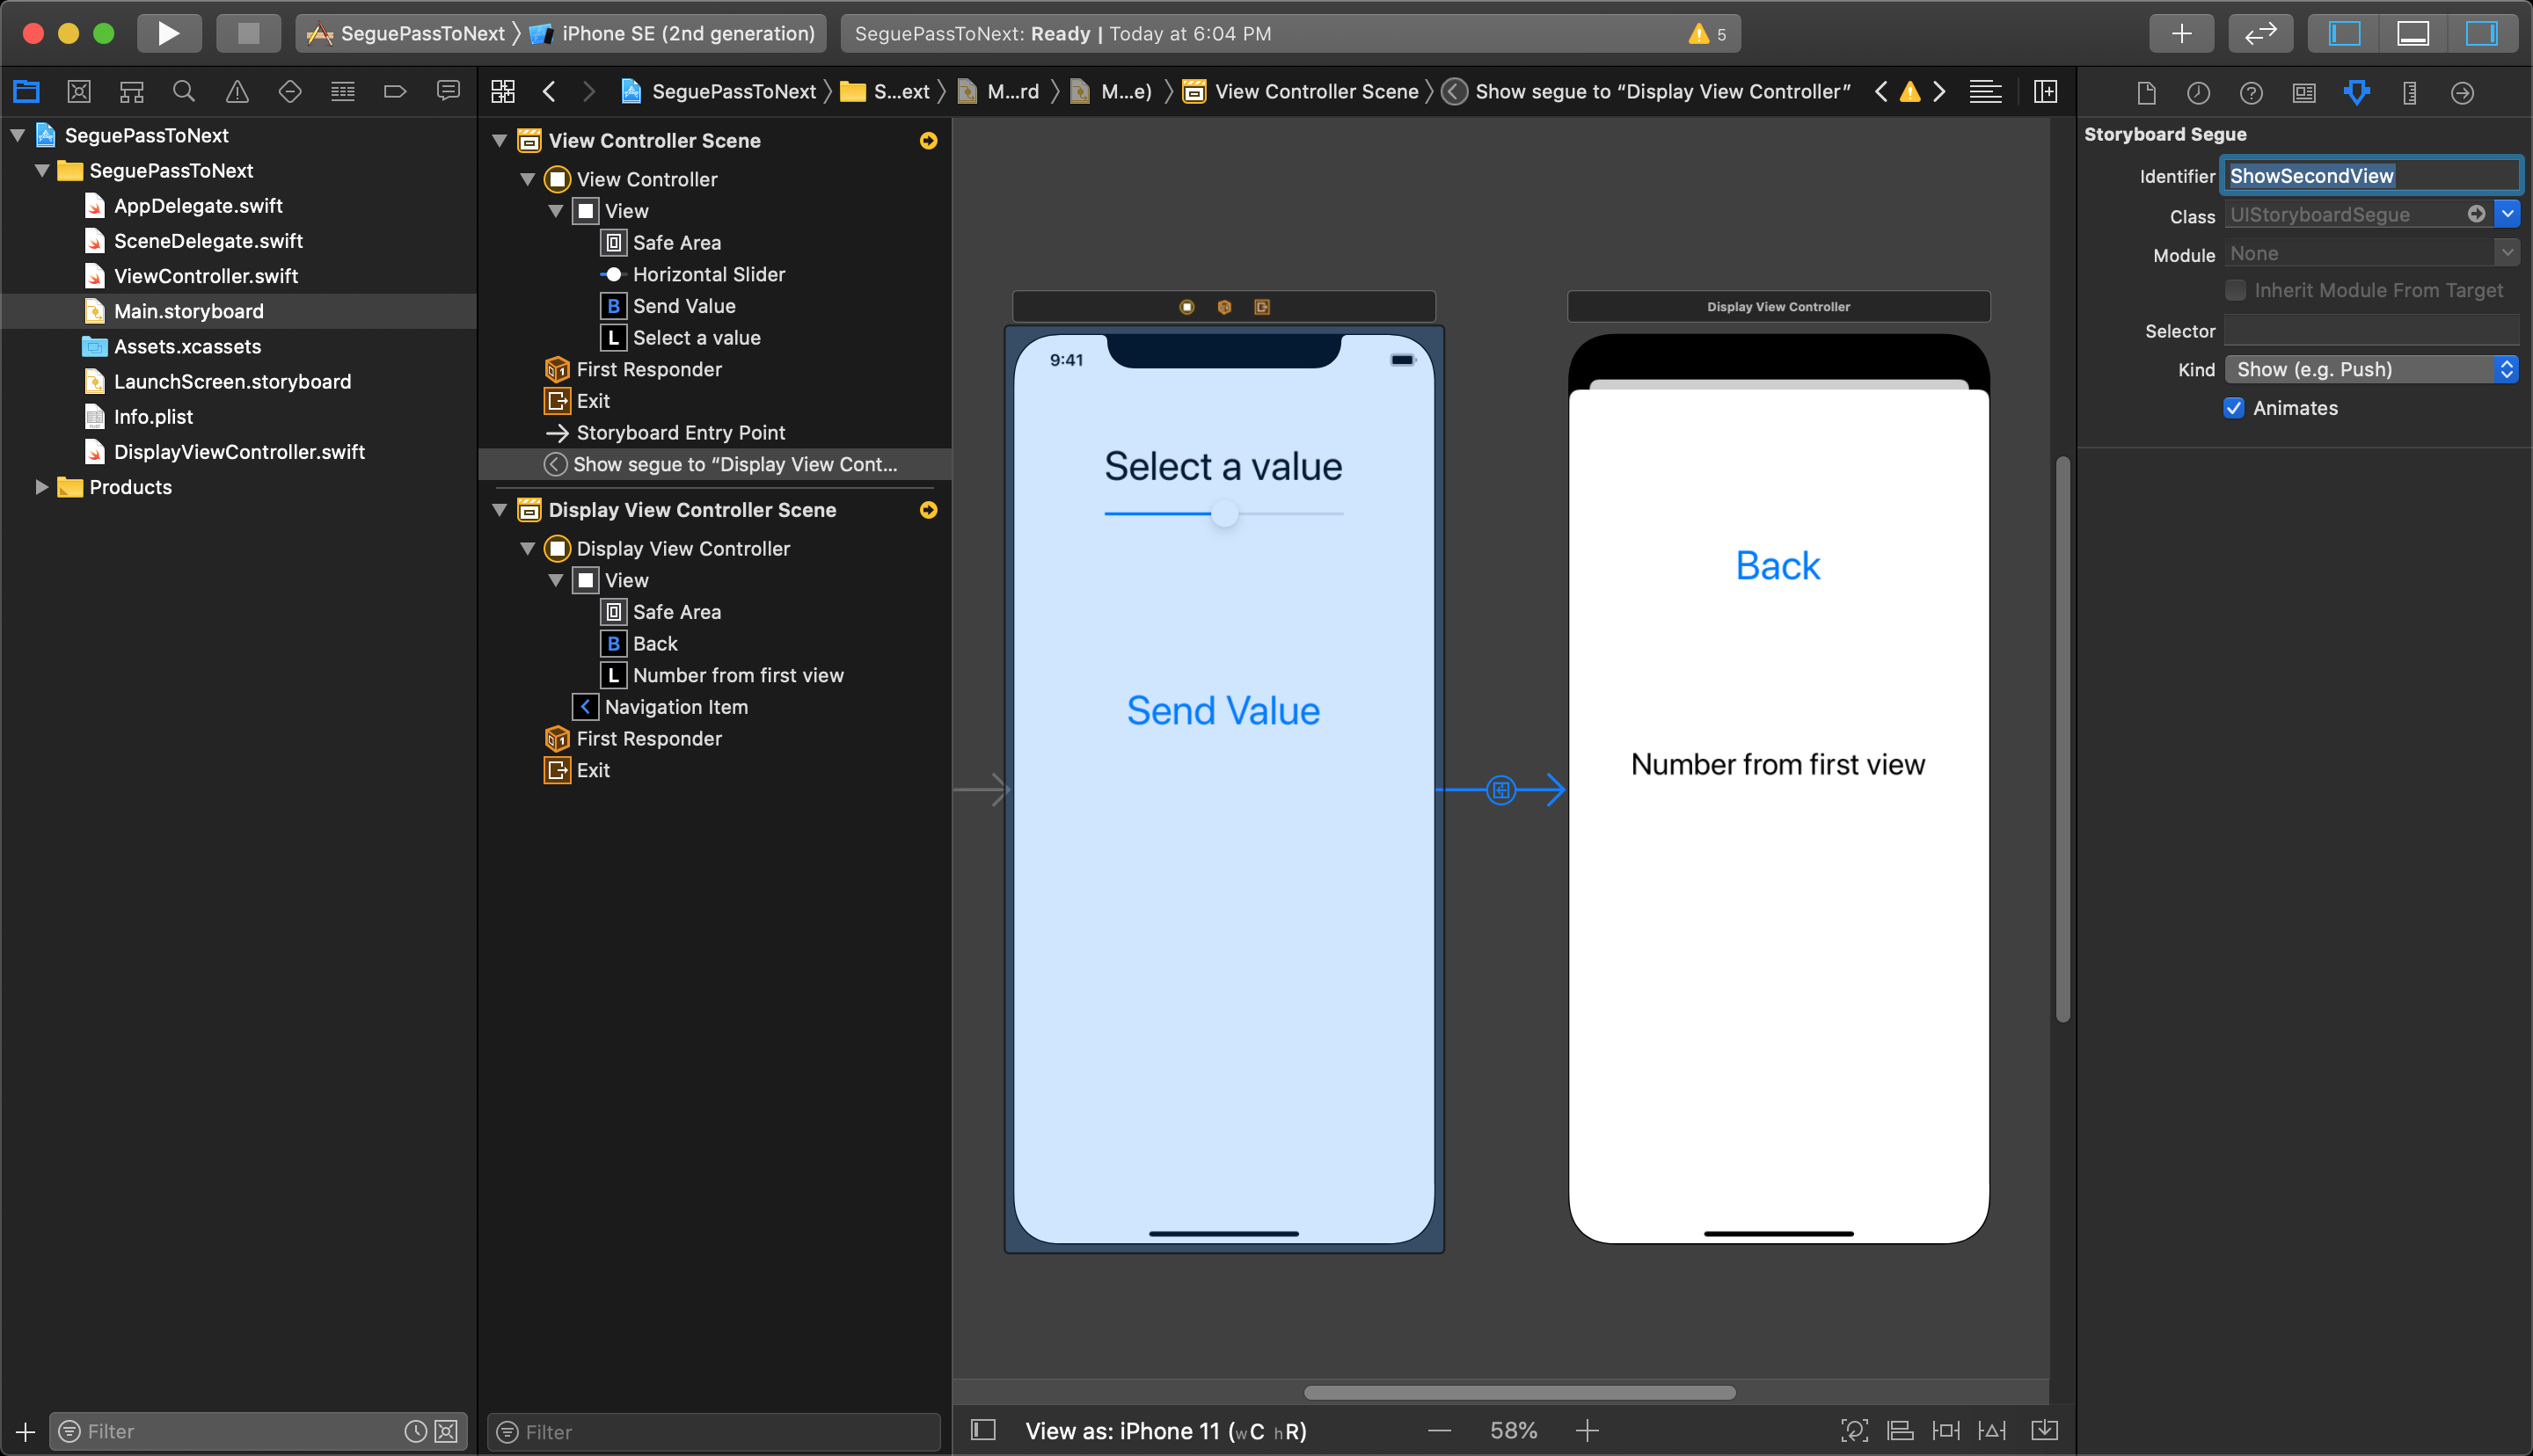
The segue that connects the first view to the second looks like an arrow with a round symbol on it showing that it is a Show segue. Click on the segue to select it and go to your Attributes Inspector. Under the heading Storyboard Segue, you must give a name in the identifier field so it can be accessed in the viewController classes.
Trigger a Segue in Code
The first viewController has an outlet connected to the UISlider object, and an action hooked up to the button in the view.
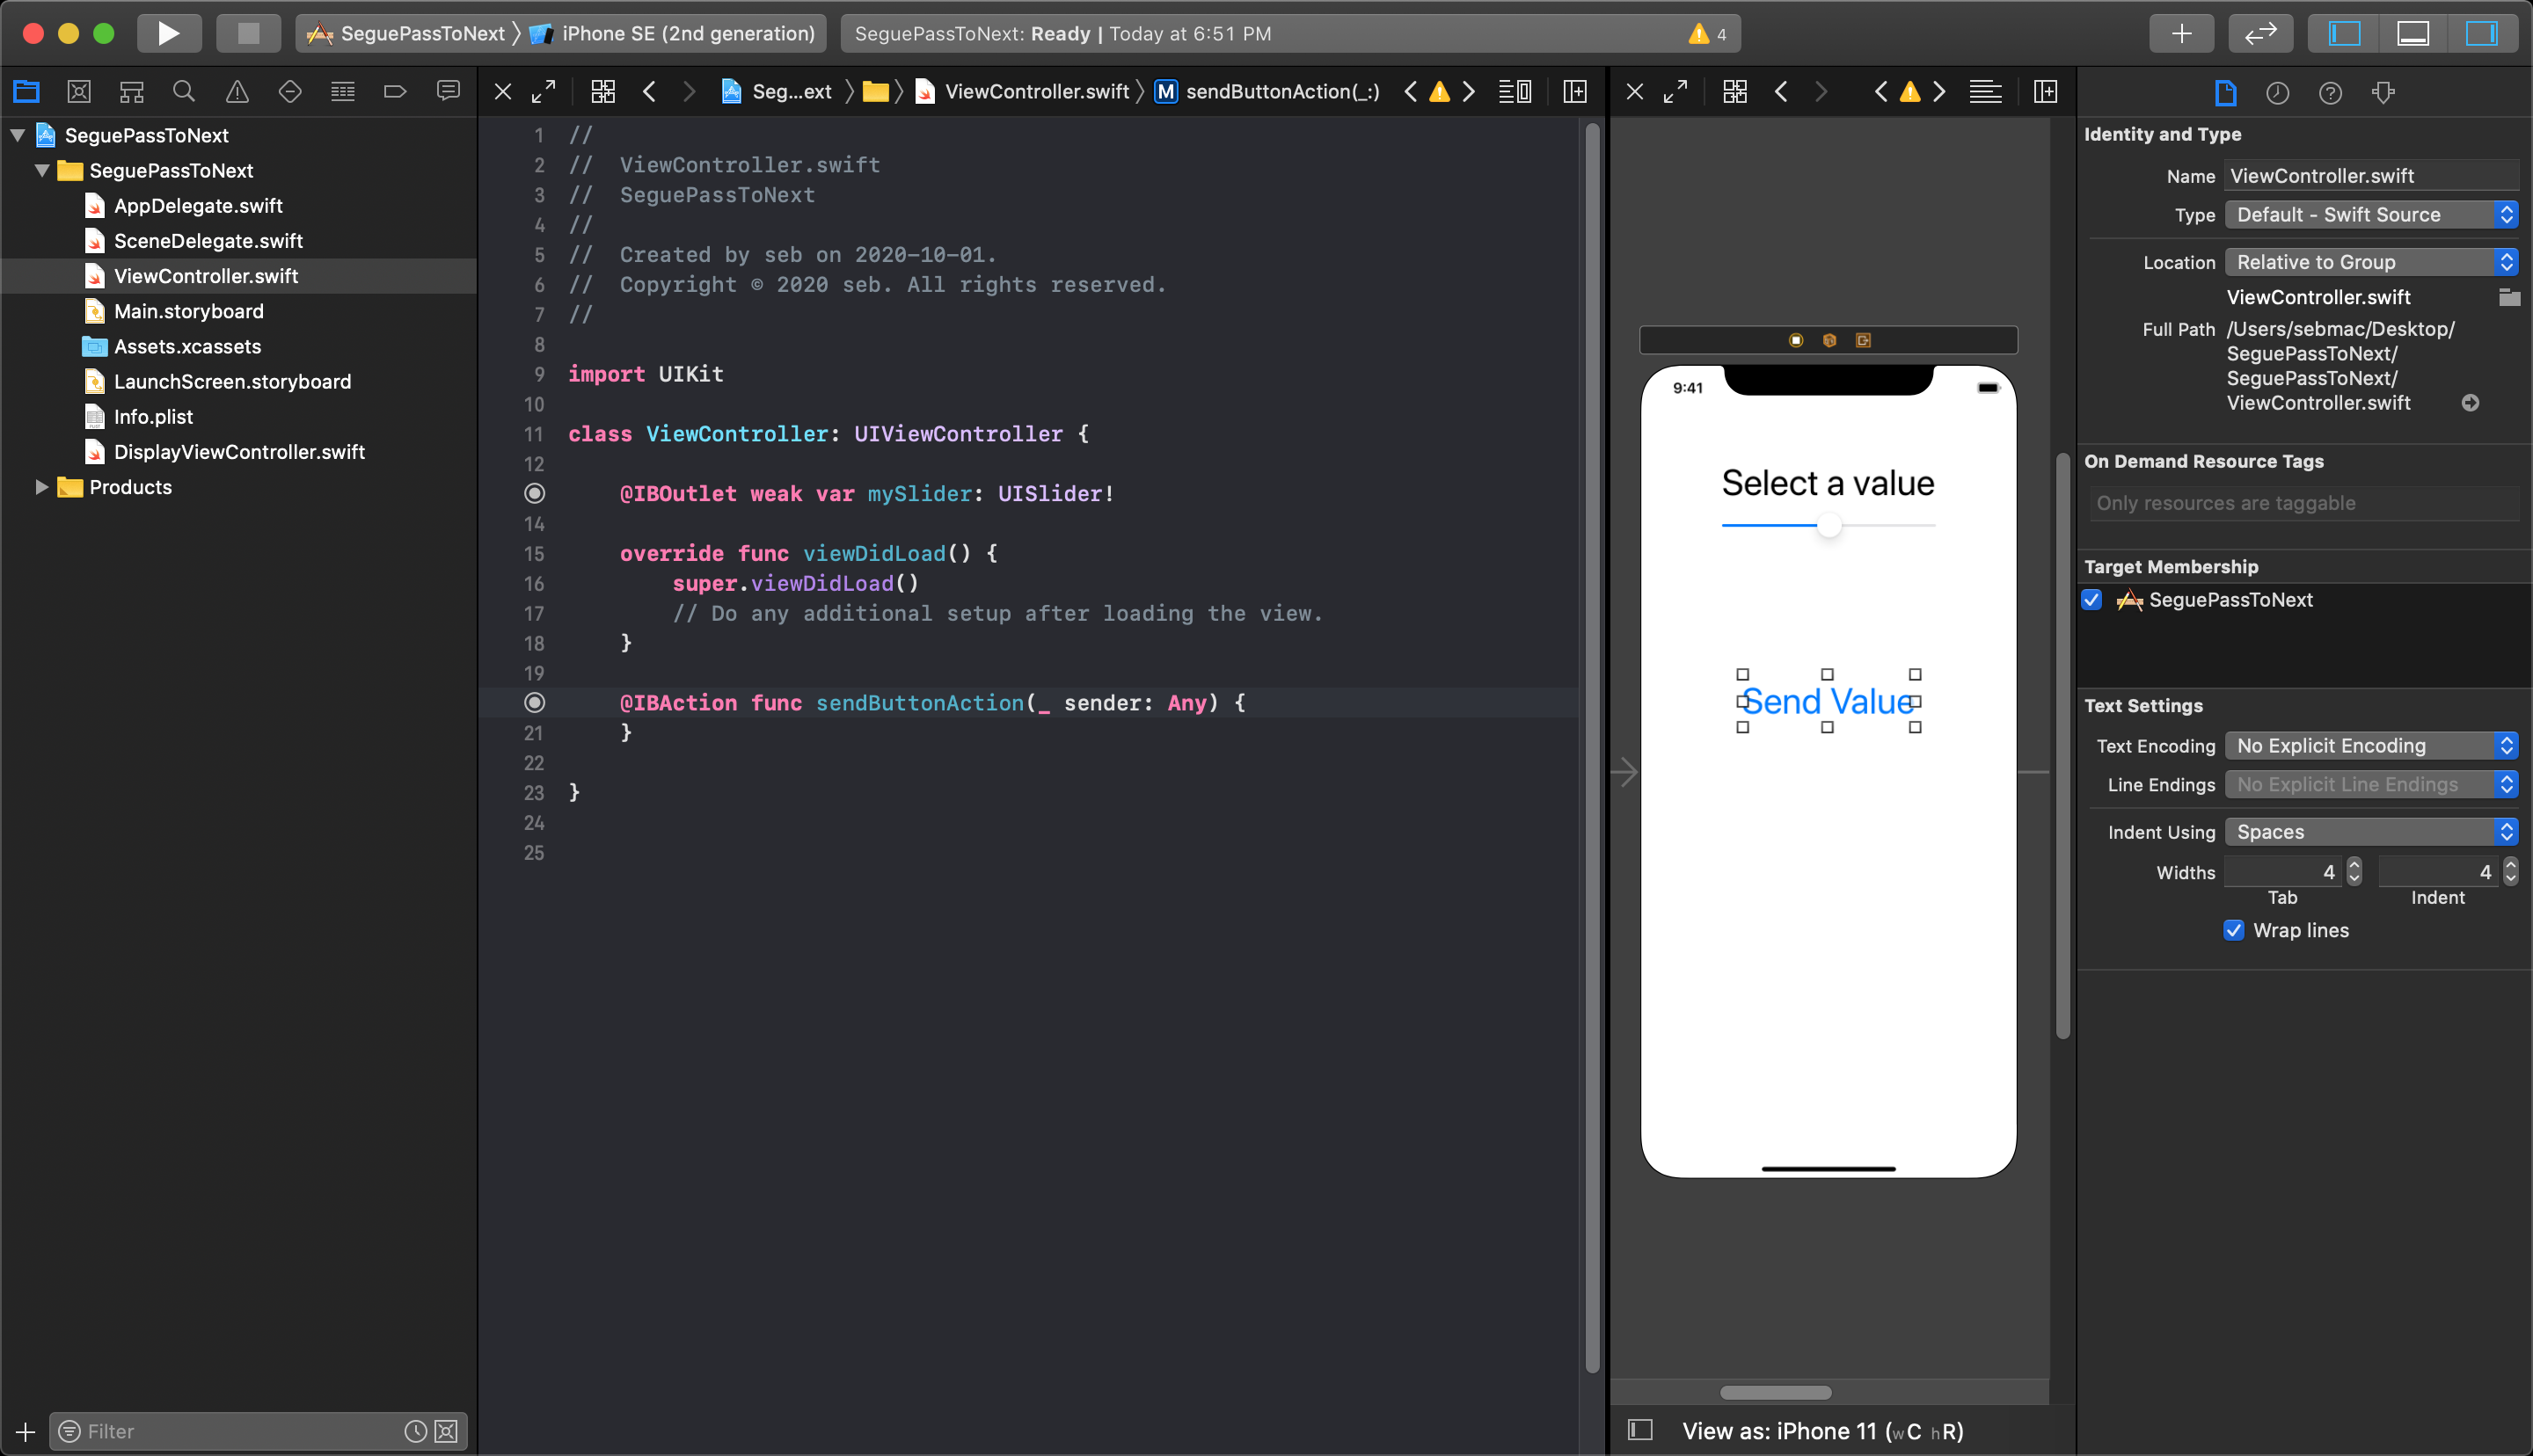
Now that the first and second viewController are connected by a segue, and that segue has a segue identifier, it is possible to trigger the segue in code. Using the function performSegue(withIdentifier: String, sender: Any?) and passing it a string with the segue identifier and self as the sender, the segue to transition from the first view to the second when executed.
Unwinding the Segue in the second viewController
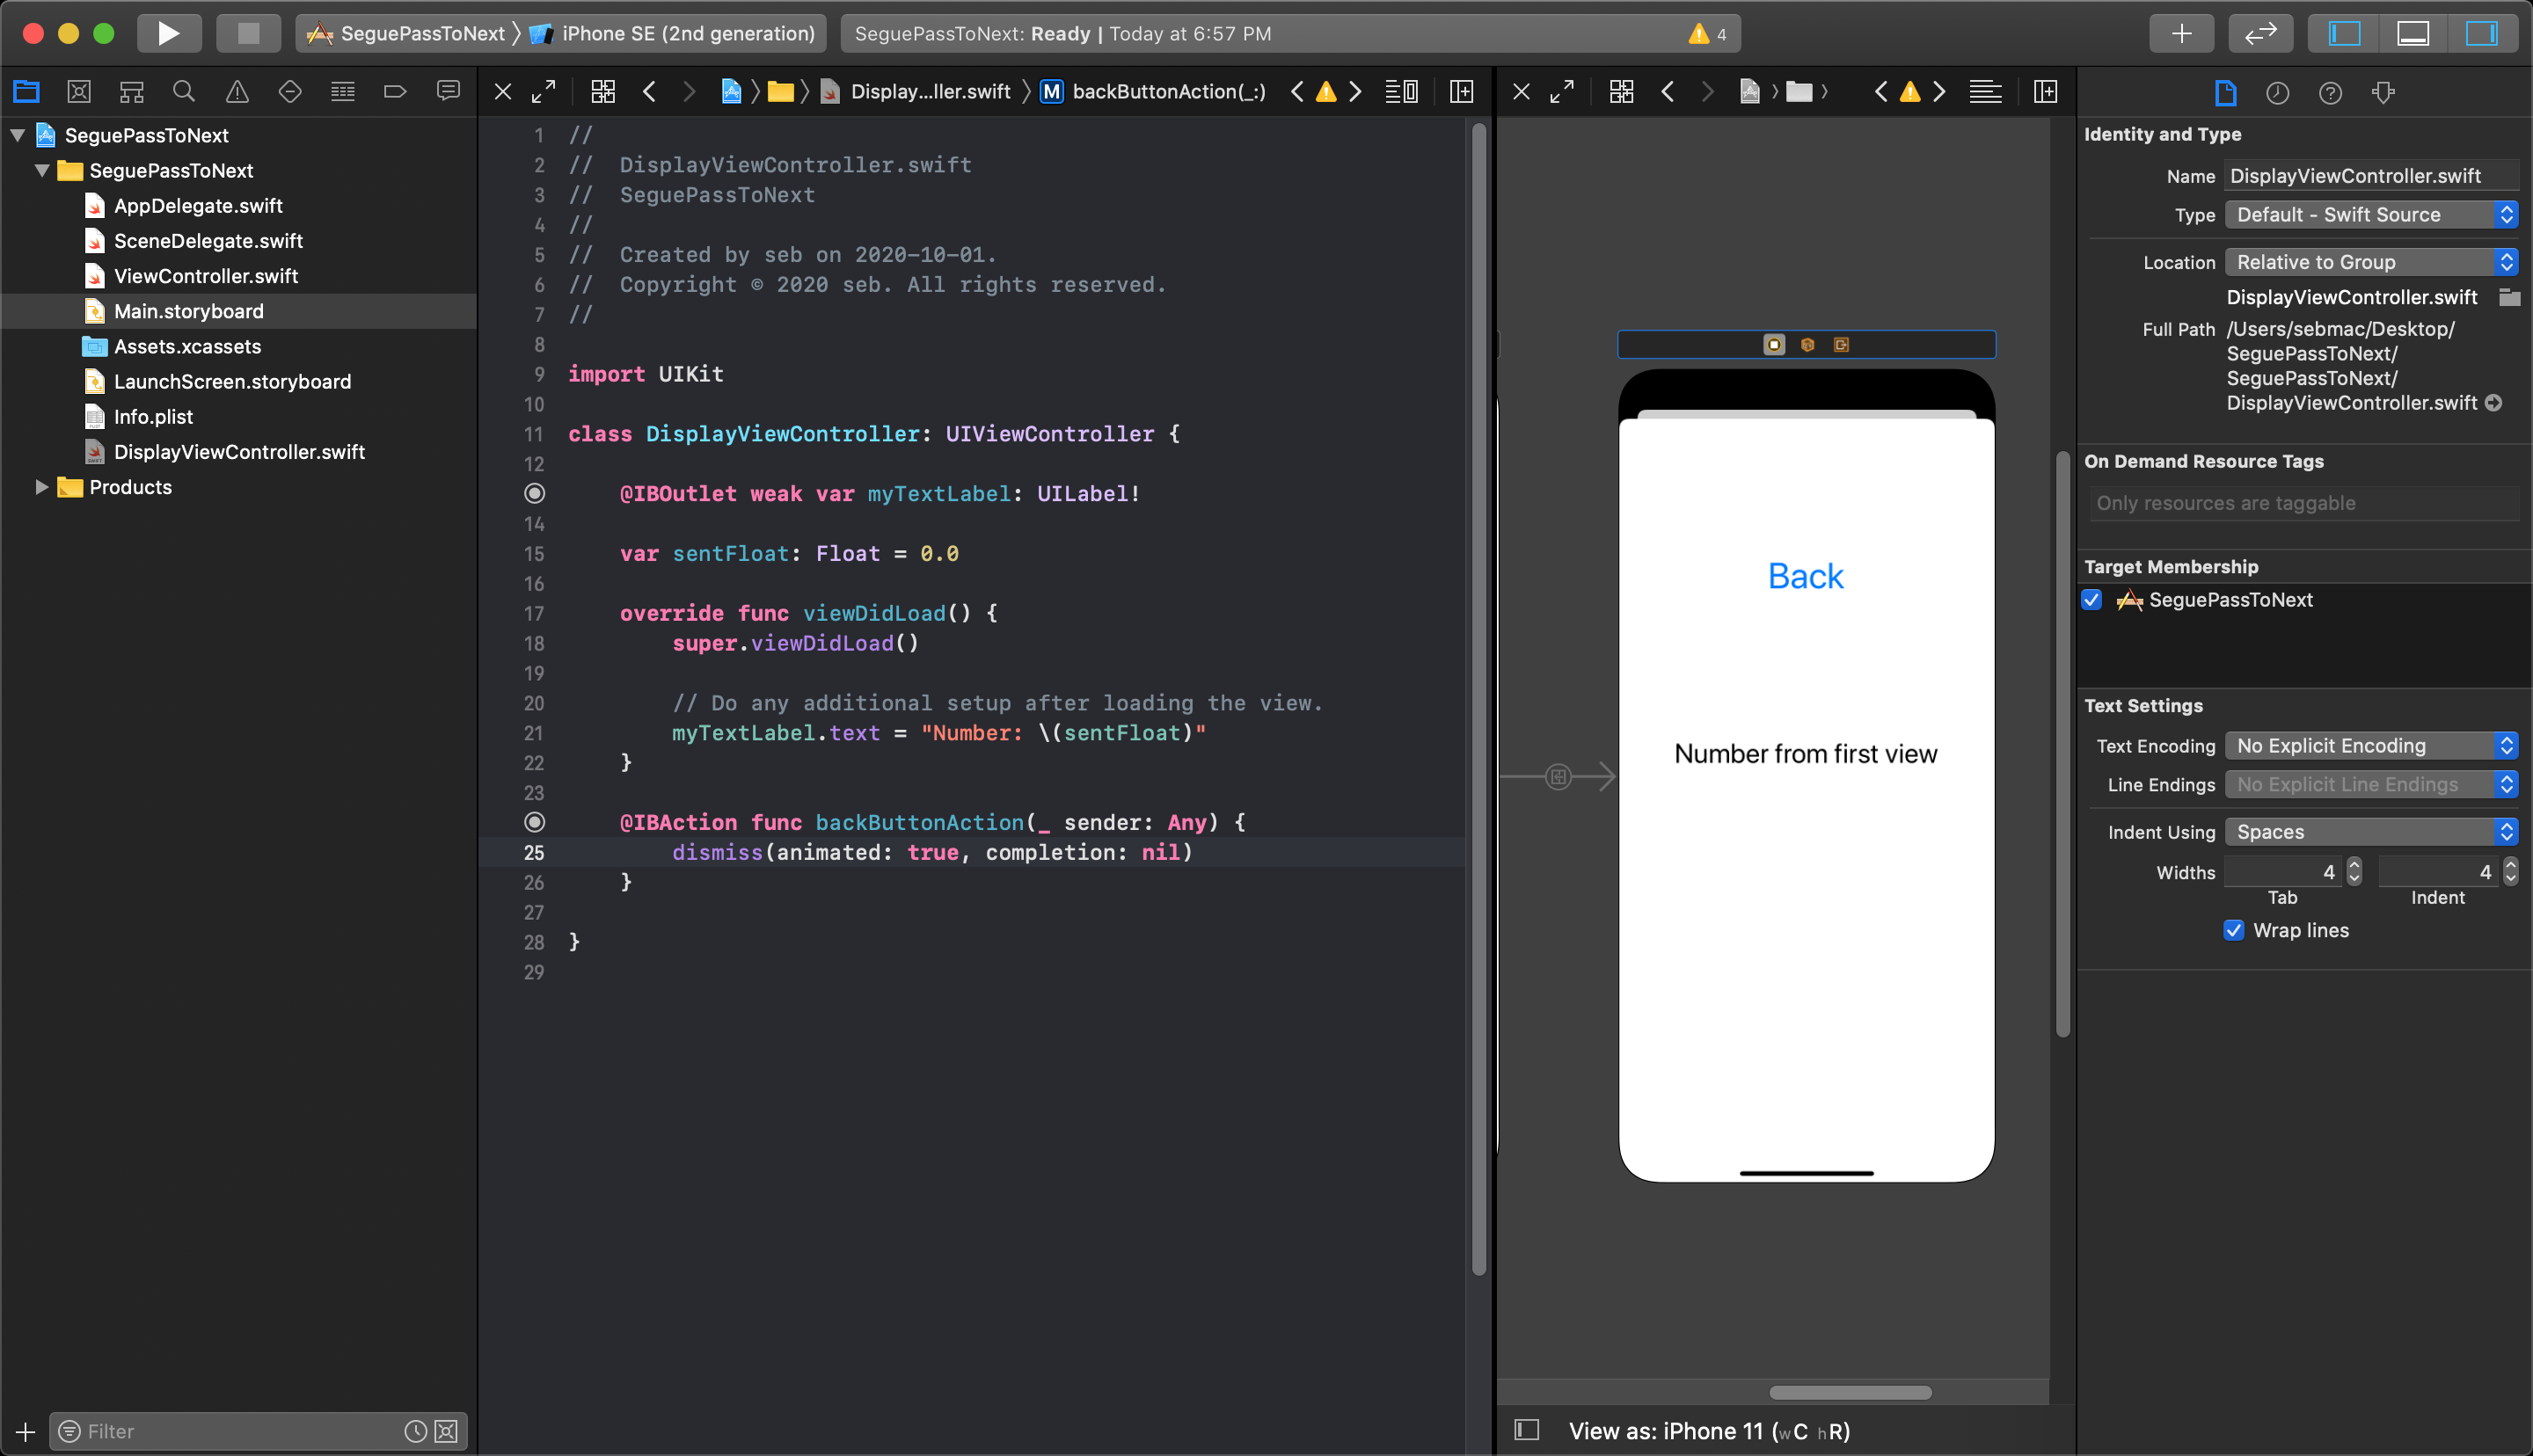
The second viewController class starts by having an outlet hooked up to the text label, and an action attached to the button within the second view. It also has a float variable called sentFloat that will be set in the first view later. This float has a default value because it is not an optional.

Adding some code in the viewDidLoad function sets the text label to show whatever the value of sentFloat is when the second view finishes loading.
Adding a call to the function dismiss(animated: true, completion: nil) in the button action will cause the segue to unwind transitioning the user back to the first view.
Passing data from one view to the next through a segue
When navigating from one view to another, you may want to have some data passed from the first viewController to the second. This is possible by accessing the second viewController object from within the code of the first, just before the application segues to the next view. It is at this point you can set variables in the second viewController class just before changing views.
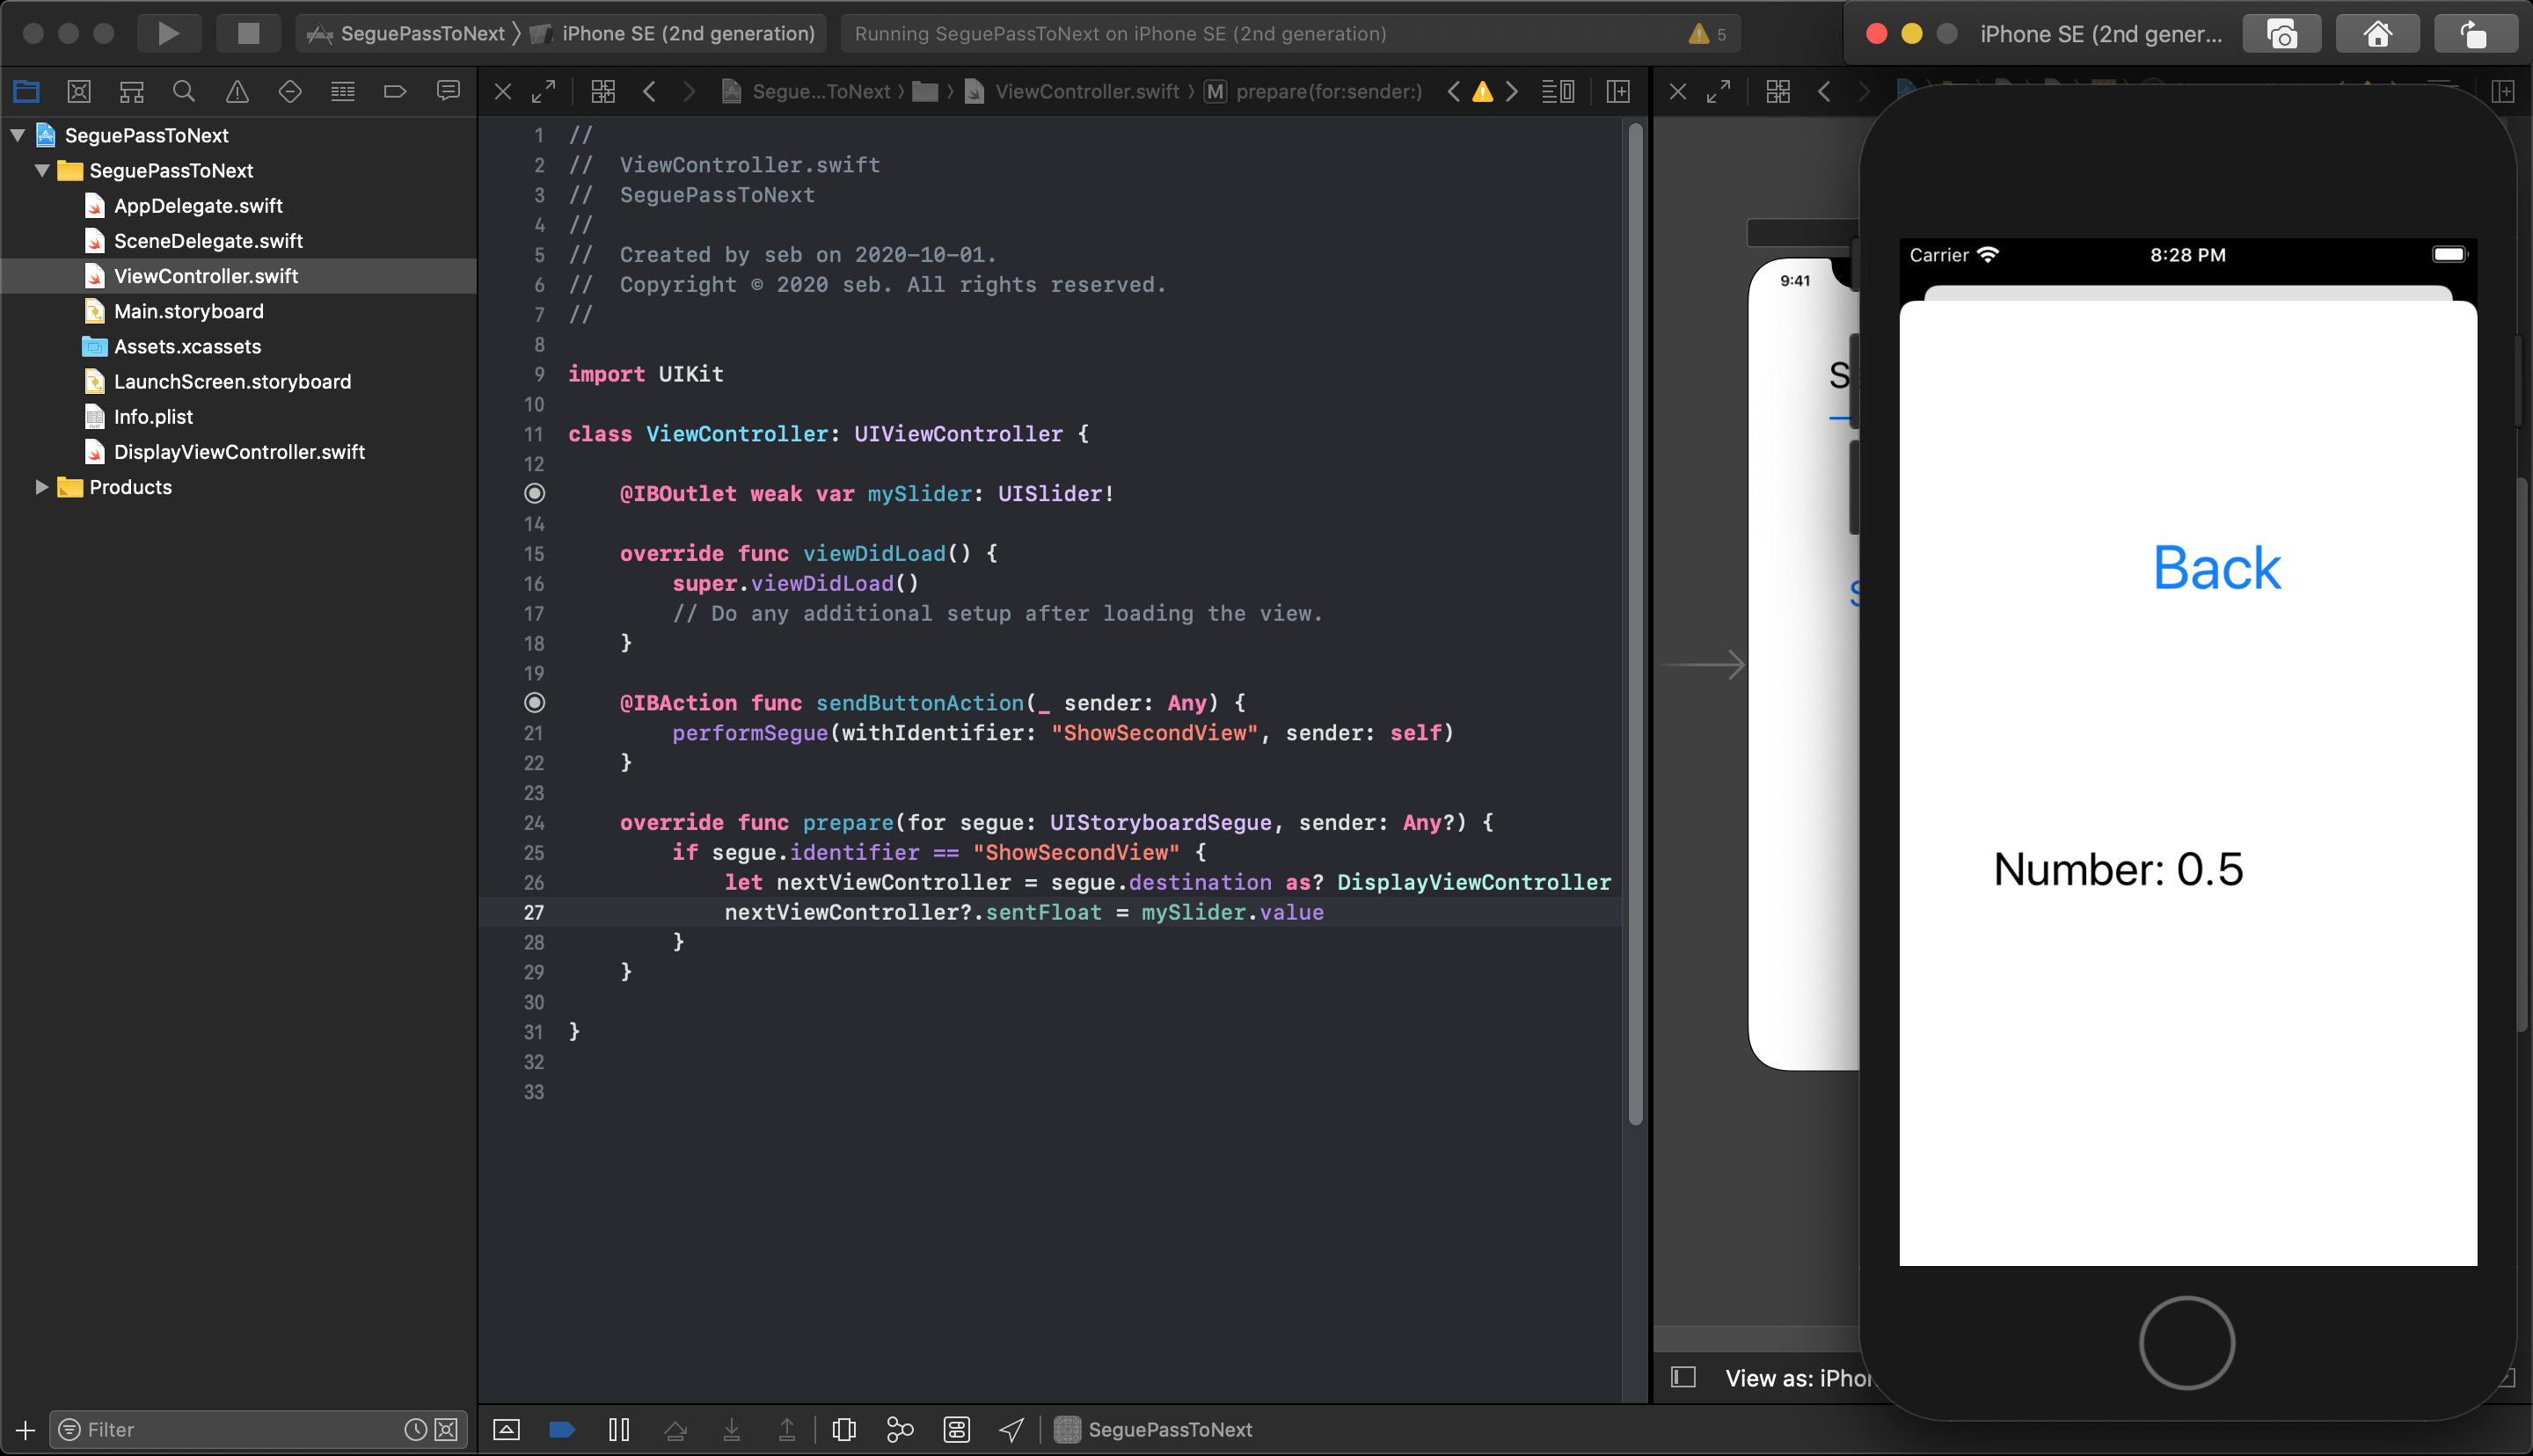
To set the property of the second ViewController class in the first you will go back to edit the first viewController class. Below, you will see the next two lines added to an overridden function called prepare(forSegue: UIStoryboardSegue, sender: Any?). This function is triggered during a segue transition, just before switching focus from the first view tho the second. In it we get a reference to the second viewController, and then we set its properties before the segue continues.
The first line of code looks like this:
let nextViewController = segue.destination as! DisplayViewController
This gets a reference to the second viewController object that this segue points to with its destination property. This property gives you a reference to a basic UIViewController class so we need to explicitly convert (cast it) it to our SecondViewController type to tell it exactly what type of class it is, and what properties we expect it to contain.
The next line of code actually sets the sentFloat property of our SecondViewController class using the value from the slider:
nextViewController.sentFloat = mySlider.value
Now the slider's value from the first view is passed to the sentFloat property of the second viewController during the segue. When the segue is done the second view now shows the value passed from the first viewController.
The videos provided below show you an overview of, and the techniques to create an application with two views connected with a segue. This gives the application the basic ability to transition from the first to the second.
iOS 11 Fundamentals - Creating iOS Apps with Multiple Screens Introduction Pluralsight
iOS 11 Fundamentals - Defining iOS Apps with Multiple View Controllers Pluralsight
iOS 11 Fundamentals - Segueing to New iOS View Controllers Pluralsight