View Layout Errors
Scenario 2: You have deleted the placeholder text from a textField and have lost track of where the textField is, or covered up one UI object with another.
Imagine you were building the following project in Xcode and needed to change the layout of some the UI objects.
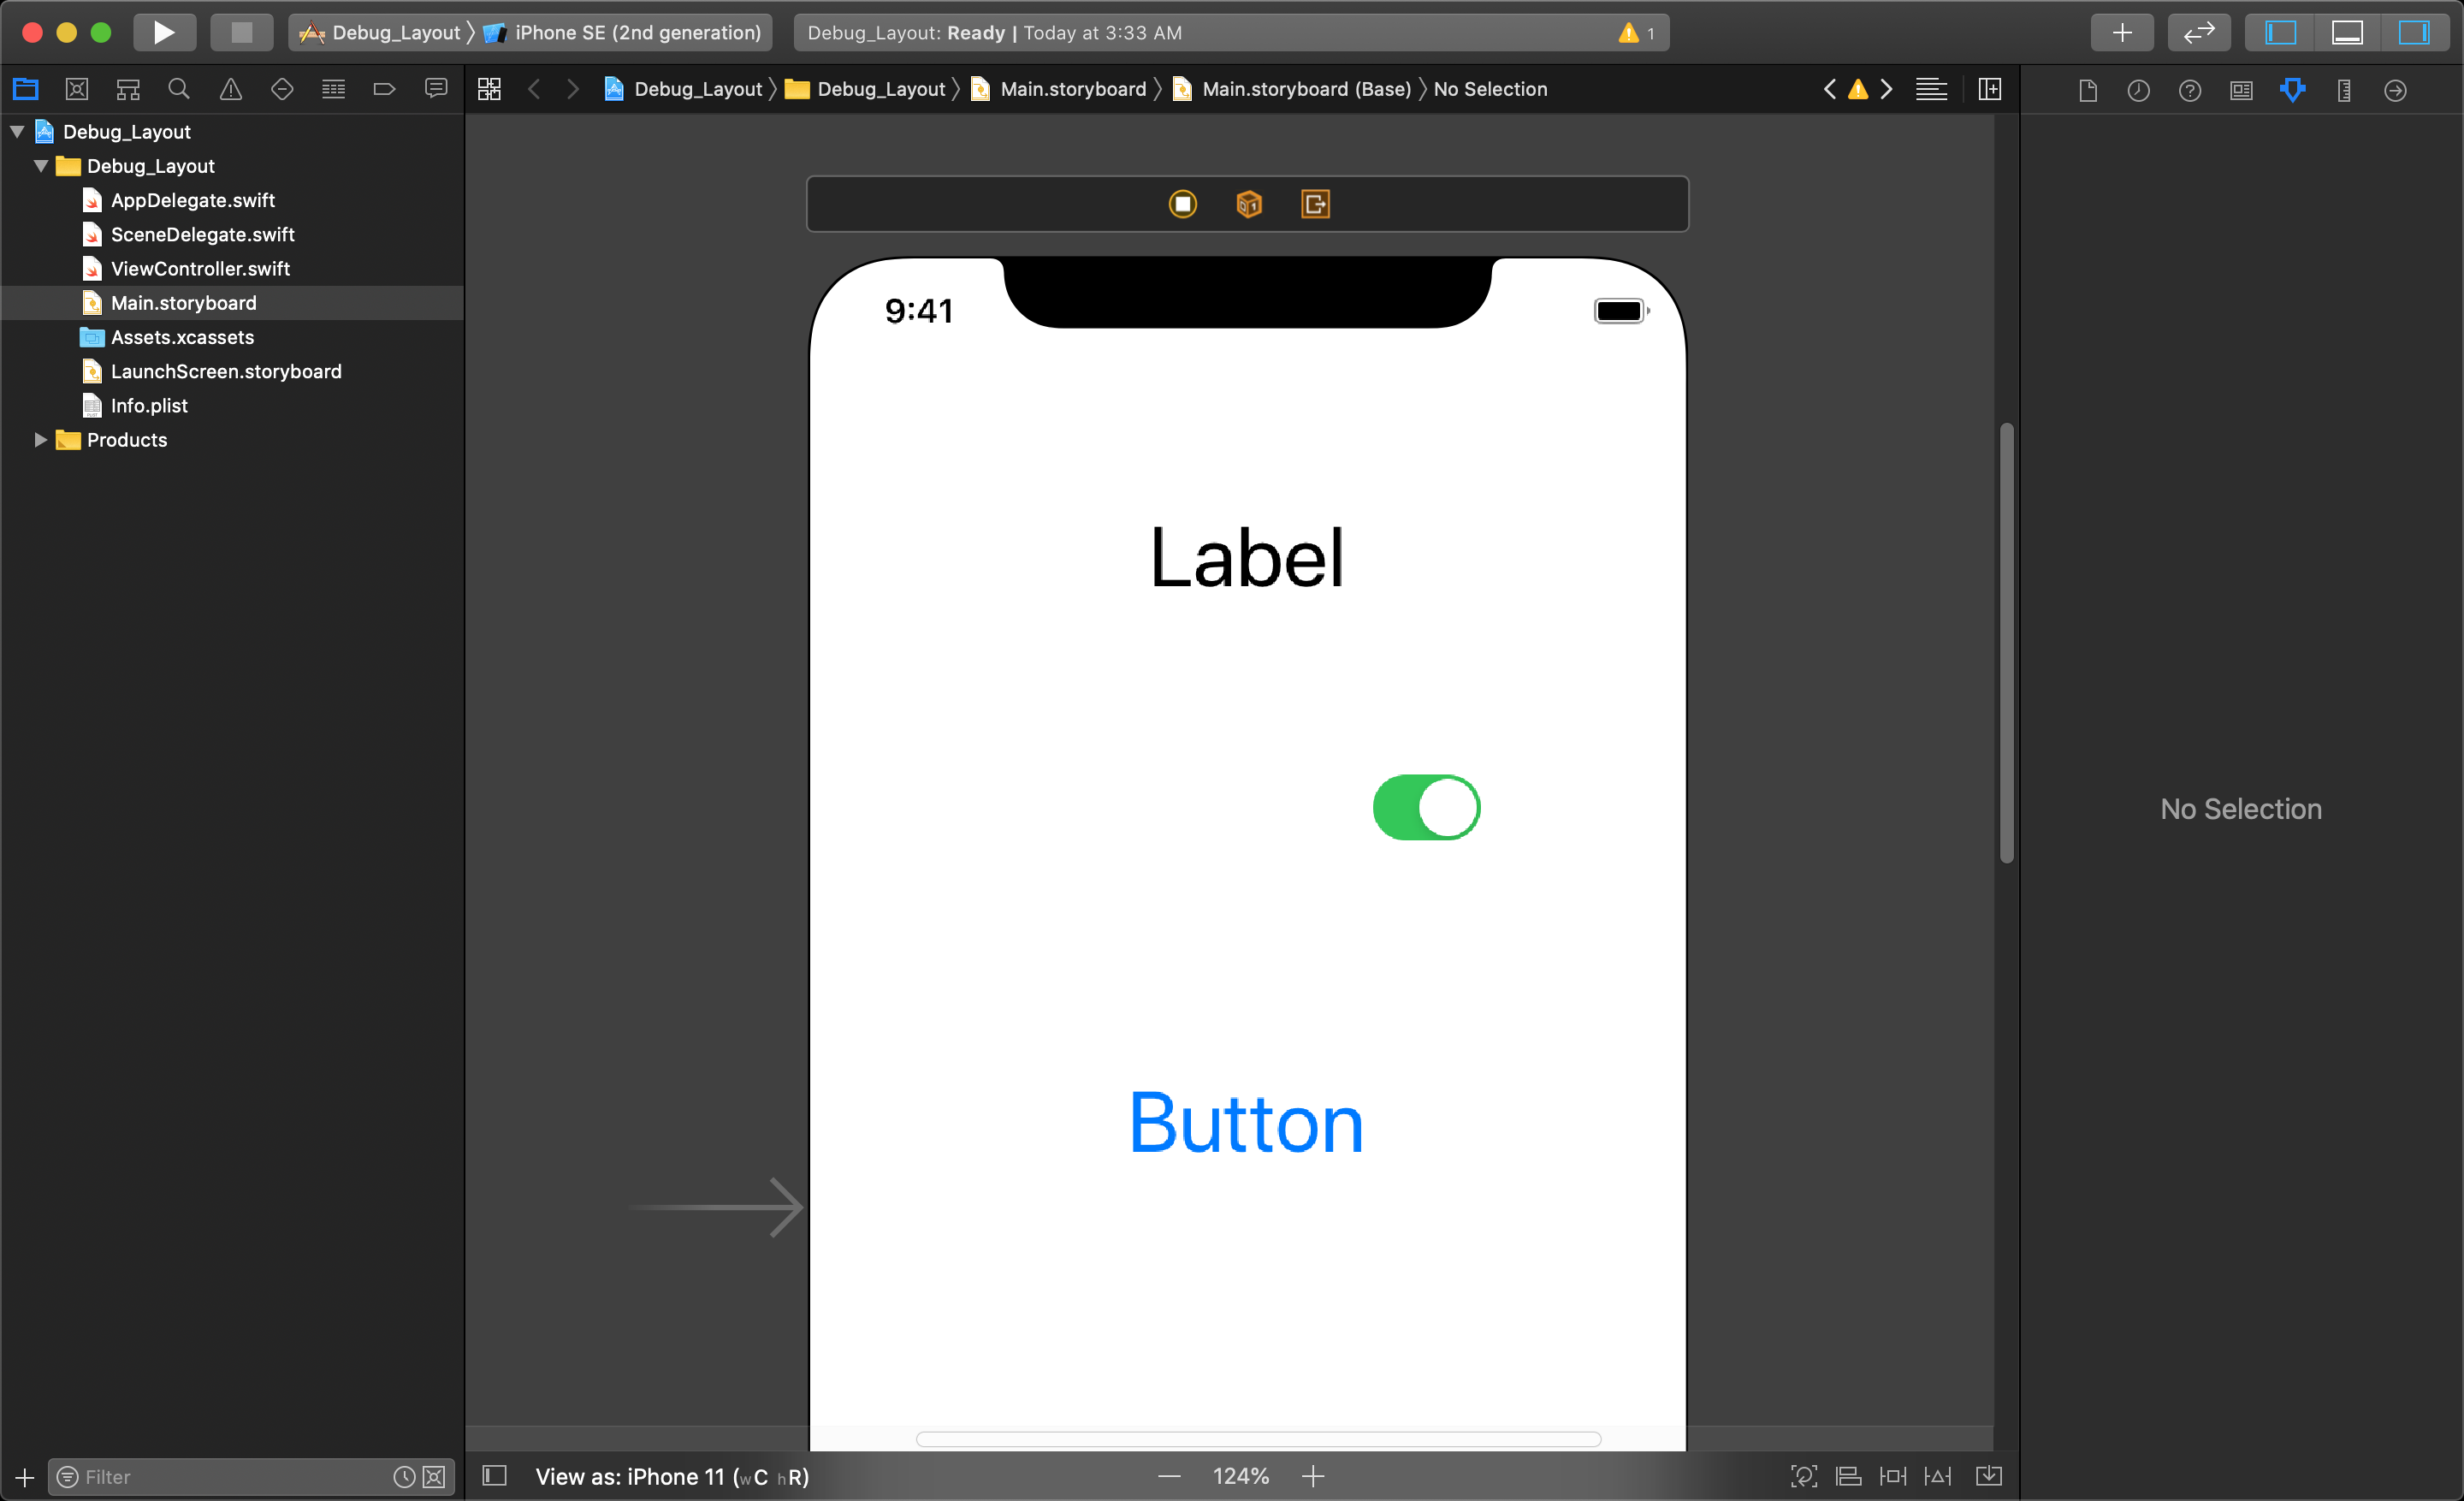
You start by moving the button, but accidentally place it over the switch object. If the background for the button is set to a solid colour, the button will completely cover the switch.
Debugging your layout with the View Hierarchy
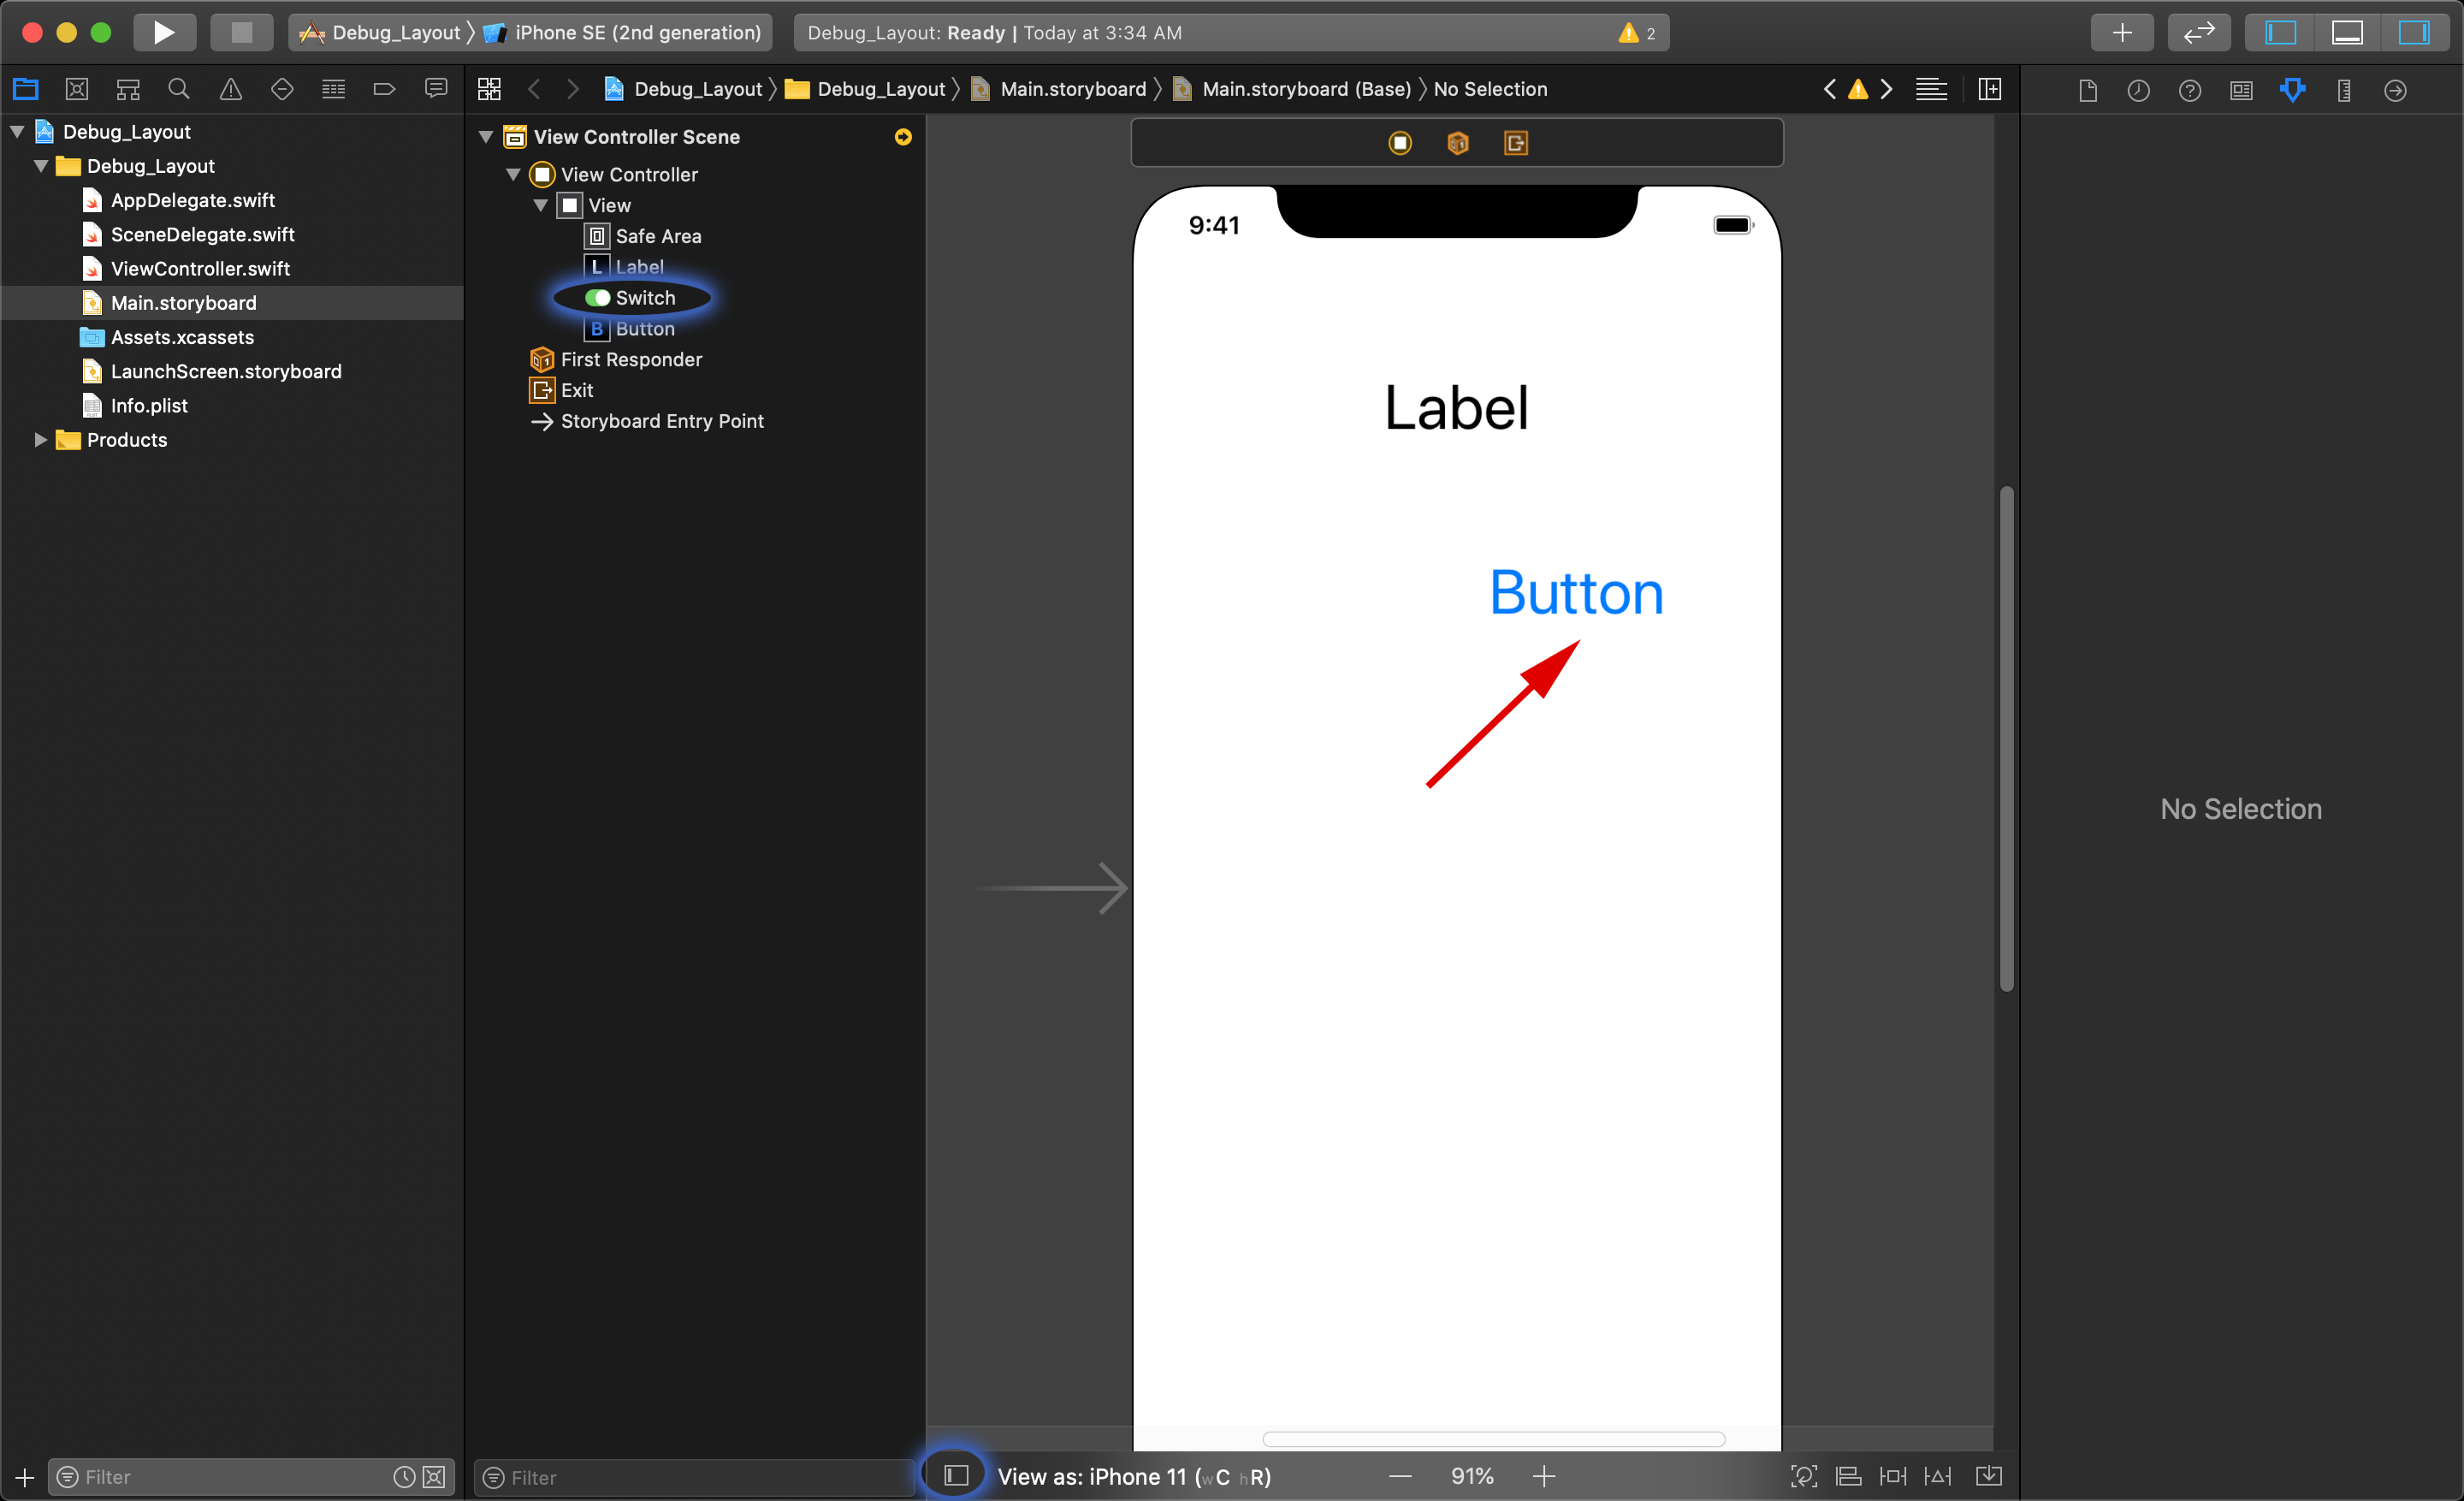
If you cannot find a UI element — or are having problems understanding why it is not visible — you can go to your storyboard and look at the view hierarchy to locate each UI object in the view. You can show the view hierarchy by clicking the small icon at the bottom left of the editor area in Xcode.
This opens the hierarchy to the left of the storyboard in the editor area, and allows you to select each UI object in the view (which will highlight the UI object in your storyboard). You can change which object is shown in front of the others by reordering the objects within the view hierarchy.
Debugging your layout with the Debug View Hierarchy
It is possible to create, style and place new UI objects programmatically within Swift. These objects are not added manually into the storyboard in your project, but get added when the application is already running. You will not be able to rely on the view hierarchy in your storyboard to check if one object is overlapping another.
There is, however, a way to debug the view hierarchy once the application is launched and running in the simulator.
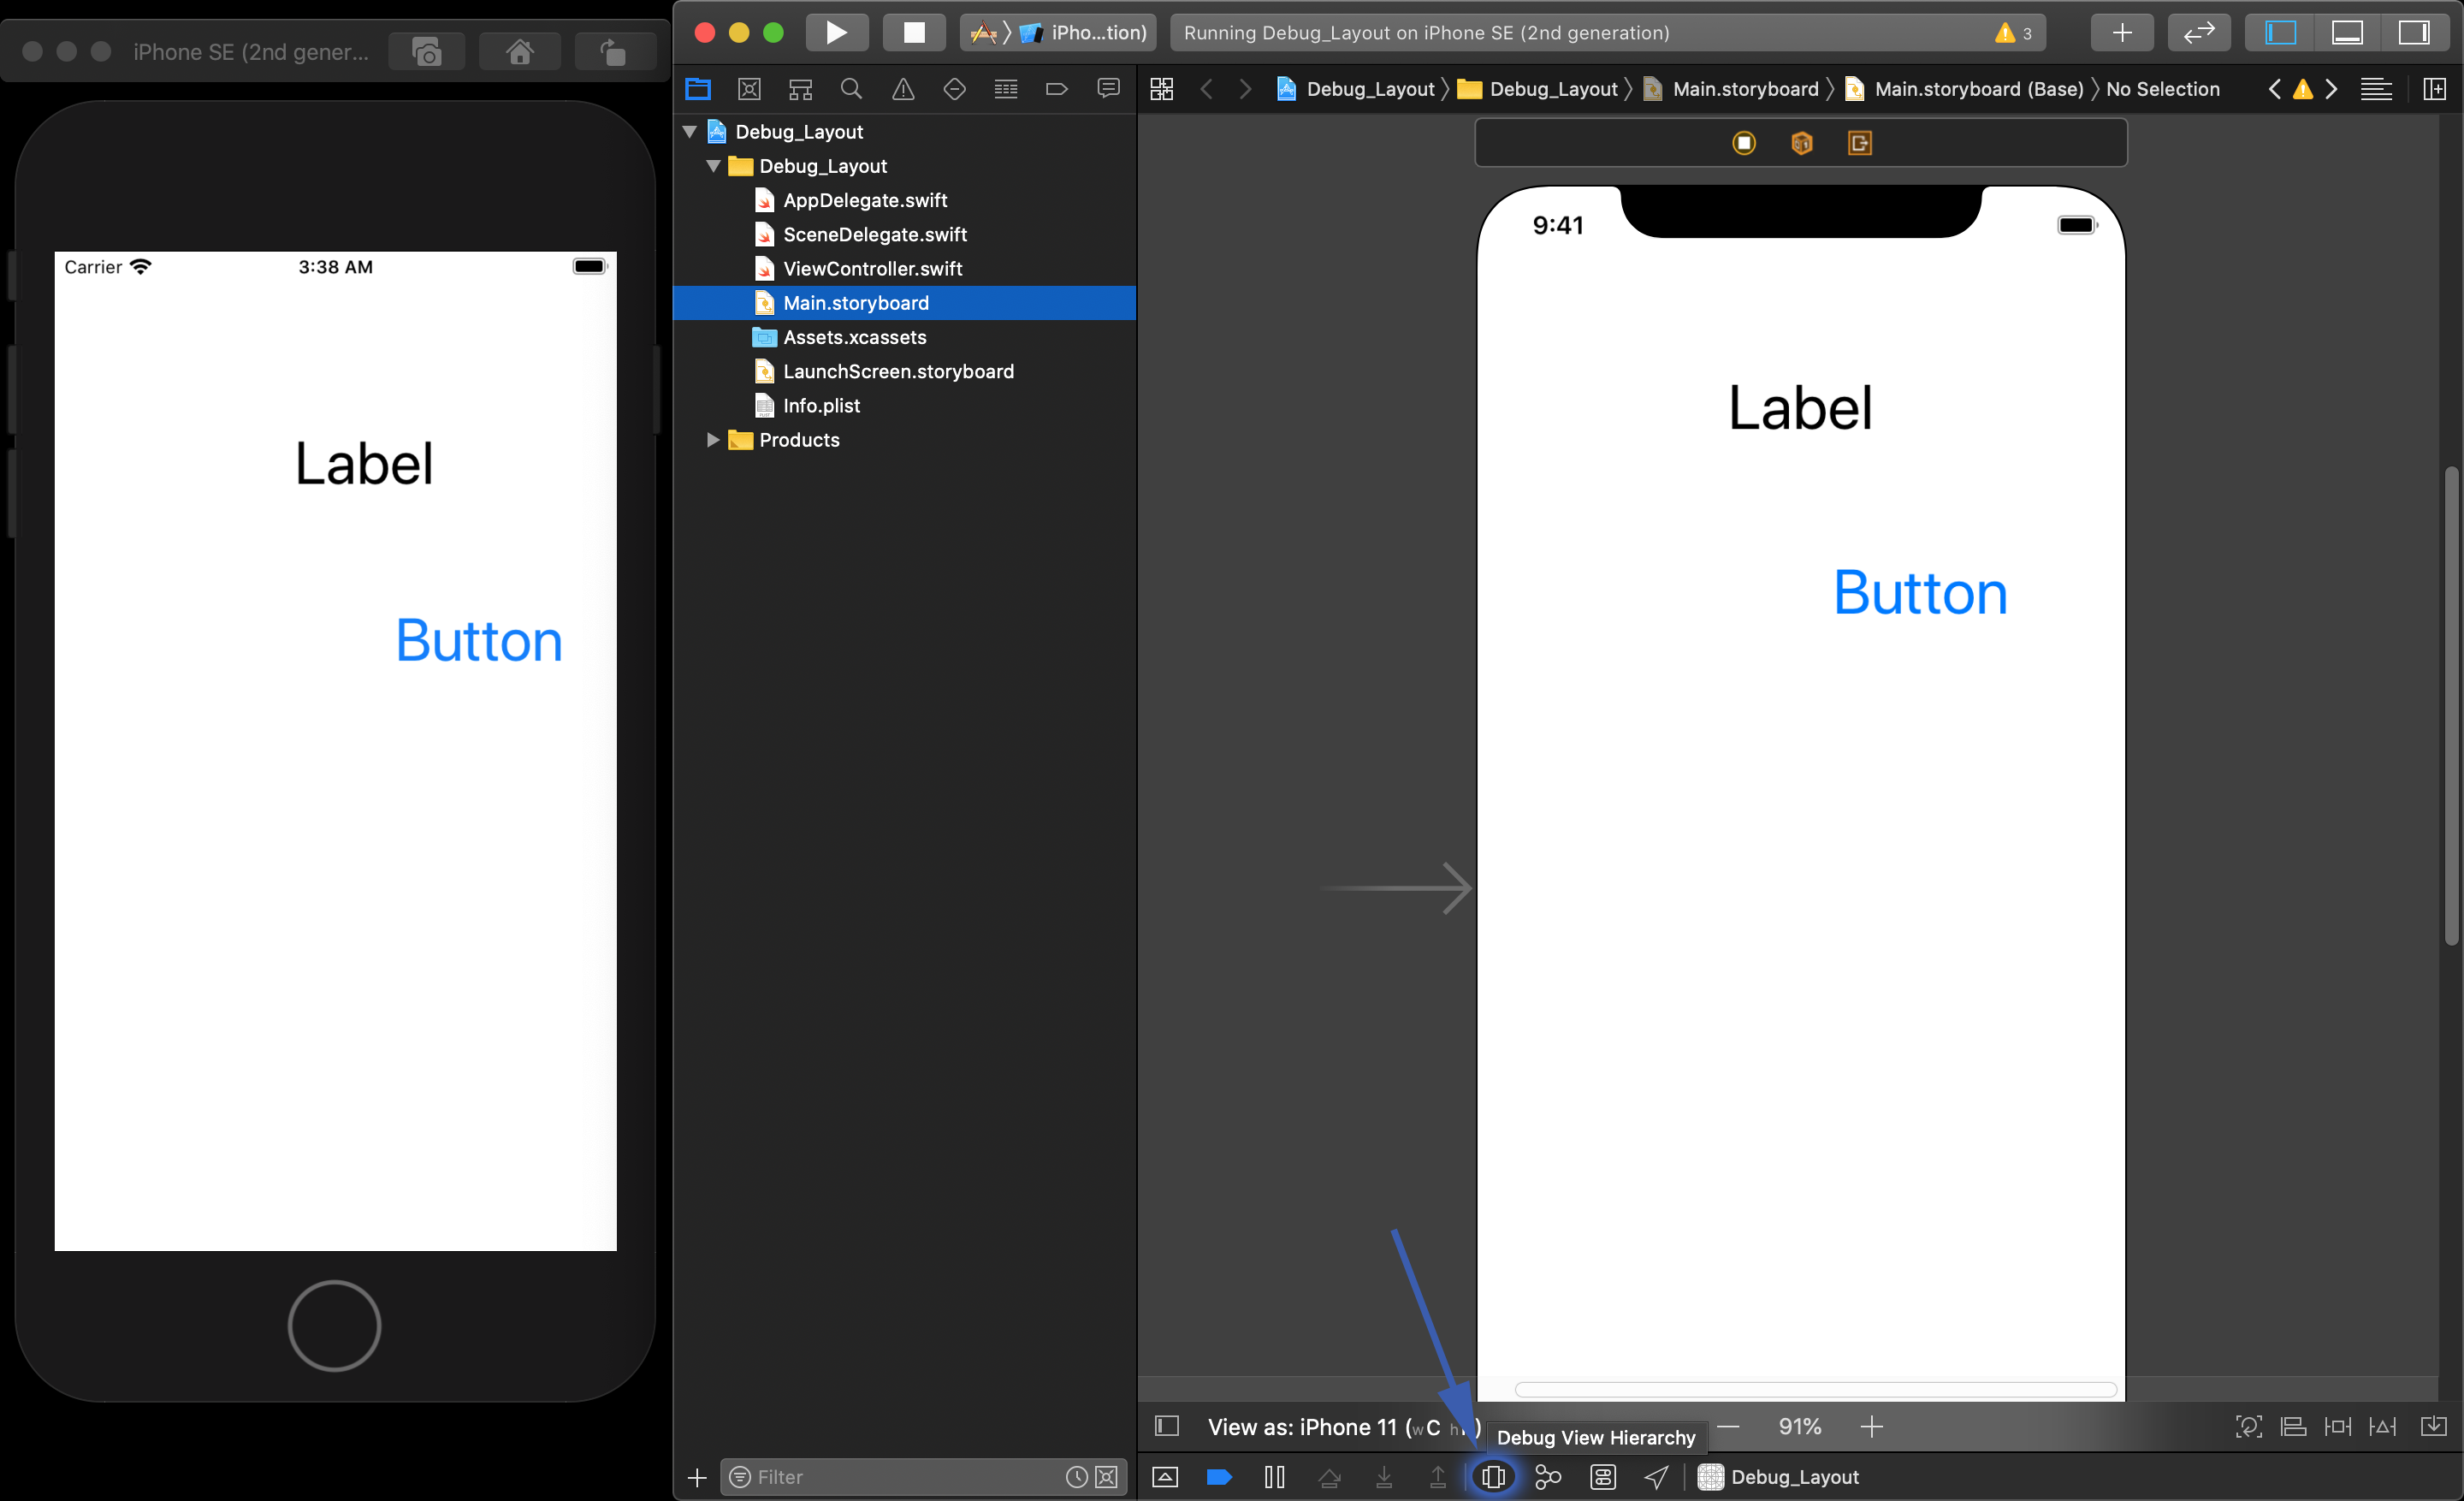
Once you launch your application and it is running in the simulator, you need to go back in Xcode (do not stop the application) and open the Debug View Hierarchy by clicking the icon (shown above) at the bottom of the editor area. This lets you get an in-depth view of all the UI elements currently in your view, and how they're ordered while your application is running.
On the left, you are shown a view hierarchy of all the current UI objects in the view — including any objects programmatically added to the view from the code. The centre shows you an 'exploded' view of the layout. This is not showing the storyboard and will not let you move UI objects around, but it lets you view your application in 3D, allowing you to examine how your UI objects are layered in your application in real time as it runs. Just below the 3D view is a horizontal bar with some controls to let you manipulate the 3D view.
You can rotate the view by clicking on the view with your mouse and dragging around.
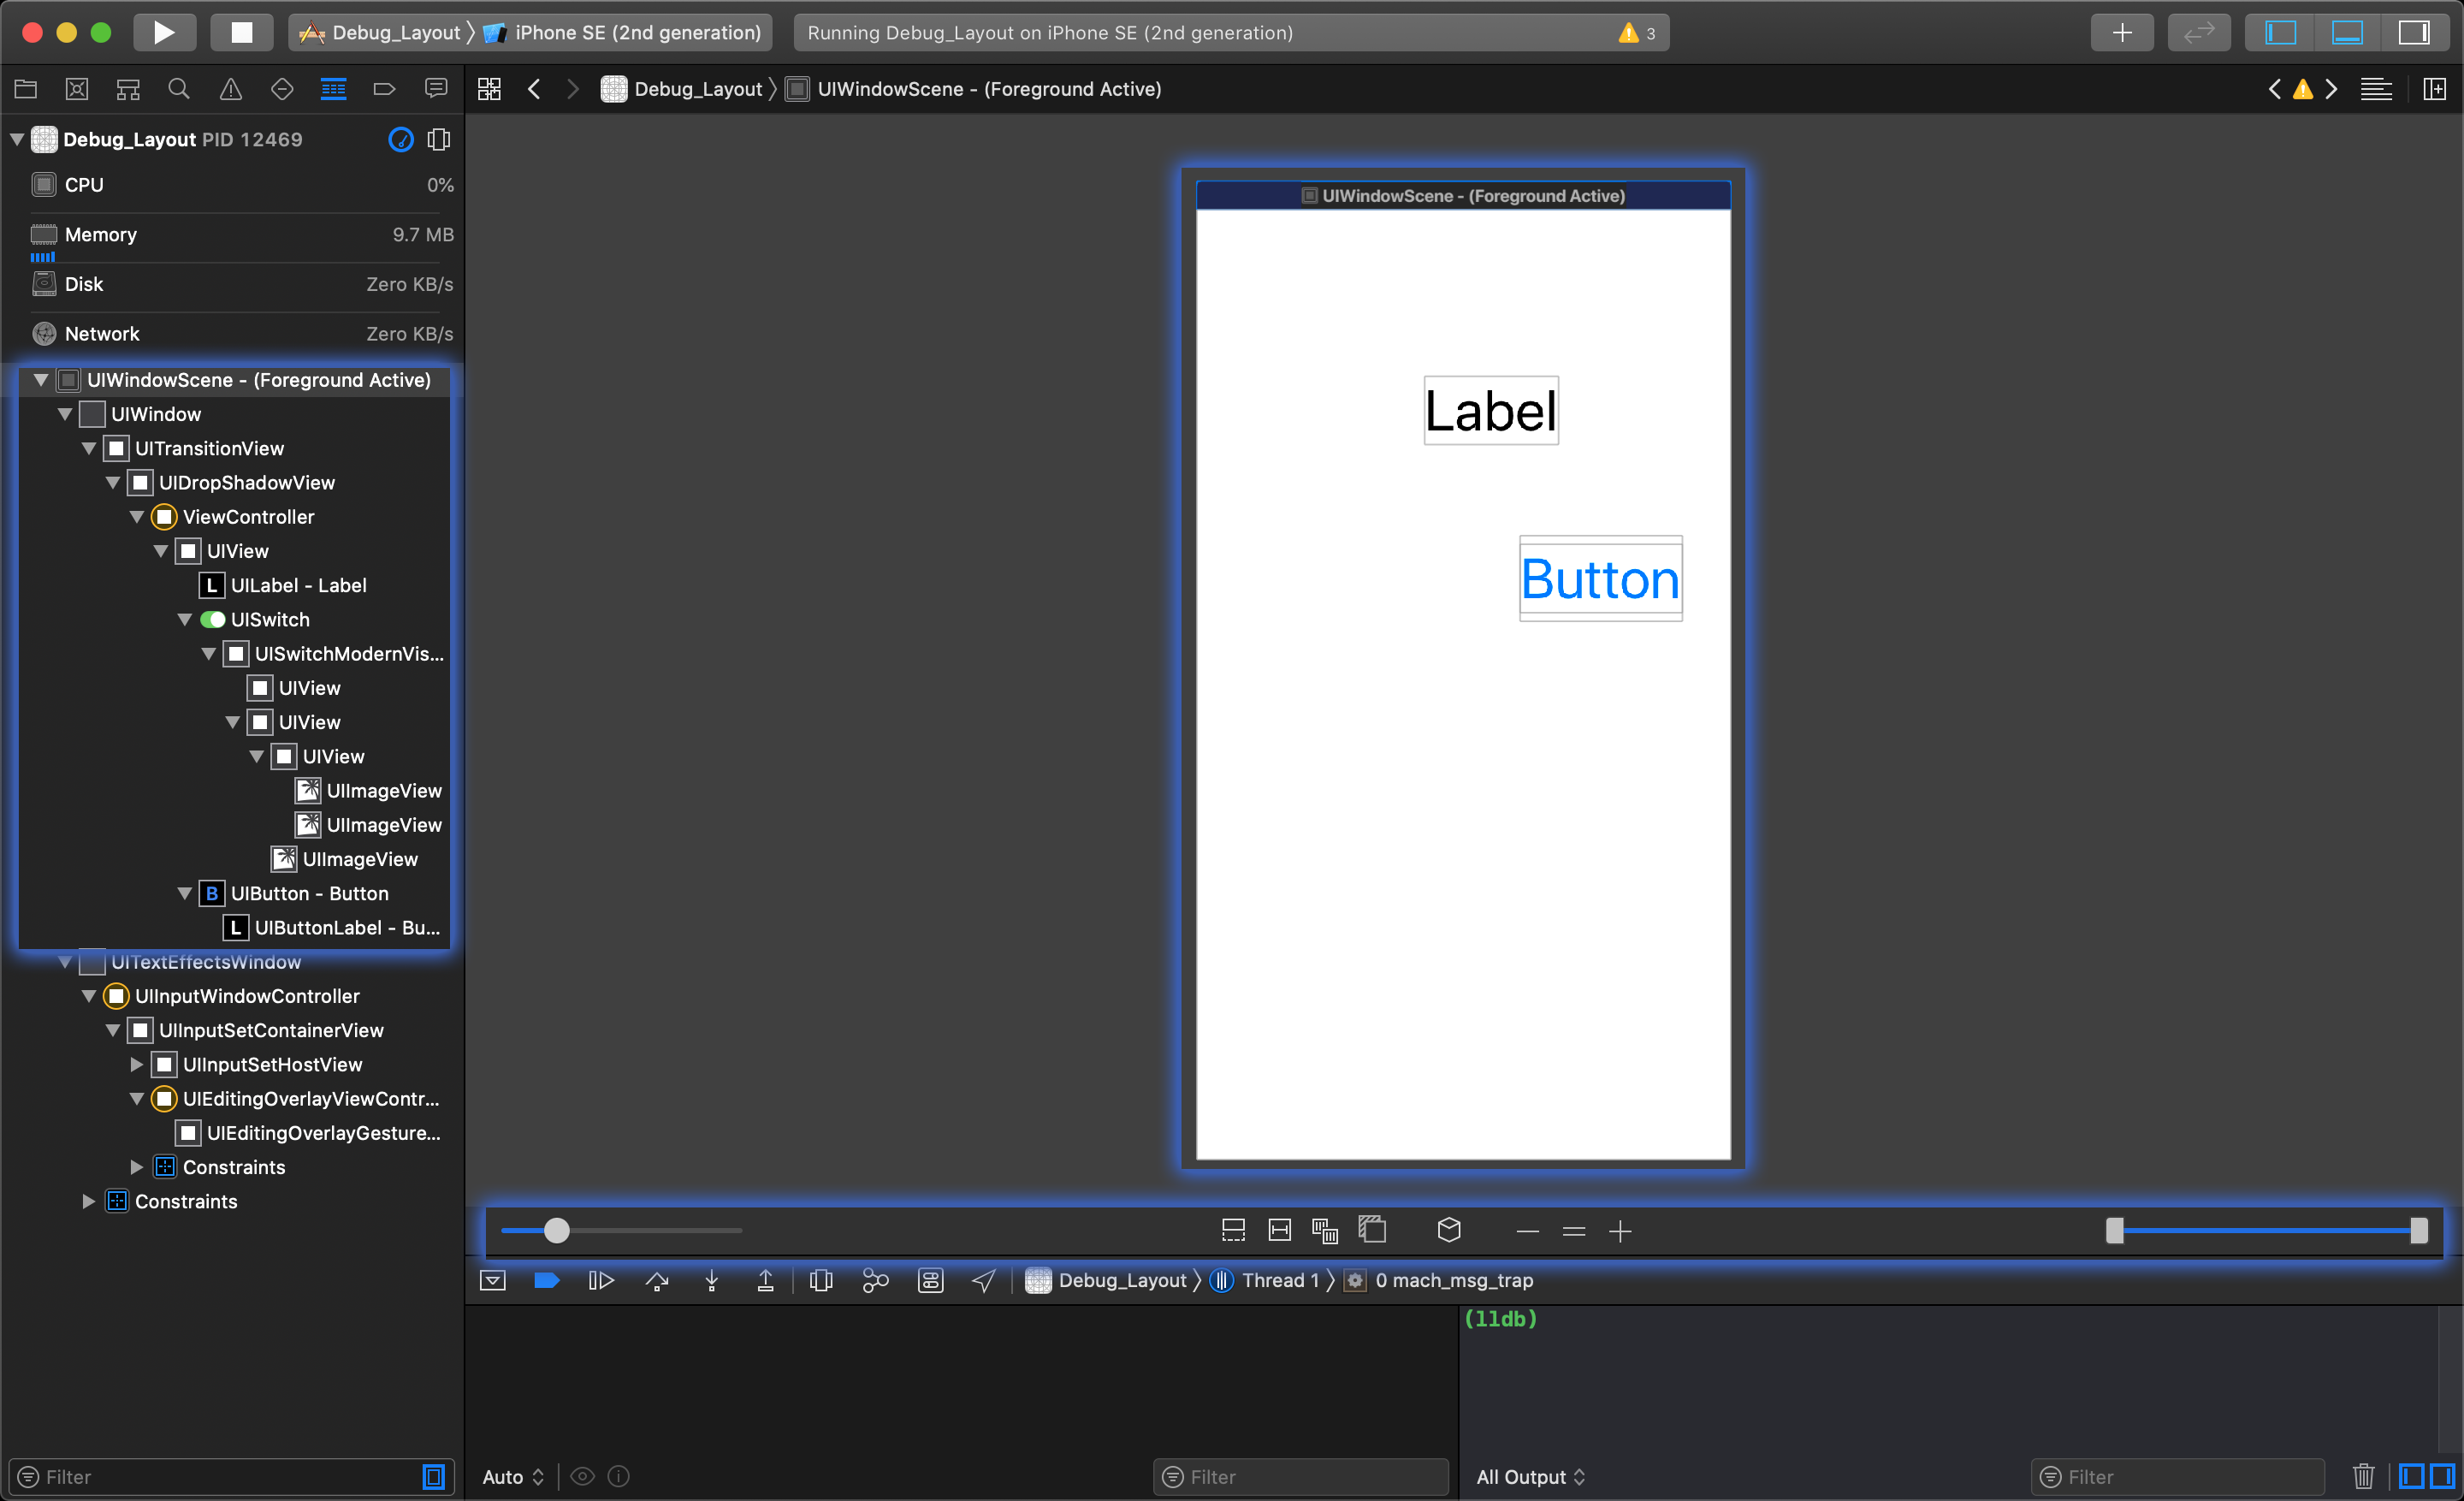
The left slider in the controls at the bottom lets you increase or decrease how far to explode the view.
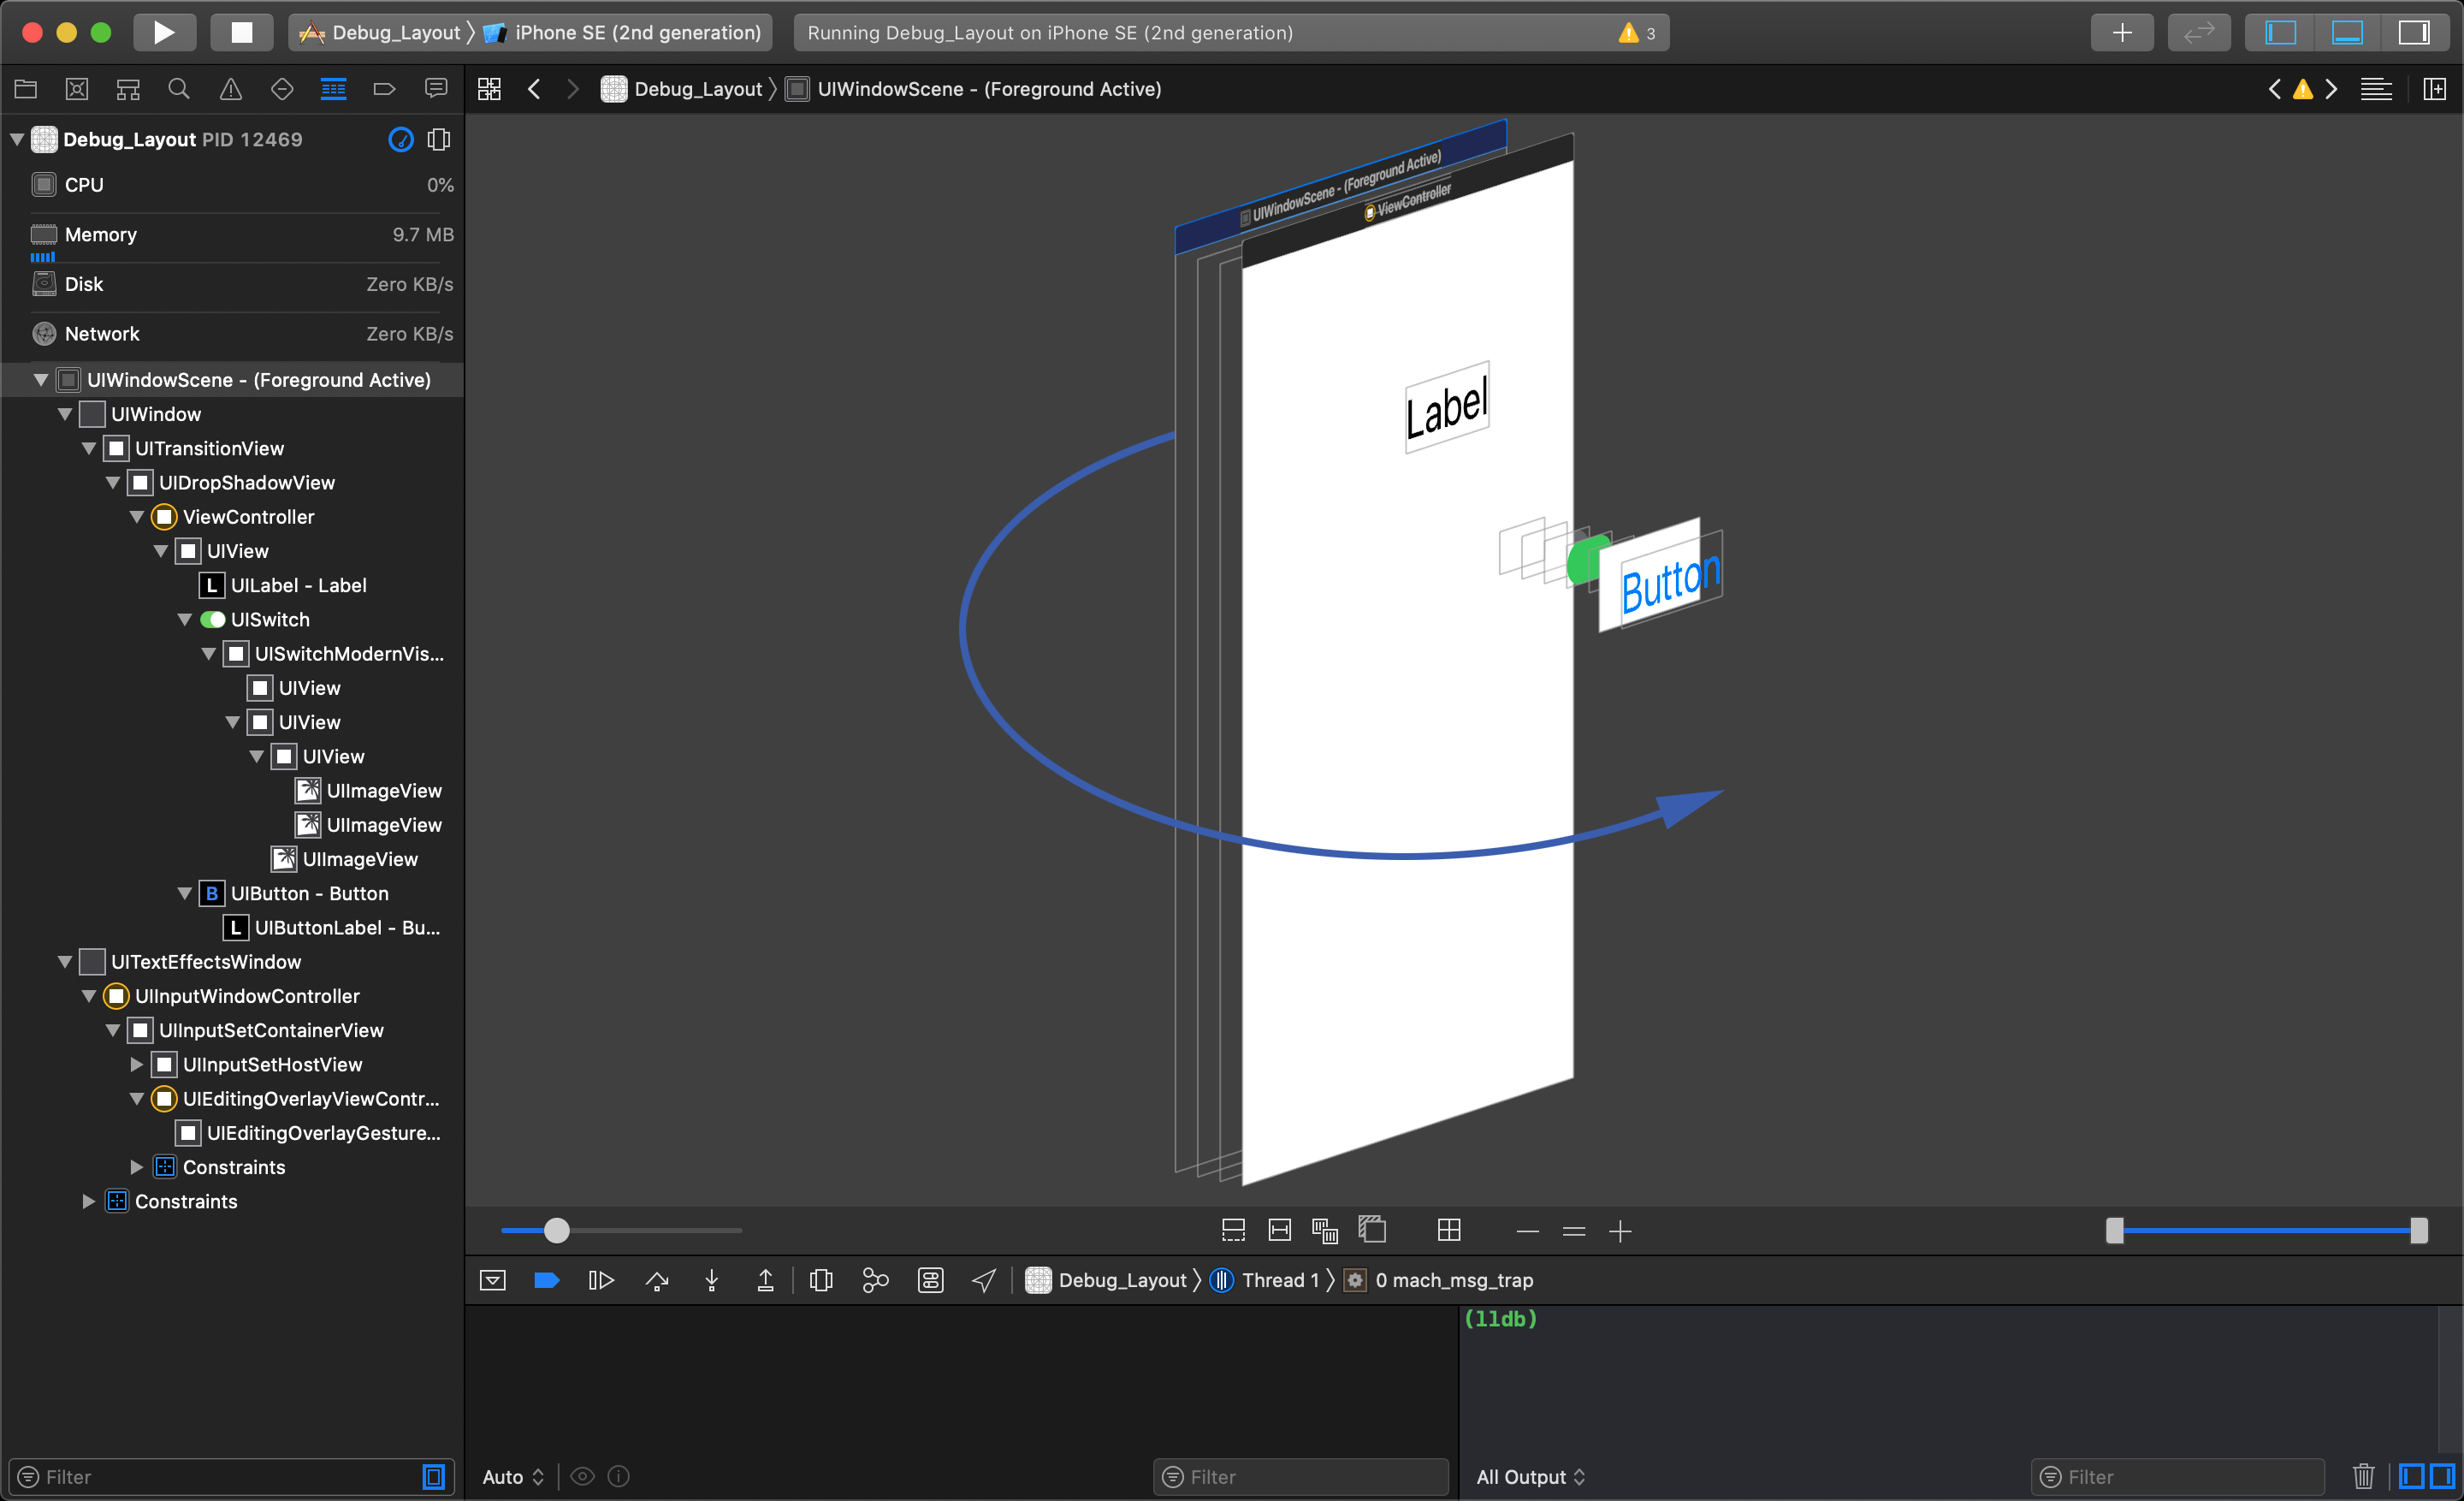
The bottom right slider controls the visibility of all the UI objects in the 3D view and has two controls: one for the back and one for the front.
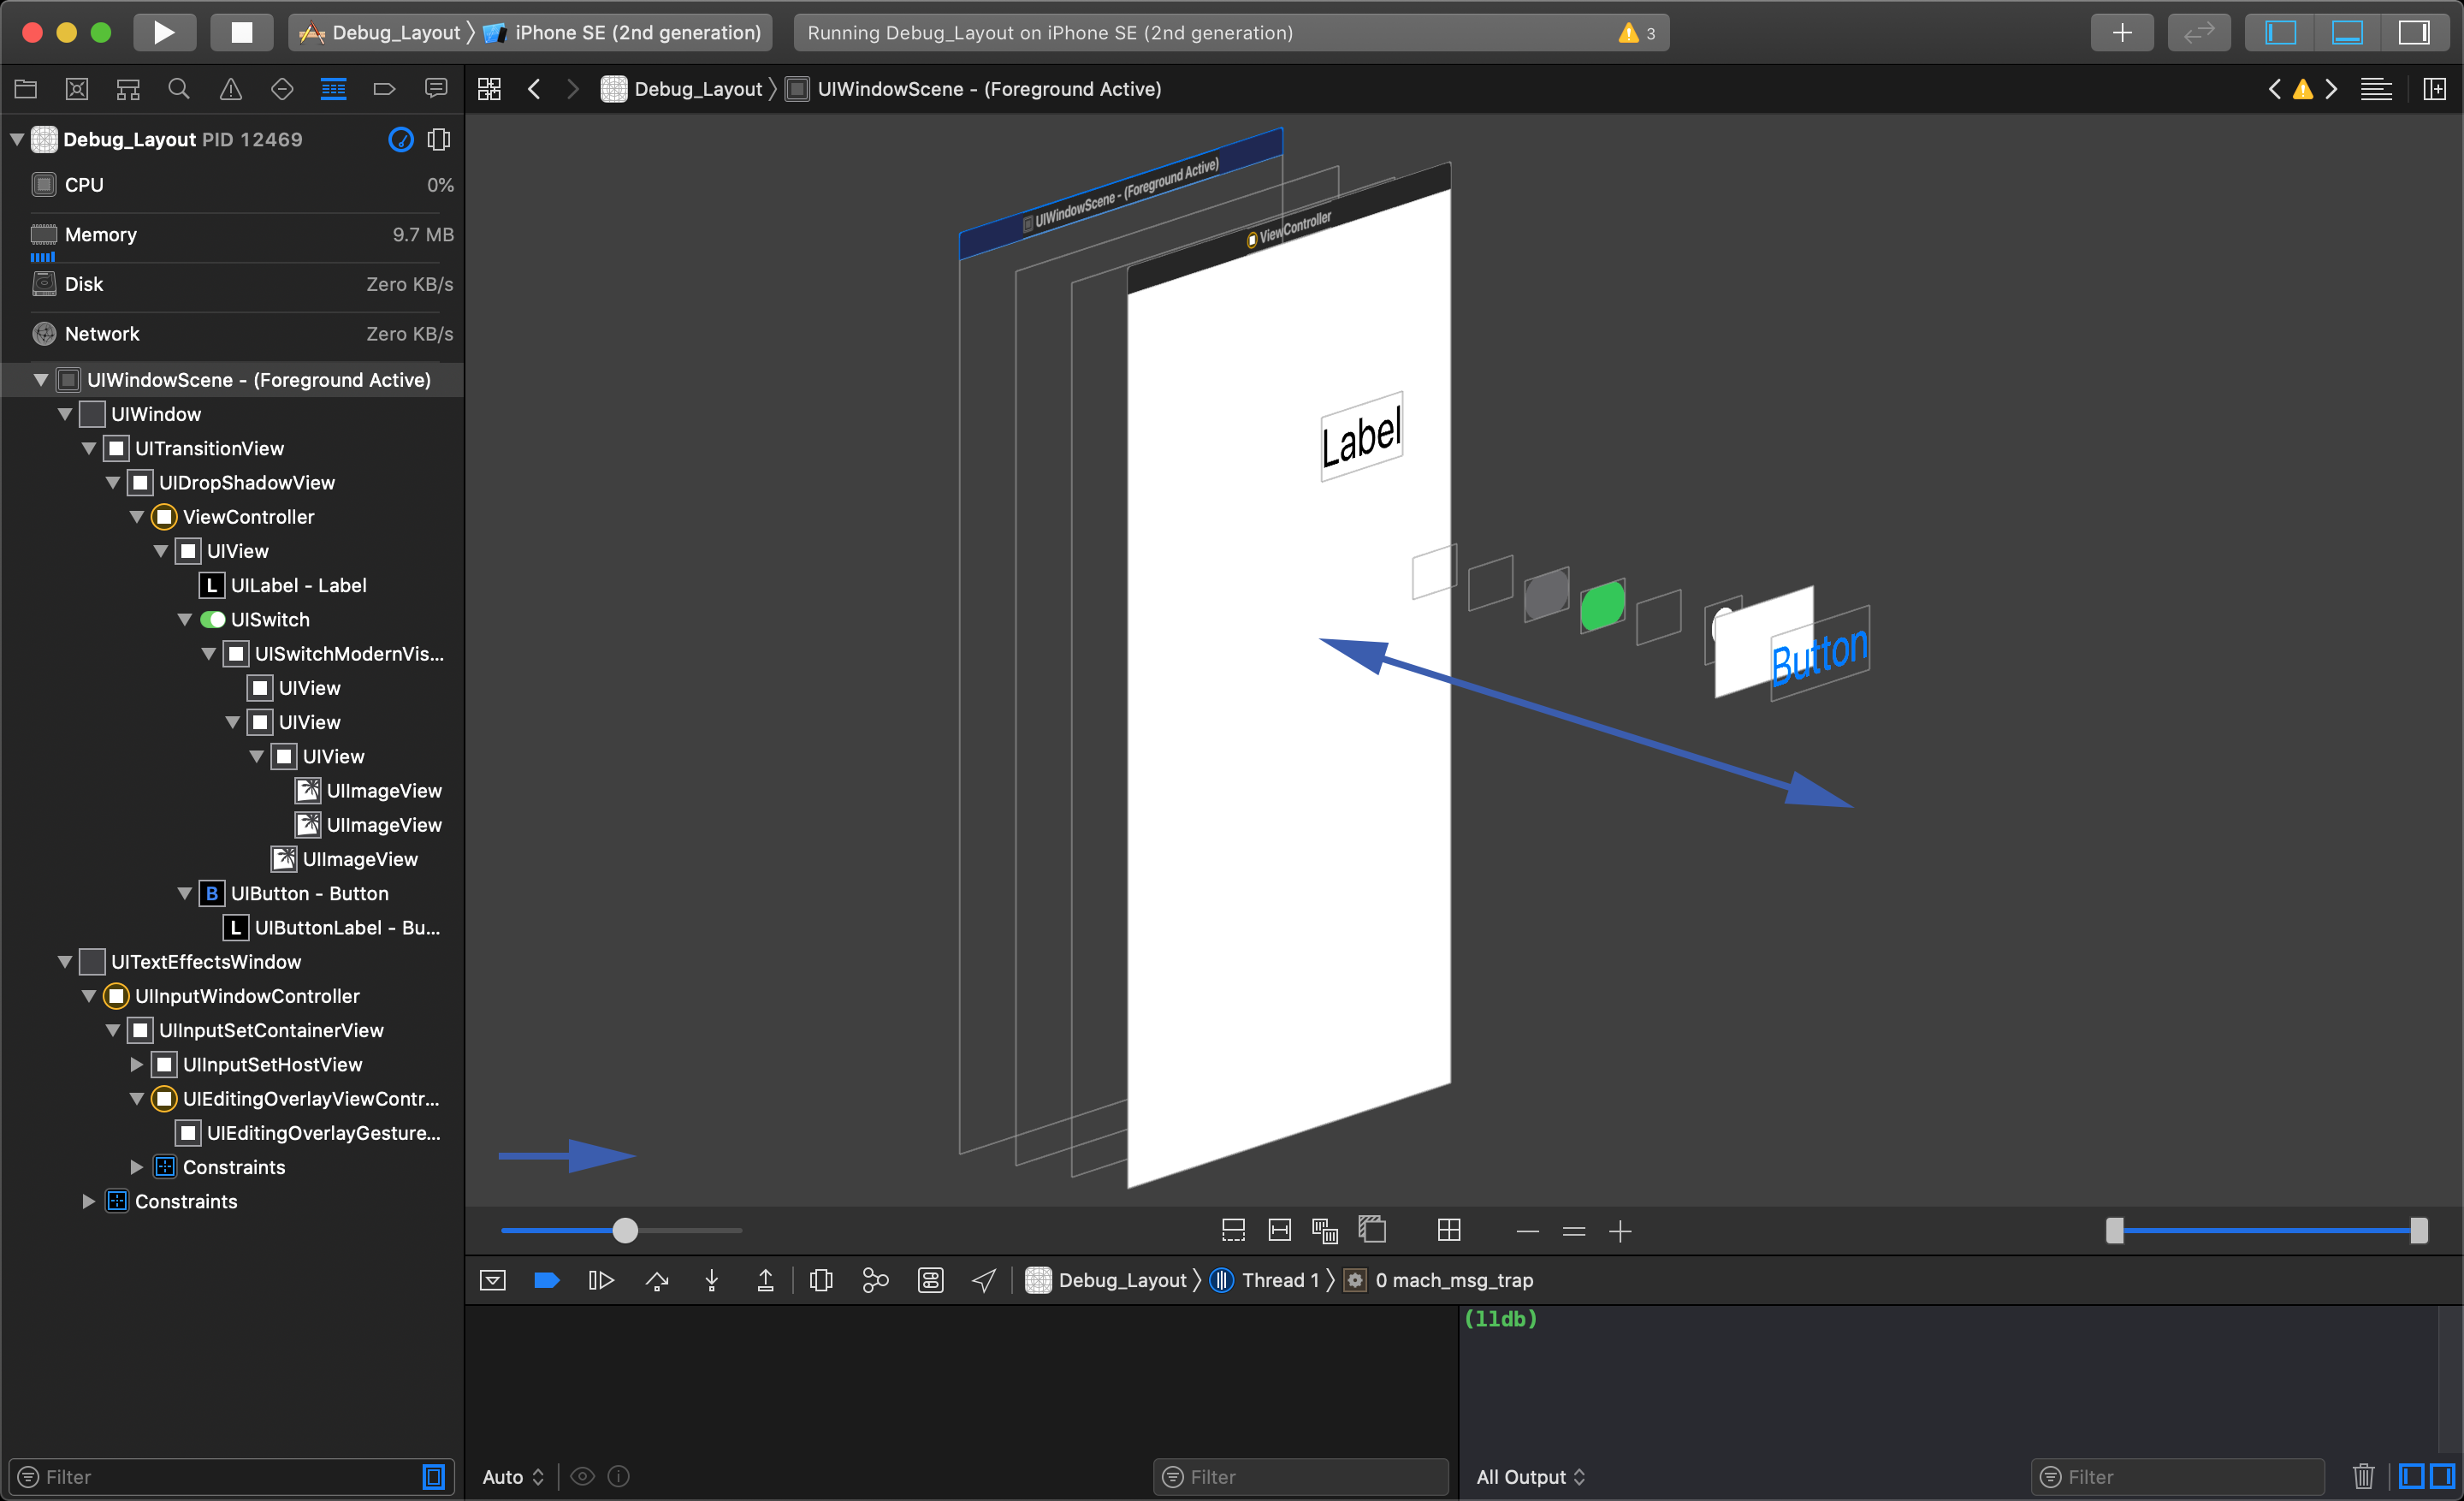
Moving the left control inwards will start to hide UI objects from the back to the front.
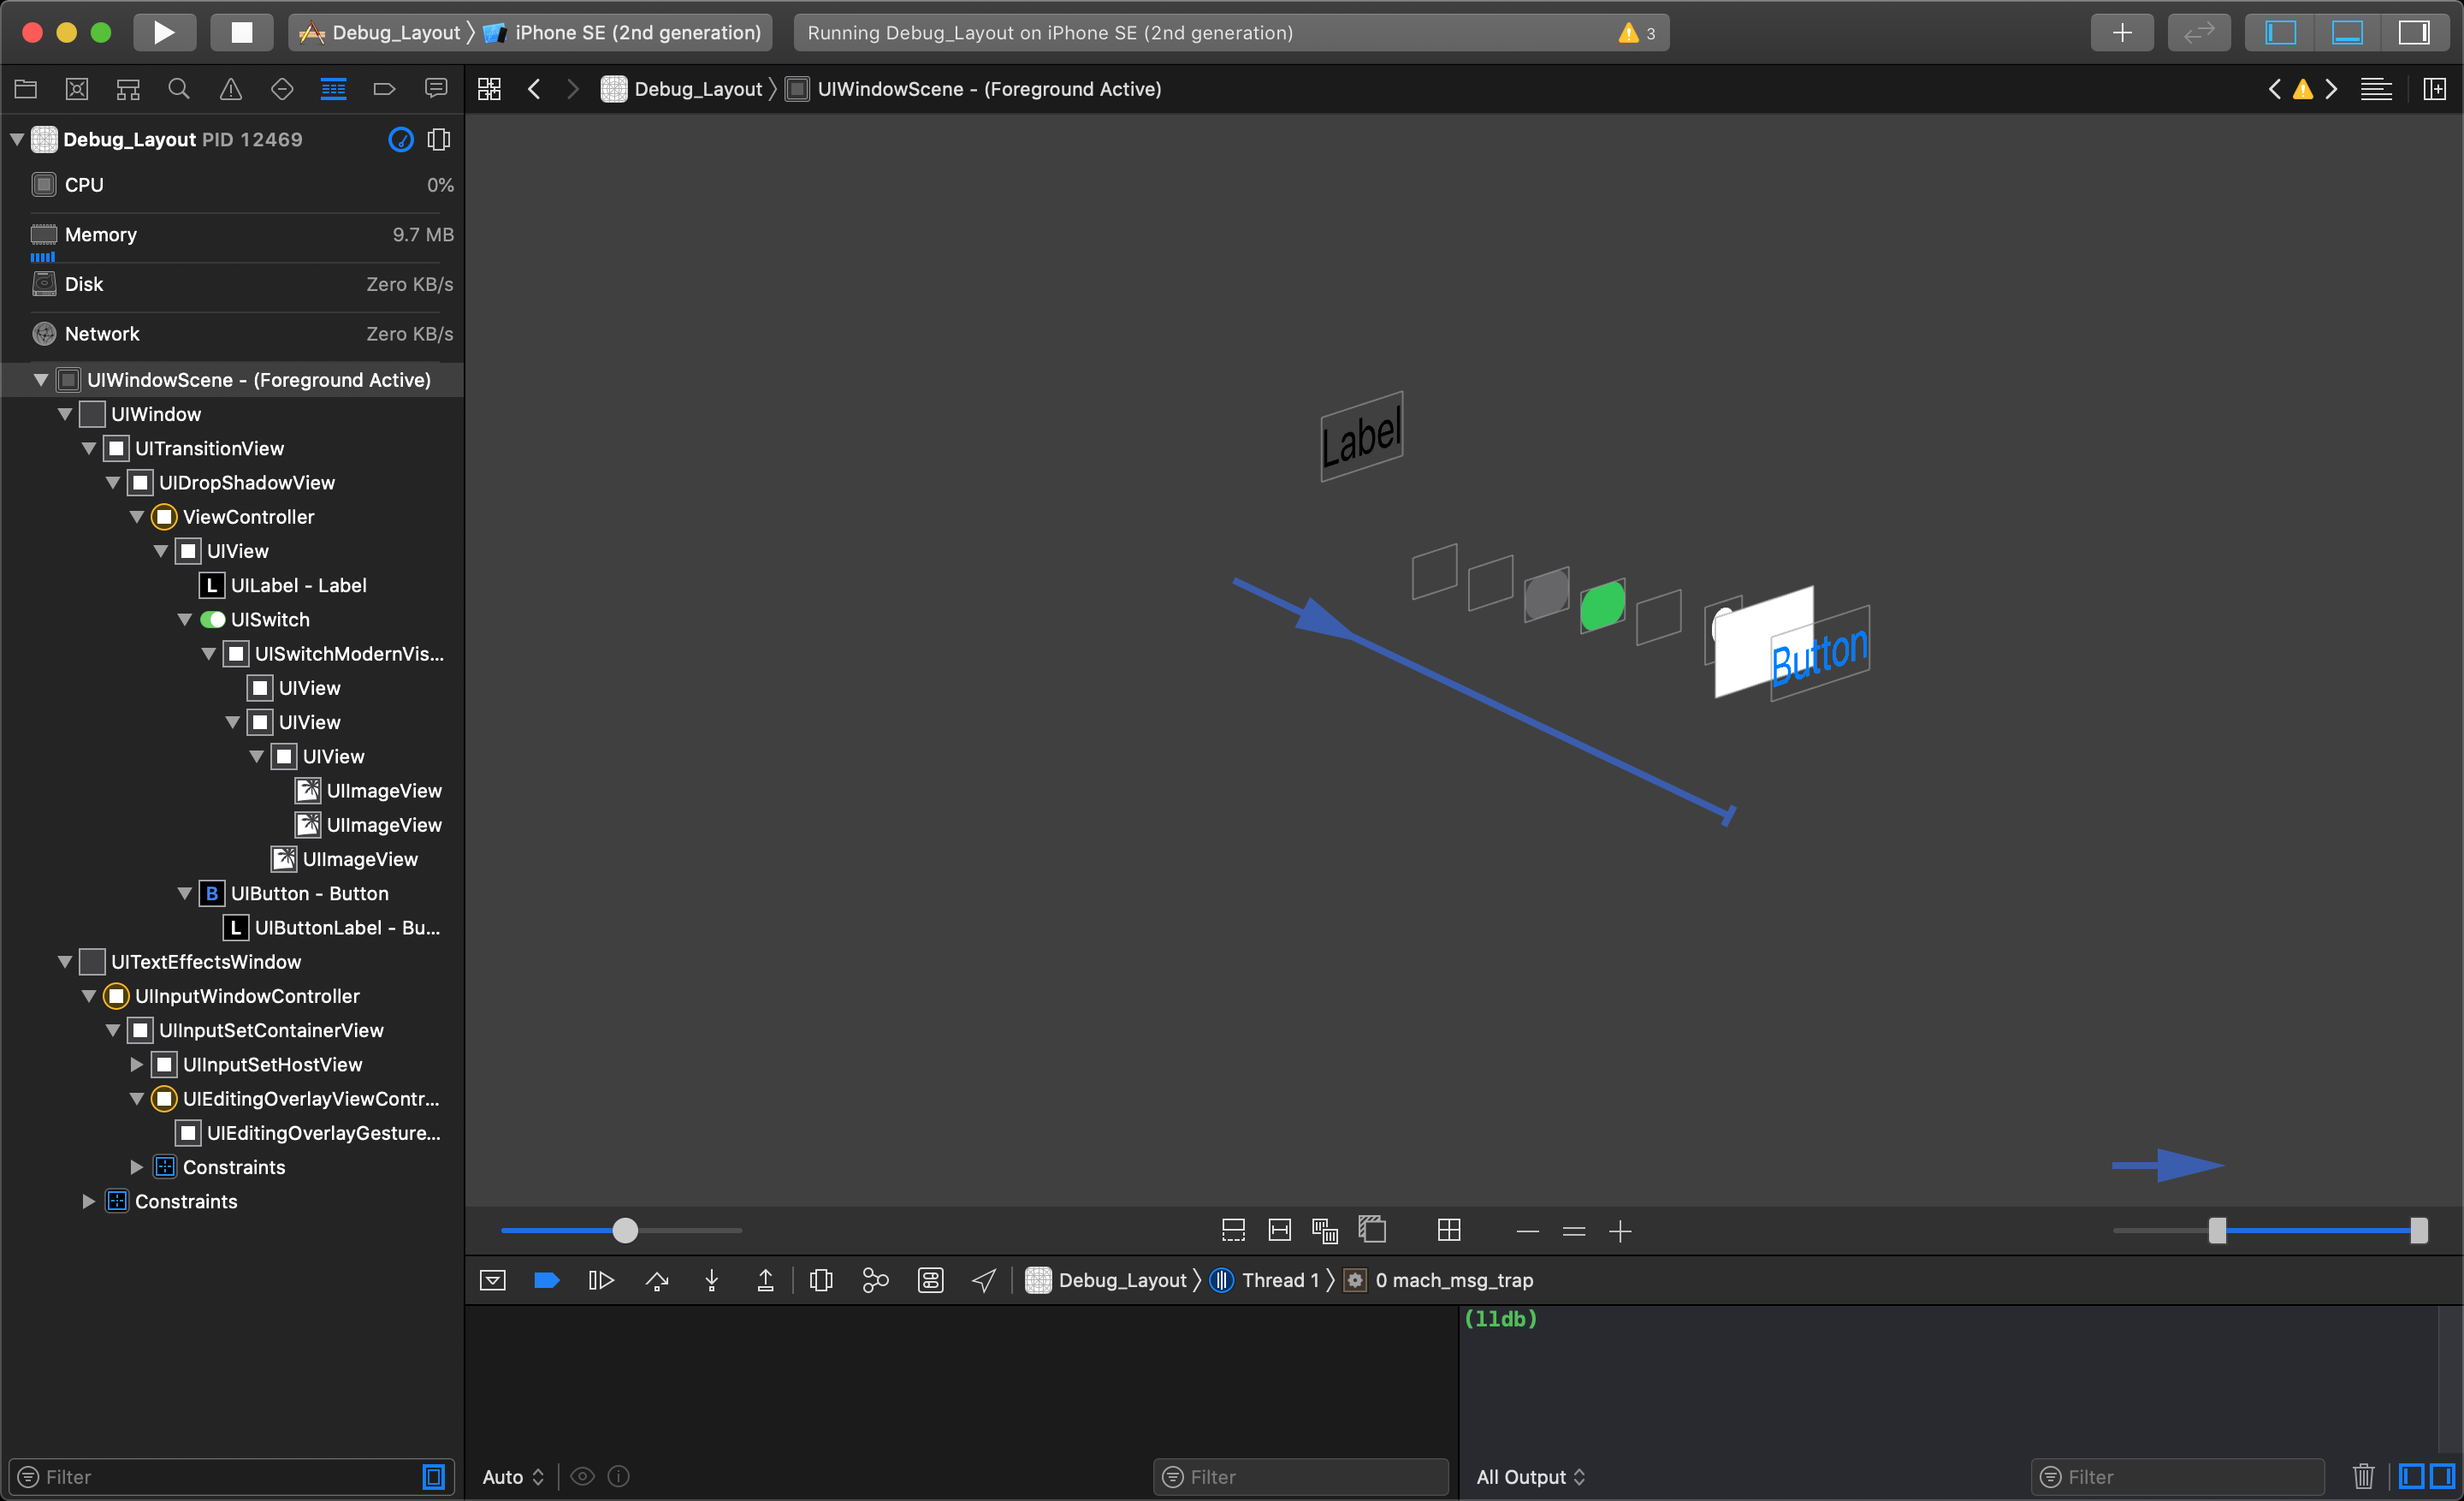
Moving the right control inwards will start to hide UI objects from the front to the back.
The following video describes how to debug the subviews of your application using the Debug View Hierarchy:
iOS 10 App Development Essentials 4: Application Architecture - Debugging view hierarchies