Image and Camera Picker
Sometimes you wish to let the user choose an image to be used in the application. This can be done by letting them take a new picture with the camera, or choose an existing image form the camera roll. This is done by using a UIImagePickerController, but there is some things you will need to setup to use this.
The three things you need to do in order to use a UIImagePickerController is a follows:
Add an entry to your Info.plist file set to the value 'YES' for one or both of the following keys: 'Privacy - Photo Library Usage Description' 'Privacy - Camera Usage Description'
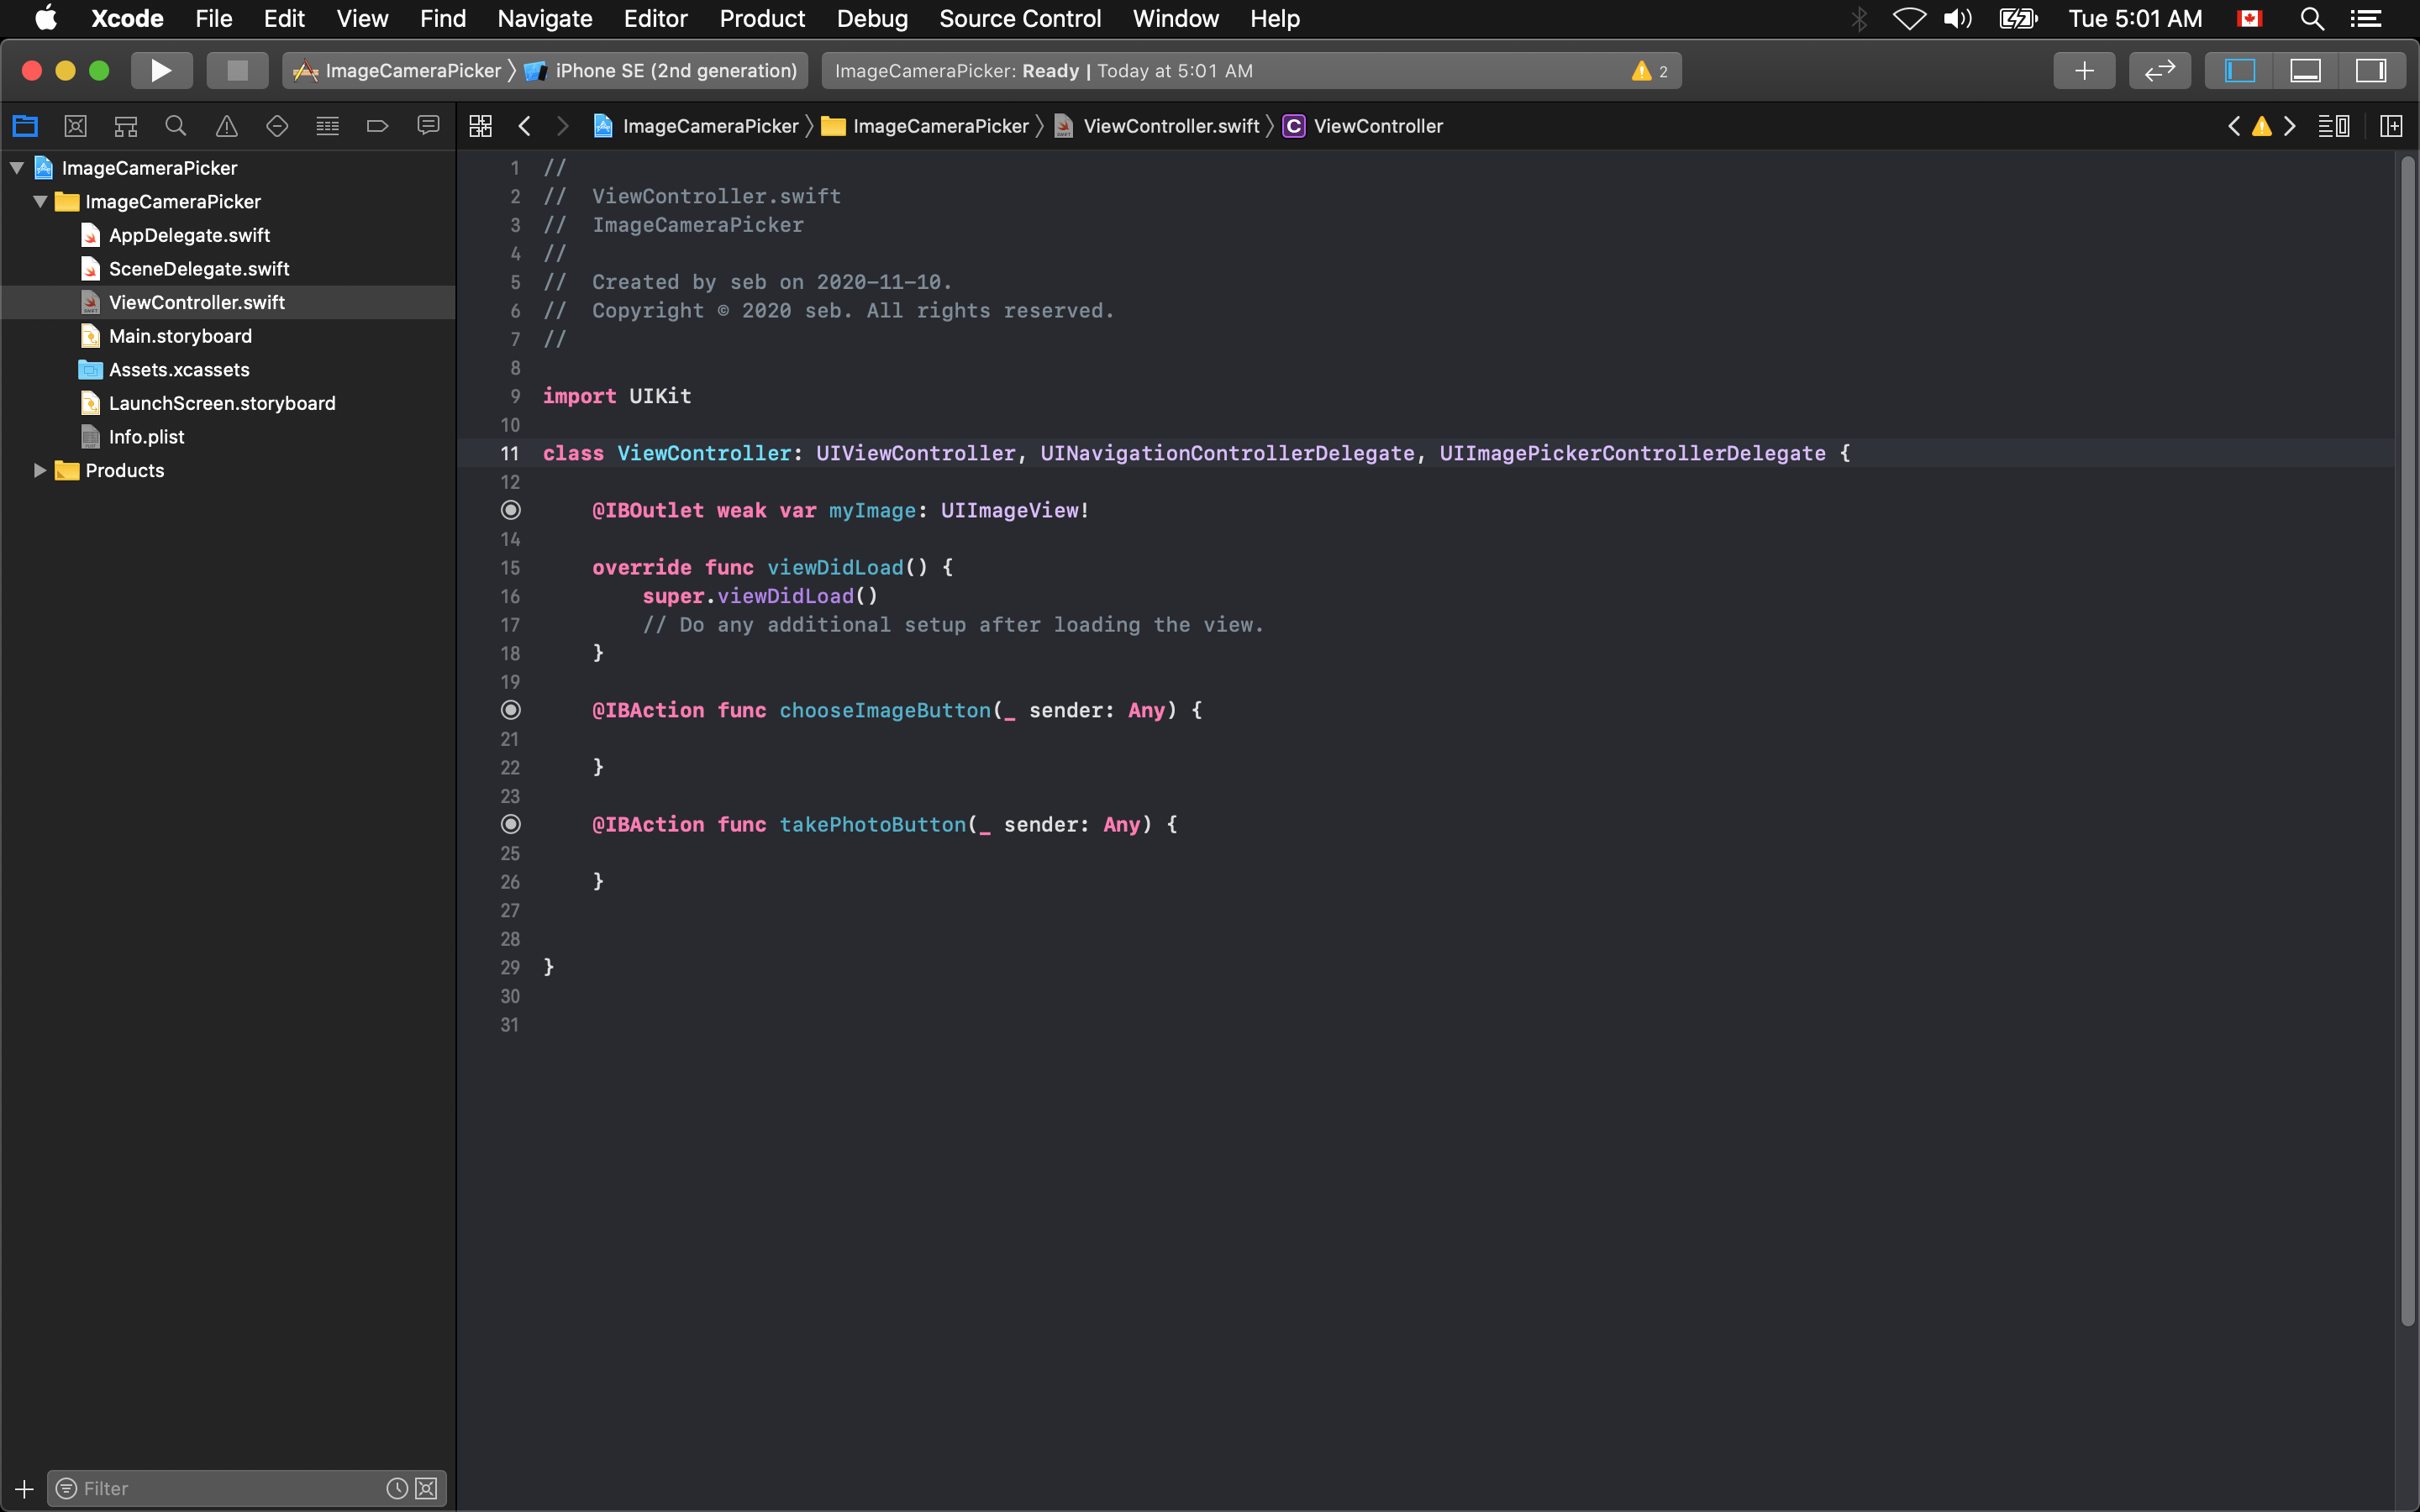
Make you viewController class inherit from UINavigationControllerDelegate, and UIImagePickerControllerDelegate protocols.
Write the functions for when the user has selected an image successfully, and when the user cancels out from picking an image.
NOTE
The Info.plist file contains settings that define how your application works. In this situation we need to add privacy permissions to allow your application to try and access the Photo Library and Camera on the device.
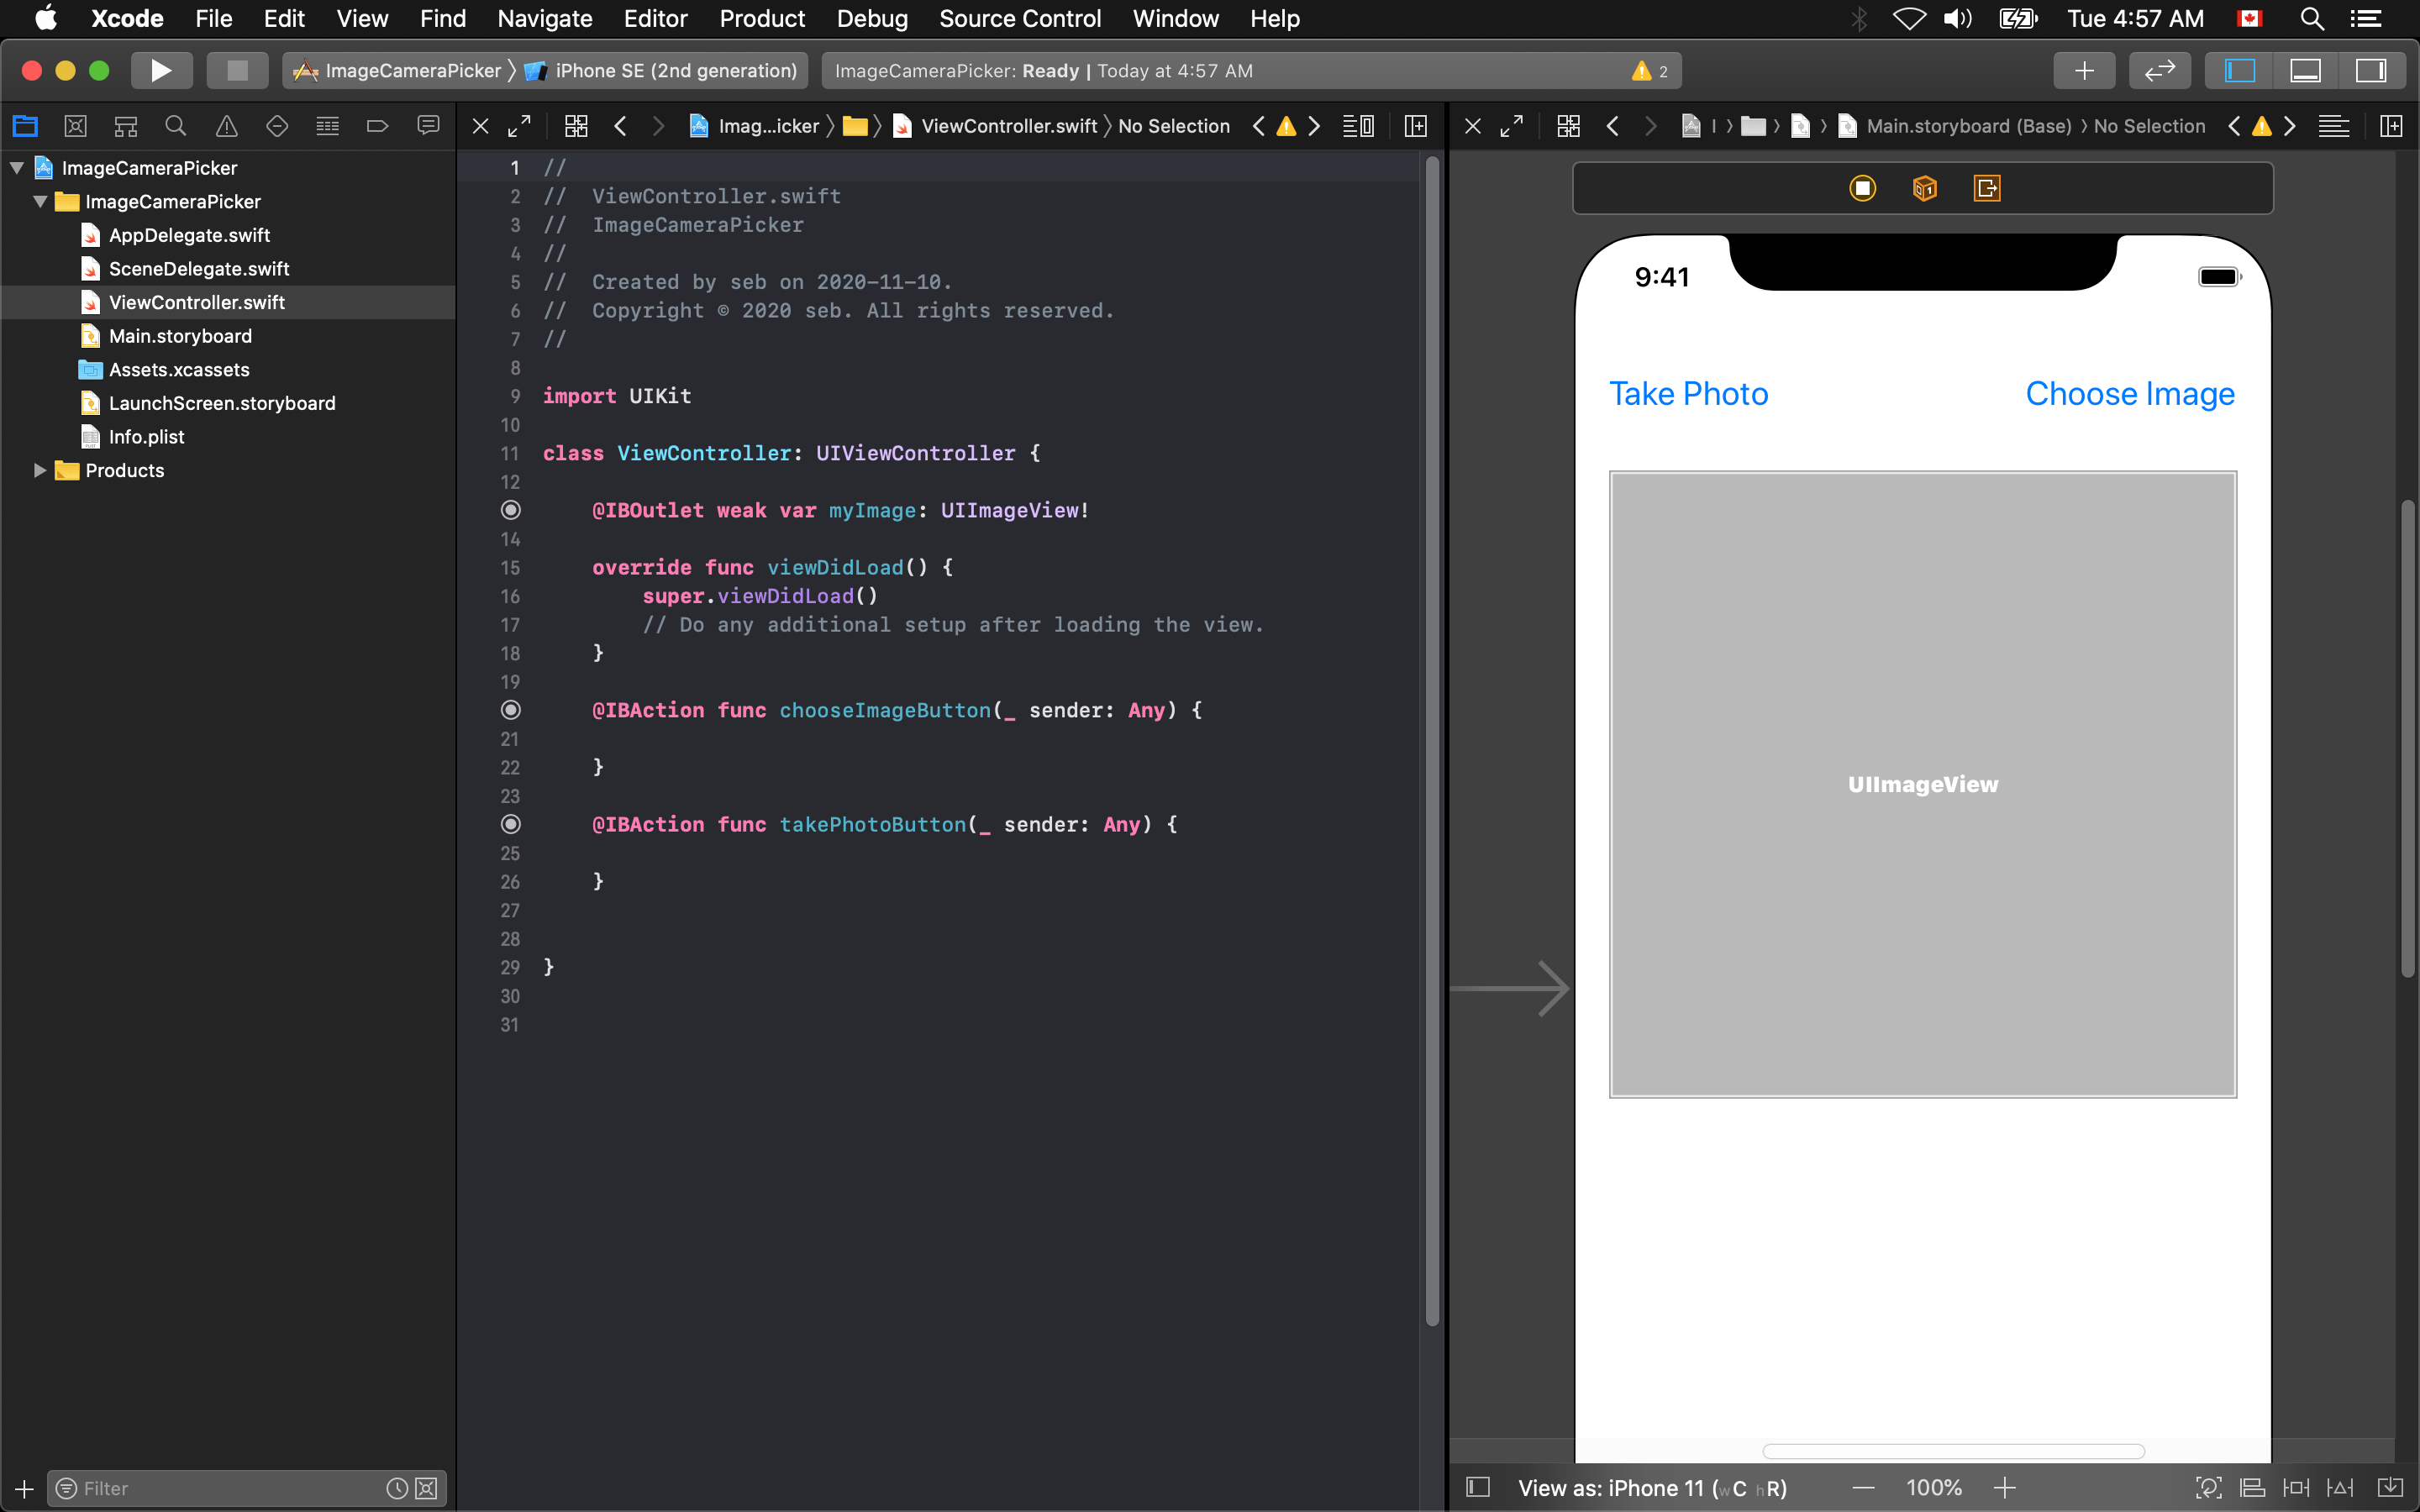
In this example we will have a simple UIImage object display whatever image the user selects. We will also have 2 buttons, one for selecting an image from the Photo Library, and the other for taking a picture with the camera. You can see the basic setup of this application in the following picture.
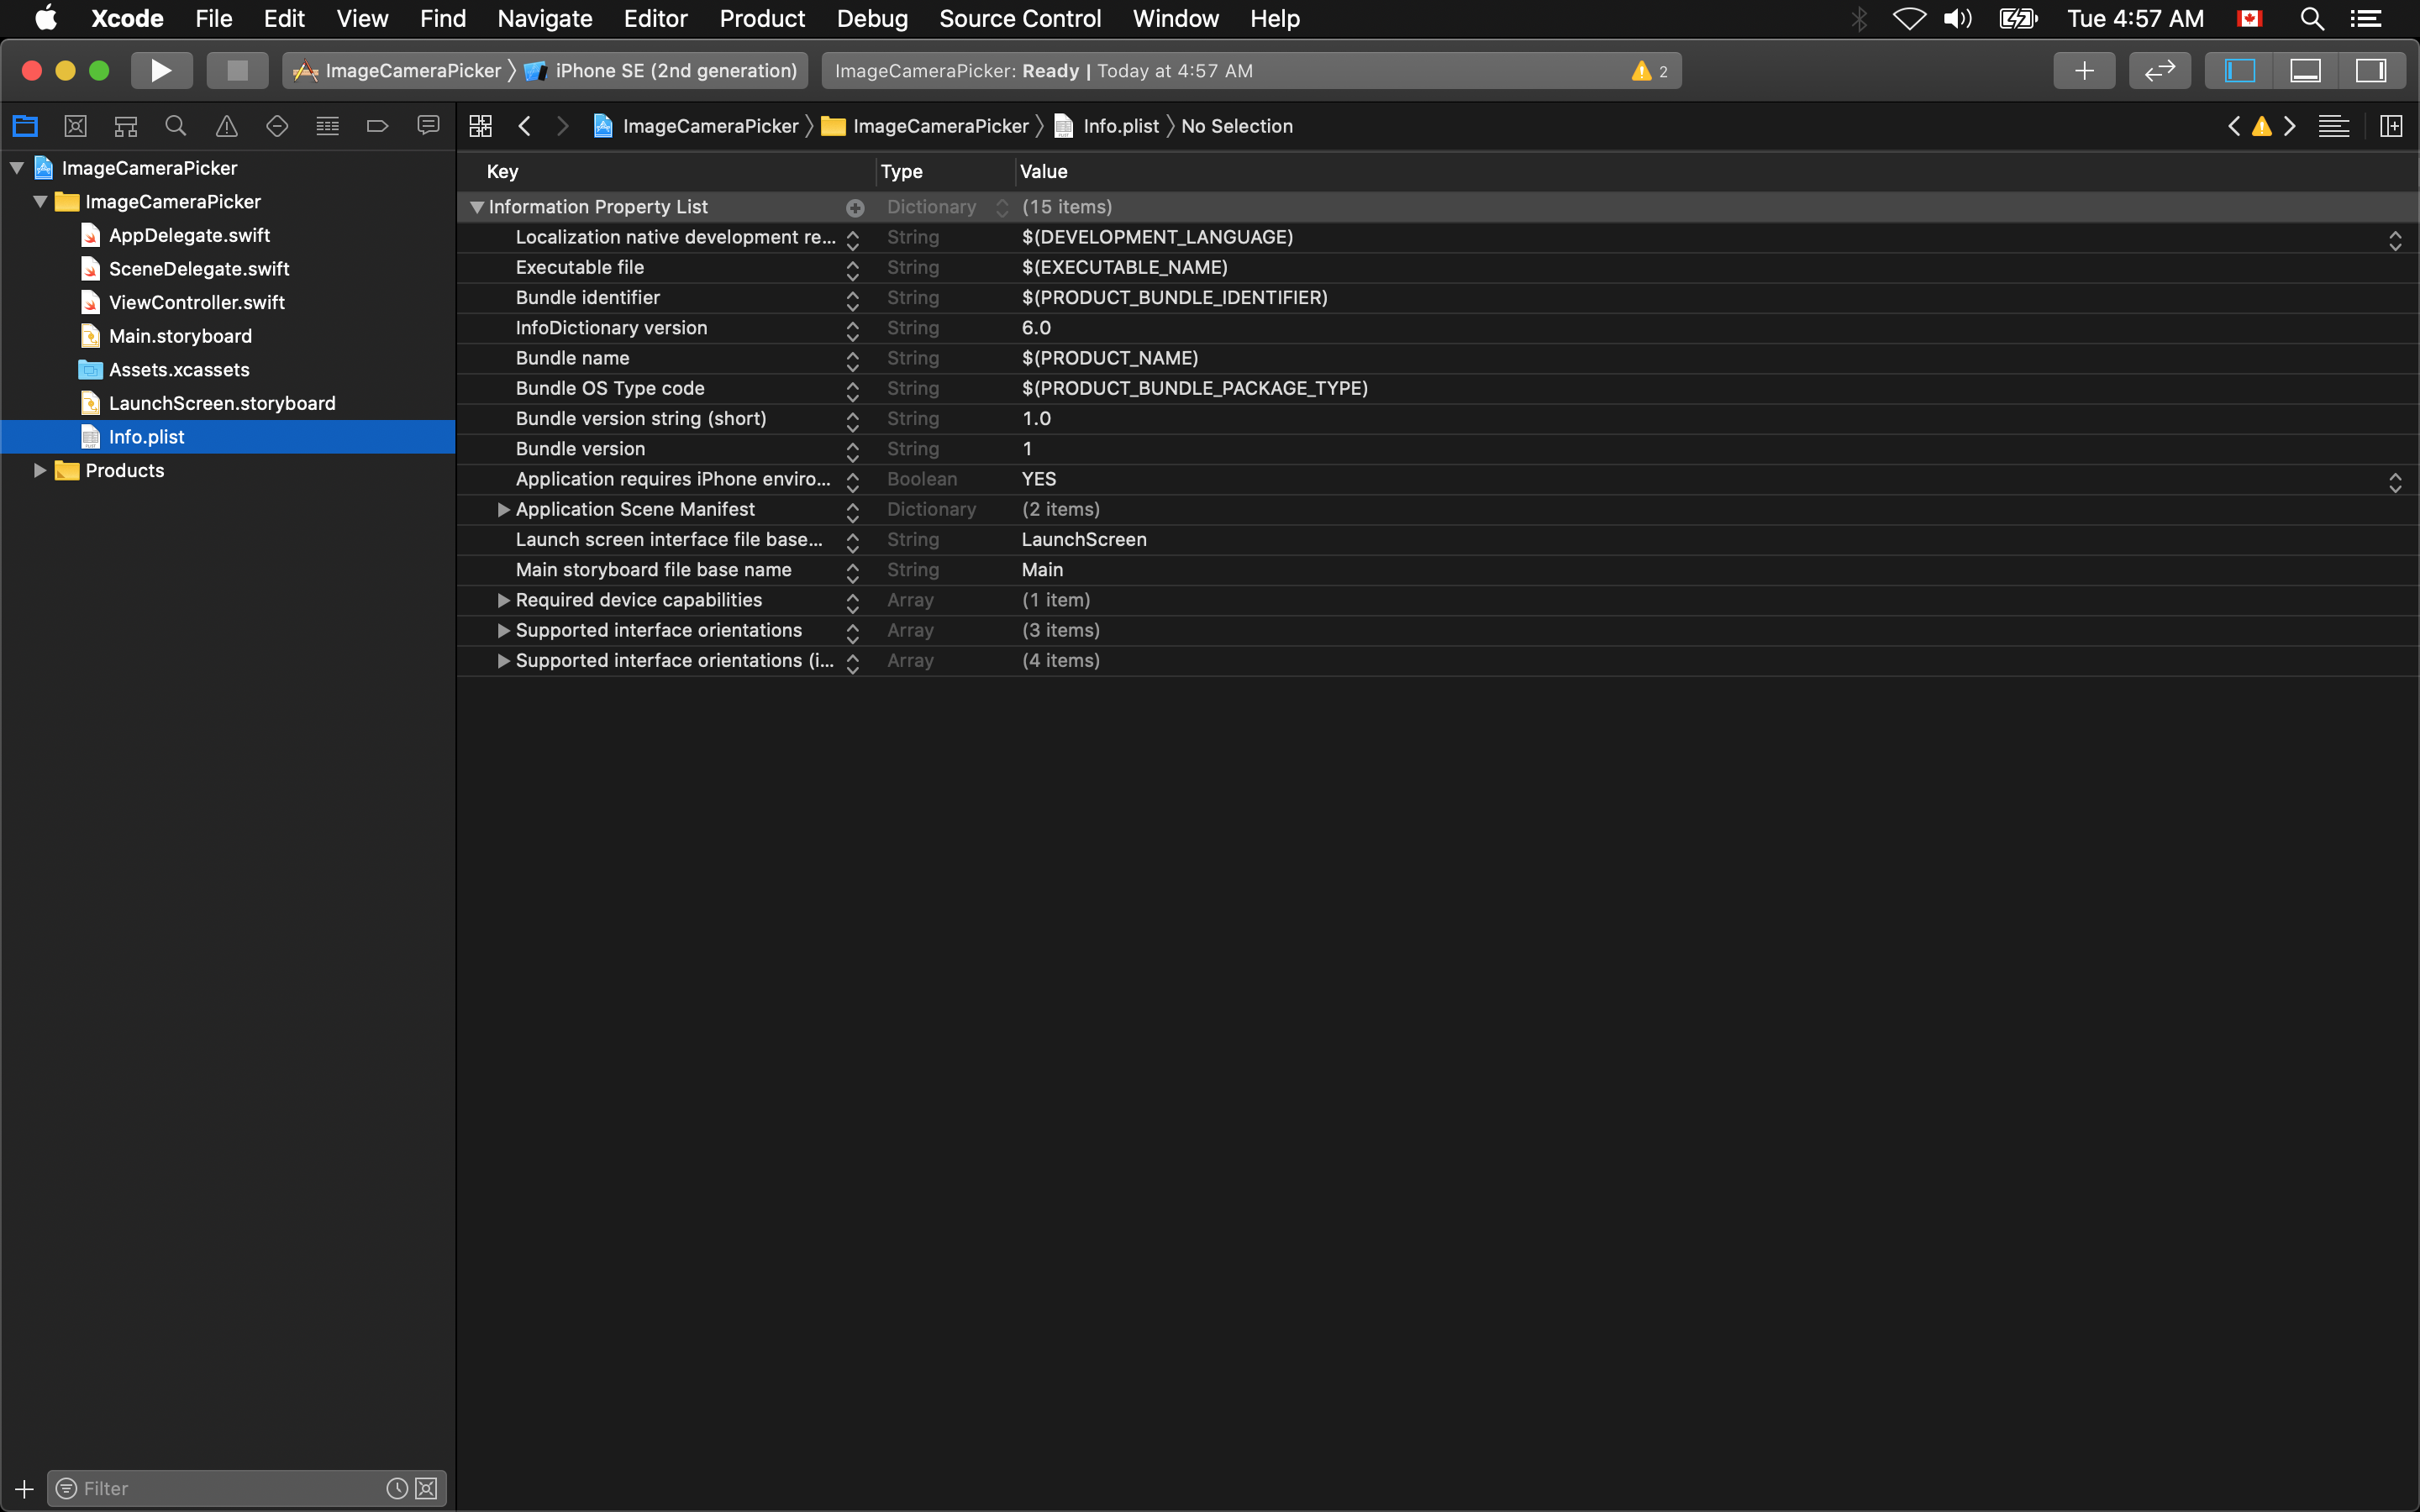
Modifying the Info.plist File
First select the Info.plist file in your project files.
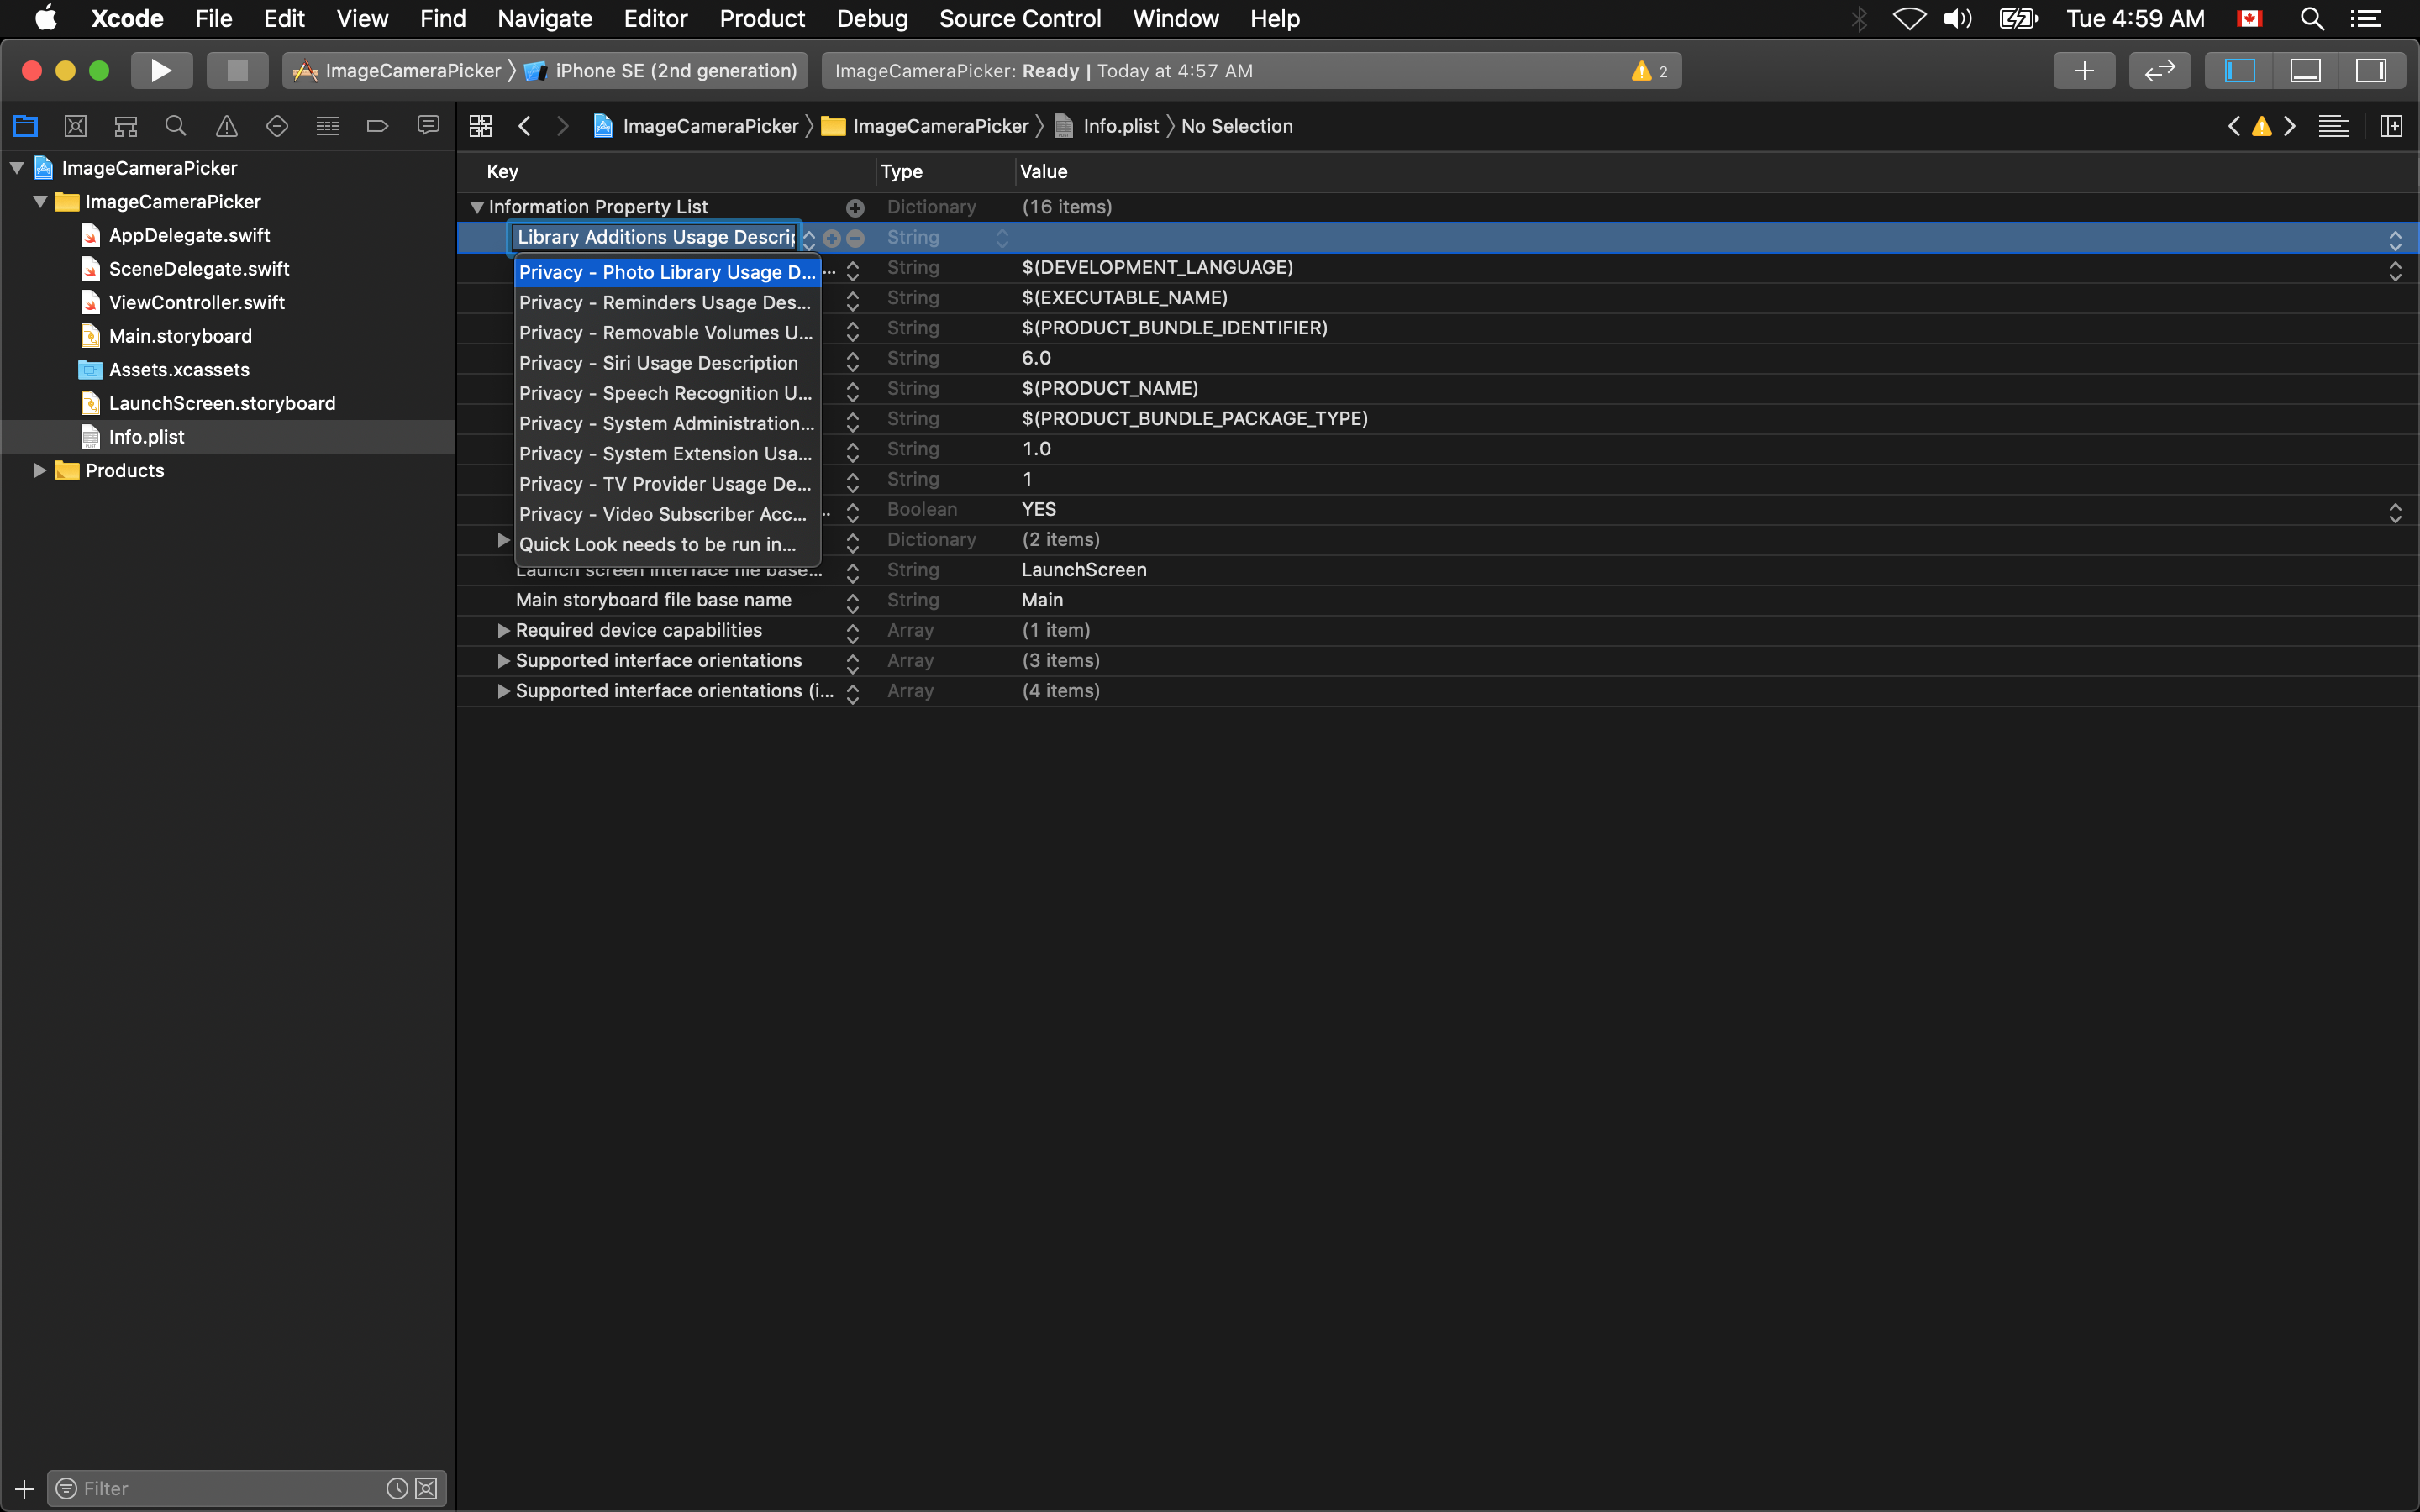
Then right-click on the background and select Add Row.

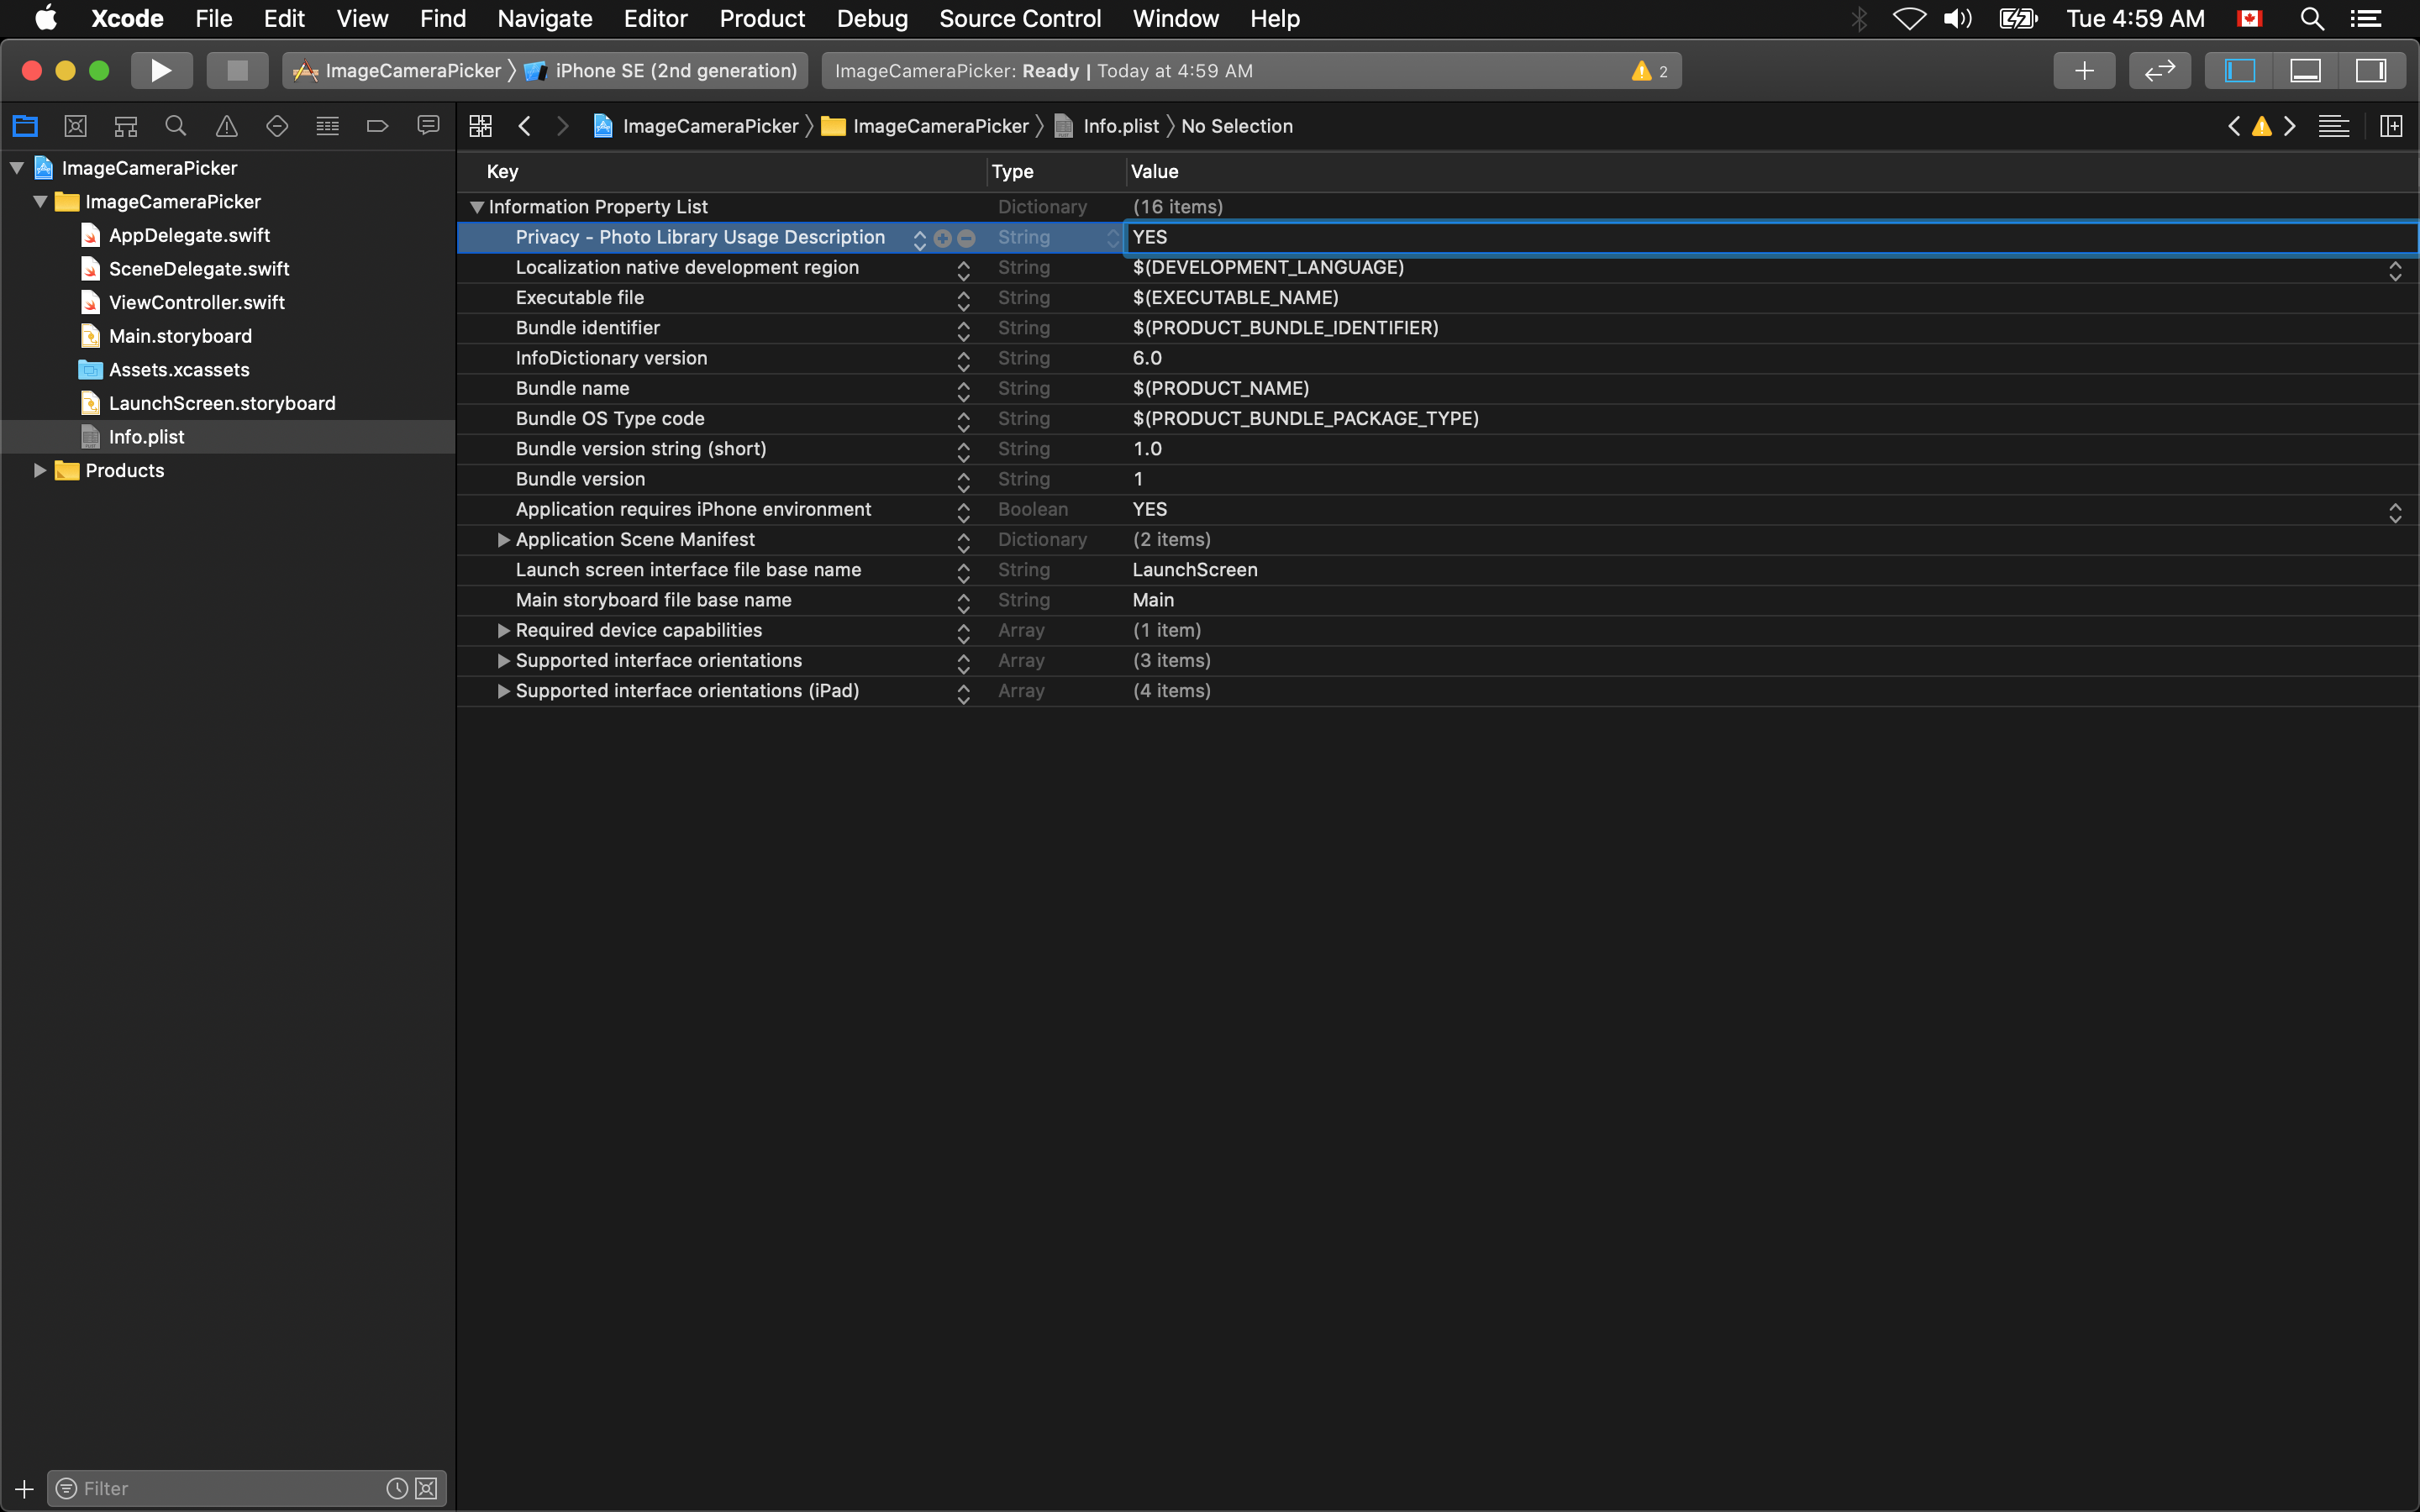
If you want to allow your application to request access to the Photo Library type 'Privacy - Photo Library Usage Description' in the field. A list should pop up showing you a list of all known options for keys.
Then double click in the value area for this new key and enter 'YES'.
If you want to allow your application to request access to the Camera type 'Privacy - Camera Usage Description' in the field.
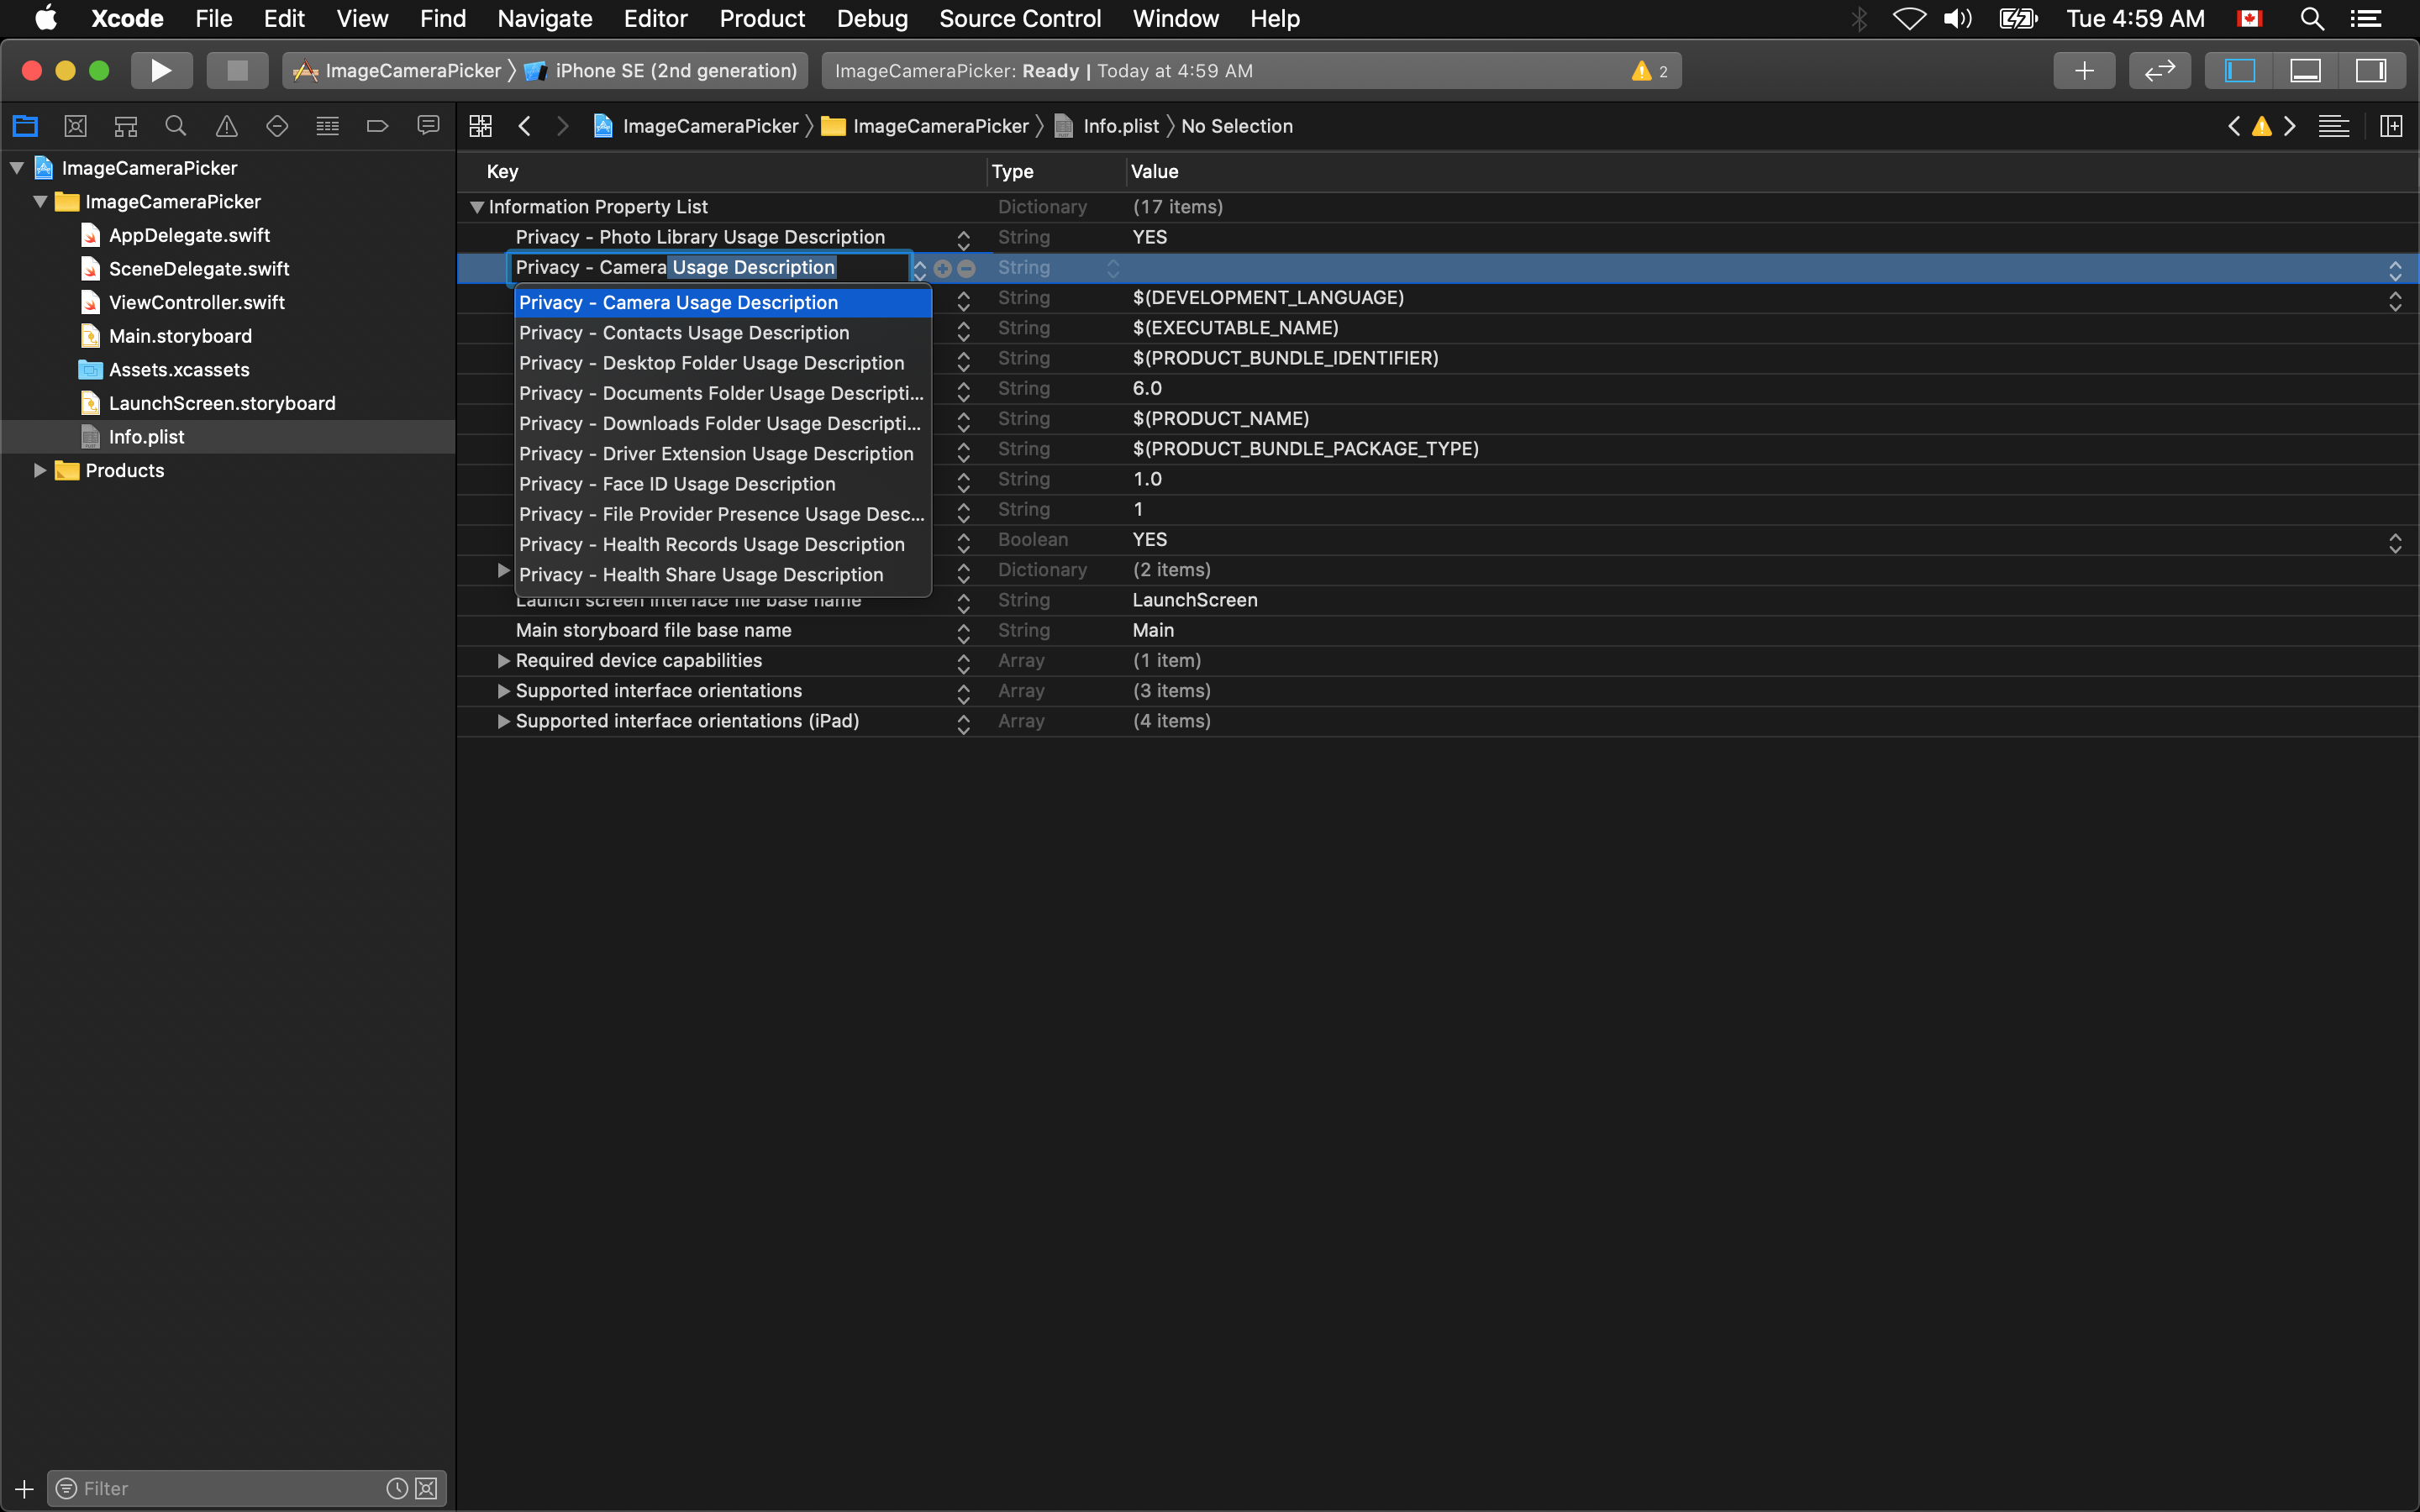
And enter 'YES' as the value for this as well.
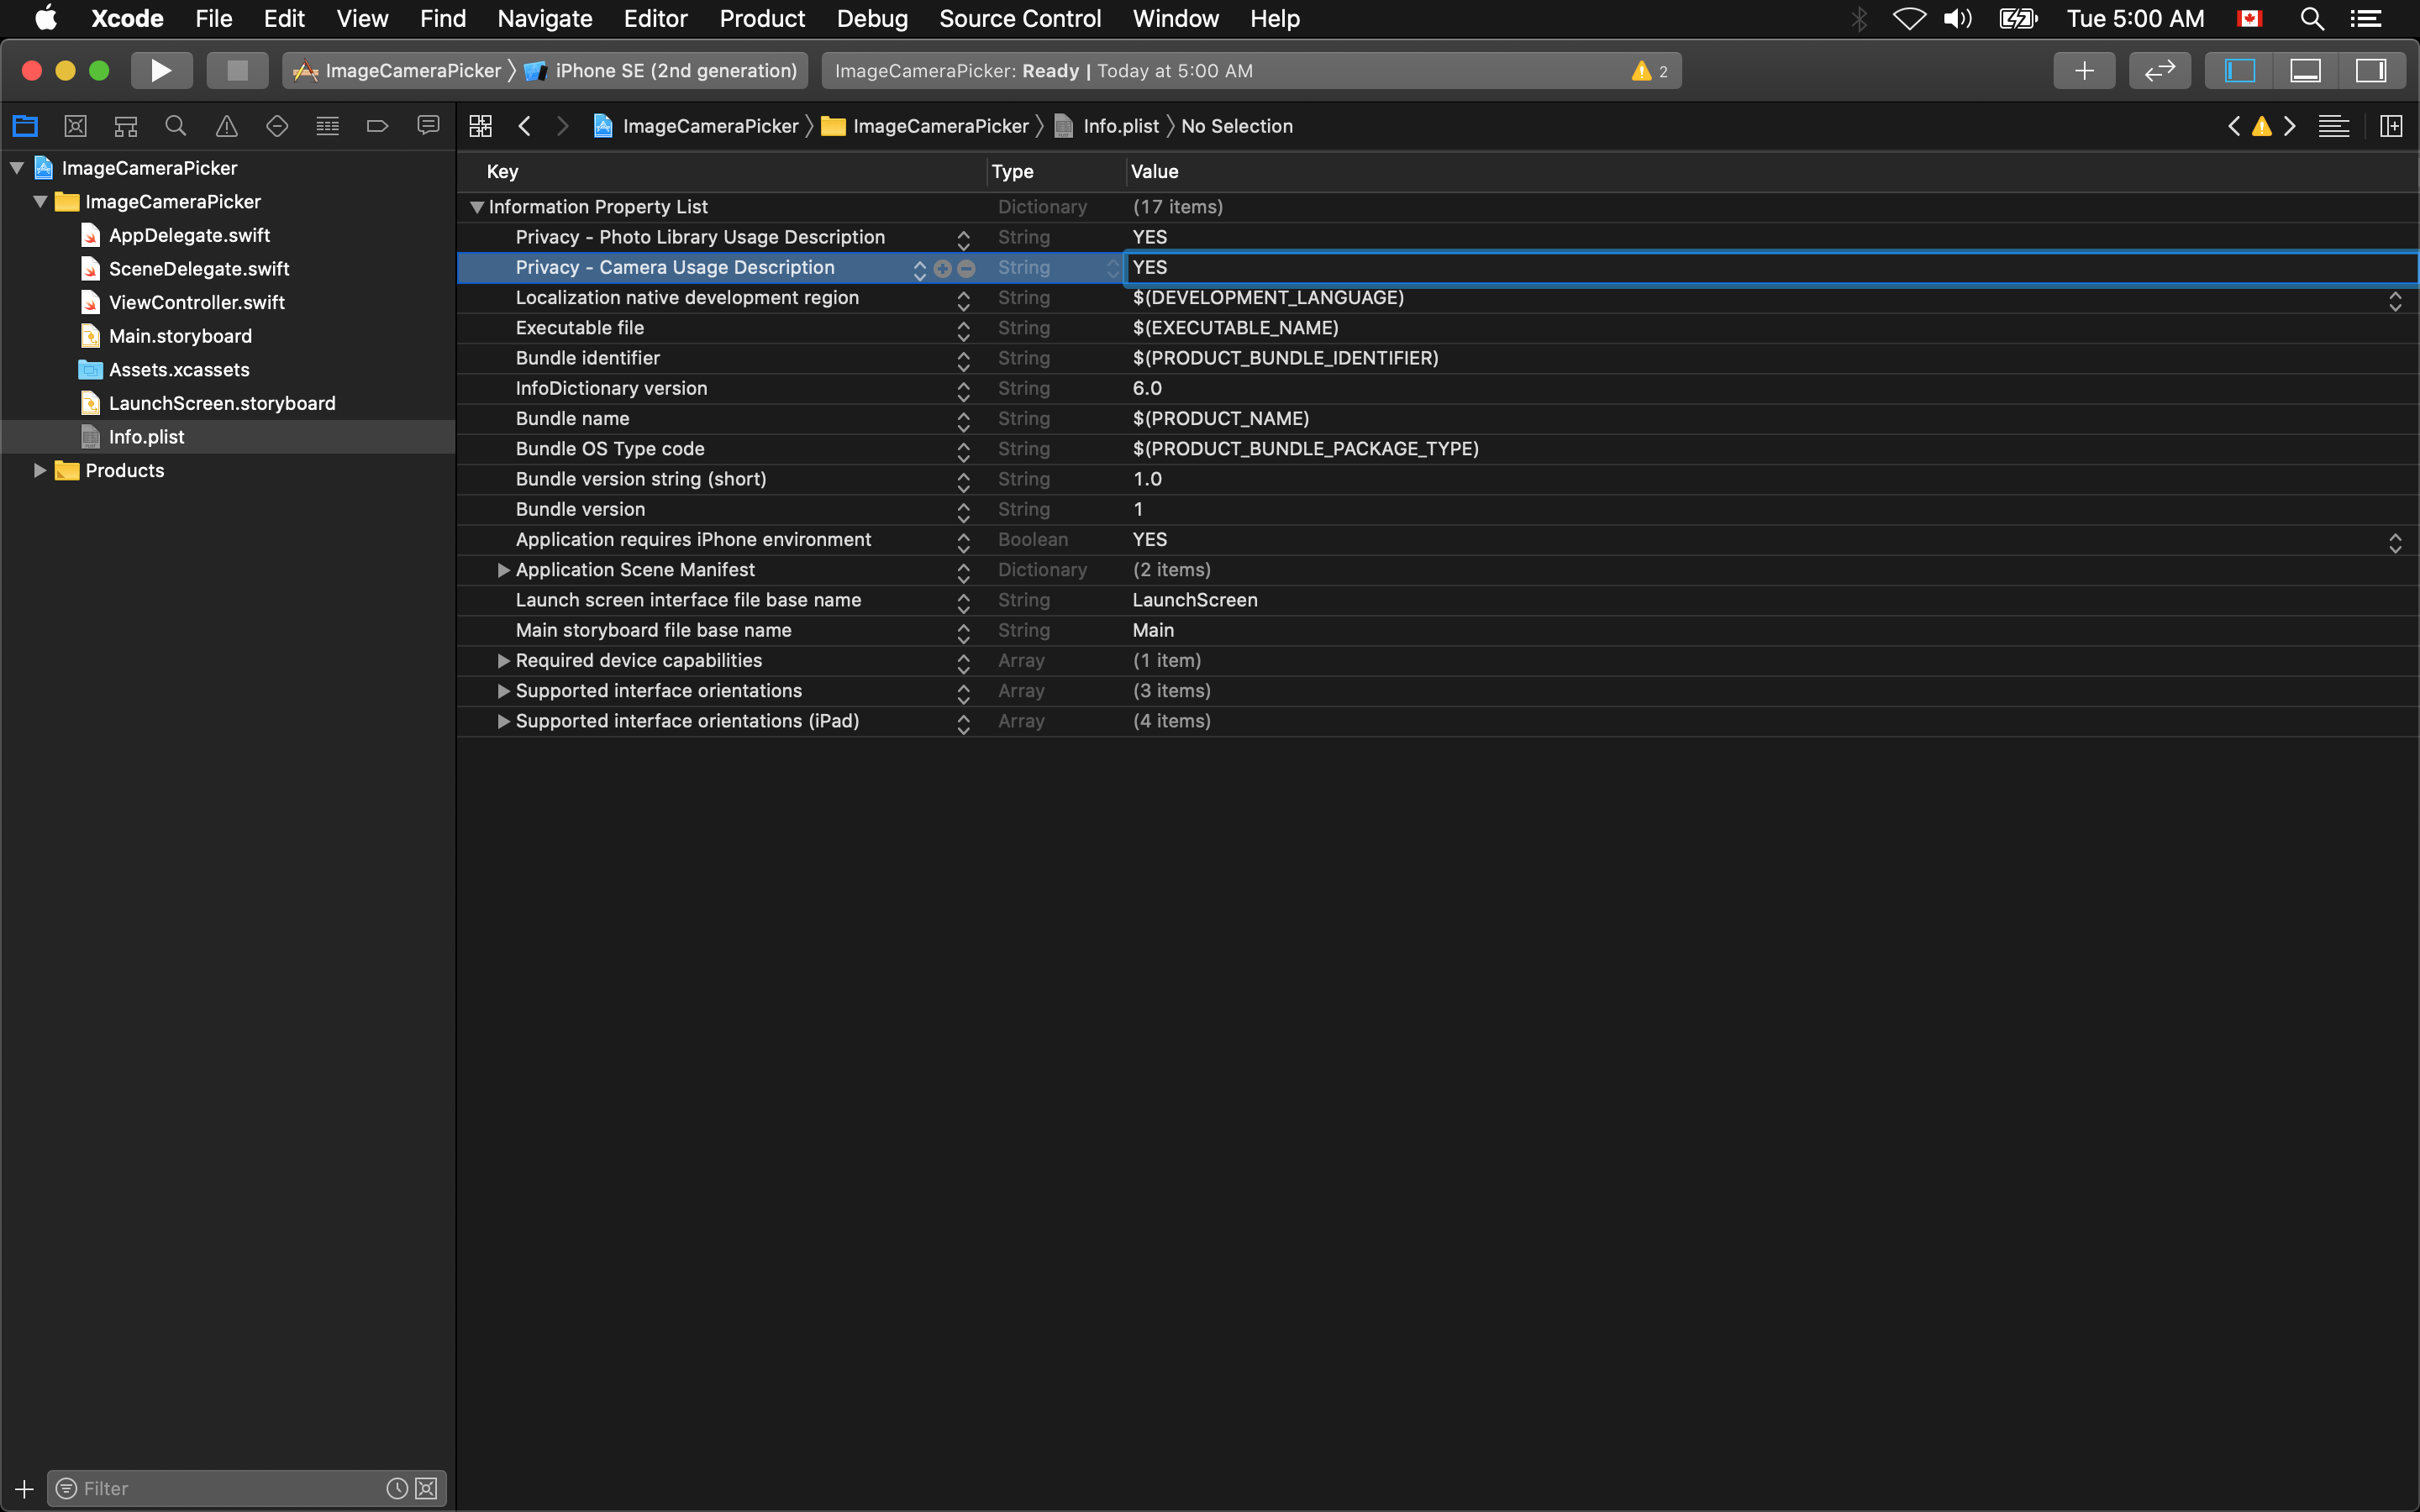
With these options enabled, when the user clicks one of the buttons to open the camera, or library they will be asked if they would like to grant this application permission to access those applications from the operating system. You can choose to use just the Camera, or just the Photo Library if your application if only one or the other is needed as you will see in the code that follows.
Inherit from Protocols
Next thing that must be done is to have your viewController inherit form the UINavigationControllerDelegate, and UIImagePickerControllerDelegate protocols. This is done like this.
WARNING
Both are required for either the camera, or the photo library to be used.
Functions for Canceled and Finished Picking States
Now you need to write code in the two buttons, one for creating an instance of the UIImagePickerController set to the '.photoLibrary' source, and the other to be set to the '.camera' source. You must set the picker, and the camera delegate to this viewController by setting it equal to 'self'. Then in this example you will set the 'allowsEditing' to false so that the user can only select an image, but can not modify the the library or camera settings.

The last thing is writing the protocol functions for the the user cancels out of selecting an image, and when the user has successfully selected an image. When they have canceled you need to manually dismiss the library or camera.
If the user has successfully selected an image, the image will be returned to your application in a key:value paired variable called 'info'. You must cast the info[UIImagePickerControllerOriginalImage] as? UIImage to use the image. And again, you must dismiss the library or camera.