Fonts for Different Size Classes
Introduction to Font Customization for Size Classes
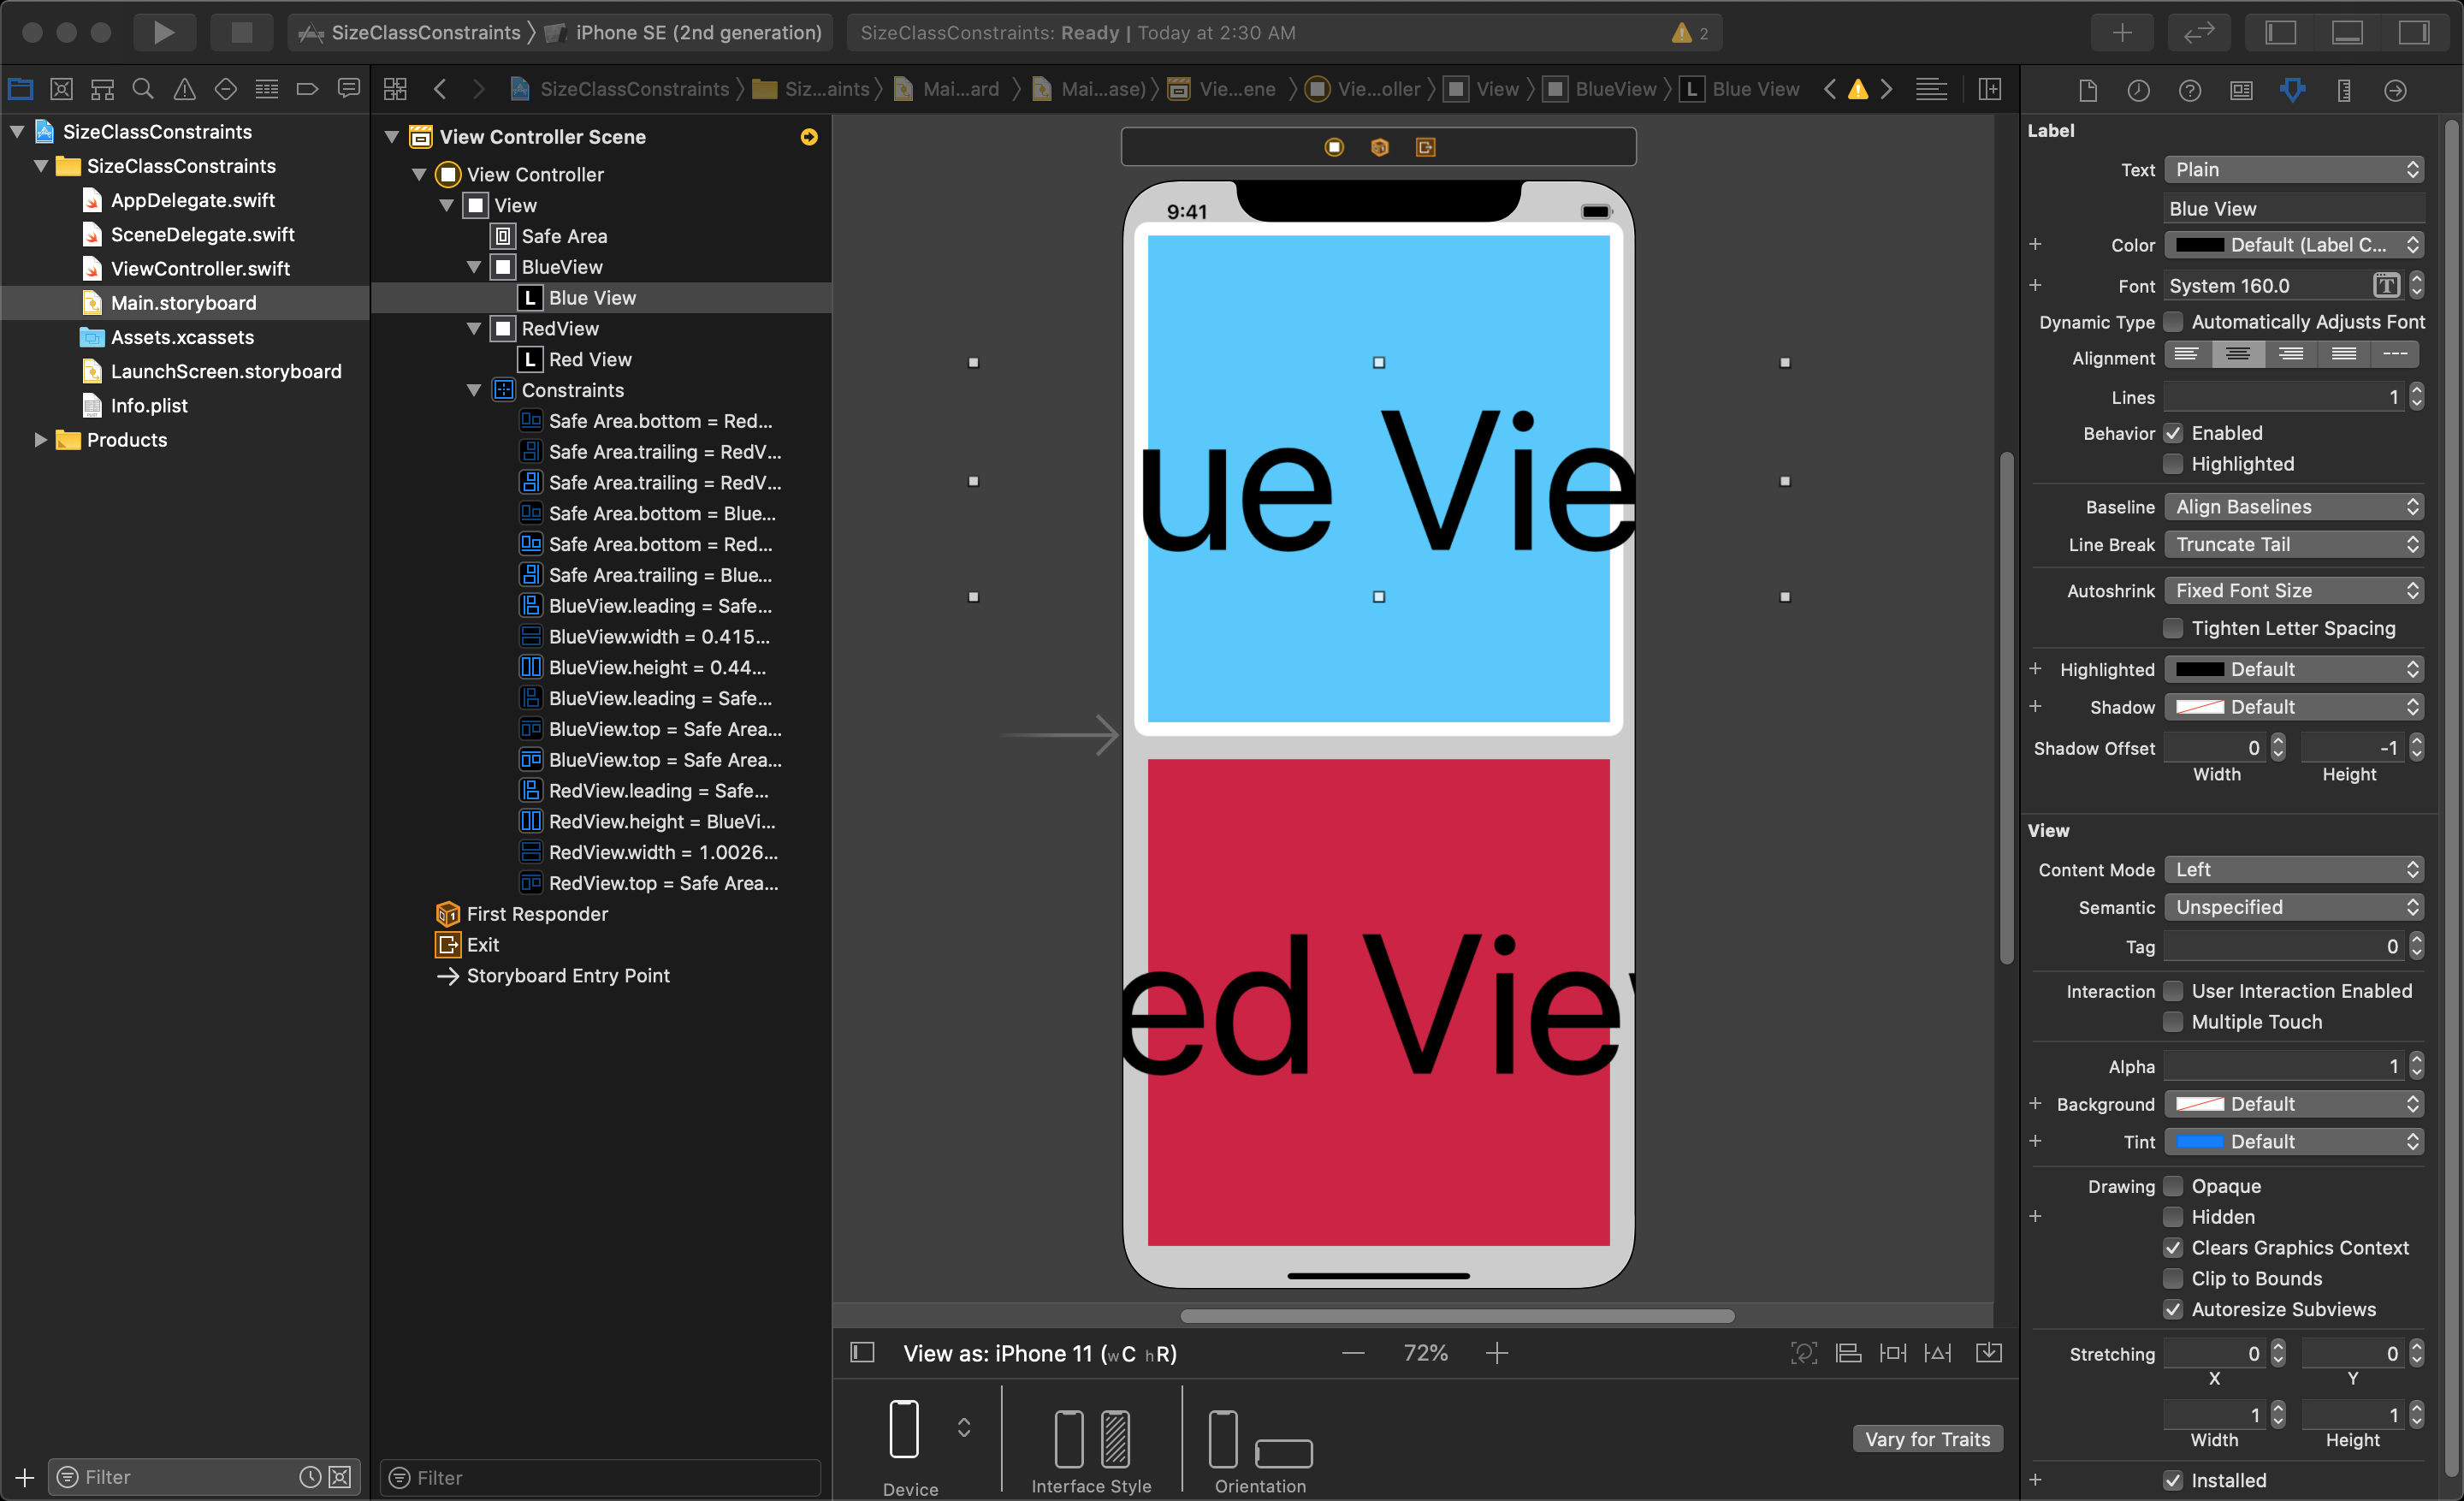
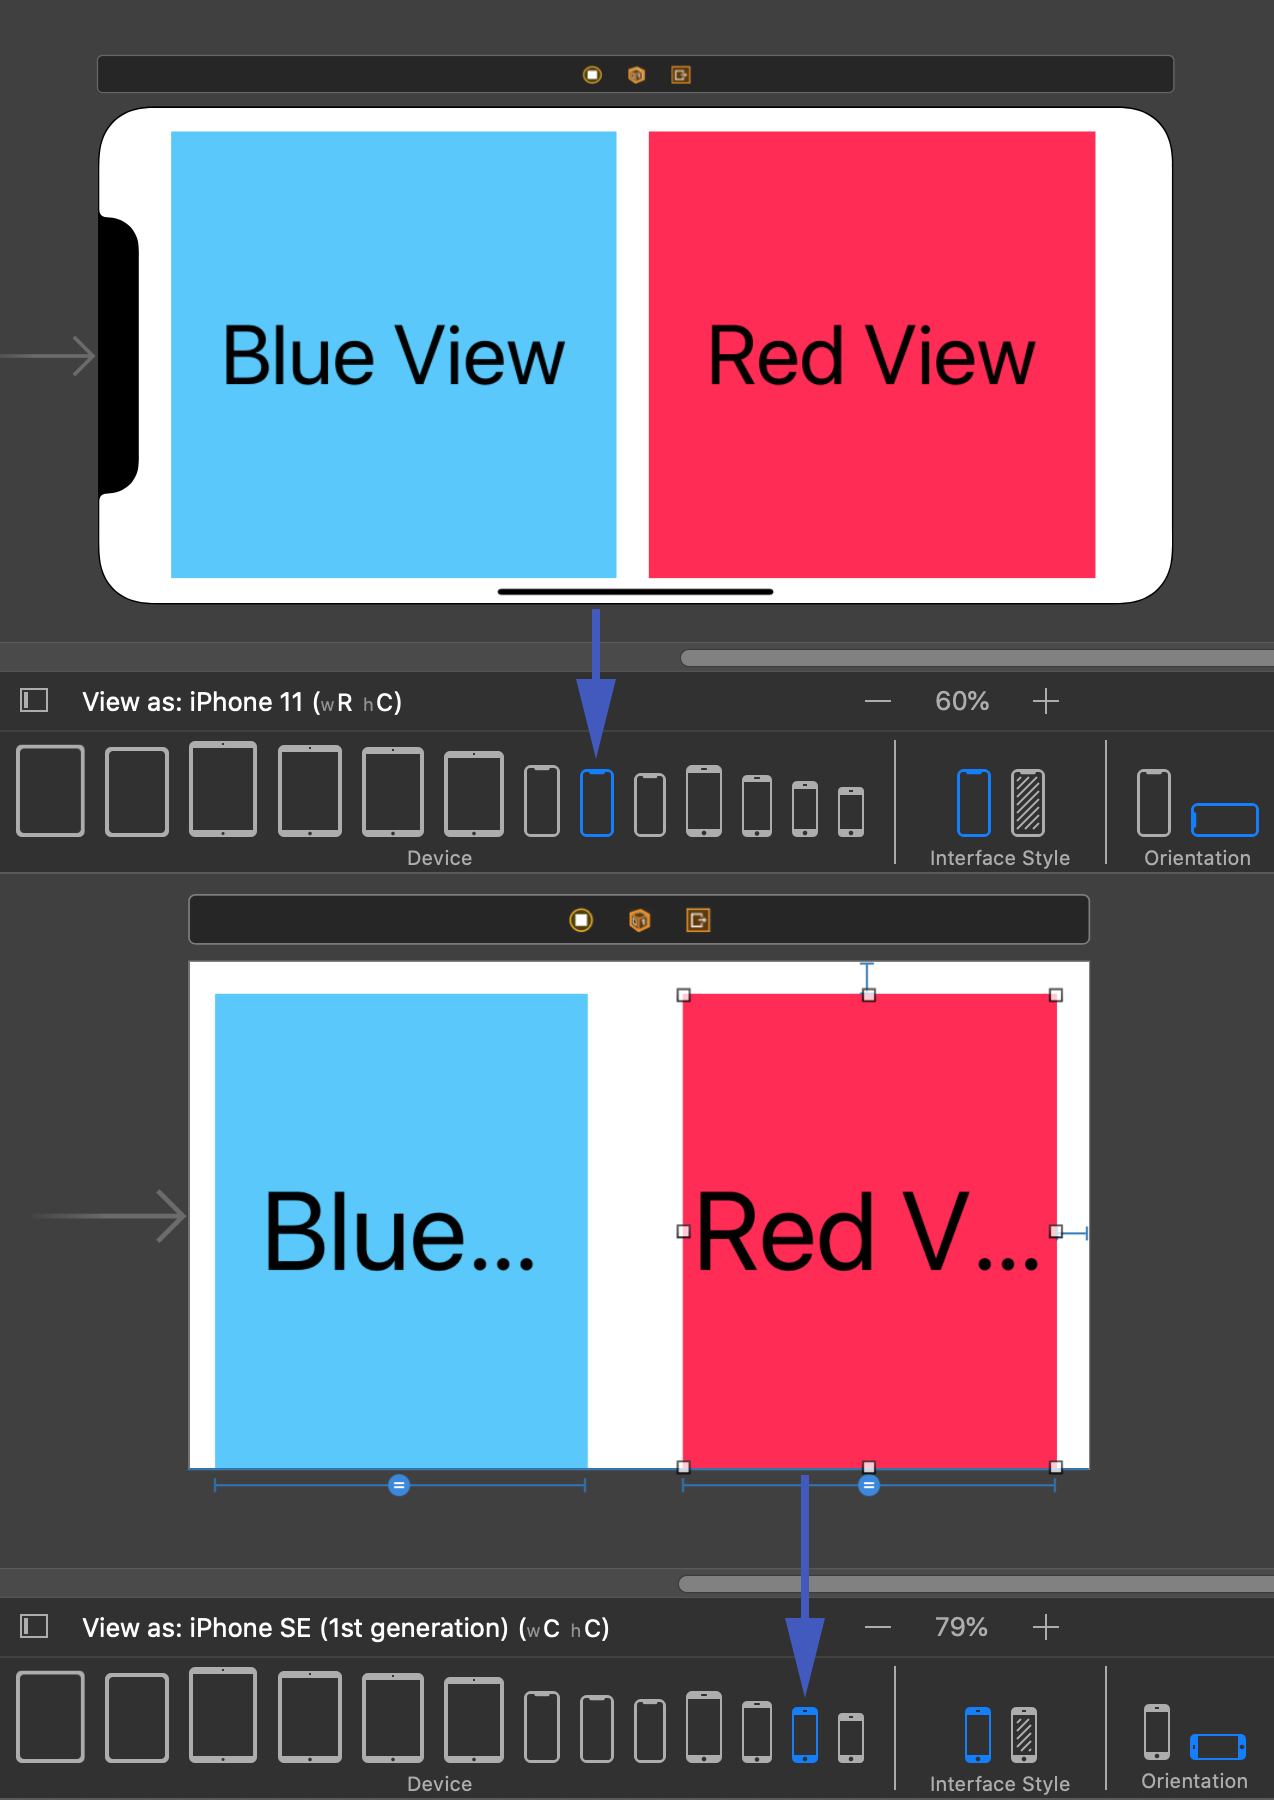
This lesson builds on the previous one, and examines how to control the font size and style of a Label for different Size Classes. We will start by adding a Label in to each view, centering them within the view. Then, center-align the text justification and set each Label's font size to 160 point as shown below.
Setting the font this large is a good idea if you plan on creating an iPad layout for your application. In this lesson you will learn how to create fonts that are adaptive to different Size Classes, downsizing the font to fit within each view.
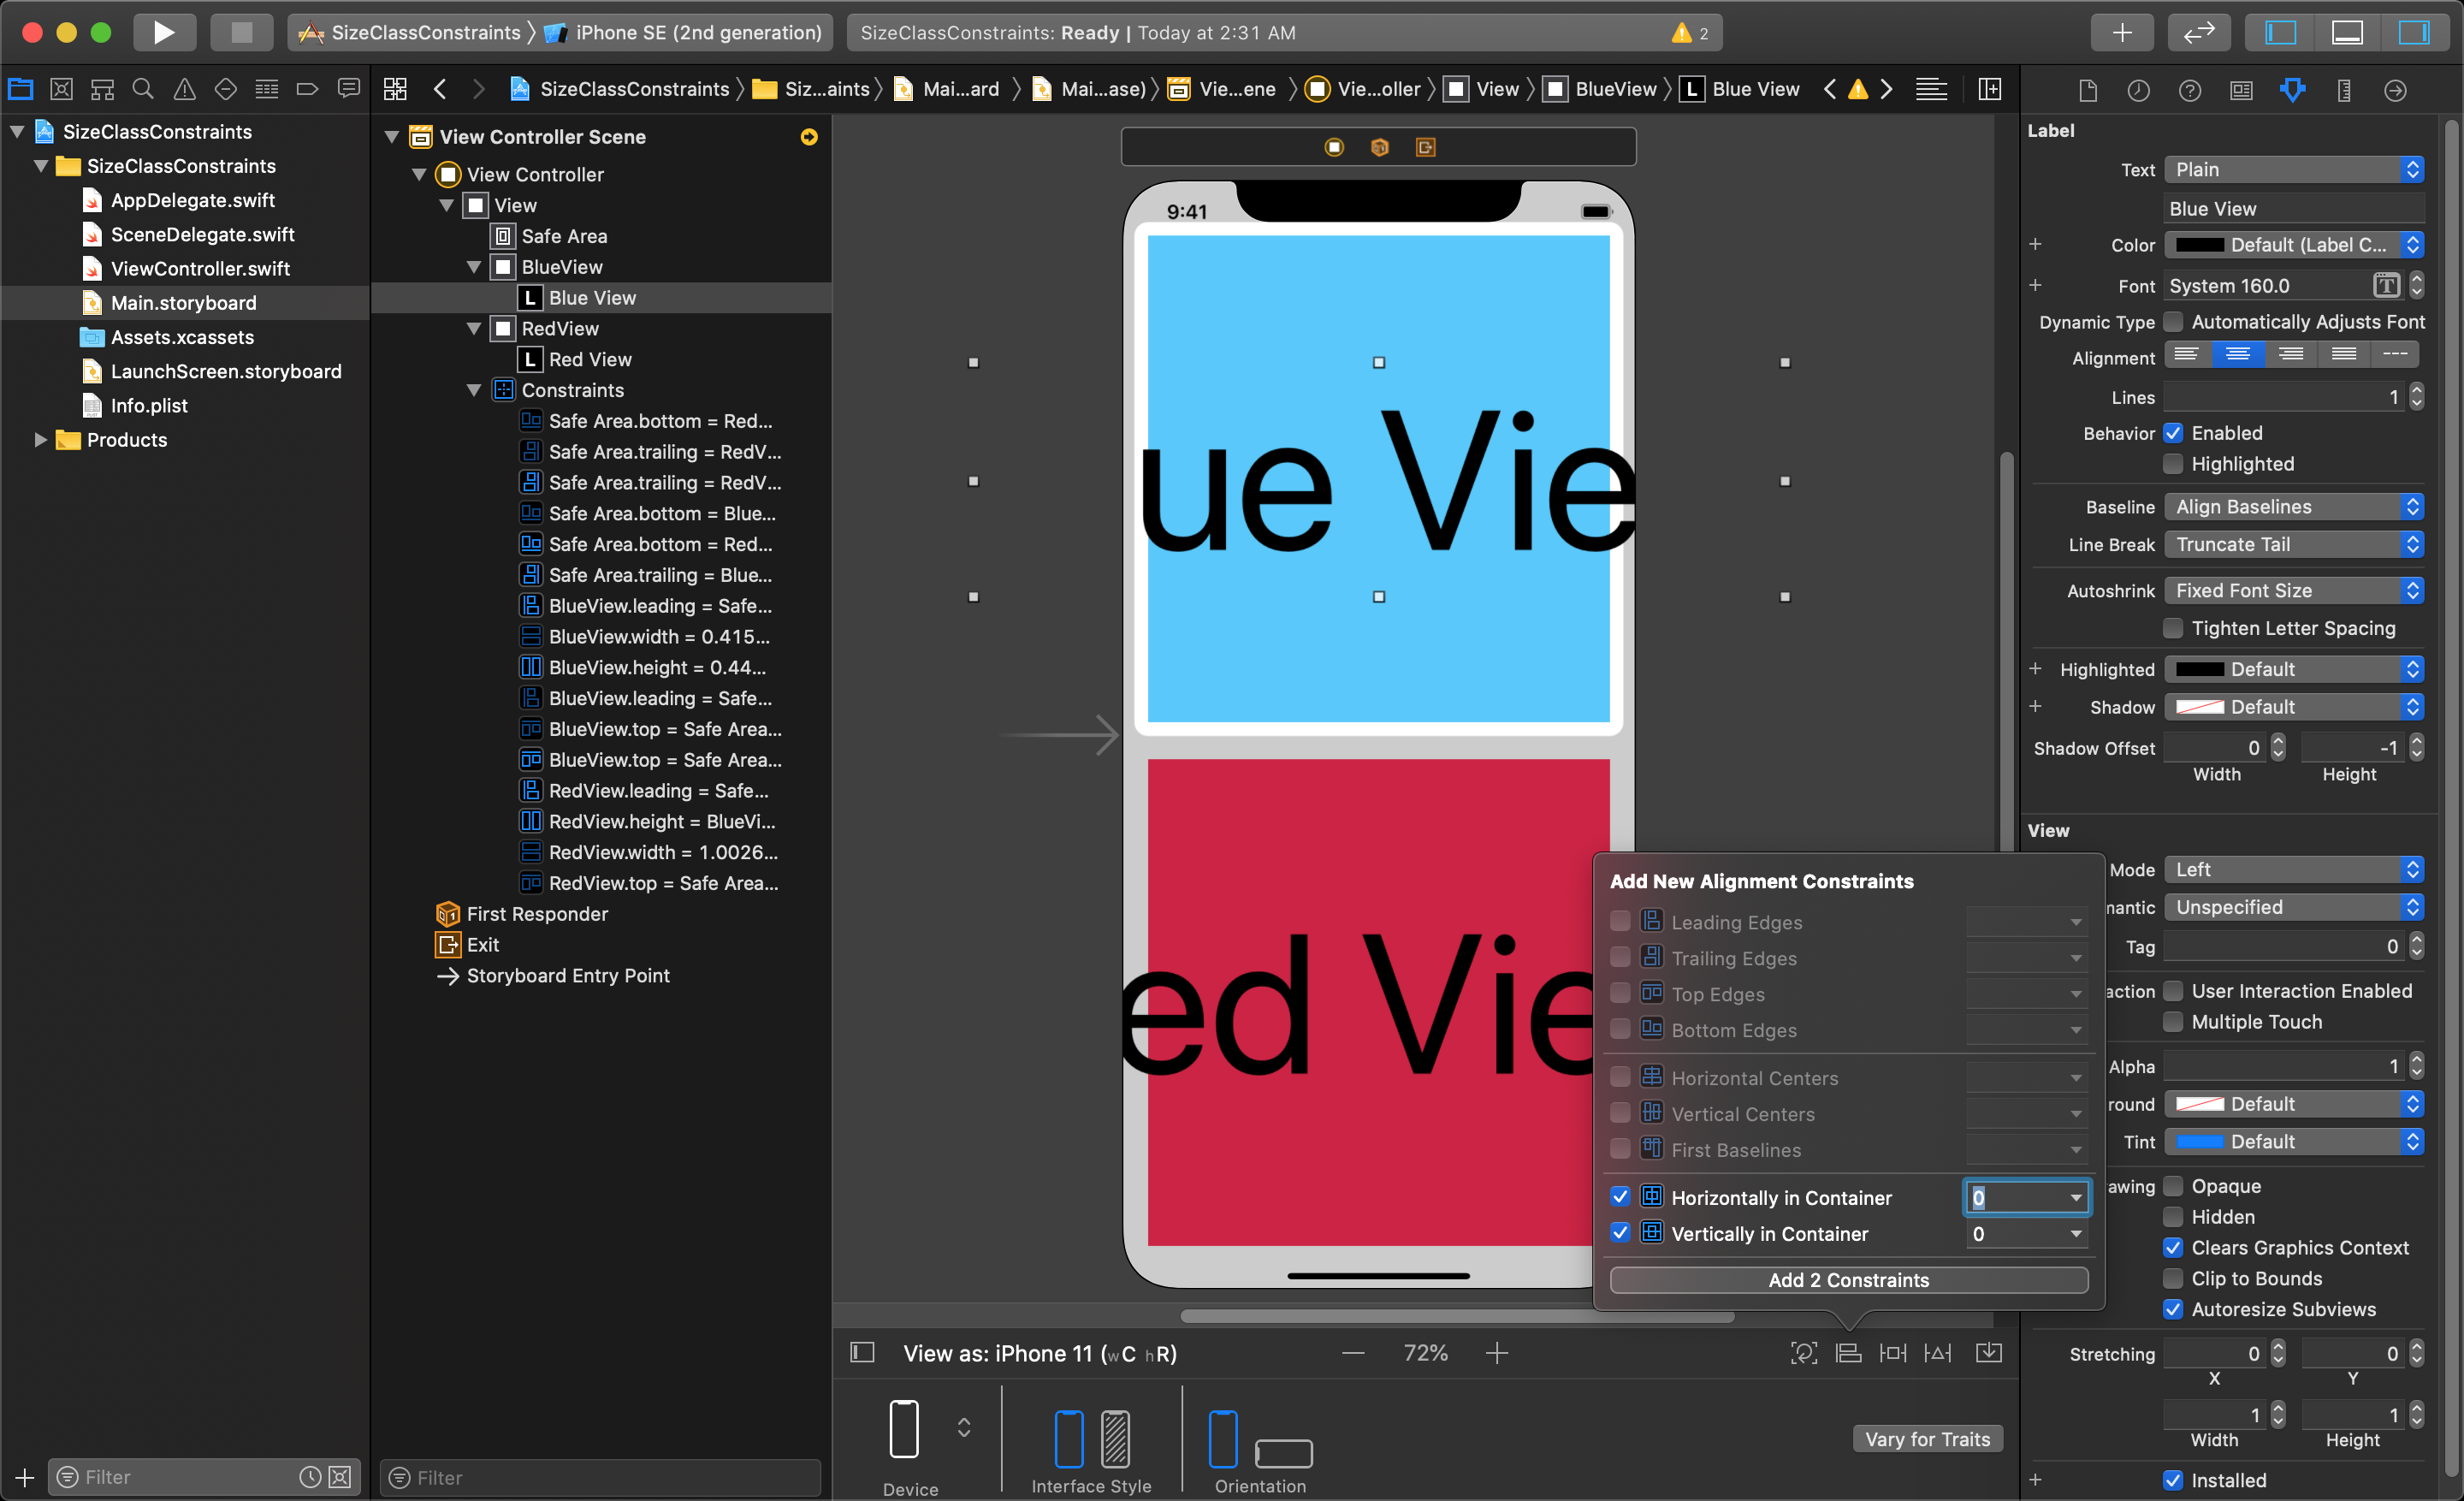
Next, add constraints to centre both of the Labels by selecting each one and clicking the Add New Alignment Constraints menu, found at the bottom of the editor. For both Labels, you need to select Horizontally in Container and Vertically in Container, and then click the Add 2 Constraints button at the bottom of the menu.
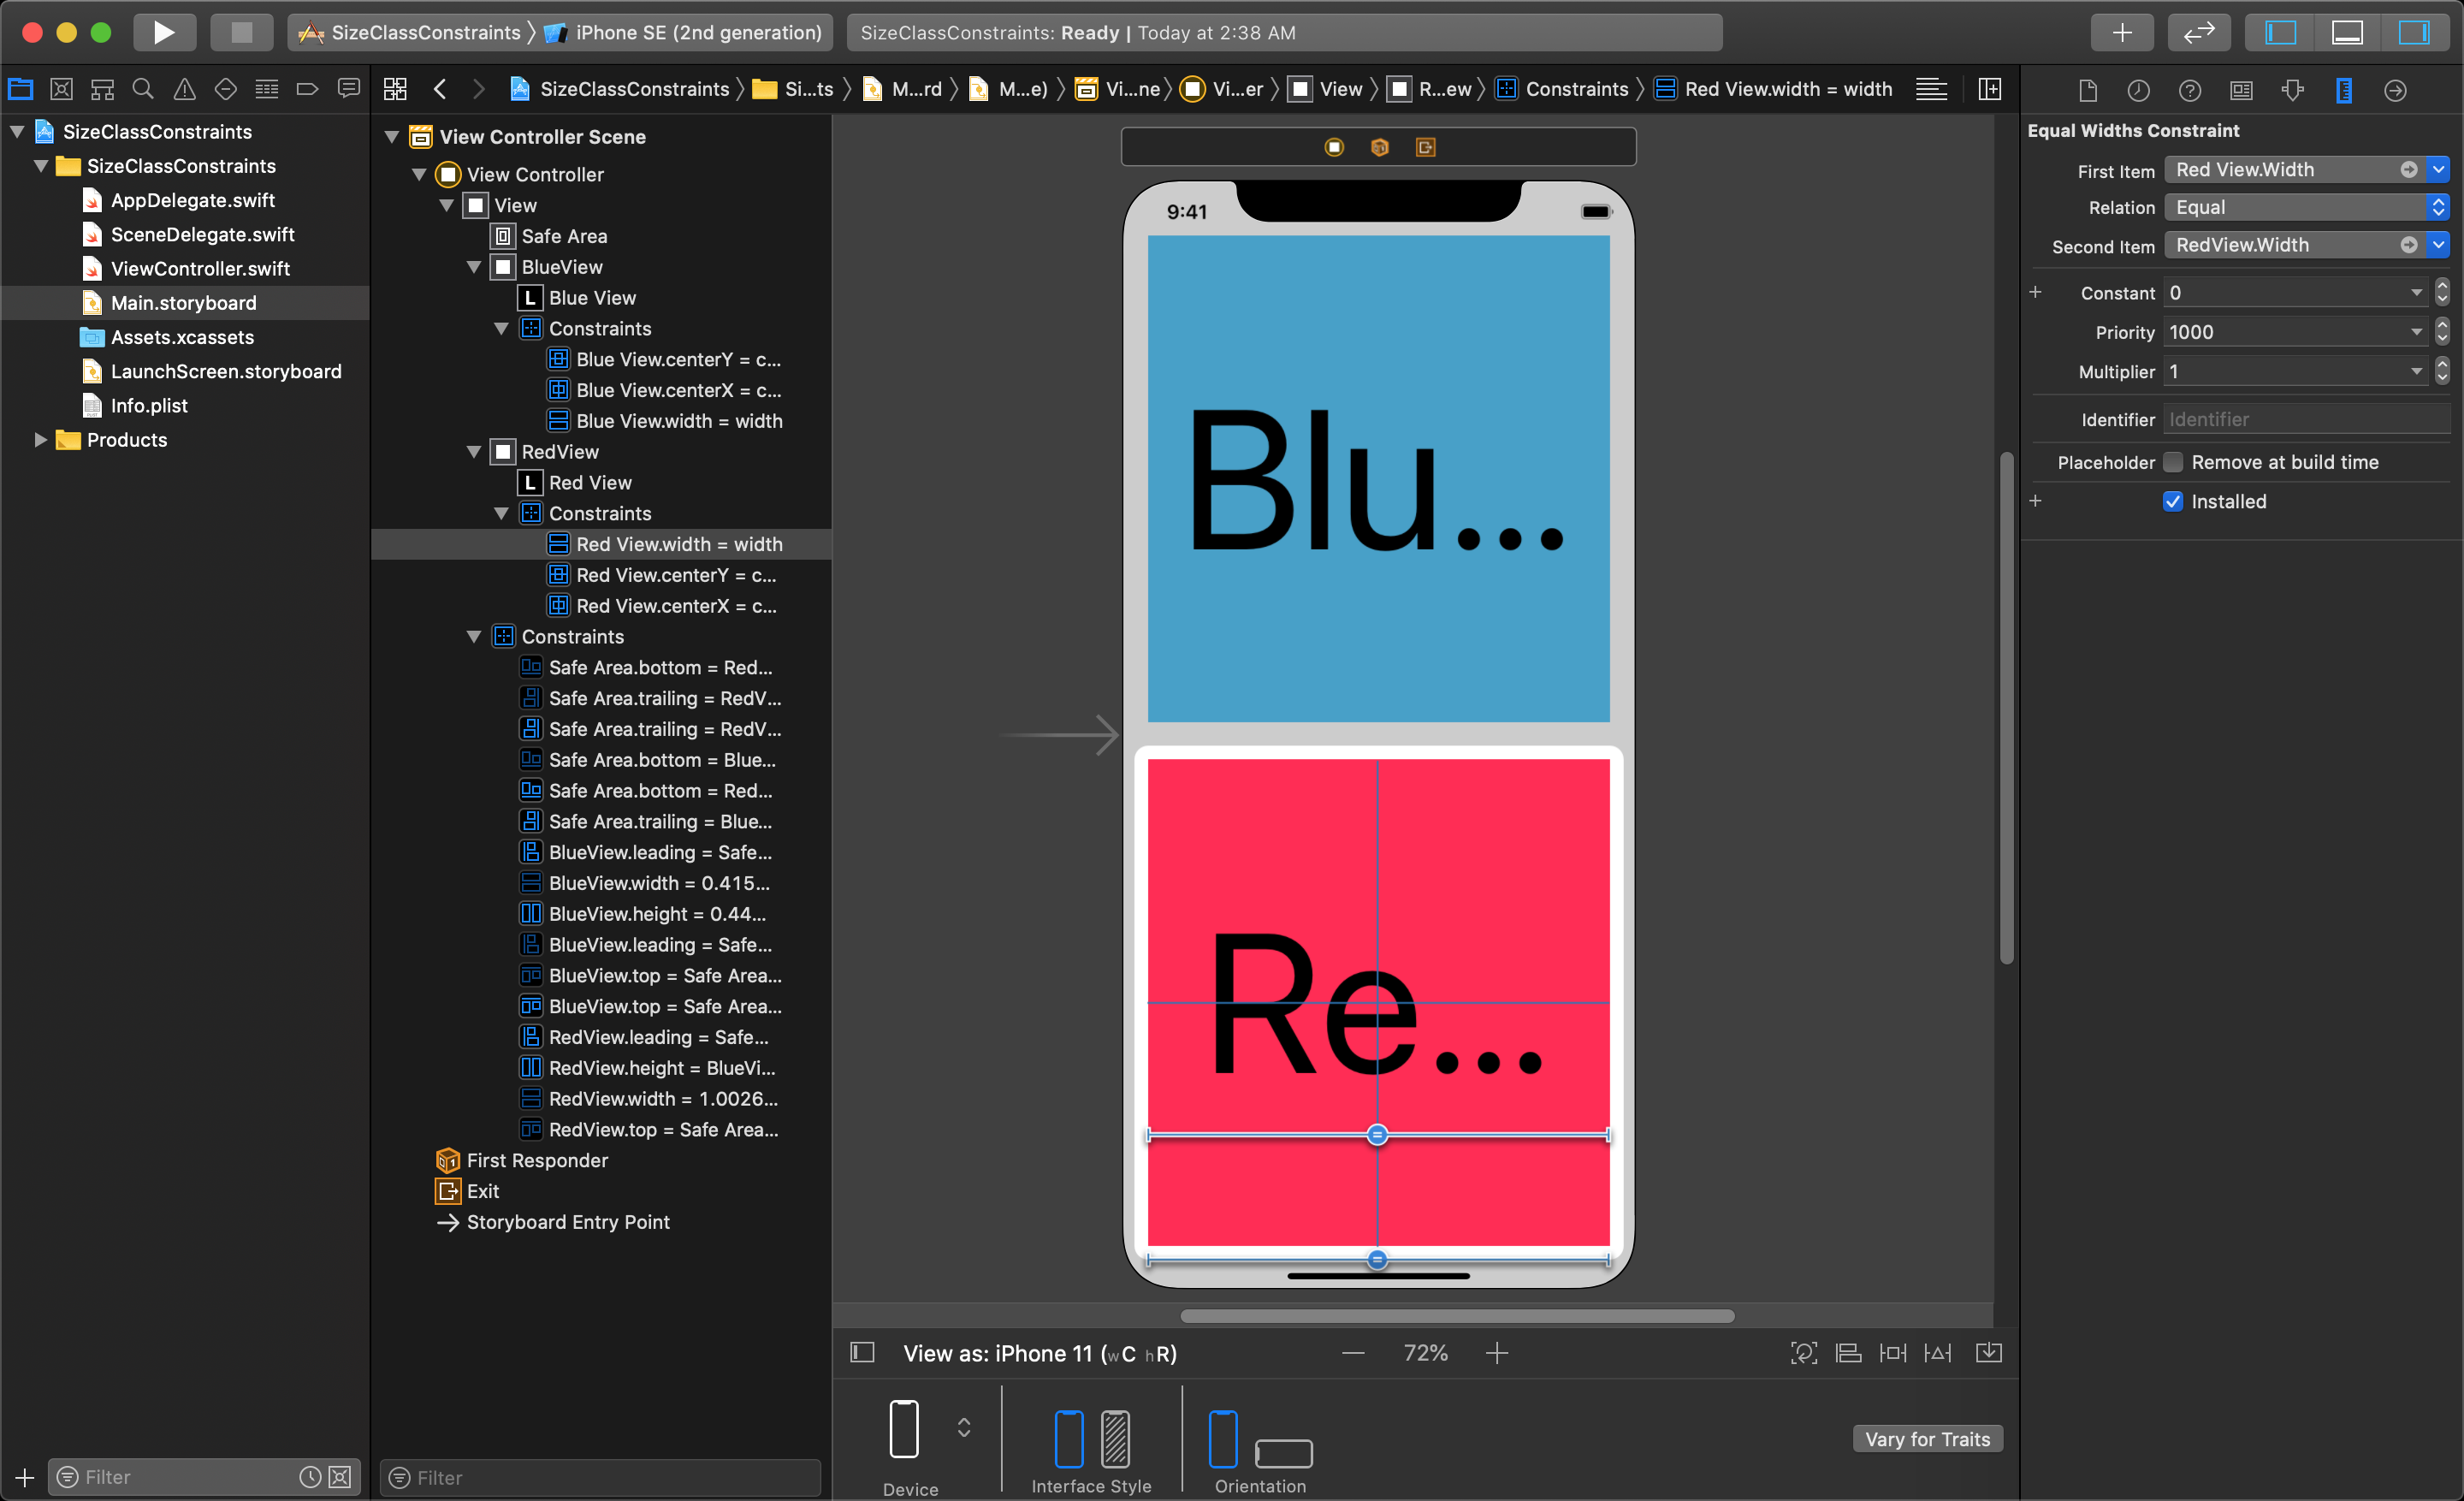
You need to also set the width of each Label to the width of the view it has been placed in. This is done by holding control and mouse-clicking from the label, and dragging it to the view it is in. Next, select Equal Widths in the pop-up menu.
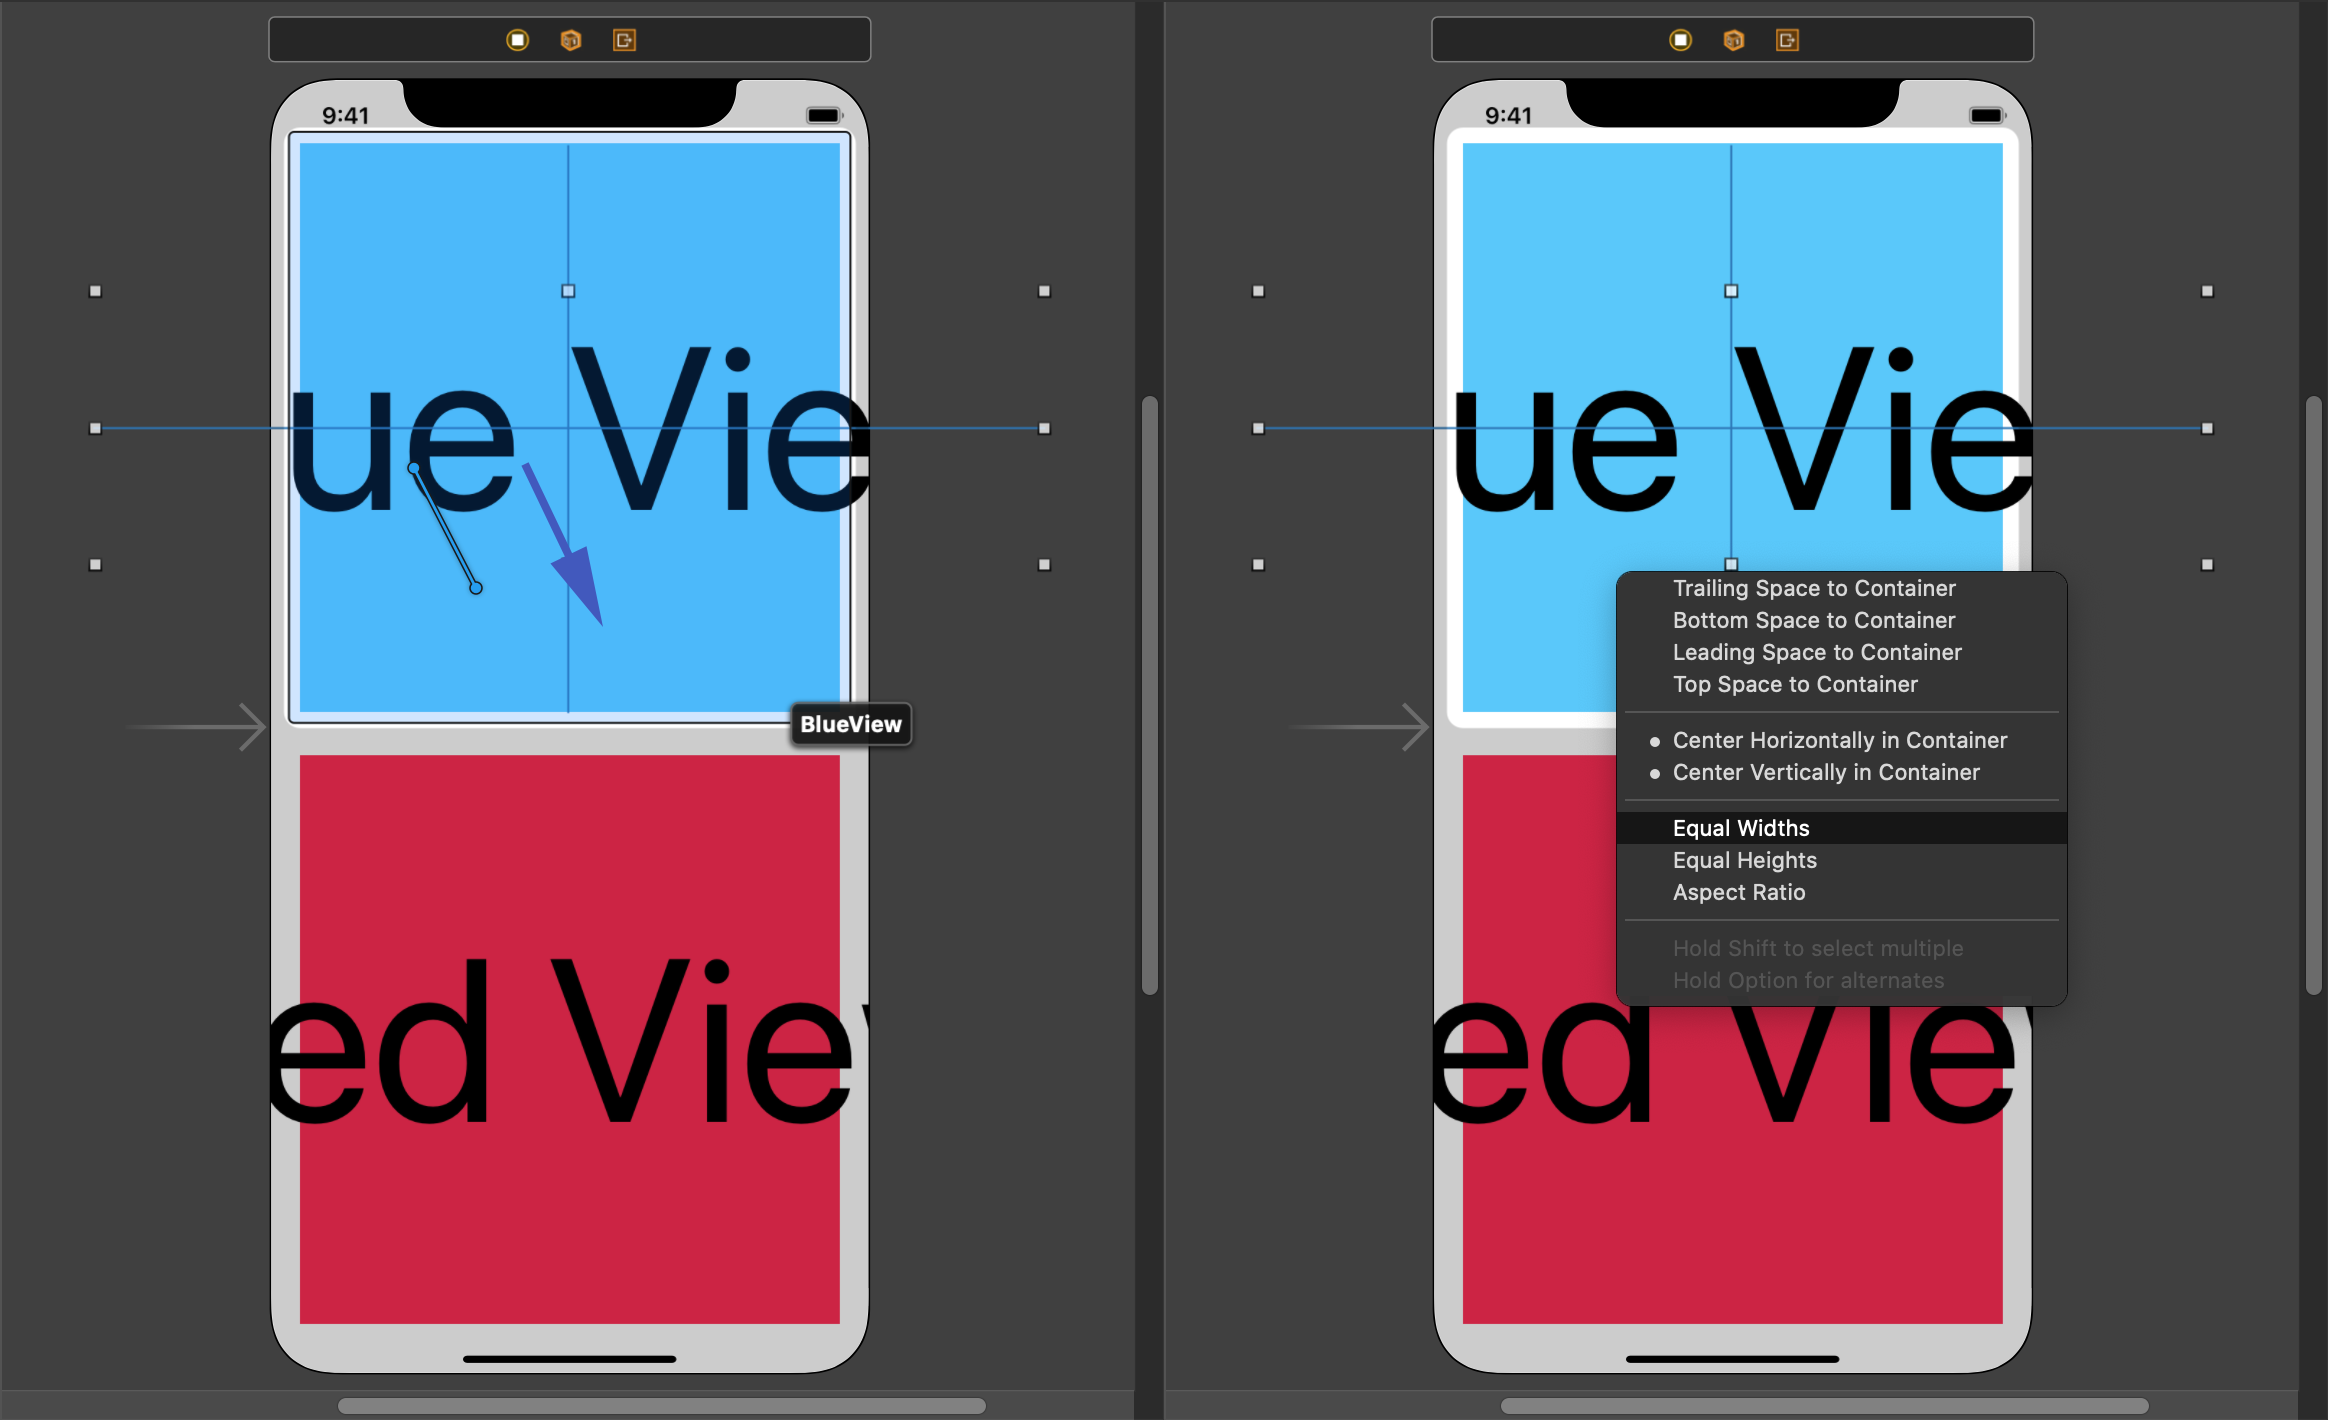
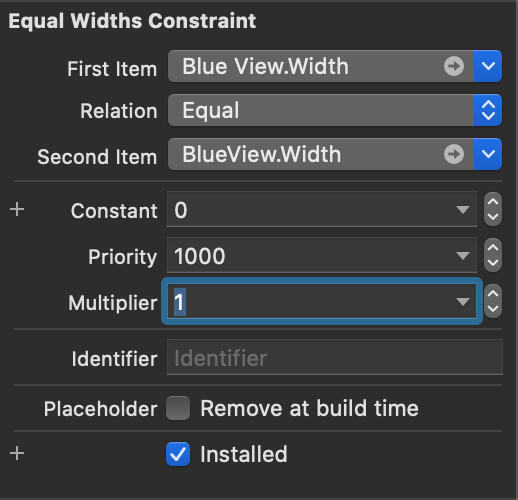
Now you will need to modify the Equal Widths Constraint; clicking on it and opening the Size Inspector will show that the multiplier is set to a value larger than zero, representing the width of the text label in comparison to the view.
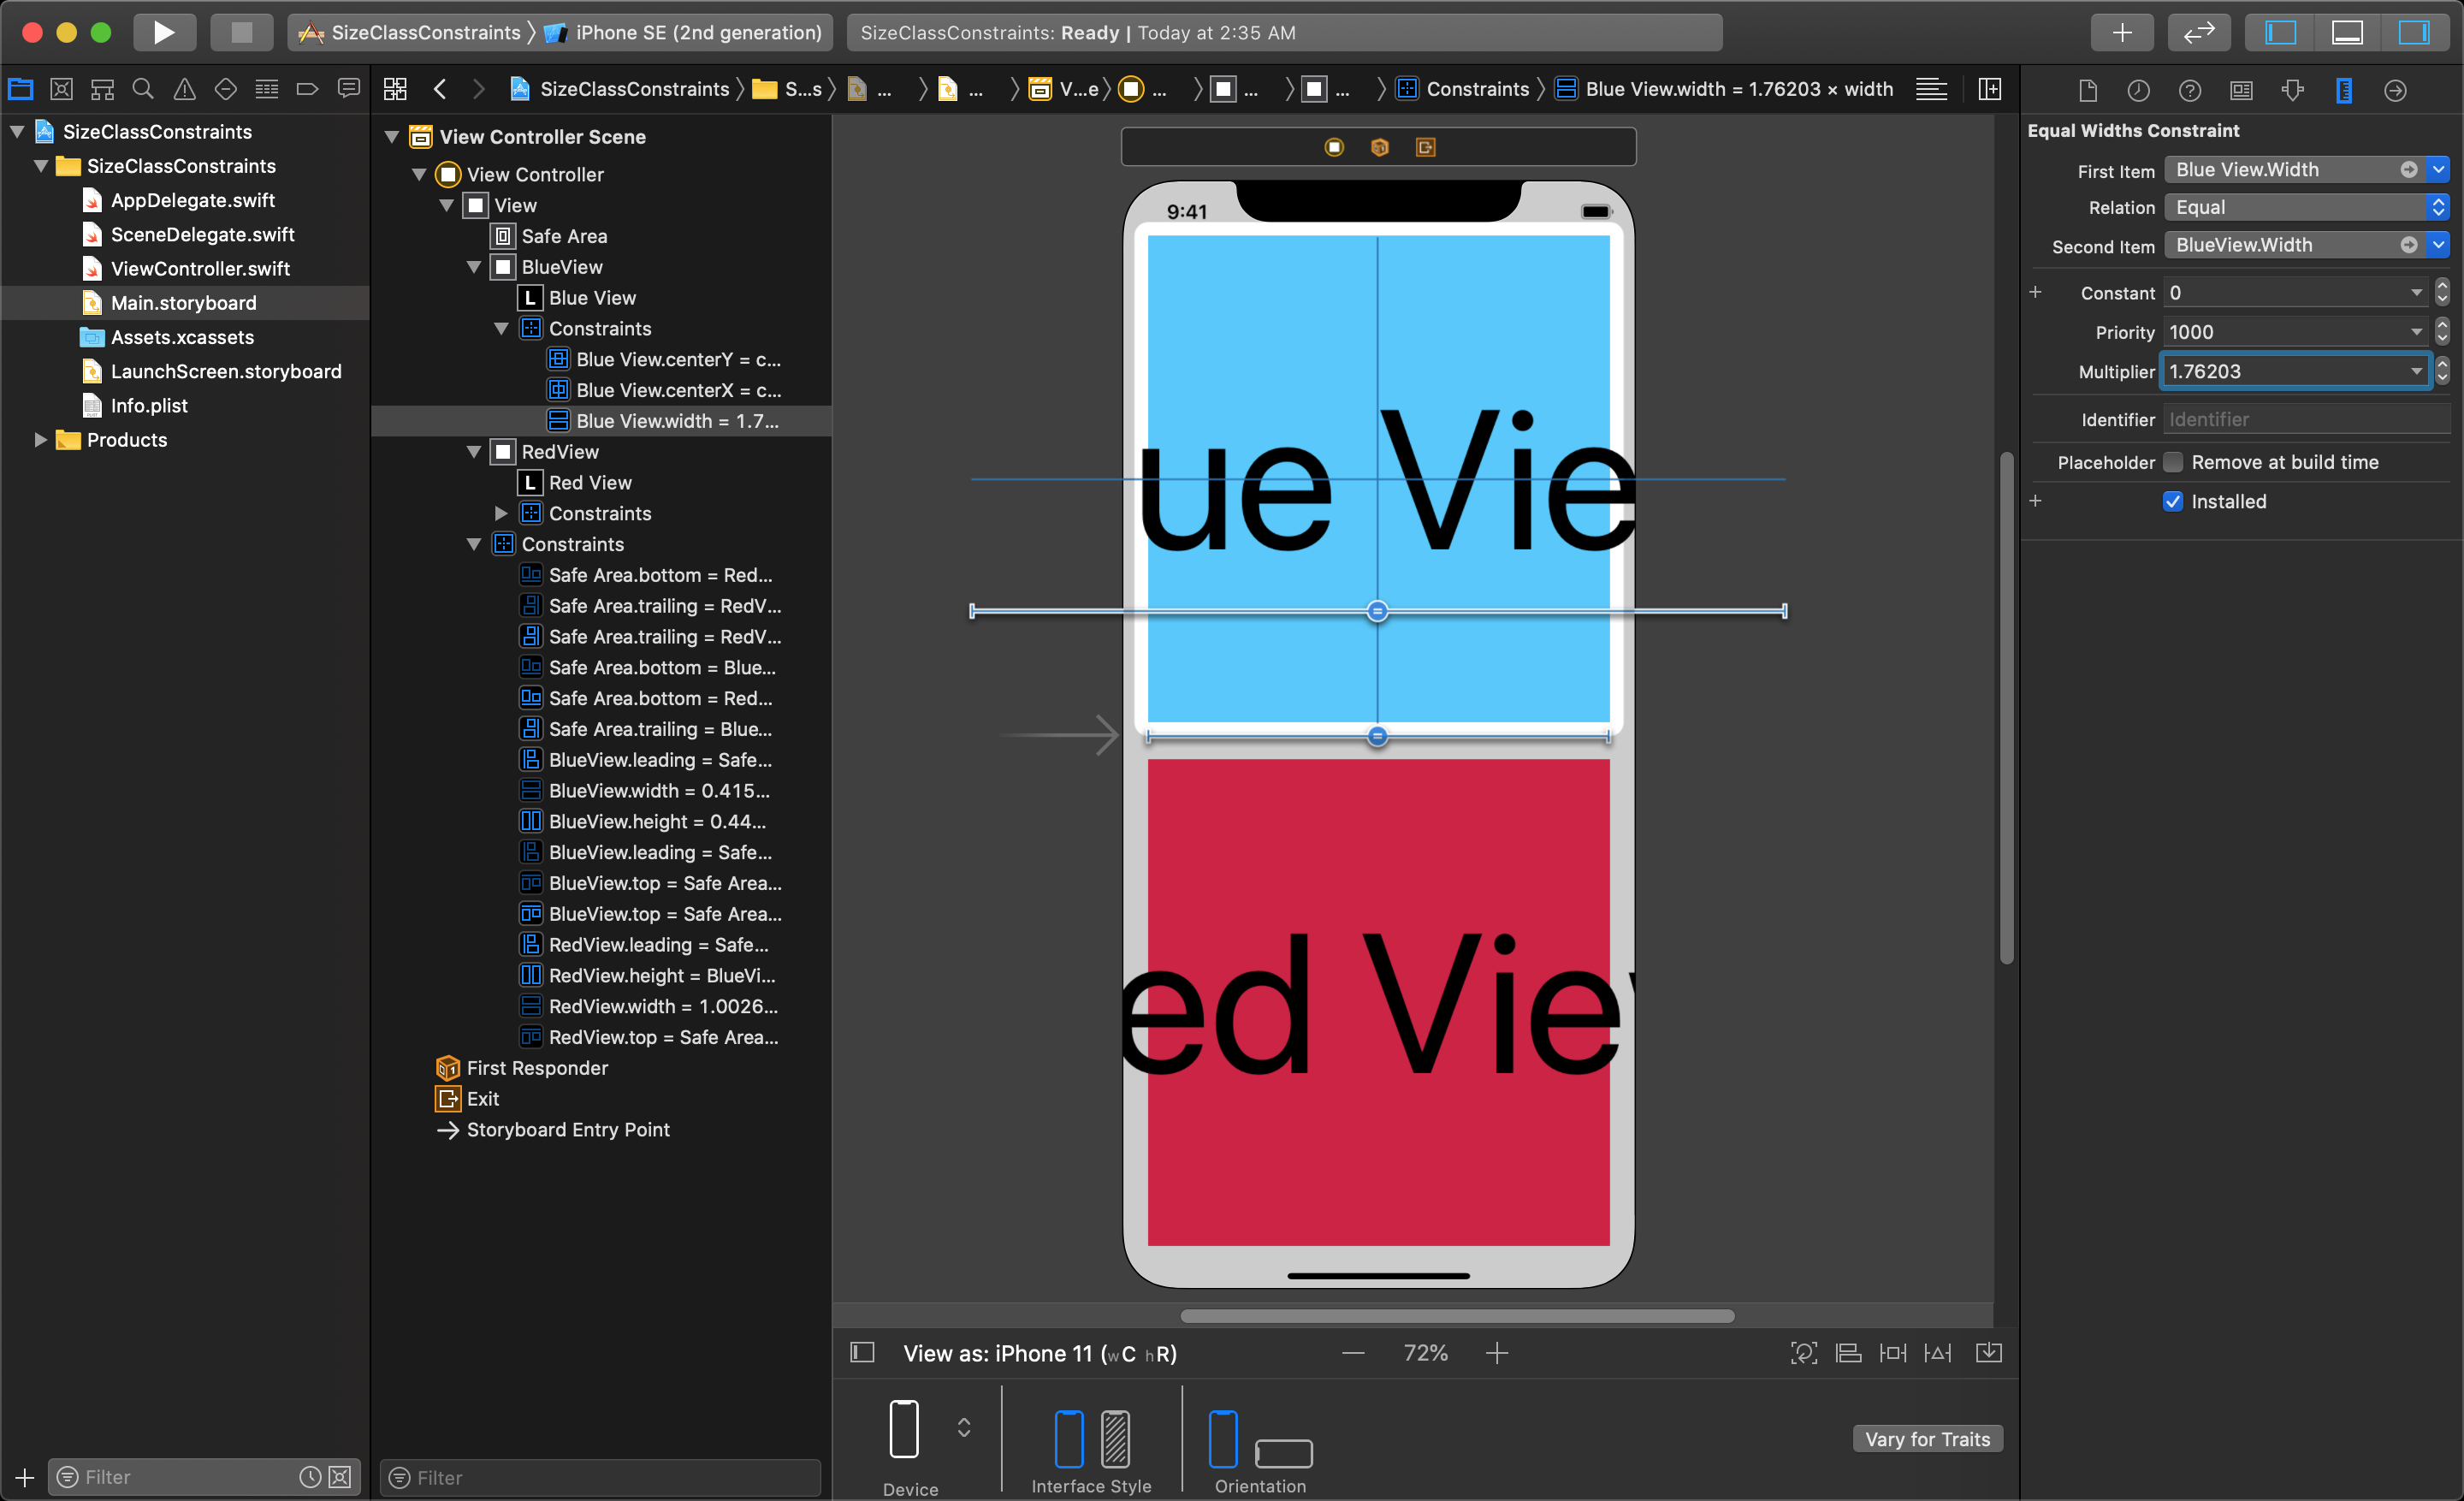
You must set it equal to 1 so the Text Label is constrained within the view, and does not extend out past it's bounds.
After doing this process to both labels, you will see the labels are reduced in width to fit within the view, and the text is truncated indicated by the ellipsis (...) at the end of the visible text.
Adding Customization to Fonts for Size Class
To customize the font of a UI object for different Size Classes, we need to modify the font in the attribute inspector. This process will not use the Vary for Traits feature, but instead uses a feature found right in the Attributes Inspector for the Label. After selecting a Label you will find a (+) button to the left of the font parameter in the Attributes Inspector. This is called the Add customization button.
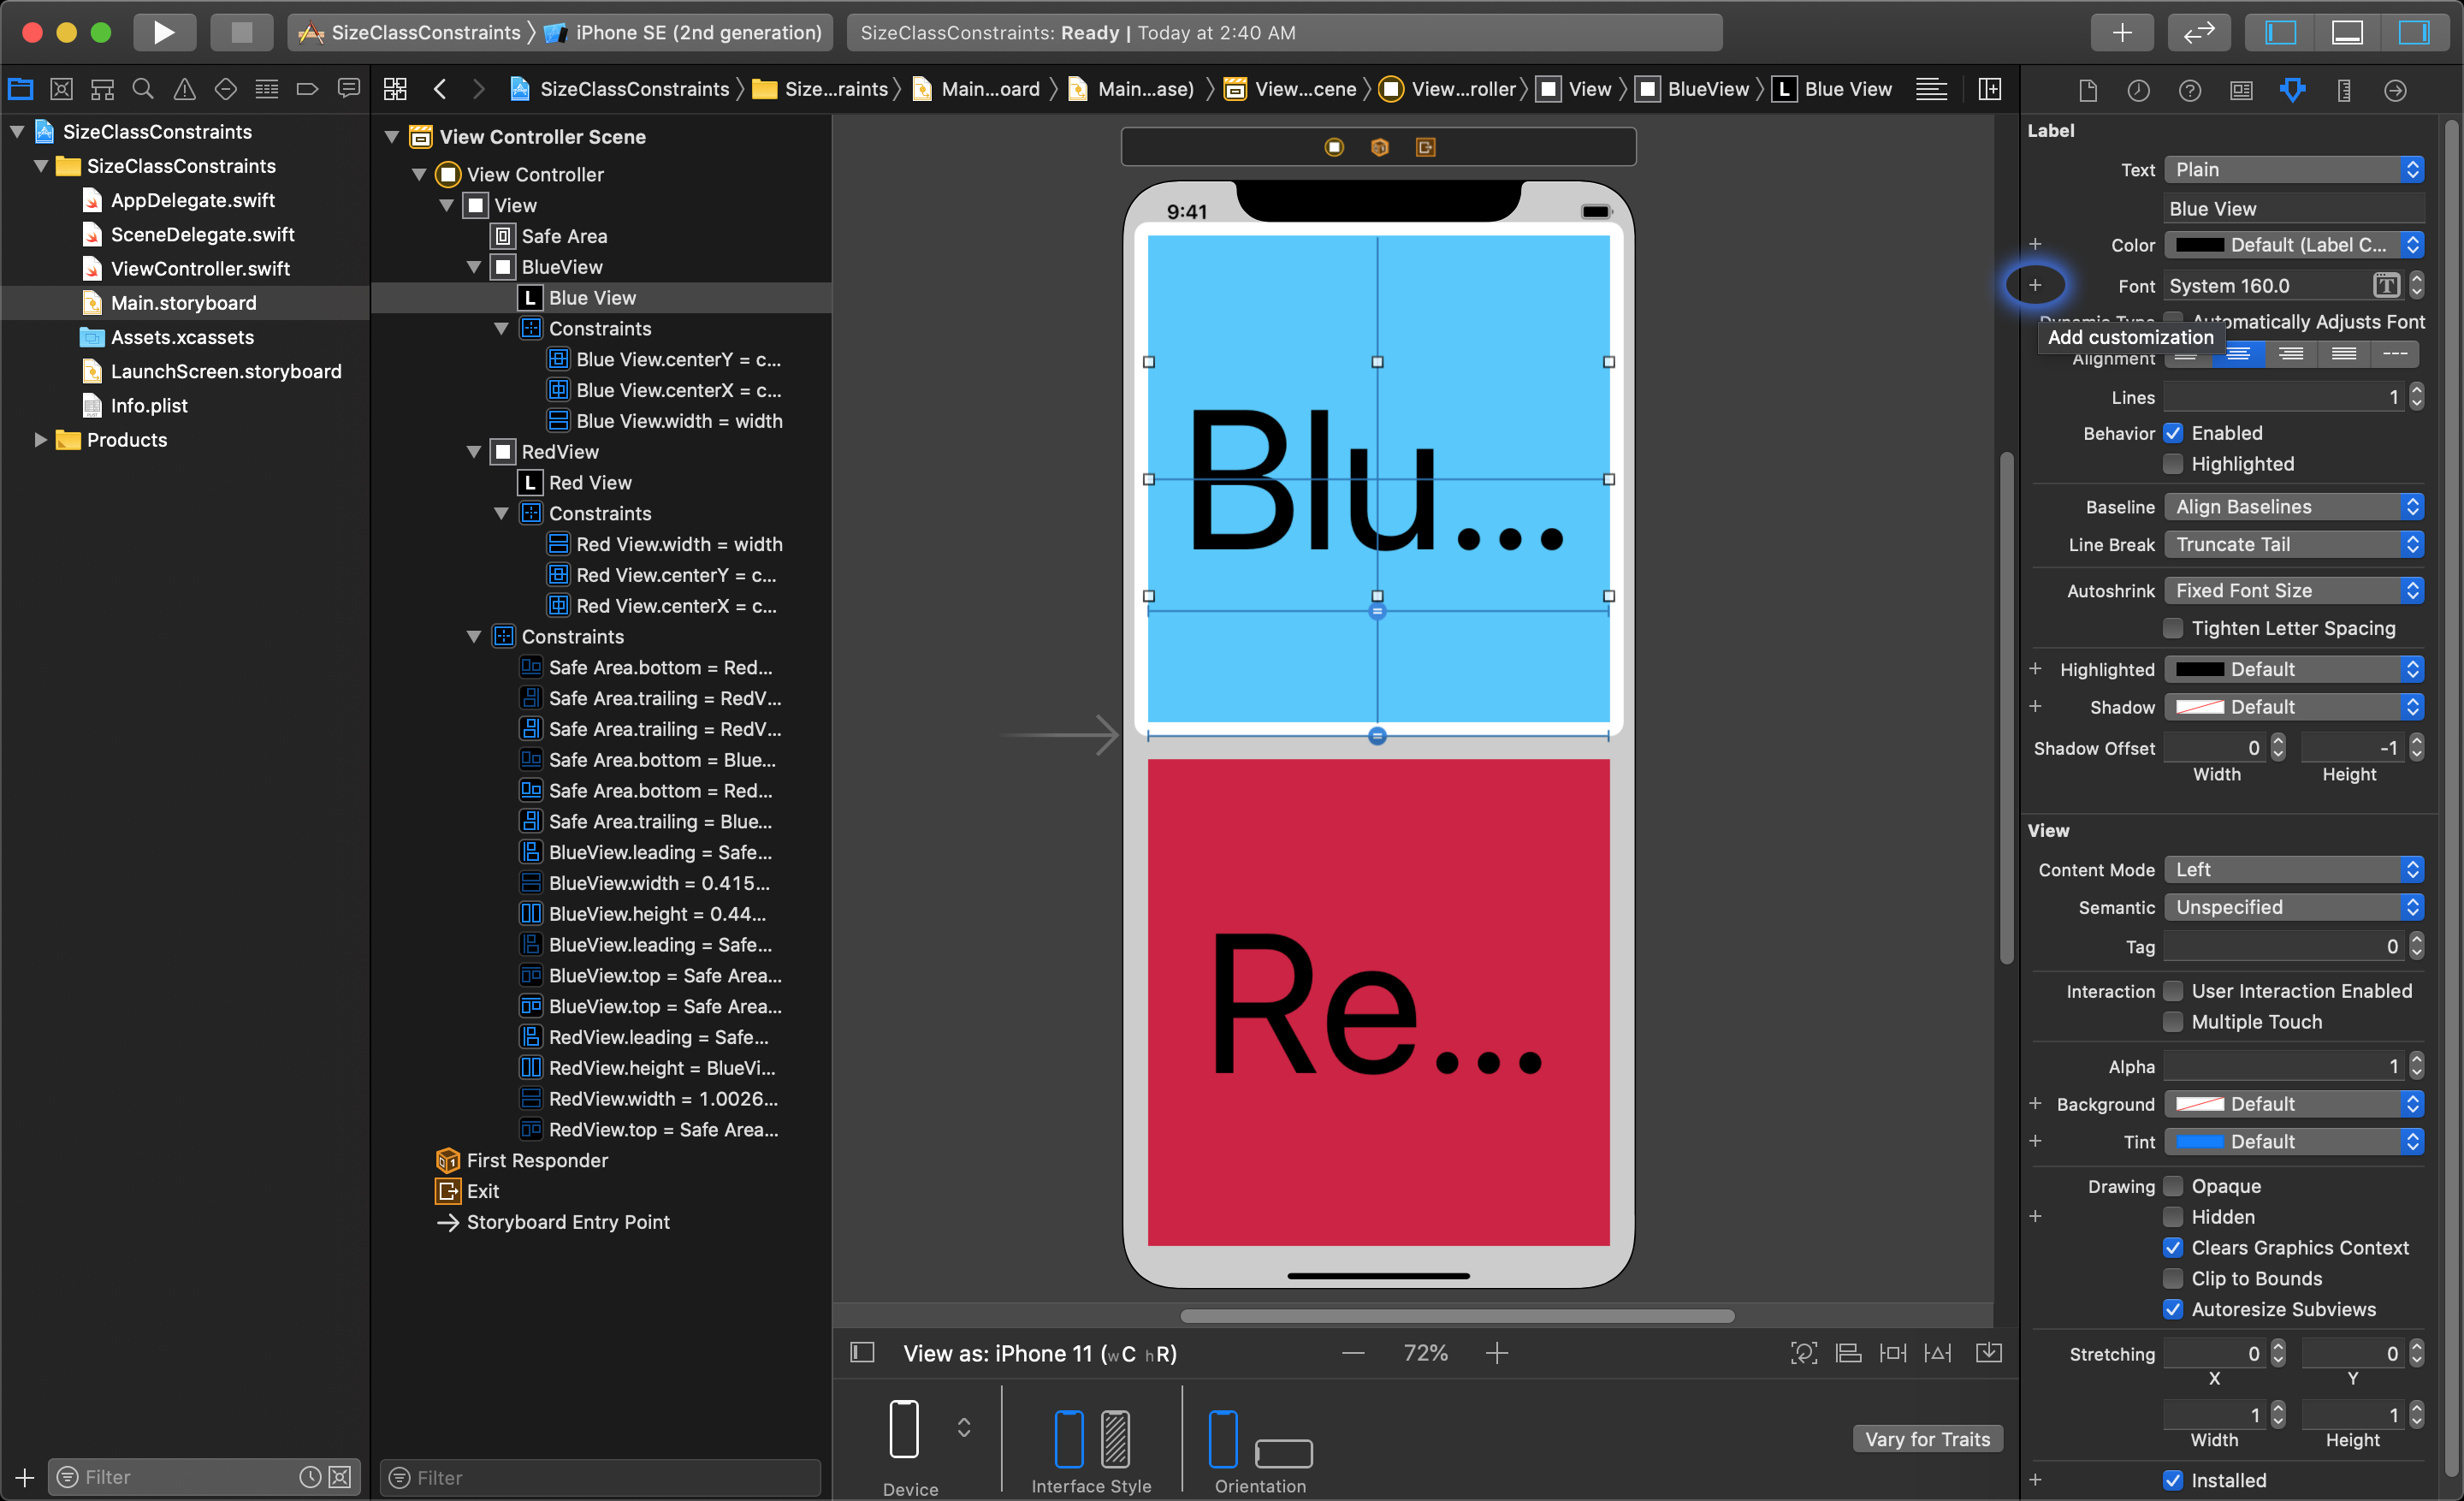
Clicking this button opens a pop-up menu allowing the selection of different Size Class combinations you can set the font for. In this application, we will set a font size for the current Size Class which is seen at the bottom of the editor (wC hR). We need to select "Width: Compact", and"Height: Regular" and click the "Add Variation button" at the bottom of the menu.

This adds an additional Font parameter in the Attributes Inspector for wC hR, and we can select a new size for the font with the current Size Class. A size of 8- points looks good here.

Doing this to both Labels will make them look good for portrait mode, but when we change to landscape mode, the font is still displayed full-sized.

Setting up additional font variations is done the exact same way. Click on the Label, go to the Attributes Inspector and click the Add customization button beside the font parameter again.
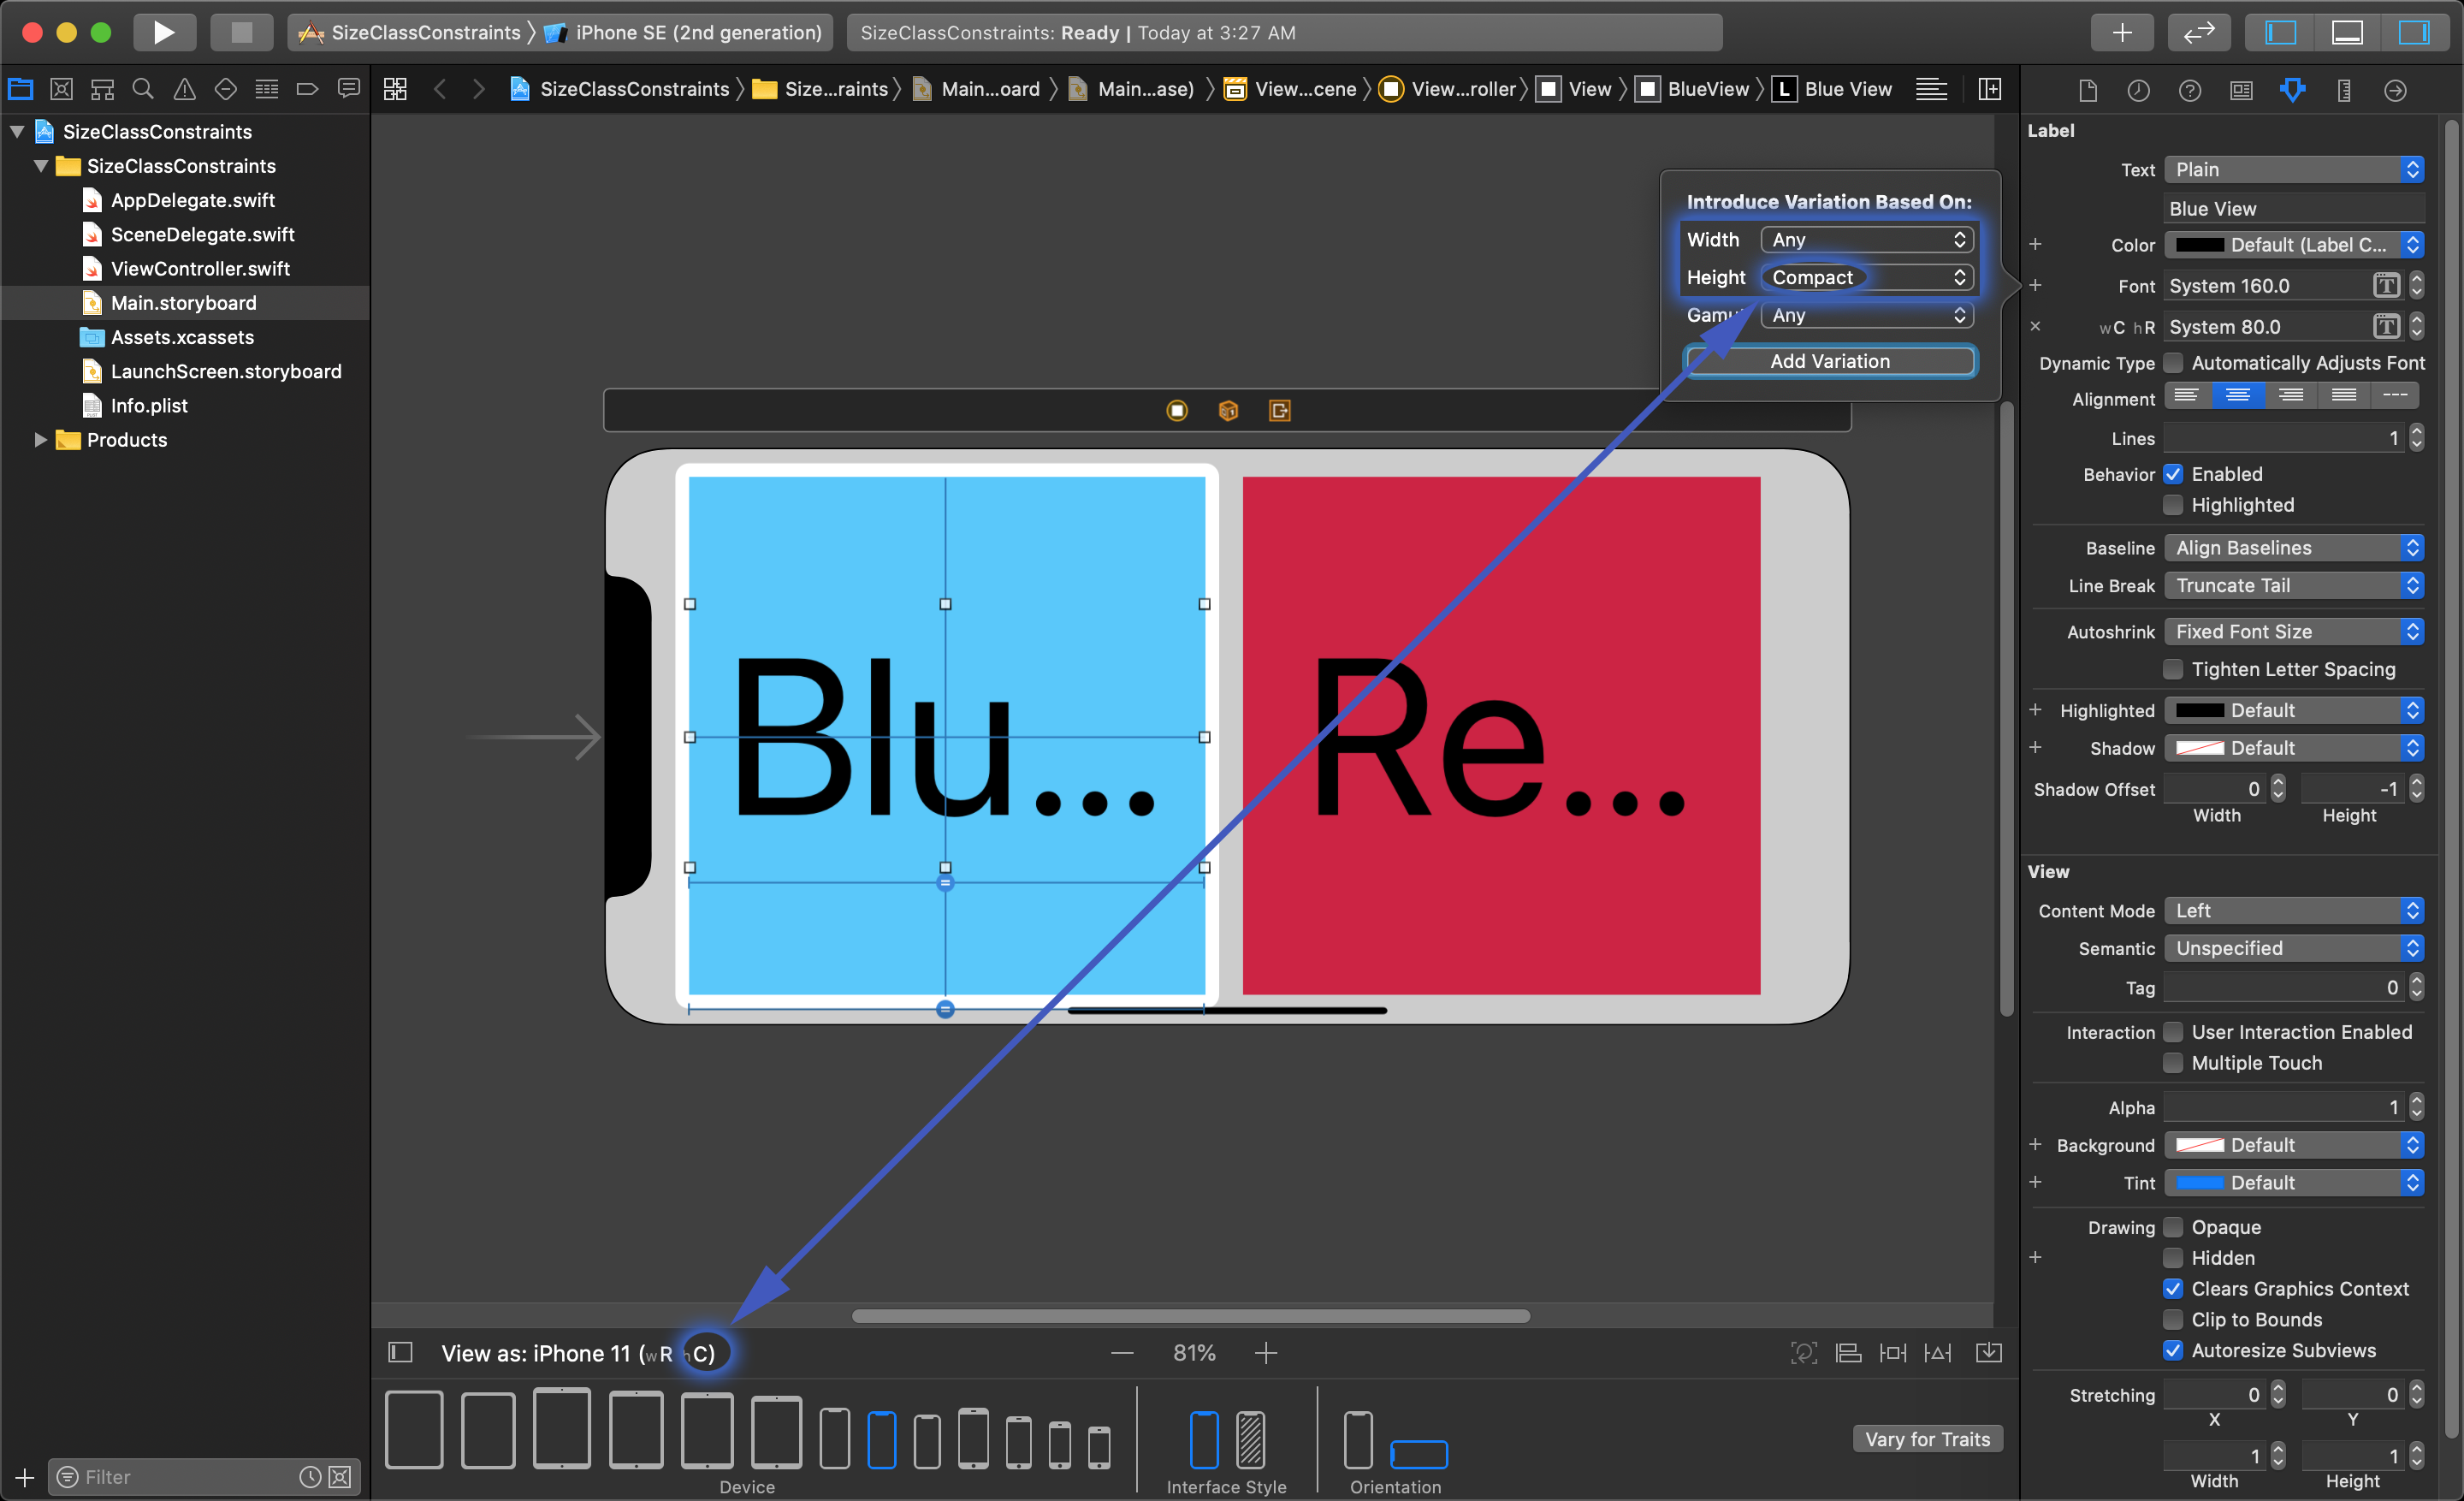
In the case of the iPhone 8, we went from (wC hR) in portrait to (wC hC) in landscape-mode, but the iPhone 8 Plus is (wR hC) in landscape mode, so we should only check for changes in the height this layout work for all the phones in landscape-mode. To do this set Width: Any and Height: Compact, and click the Add Variation button at the bottom of the menu. This adds an additional font parameter, "hC", showing that this setting is for all compact height sizes. Setting the Label's font size to 70 points looks to fit the view well.

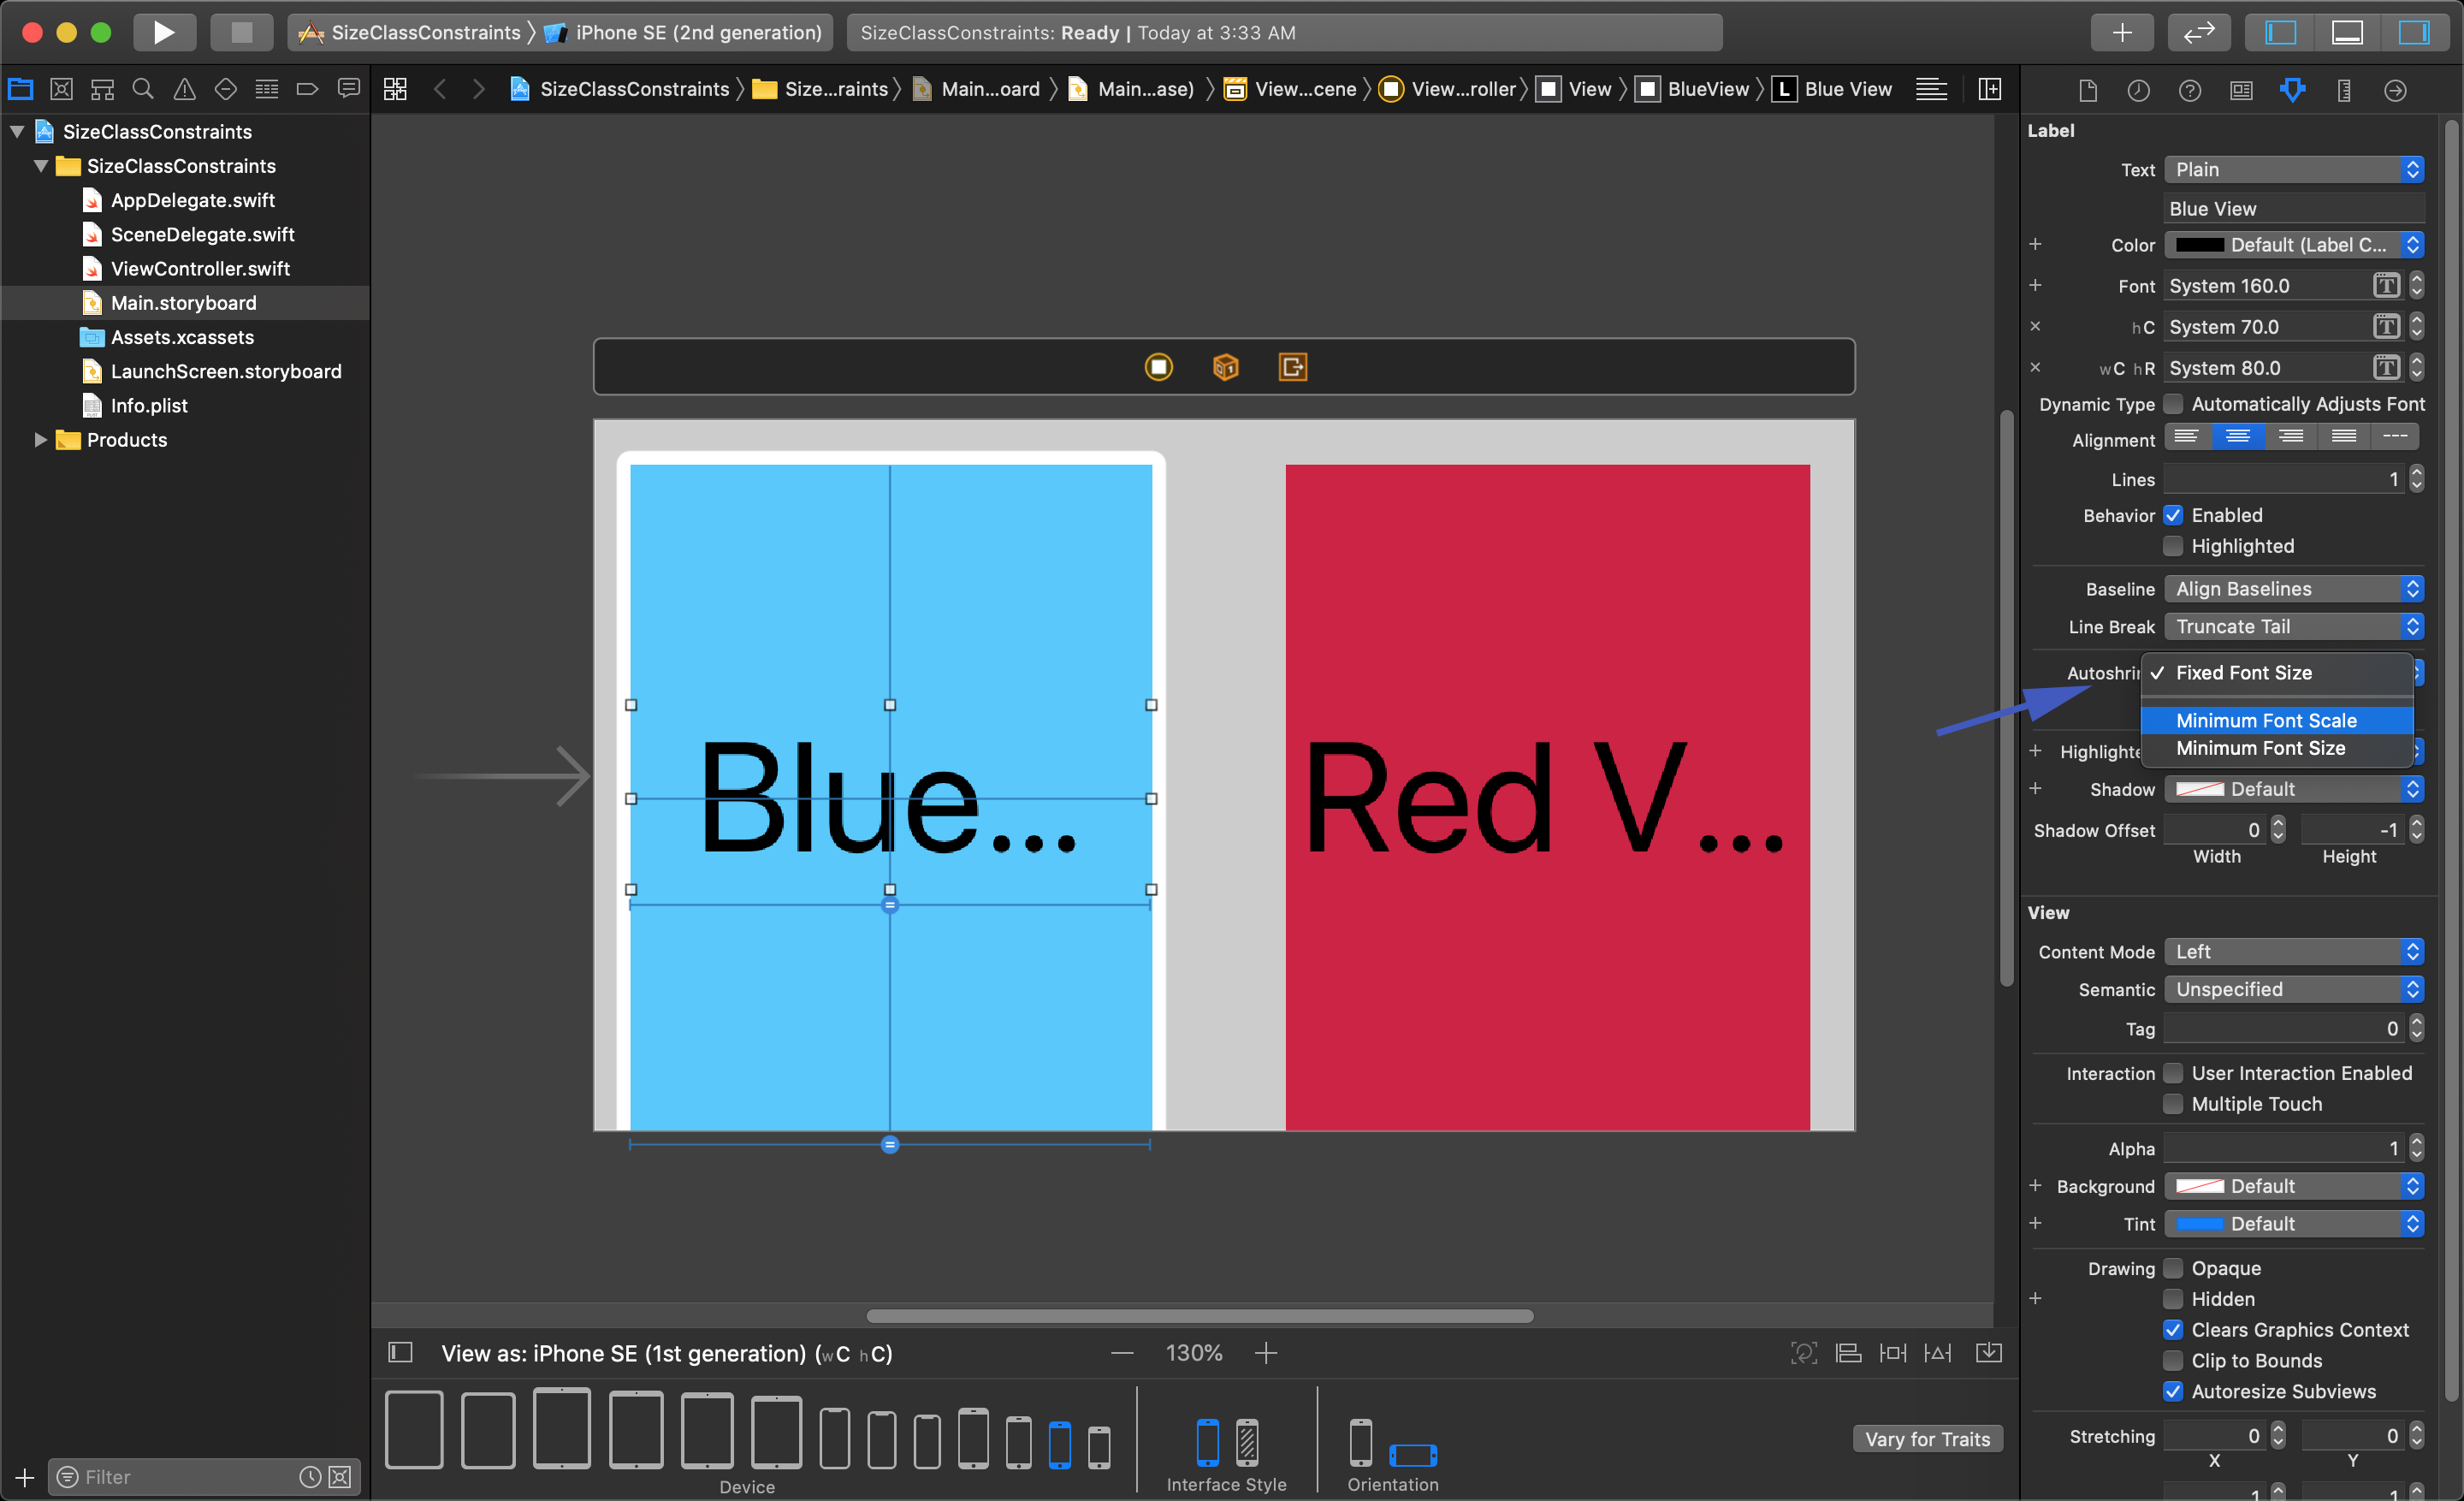
This font size looks good in landscape mode, but what if we were trying to also release this app on a smaller device? Looking at the iPhone 4s, the font is cut off a bit.
The label has a feature that can help auto resize the font within a range of its current font size. Select the Label, go to the Attributes Inspector and go down to the Autoshrink option. It starts set to Fixed Font Size, and you can change it to Minimum Font Scale or Size. Scale lets you set a percentage of the font's current size to limit the shrinking, Size lets you choose a font point size to limit the shrinking.
Setting both Labels to use Minimum Font Scale for the Autoshrink parameter will allow for the font to display correctly on smaller devices, too.
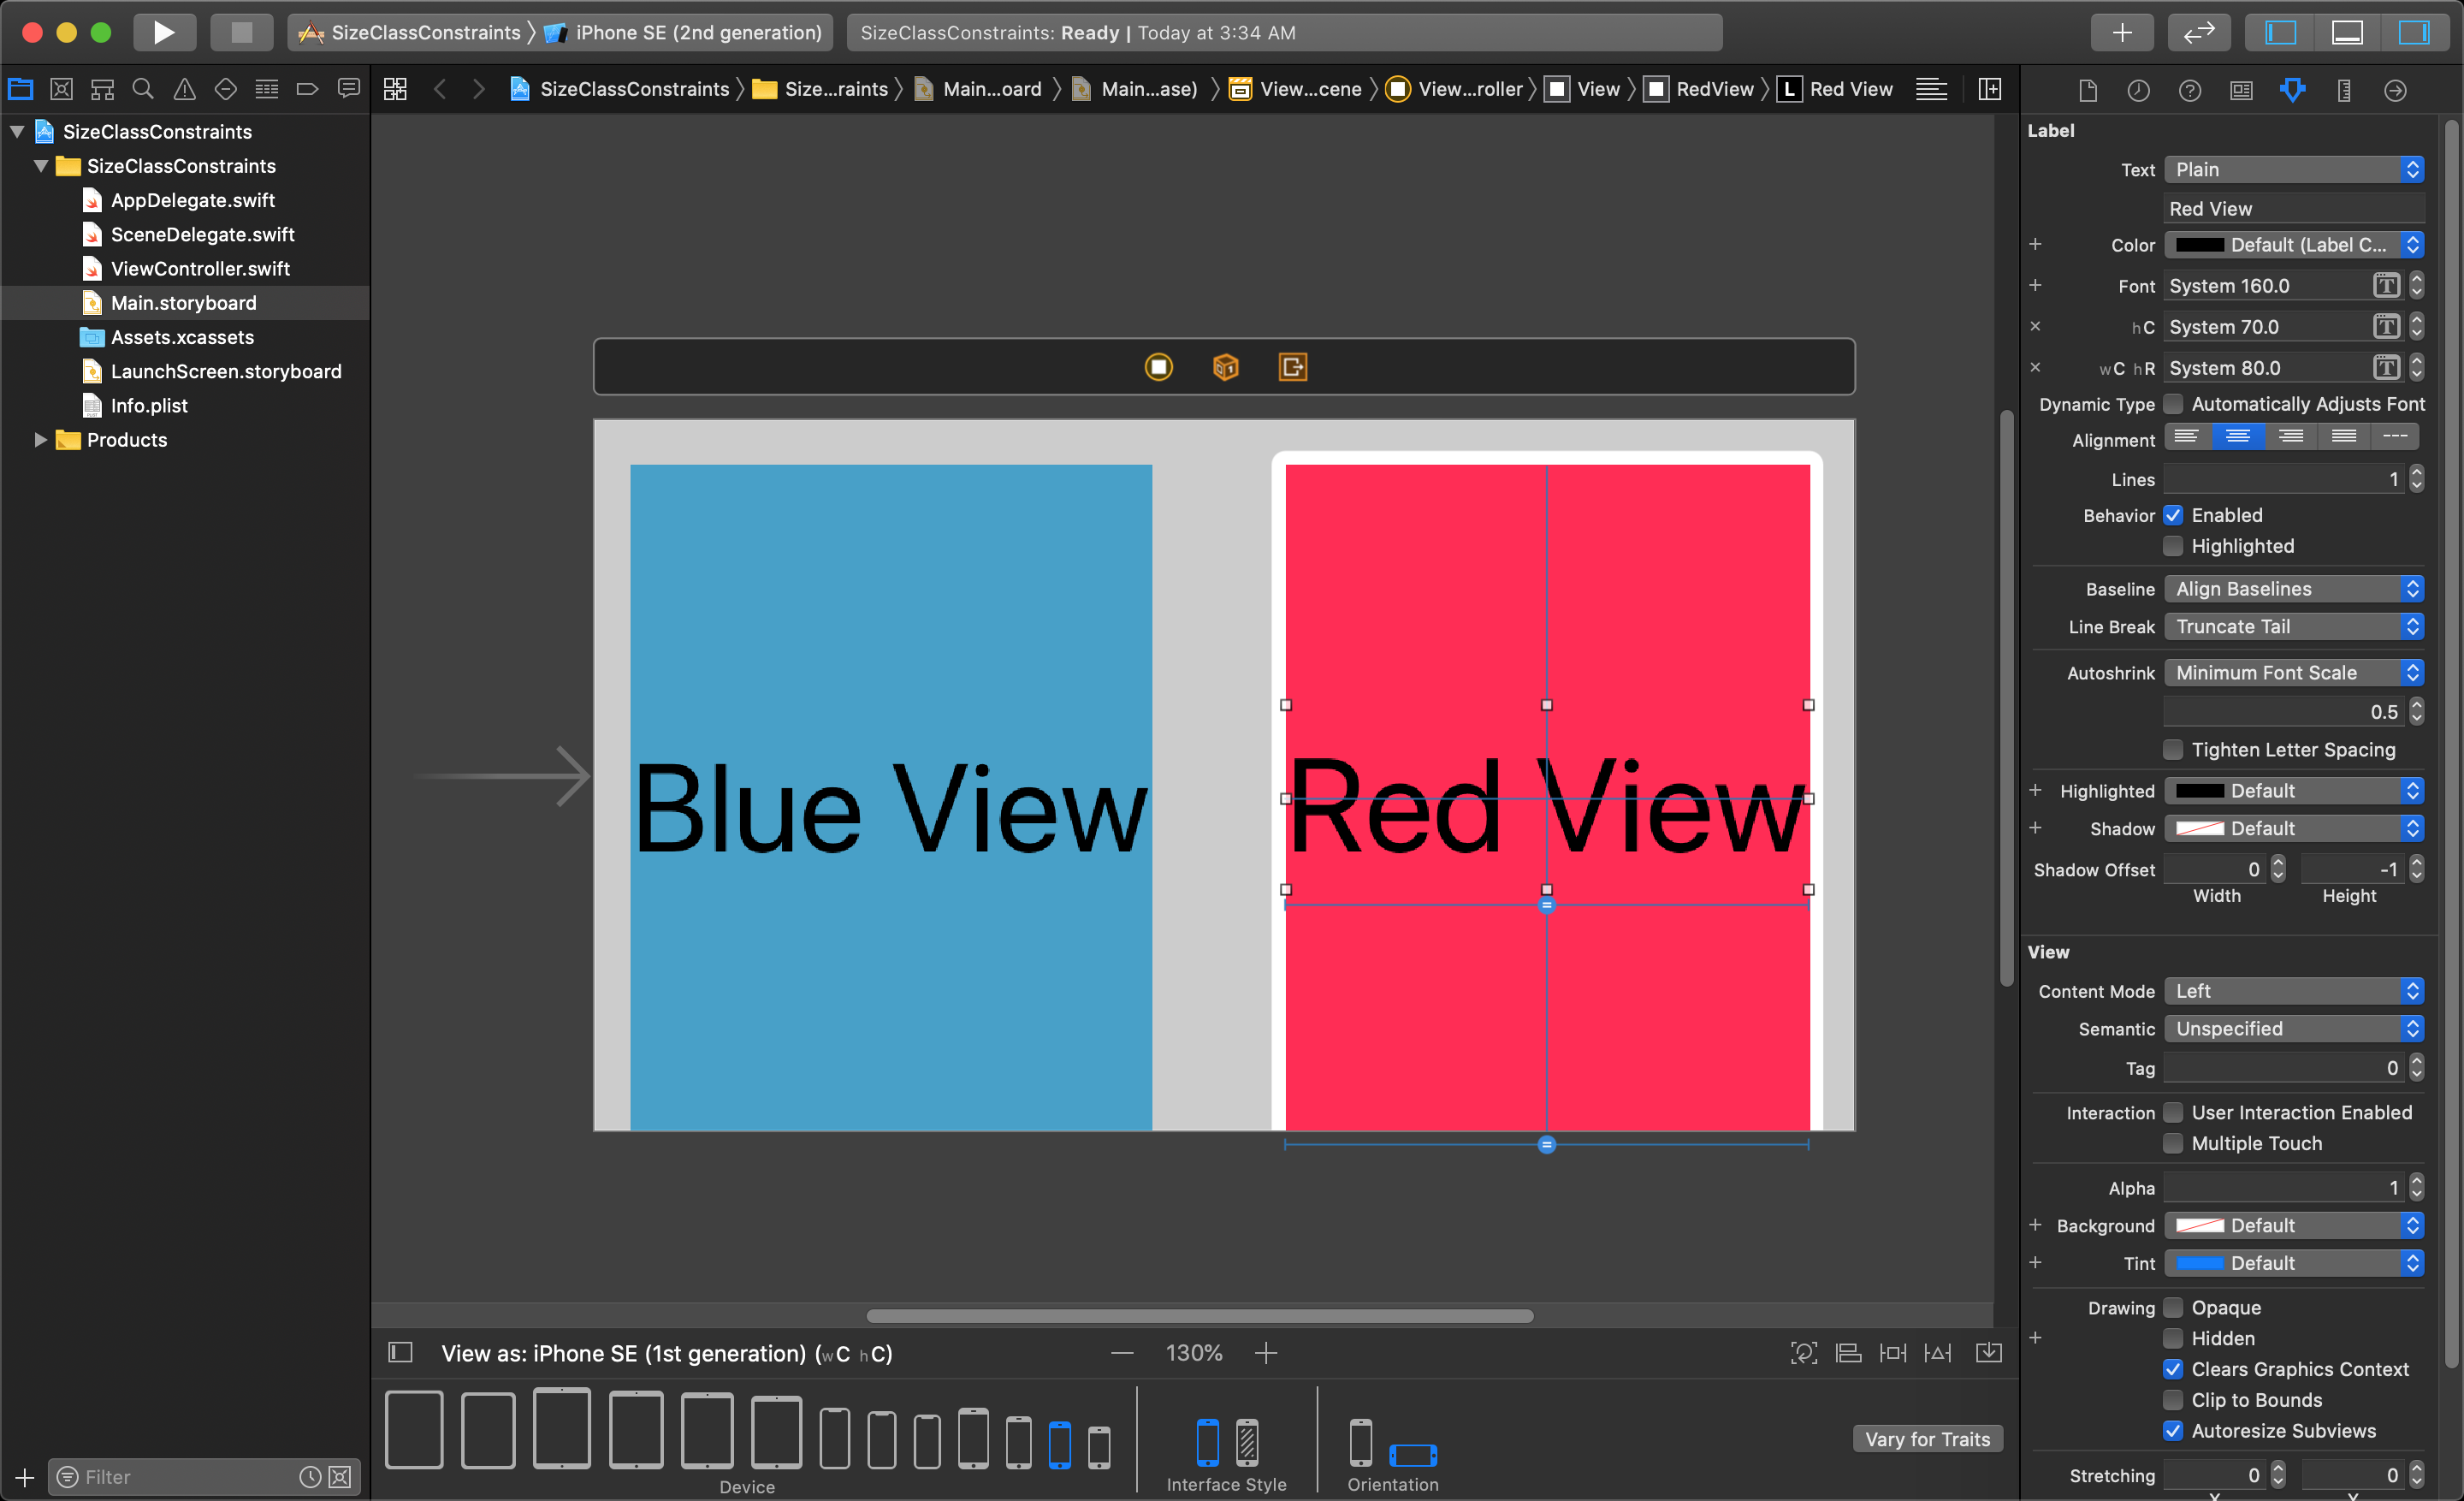
Now this application's font will adapt to different Size Classes and in different orientations correctly.
The next video describes how to add font variations based on size classes:
iOS 11 Development Essential Training - Font sizes with size classes